Model: MLGY16006
Made in China
Save instructions for
future reference
4
567
8
910
11
12
14
Tubes angle in at
the top and can-
not be assembled
upside down
13
15
16
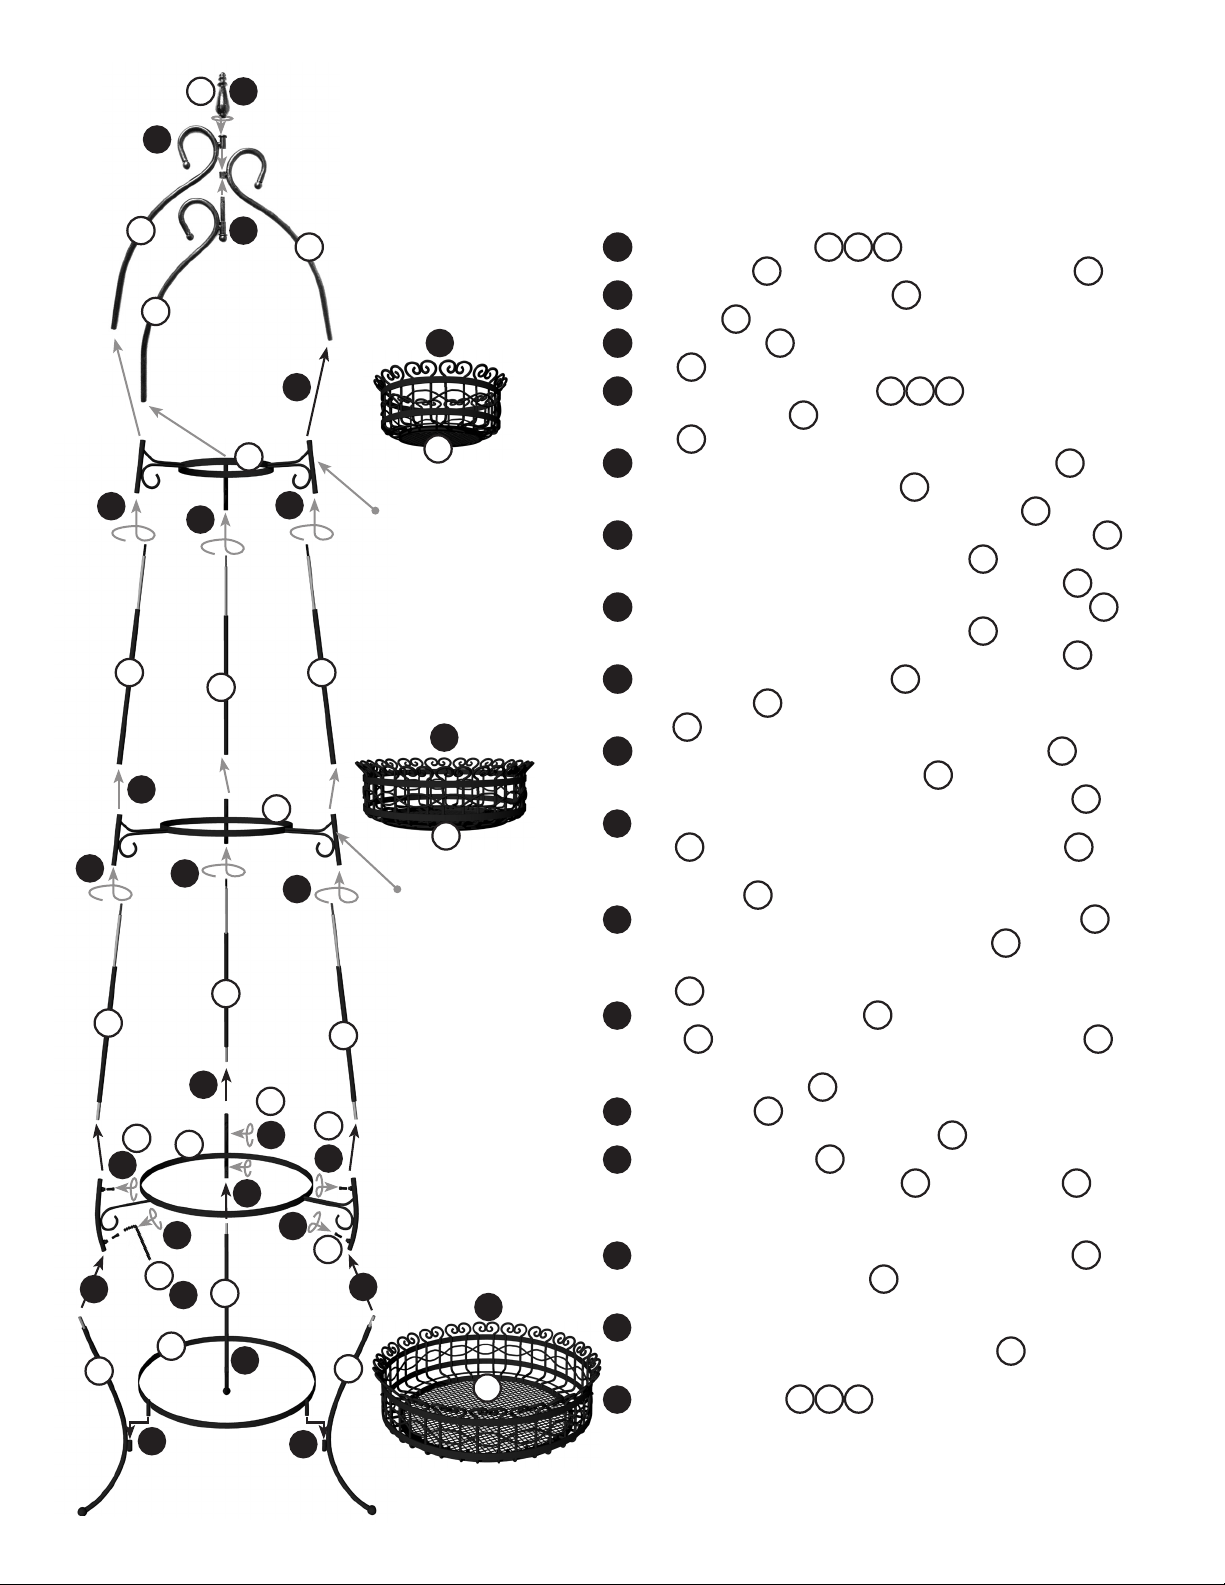
Step by Step Assembly Instructions:
1
Orient the 3 top curls B C D as shown. Slide the post of
the lower curl D through the tube of the middle curl C.
2
Slide the tube of the upper curl B over the post of the
lower curl D.
3
Screw the finial A on to the threaded top of the lower curl
post D.
4
Rotate & align the 3 top curls B C D over the tubes of the
small support ring H. Note that the curls on the small support
ring H are on the bottom.
5
Insert the threaded end of the shorter support pole E through
a tube on the small support ring H and screw it into the
threaded hole on the end of the lower curl post D.
6
Insert the threaded end of another shorter support pole E
through a tube on the small support ring H and screw it into
the threaded hole on the end of the middle curl post C.
7
Insert the threaded end of the last shorter support pole E
through a tube on the small support ring H and screw it into
the threaded hole on the end of the middle curl post B.
8
Align the medium support ring I under the three shorter
support poles E. Note that the curls on the medium support
ring I are on the bottom.
9
Insert the threaded end of the longer support pole F through
a tube on the medium support ring I and screw it into the
threaded hole on the end of one shorter support pole E.
10
Insert the threaded end of another longer support
pole F through a tube on the medium support ring I and
screw it into the threaded hole on the end of another shorter
support pole E.
11 Insert the threaded end of the last longer support pole F
through a tube on the medium support ring I and screw it
into the threaded hole on the end of the last shorter support
pole E.
12 Align the large support ring J under the three longer support
poles F. Note that the curls on the large support ring J
are on the bottom. Slide the tubes over the ends of the three
longer support poles F.
13 Insert a screw O at each connection point. Finger tighten the
screws to hold the large support ring J in place.
14 Insert the curved legs G one at a time into the tubes on the
bottom of the large support ring J. Use one screw O at each
connection point. Finger tighten the screws to hold the curved
legs in place.
15
Insert the posts on the bottom of the leg support ring K into
the tubes on the curved legs G. It may be necessary to loosen
the screws that hold the curved legs to align the tubes.
16
Double check all connections and adjust and tighten as
necessary for a tight fit. Use the hex wrench P to firmly
tighten the 6 hex screws taking care not to over tighten.
17
The three baskets LMN are removable in use. The ring
on the bottom of each basket fits inside the ring of the
corresponding support ring on the stand.
1
2
3
E
F
A
BC
D
H
I
J
K
L
M
N
O
P
EE
F
F
G
G
G
Tubes angle in at
the top and can-
not be assembled
upside down
13
13
O
O
O
14
14
14
14
15
15
17
17
17
Curl 3 Tier Basket
ASSEMBLY INSTRUCTIONS


