manuals.online logo
Brands
  1. Home
  2. •
  3. Brands
  4. •
  5. rad3
  6. •
  7. Bicycle Accessories
  8. •
  9. rad3 Base Box User manual

rad3 Base Box User manual

Page 1 from
24
Instructions rad3_bullitt_kids_box_2022 09
12
rad3 BULLITT Base Box / Kids Box / Tarpaulin / Canopy
Congratulations on your
purchase decision and have
fun on your venture!
Enclosed are some instructions
for the use, assembly and care
of the box.
We have tried to keep the total weight as low as possible during the construction. Nevertheless,
you should work in pairs if necessary during assembly and observe the usual rules for handling
heavy and bulky objects - for the sake of your health.
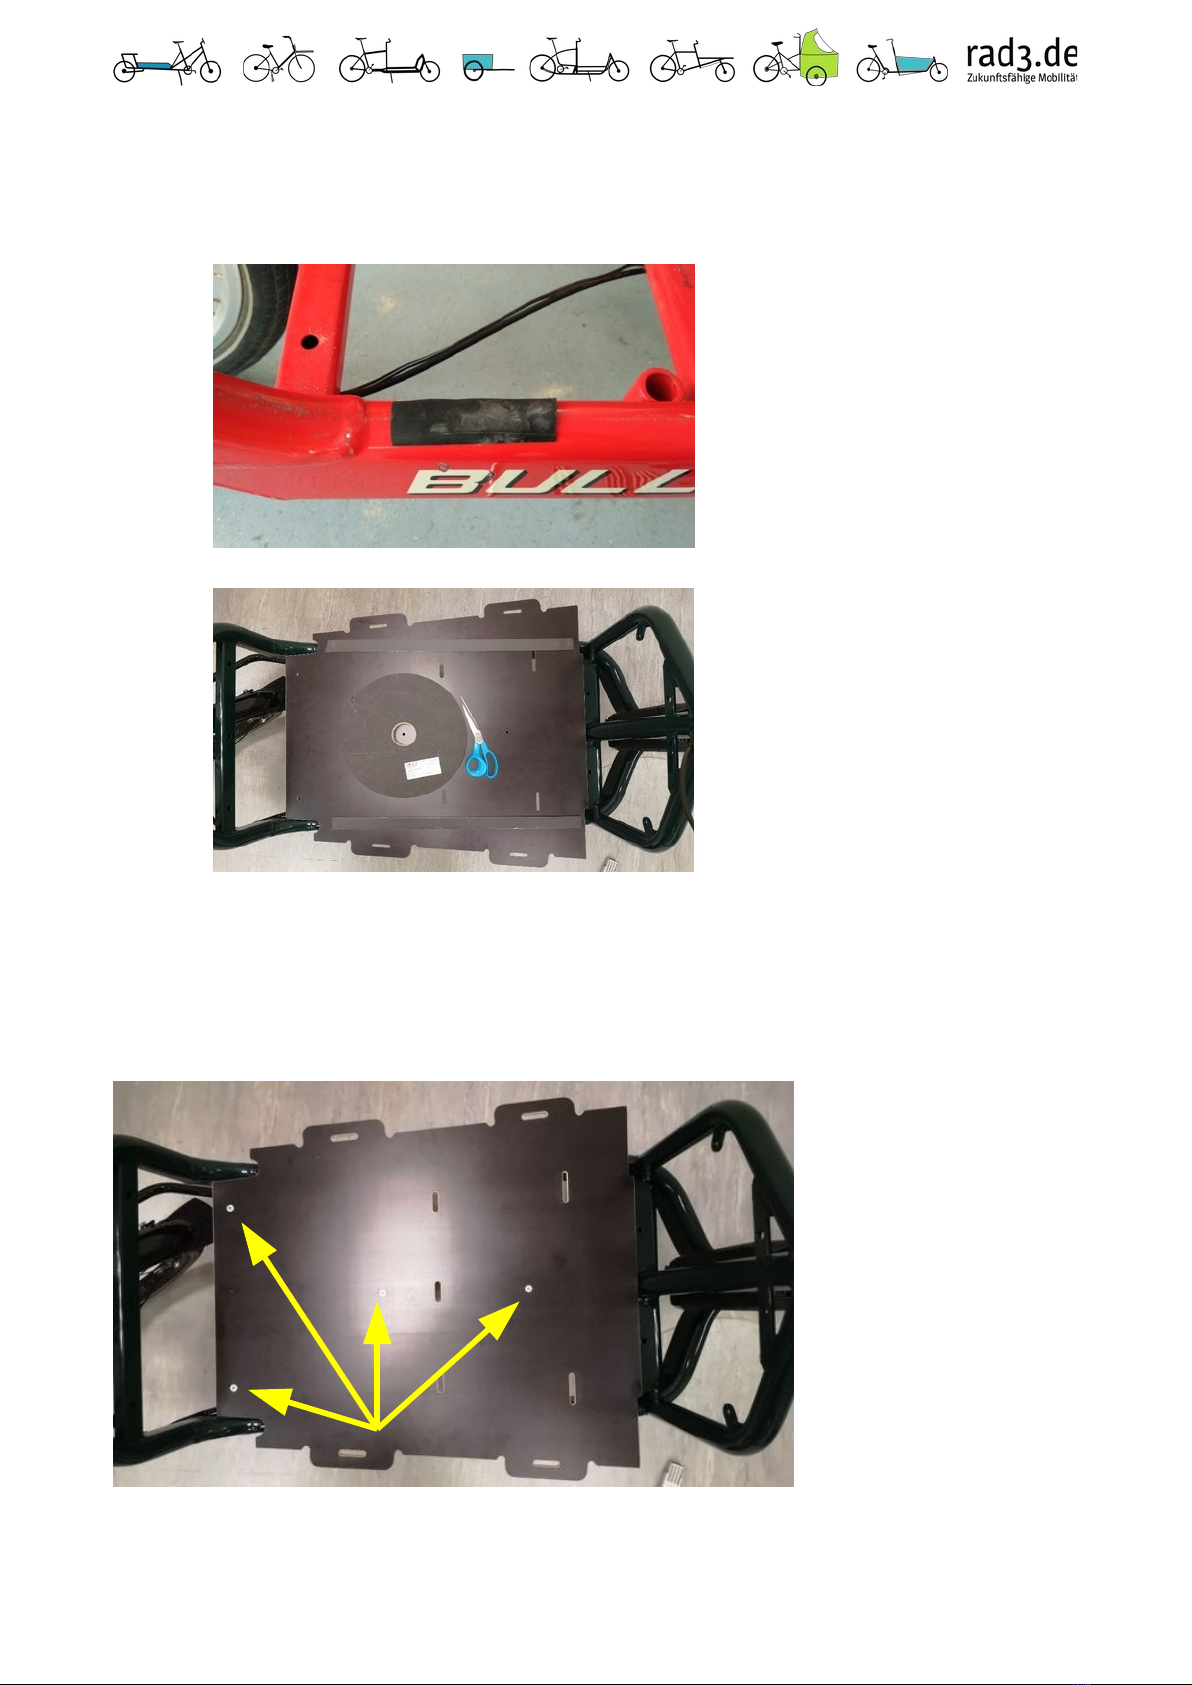
The box is adapted for the Bullitt type cargo bikes and tested with the 2013 and 2015 frames - also
with STePS drive, in today's version 2 also for the larger tolerances especially with the E8000. The
Canopy does NOT fit on the E8000, as a wider handlebar is installed here (shortening possible at
your own responsibility).
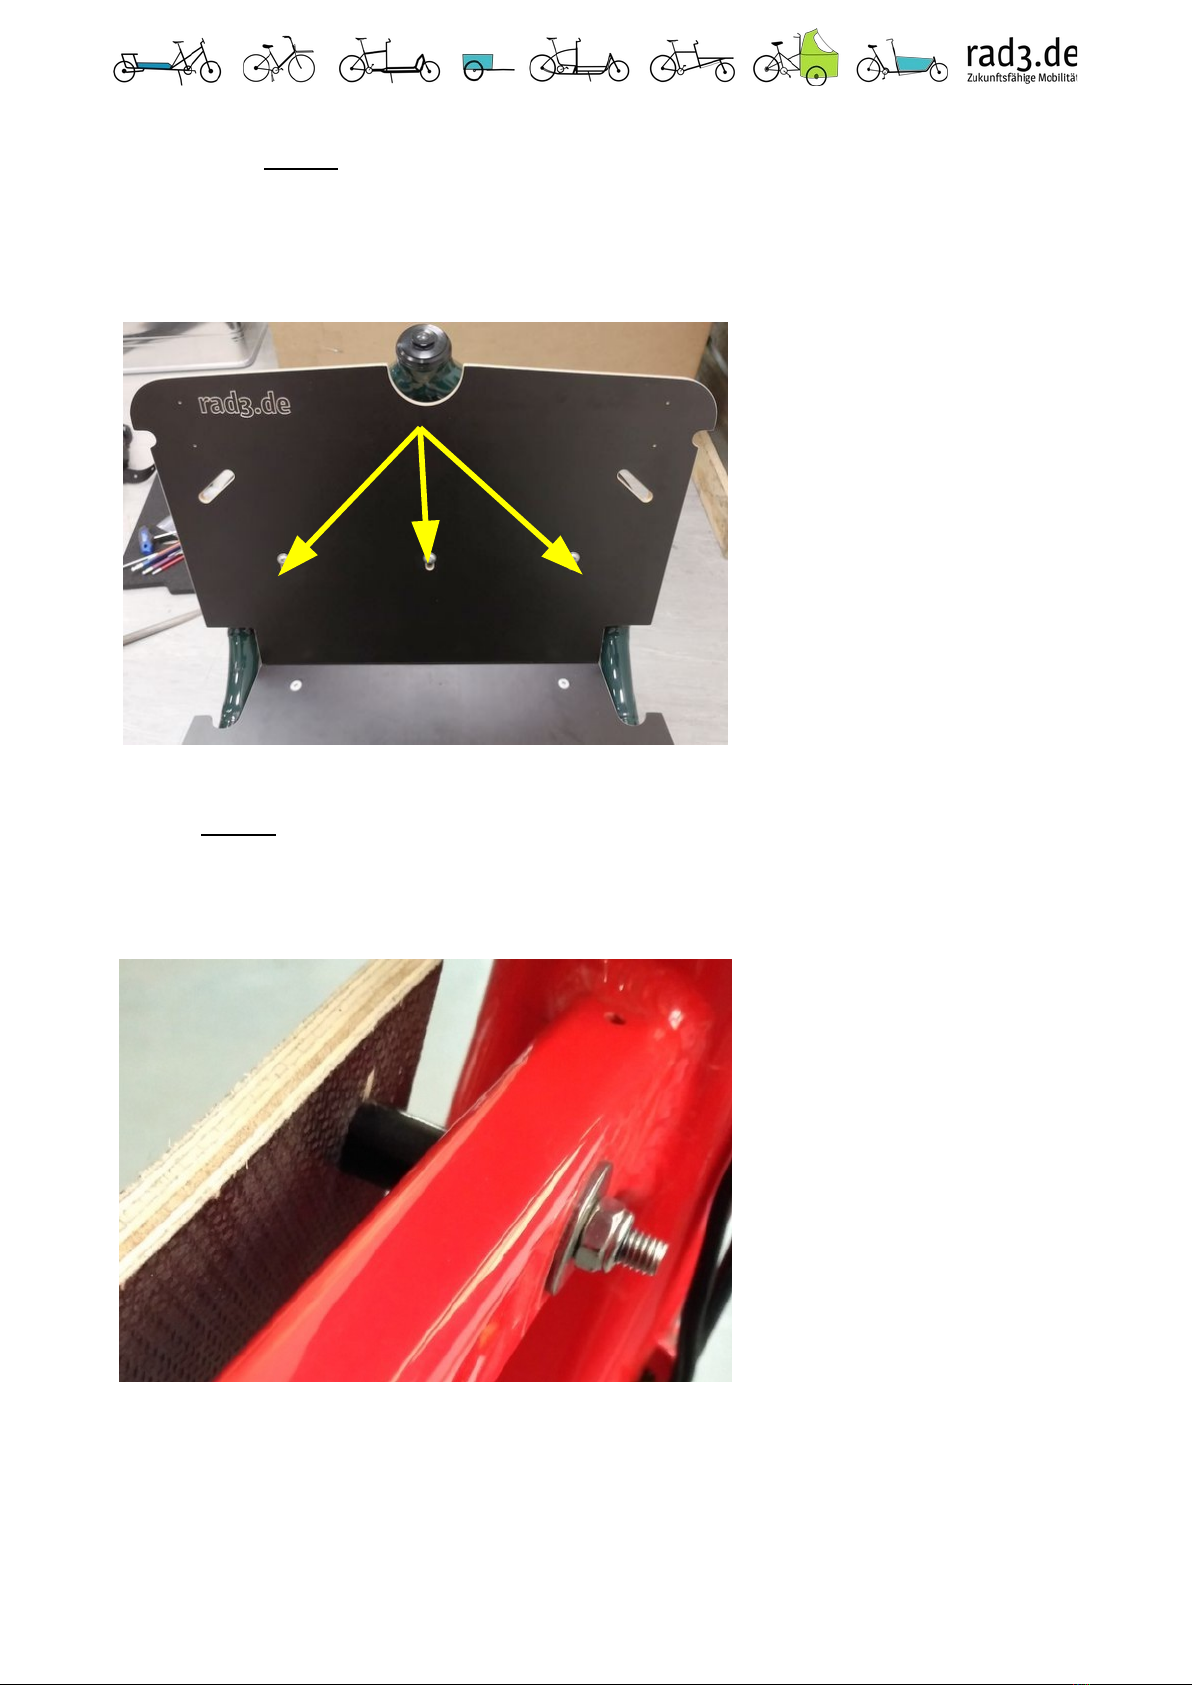
At the front, at the bottom and at the back, the panels are attached to the existing mounting
brackets on the frame.
NOTE: Unfortunately, the tolerance of the frames is sometimes VERY large, you may have to
widen our holes. We ask for your understanding.
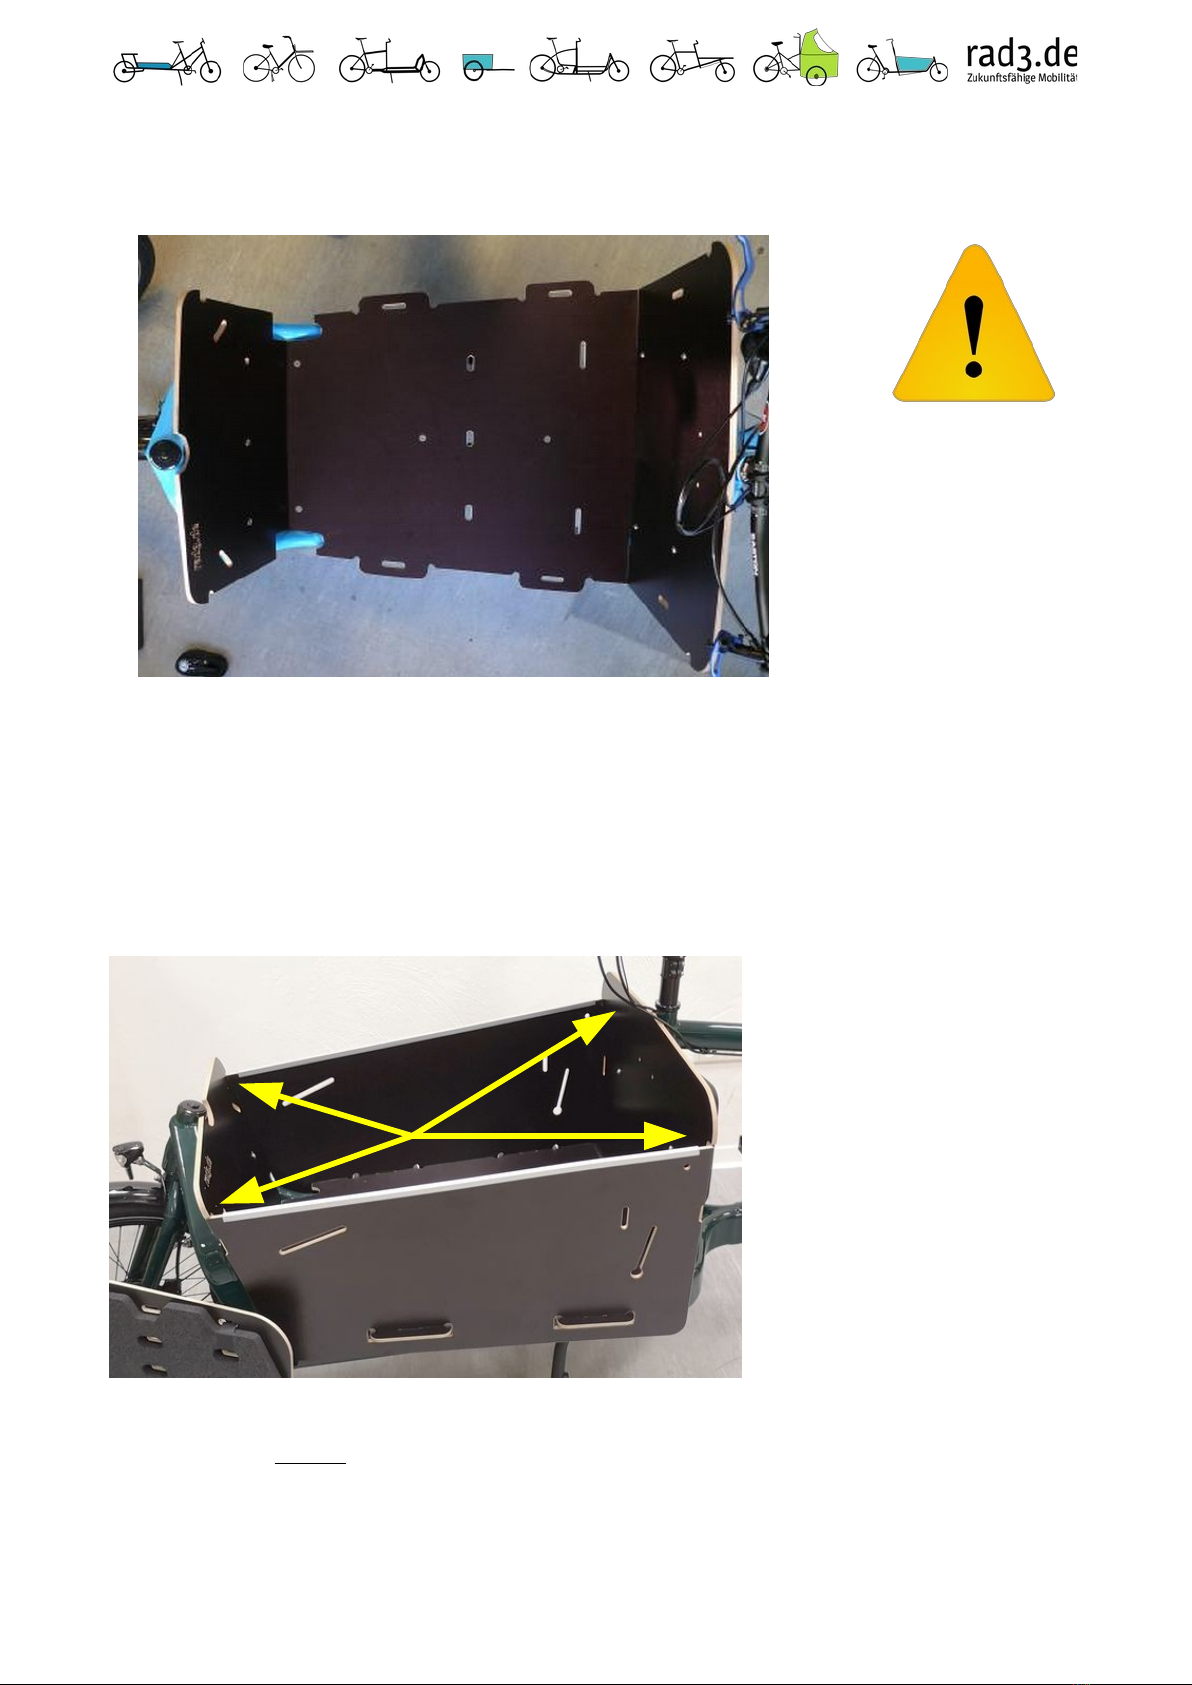
The box itself is a kit made of 5 panels:
1x front, 1x base, 1x back, 2x sides and in the standard version 1x backrest with foam.
rad3 accepts no liability for faults and consequential faults resulting from assembly and use
deviating from the intended area of use. This also applies to own attachments and modifications
to the box.
We create step by step video tutorials - please have a look at https://vimeo.com/rad3de/
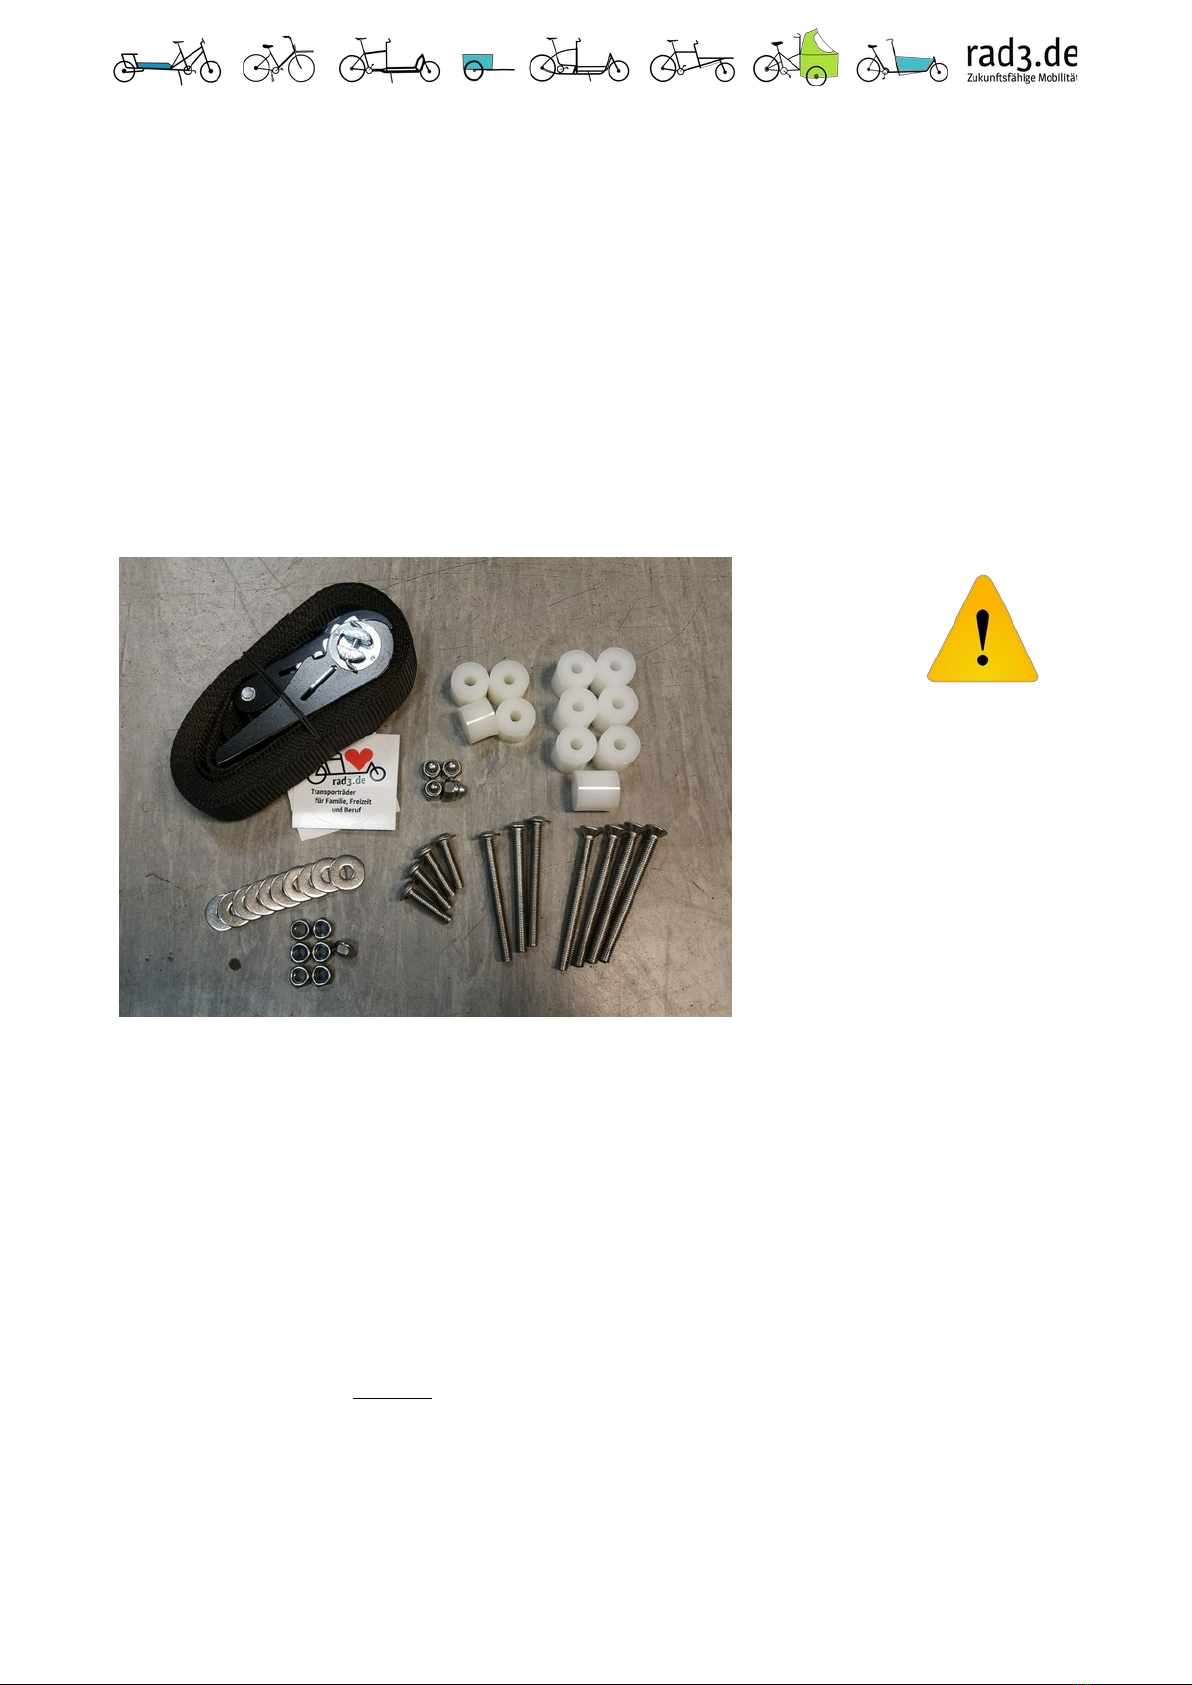
You will need some manual dexterity and the following tools for assembly:
Allen key 4 / 5 / 6 mm Open-
ended / ring spanner 10 mm
for tarpaulin and canopy
(Rechargeable) drill 1.5
mm drill bit
Cross-recess screwdriver PZ2 Ruler
Pin / Scriber
Some of the photos still show pre-series types. Don't let this irritate you - the technology is the
same - we will update this.
Subscribe to DeepL Pro to translate larger documents.
Visit www.DeepL.com/pro for more information.
Page 2 from
24
Instructions rad3_bullitt_kids_box_2022 09
12
Revisions:
Designation
Changes (focal points)
Date
Instructions-
rad3_bullitt_kids_box_
2022-09-12.pdf
Small corrections: 8 instead of 10 push buttons for
tarpaulin, 3 additional washers for front panel, additions
for 5-point harnesses, note on creaking
12.09.2022
Instructions-
rad3_bullitt_kids_box_
2019-11-10.pdf
Kidsbox version 10.2, elongated holes in the front panel to
compensate for tolerances (especially E8000), holes in the
rear wall enlarged t o compensate for tolerances, belt
guide optimised, foam backrest no longer glued but velcro
instead, small geometric optimisations, (preparation for)
side with door as option, modified canopy
10.11.2019
Instructions-
rad3_bullitt_kids_box_
2019-05-31.pdf
31.05.2019
Instructions-
rad3_bullitt_kids_box_
2019-03-15.pdf
15.03.2019
Instructions-
rad3_bullitt_kids_box_
2019-01-19.pdf
19.01.2019
Instructions-
rad3_bullitt_kids_box_
2018-03-15.pdf
15.03.2018
Instructions-
rad3_bullitt_kids_box_
2017-12-01.pdf
01.12.2017
Instructions-
rad3_bullitt_kids_box_
2017-07-21.pdf
21.07.2017
Instructions-
rad3_bullitt_kids_box_
2017-04-22.pdf
First edition
22.04.2017
Page 3 from
24
Instructions rad3_bullitt_kids_box_2022 09
12
0. the accessories - please check for completeness before
assembly
Base Box:
3 pcs. Flange head screws M6 x 60 mm (front panel)
4 pcs. countersunk head screws M6 x 70 mm (base
plate) 4 pcs. Flange head screws M6 x 25 mm (back
plate) 14 pcs. K-washers M6
4 pcs. locking cap nuts M6 7 pcs.
locking nuts M6
7 pcs. Plastic sleeves 20 mm (base plate + front plate)
4
pcs. Plastic sleeves 15 mm (base plate)
1 pc. tensioning
strap if necessary
protective inserts
Fig. 0-1:
the accessories Basis Box /
Kids Box
kids accessories:
2 pcs. Y-Gute Standard or Fidlock (bottom 40 mm webbing)
4-8 pcs. Belt buckles for 25 mm belt width (for standard belts)
2 pcs. Belt buckles for 40 mm belt width (for Fidlock belts and standard at the bottom for wide
slots!)
Tarpaulin:
8 press studs
8 pan-head screws 3.9 x 6.5 mm
Canopy
10 press studs
8 pan-head screws 3.9 x 9.5 mm for columns (9mm)
2 pan head screws 3.9 x 6.5 mm for sides (6mm panels) 2 rod
sleeves with
4 pcs. Flange head screws M6 x 20 4
pcs. lock nuts M6
4 pcs. K-washers M6
4 pcs. K-washers M6 small
Page 4 from
24
Instructions rad3_bullitt_kids_box_2022 09
12
Fig. 0-2:
the accessories for
kids comparison
straps above: Fidlock
Below: Standard
Fig. 0-3:
The Canopy accessories
Fig. 0-4:
the accessories tarpaulin
screws 3.9 x 6.5mm
Page 5 from
24
Instructions rad3_bullitt_kids_box_2022 09
12
1.
To protect your bike and reduce noise, you should enclose e.g. strips of an old bicycle inner
tube between the panels and the frame. Of course, you can also use professional (thick) paint
protection film or insulation foam strips.
If you buy your Bullitt from us, we can use partition tape B1 from Würth ®.
Fig. 1-1:
Protective supplement
Paint protection,
noise
reduction
Fig. 1-2:
with Würth tape
(glued on the
underside!)
2.
If necessary, fit the belts as described in point 9 now - it is easier.
Place the bottom panel from front to back on the base frame, taking care if necessary t h a t
the inserts do not slip. Align the plate so that the distances to the frame are even on the right and
left.
Fig. 2:
Insert base plate, screw
points
Page 6 from
24
Instructions rad3_bullitt_kids_box_2022 09
12
3.
Insert 4 countersunk screws 75 mm at the holes marked above. On the underside, the
sleeves 20+15 mm must be inserted.
Place a K washer (round edge to the frame / paint) and a nut on each from below and
screw
them on loosely.
Fig. 3:
Screws 70 mm
Sleeve sets 20+15
mm K-washers Lock
nuts
4.
Place the back panel in the centre. Insert 4 flange head screws 25 mm at the
designated holes.
Fig. 4-1:
Put on rear wall, screws 25
mm
K-washers Cap nuts
Fig. 4-2:
View from the driver Disc
with cap nuts
Page 7 from
24
Instructions rad3_bullitt_kids_box_2022 09
12
Place a K washer (round edge to the frame / paint) and a cap nut / nut on each from the rear and
screw them on loosely.
5.
Place the front panel in the centre. Insert 3 flange head screws 60 mm at the
designated slotted holes. New: please also use additional
washers
on the inside.
Fig. 5
Put on front panel, screws 60
mm
K-washers
Locknuts
6.
On the front side, the sleeves must be inserted 20 mm.
Place a K washer (round edge to the frame / paint) and a nut on each from the front and screw
them on loosely.
ATTENTION, here it is particularly important not to tighten the nuts yet, as the panel must be
aligned in height AFTER inserting the sides. There is usually a gap of 2-5 mm between the
bottom and the base plate.
Fig. 6
Put on front panel, screws 60
mm
K-washers
Locknuts
Page 8 from
24
Instructions rad3_bullitt_kids_box_2022 09
12
7.
Once again, align all the panels centrally to the frame and to each other and then carefully
tighten the nuts one after the other but not quite yet. It should still be possible to move the front
panel in particular.
Fig. 7:
Align panels, tighten nuts
loosely
After complete bolting, you can also transport bulky objects crosswise on your bike without any
problems with the structure now shown here.
For the expansion to a box, continue to assemble as follows (note the points from 10 for the kids
box!).
8.
Insert the side panels and align them in the longitudinal axis so that you have an even
projection at the front panel and rear.
Fig. 8:
Insert side parts, tighten
nuts with torque
Now tighten all the screws.
ATTENTION, the torque should be 4-8 Nm.
If the torque is too low, the stability of the box is at risk!
If the torque is too high, the plate may warp, the sleeve may be damaged or the screw may pull
through the plate!
Page 9 from
24
Instructions rad3_bullitt_kids_box_2022 09
12
9.
The straps in the backrest and the base plate
If you would like to use your box for transporting children and have ordered the seat backrest as
well, you must thread the straps into the corresponding openings and insert the buckles to
secure them before inserting the box as described in point 10.
You can use one strap in the middle for one child or 2 straps on the right and left for 2 children.
The shoulder straps can be fastened in 3 heights depending on the size of the child.
If possible, pull the belt through the opening first.
Please then thread the buckle as follows. This is the only way to ensure that the belt cannot slip.
The belt only goes through ONE slot, the buckle has to work as a barb.
Fig. 9-1:
Strap guide in the buckle
25mm standard strap
Fig. 9-2:
Belt guide on the box
Page 10 from
24
Instructions rad3_bullitt_kids_box_2022 09
12
Fig. 9-3:
Belt guide below for
-
25mm standard belts
-
40mm Fidlock harnesses
Fig. 9-4:
IMPORTANT for safety!
Bottom belt guide for
25mm standard belts
for a base plate with
40mm
slots
Page 11 from
24
Instructions rad3_bullitt_kids_box_2022 09
12
10.
Now insert the backrest into the box (go tight if necessary) before inserting the side panels
at the top under the notches of the front panel and back.
Please read point 9 on threading the belts beforehand!
Fig. 10:
Insert seat back
Slide the side panels on top under the notches of the front panel and rear panel.
11.
Now thread the belt, starting at the front and to the left, with the ratchet on the inside. As
you go along, make sure that the belt does not twist.
Fig. 11-1:
Thread the tensioning
strap, in
front and to
the left
Page 12 from
24
Instructions rad3_bullitt_kids_box_2022 09
12
If you have installed the seat back, it must be enclosed by the belt! This is the only way to ensure
that the belts are sensible and effective for your pets!
Fig. 11-2:
IMPORTANT for safety!
Thread the belt,
Include seat back
Pull the loose end from the back (right) through the ratchet and tighten the strap.
Fig. 11-3:
Threading the belt
Fig. 11-3:
Tighten with ratchet
If necessary, shorten the loose end later and "weld" the cut edge. Leave enough tape.
(e.g. with a lighter - WARNING: risk of burns!)
Page 13 from
24
Instructions rad3_bullitt_kids_box_2022 09
12
12.
Insert the seat cushion to fit (the red / coloured cover is an optional accessory).
Fig. 12:
Insert cushion (shown
without straps)
13.
The tarpaulin
ATTENTION, if you have (also) ordered a canopy, please start with it, see point 14! If you
have ordered the canopy, you must screw on the press studs.
The inner parts of the press studs may be clipped in or are enclosed. Please loosen them e.g.
with the help of a small screwdriver. The matching screws are supplied 3.9 x 6.5 mm.
Fig. 13-1:
Separate press studs if
necessary
Fig. 13-2:
Push buttons
Page 14 from
24
Instructions rad3_bullitt_kids_box_2022 09
12
Then they pull the tarpaulin tightly over the assembled box.
Fig. 13-3:
Pull the tarpaulin tight, press
studs on the right
are mirror
image
Mark the centres of the press studs on the box with a suitable pencil and / or drawing pin /
countersink. To do this, gently pull down on the front and back of the tarpaulin. However, you
should not do this on the side walls.
Better check the position once more before you drill!
Fig. 13-4:
Mark the position of the
centre point on the box
ATTENTION, the front push button marked red above is also used by the canopy. The priority is
the fit to the canopy! The head is not necessarily important for the canopy.
Page 15 from
24
Instructions rad3_bullitt_kids_box_2022 09
12
Please pre-drill the points with a 1.5 mm drill bit. Hold a piece of wood or similar against the
opposite side to avoid splintering (risk of injury).
We deliberately chose screws that are almost too long. However, this is the only way to hold the
knob sufficiently tight in the thin board. If you do not drill all the way through, the
last layer of
plywood
may
lift slightly
when you screw it in.
If you do not pre-drill at all, there is a risk that the button will come loose again relatively soon.
Fig. 13-5:
Pre-piercing and pre-drilling
The screwing in should be done slowly with high pressure (please do not use a cordless screwdriver
but a hand screwdriver).
Fig. 13-6:
screwed-on push-button
Page 16 from
24
Instructions rad3_bullitt_kids_box_2022 09
12
The tarp is designed so that you
can
also use it as a basic rain cover for your children.
To do this, it is rolled up about ¼ of the way from the back and fastened with on the double push
button (on older models with the Tenax, see photo).
Fig. 13-7:
Tenax screwed on
(photo old model)
In the end, the rolled-up tarpaulin should look something like this.
Fig. 13-8:
Tenax clipped in (old
model)
Page 17 from
24
Instructions rad3_bullitt_kids_box_2022 09
12
Fig. 13-9:
Tarpaulin rolled up
14.
The Canopy
If you have also ordered the canopy, you must also screw on the press studs and the pole
sleeves at the front.
ATTENTION: if you want to retrofit an older box with the Canopy, you have to drill additional holes
in the sides! This is described at the end of this chapter.
Start marking the drill holes for the sleeves as follows.
The important
functional dimension is the hole spacing of 40 mm in the aluminium sleeve.
In
current boxes this is already pre-marked.
Fig. 14-1:
Dimensions of drill holes in
front Distance between drill
holes Nominal dimension
40mm
40 mm
Fig. 14-2:
screwed sleeve
Page 18 from
24
Instructions rad3_bullitt_kids_box_2022 09
12
Drill on the right side mirror-inverted to the left side shown here. Use a 6, better 6.5 mm drill bit.
Hold a piece of wood or similar against the opposite side to avoid splintering (risk of injury!).
Ideally, you should fix the wood with a screw clamp to avoid injuries!
Dimensions 40 and 42 mm refer to the extension of the long straight edge on the left.
Dimensions 22 and 62 r e f e r t o t h e e x t e n s i o n o f t h e l o n g s t r a i g h t edge at
the top.
Use the M6x20 flange head bolts, the large K-washers on the outside, the small ones on the inside.
Now assemble the linkage.
By the way, this is designed with the separating points so that it fits folded into the box. Slide
the long rods into the guides from below with the straight ends first. This will go quite tight the
first time - that is normal.
If you want to remove the rods later, NEVER pull on the lower end but push gradually from the
top downwards. Otherwise the rubber inside will tear!
Fig. 14-3:
Threading large rods
Fig. 14-4:
Threading crossbar, is
usually already
mounted
(small viewing window is
still prototype)
If not already fitted, now insert the sail batten at the top into the "shoes" on the right and left,
you must bend it slightly for this.
Then close the Velcro fastener.
Page 19 from
24
Instructions rad3_bullitt_kids_box_2022 09
12
If not already done, insert the side windows with the zips. It is well known that zips are often
weak points. We have chosen a correspondingly robust size. Nevertheless, you should always
pull carefully and not use force. Zips can be maintained with wax and made more flexible.
Now mount the M6 x 16 mm screws in the columns that guide the canopy at the back. The nuts
protruding on the inside are only for positioning the columns.
The columns are now inserted on the sides under the tensioning strap and tensioned along with it.
Fig. 14-5:
Insert columns
Now insert the fully assembled canopy with the rod feet into the sleeves on the front panel.
Fig. 14-6:
Insert Canopy
If you now bend it down to the pillars, it will almost have the final shape. First mark the upper push
buttons of the middle section, mount them and clip them in place. Proceed as described in point 13
(Picture 13-4).
Then continue with the other press studs, at the side pieces you should pull back slightly and give
tension.
ATTENTION, the screws 9.5 mm are for the columns, the 6.5 mm for the sides (only 6mm thickness!)
Page 20 from
24
Instructions rad3_bullitt_kids_box_2022 09
12
Have a second person help you mark the position. Place the handlebar in the uppermost
position to check. Pull the canopy down so that the wooden
side is just not visible in the
window cut-out.
Fig. 14-7:
Pull handlebars up
and shape, set first
push button
Fig. 14-8:
Pull the sides
into shape, set
more press
studs

This manual suits for next models

1

Popular Bicycle Accessories manuals by other brands

Cannondale Headshok Silk Road 1999 owner's manual

Cannondale

Cannondale Headshok Silk Road 1999 owner's manual

ADDITIVE BAG V3 owner's manual

ADDITIVE

ADDITIVE BAG V3 owner's manual

ACID PACK PRO 2 quick start guide

ACID

ACID PACK PRO 2 quick start guide

HAUL MASTER 99701 Instructions and precautions

HAUL MASTER

HAUL MASTER 99701 Instructions and precautions

Look E-POST R5 Mounting instructions

Look

Look E-POST R5 Mounting instructions

EUFAB 11526 manual

EUFAB

EUFAB 11526 manual

LIGHTWEIGHT KEYKEG quick start guide

LIGHTWEIGHT

LIGHTWEIGHT KEYKEG quick start guide

Steco Pakaf-Mee Assembly manual

Steco

Steco Pakaf-Mee Assembly manual

Powerfix Profi KH 4260 operating instructions

Powerfix Profi

Powerfix Profi KH 4260 operating instructions

Chariot Carriers CX 1 owner's manual

Chariot Carriers

Chariot Carriers CX 1 owner's manual

Topeak DeFender R1 user guide

Topeak

Topeak DeFender R1 user guide

Bosch KETTLER KB148-Z KC46 Series Translation of the original operating instructions

Bosch

Bosch KETTLER KB148-Z KC46 Series Translation of the original operating instructions

Shimano ALFINE S7051 Series Dealer's manual

Shimano

Shimano ALFINE S7051 Series Dealer's manual

Princeton Tec PUSH Operating and maintenance instructions

Princeton Tec

Princeton Tec PUSH Operating and maintenance instructions

Shimano CN-9000 Dealer's manual

Shimano

Shimano CN-9000 Dealer's manual

Cateye HL-1600 instruction manual

Cateye

Cateye HL-1600 instruction manual

Iget C220 user manual

Iget

Iget C220 user manual

Scosche HANDLEIT BM01 manual

Scosche

Scosche HANDLEIT BM01 manual

manuals.online logo
manuals.online logoBrands
  • About & Mission
  • Contact us
  • Privacy Policy
  • Terms and Conditions

Copyright 2025 Manuals.Online. All Rights Reserved.