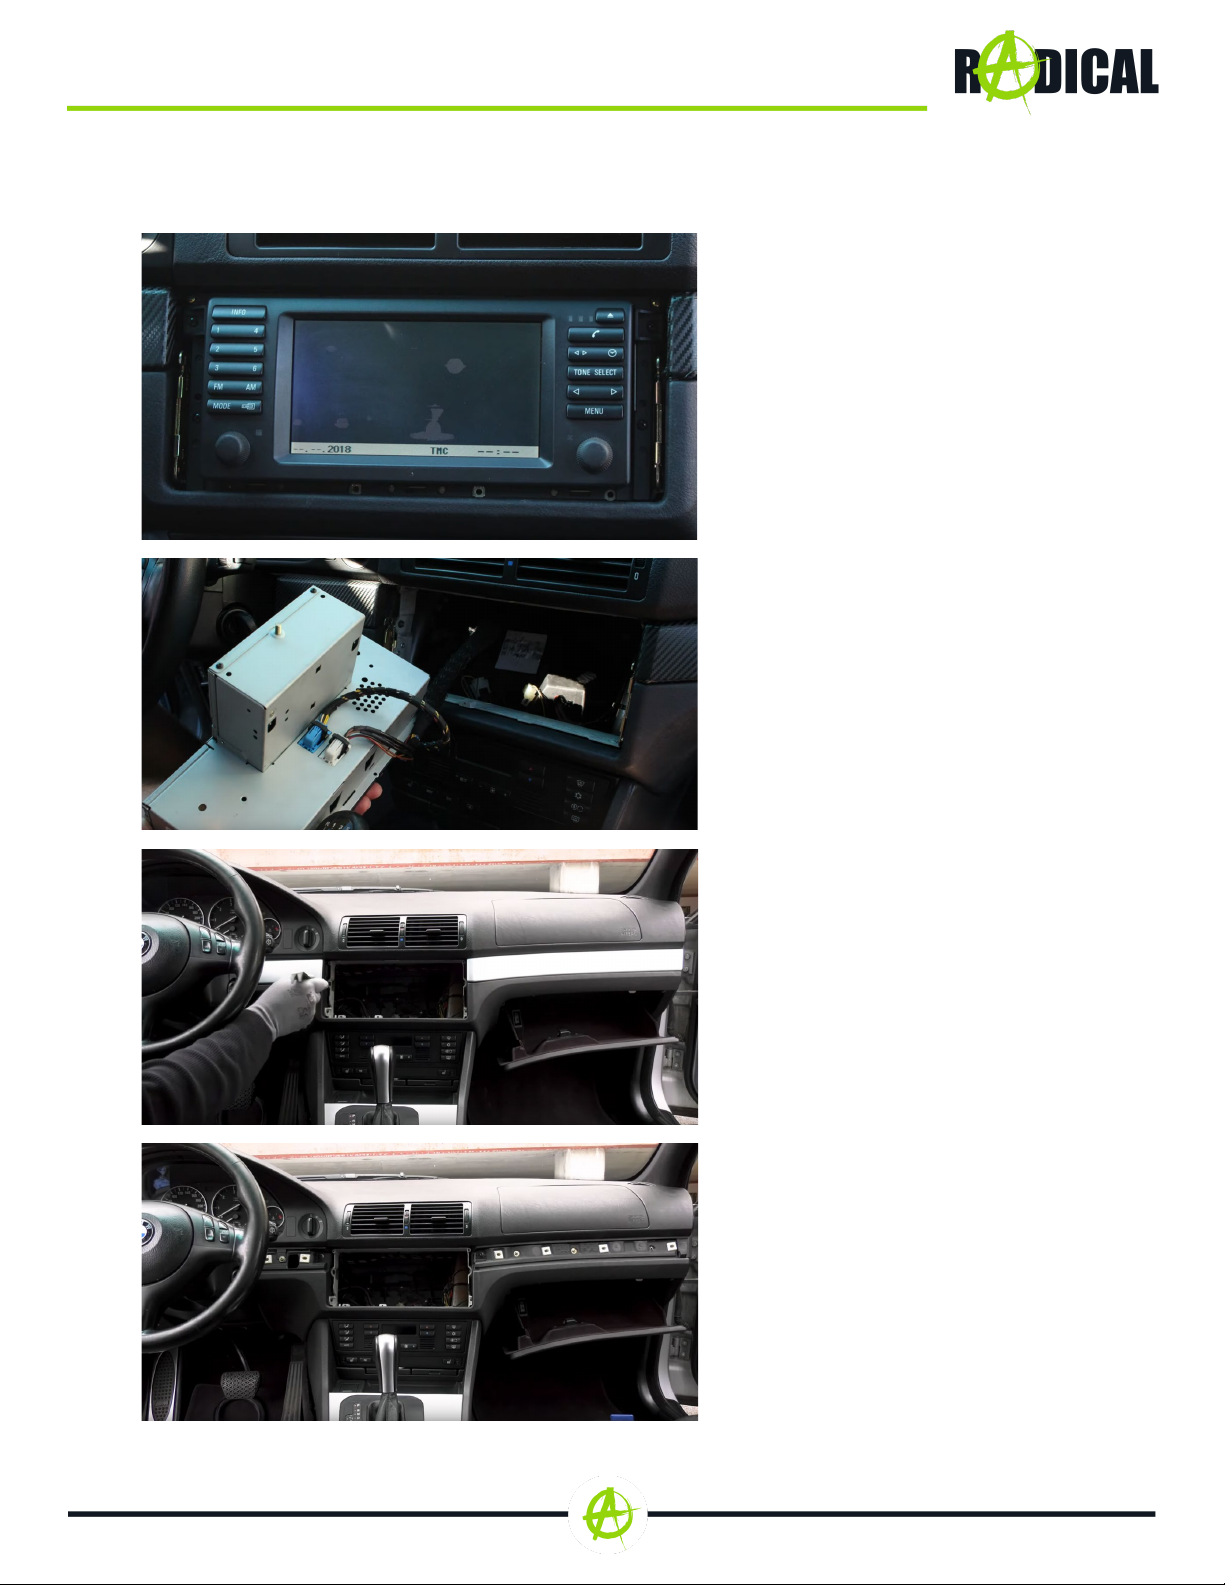
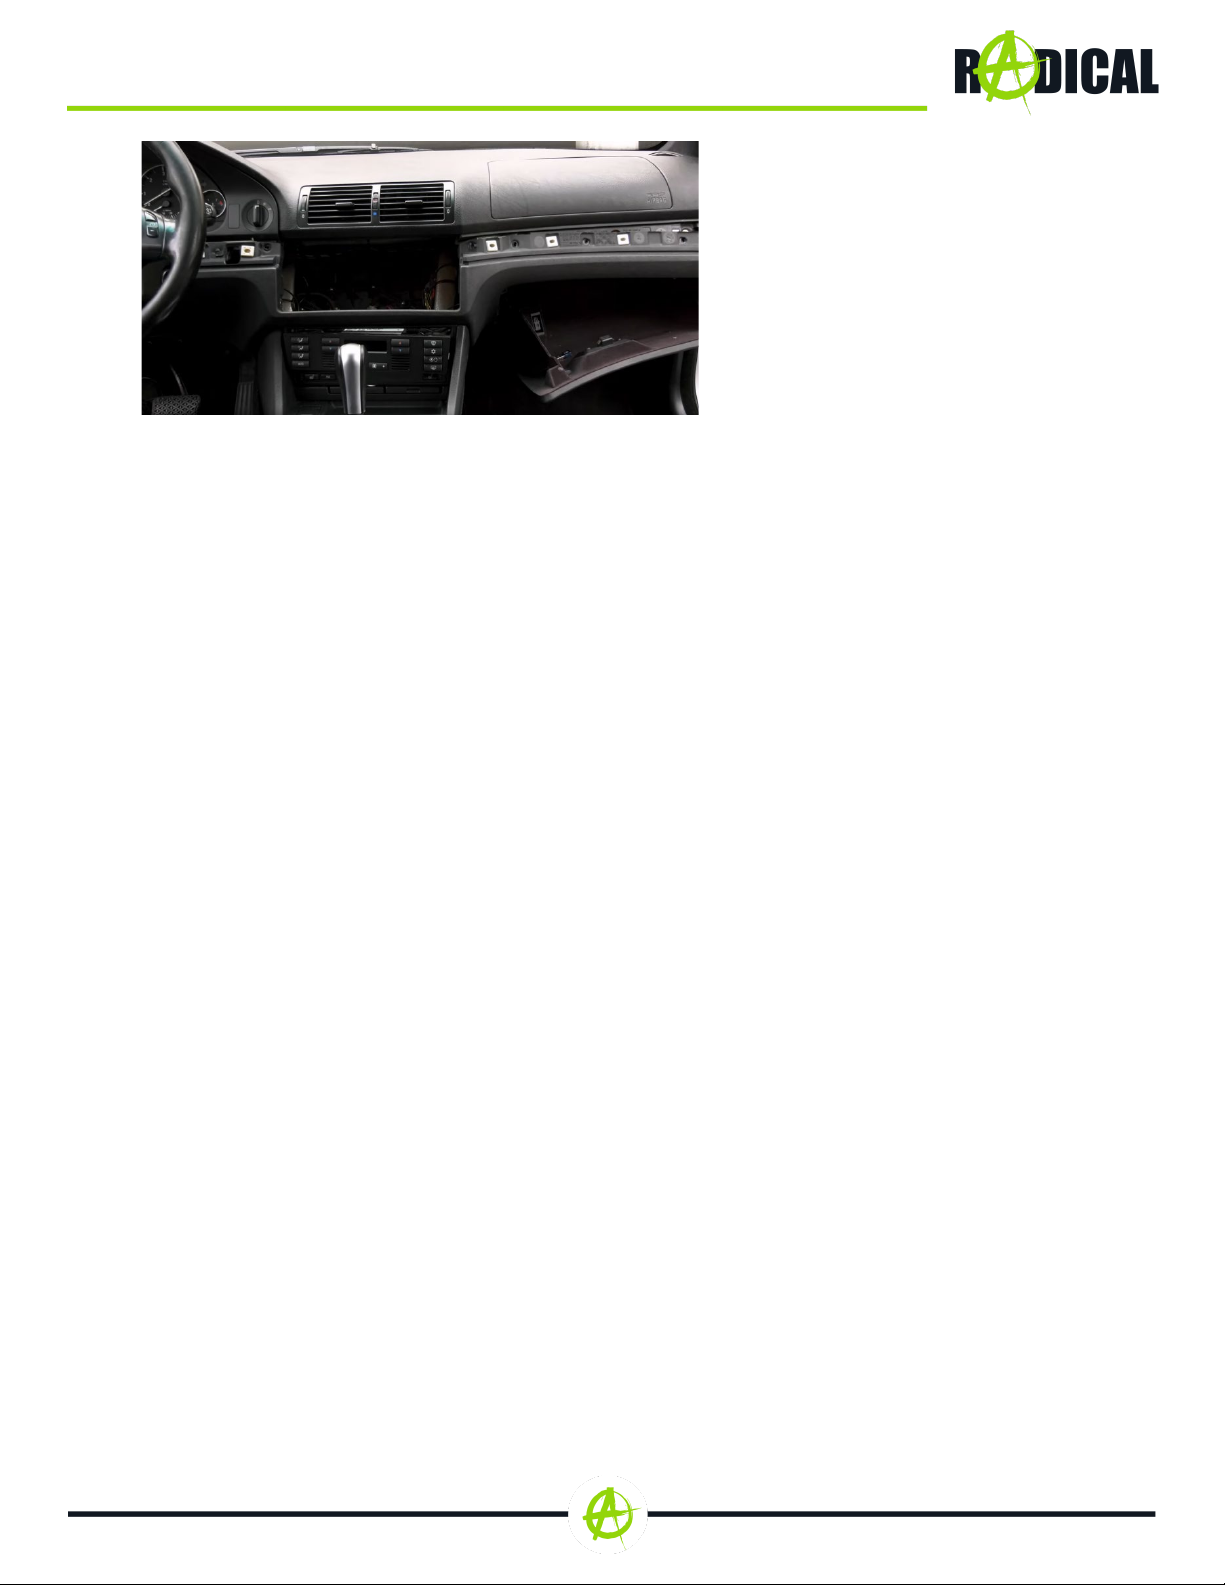
RADICAL R-C11BM3 User manual

MONTAGEANLEITUNG
DEVICE INSTALLATION MANUAL
DE / EN
BMW E39
R- C11BM3

KOMPATIBILITÄTSLISTE
BITTE BEACHTEN:
-Der Einbau des Radical-Geräts sollte von einem autorisierten Fachhändler durchgeführt werden.
Zur Montage werden spezifische Kenntnisse und Werkzeuge benötigt. Unsachgemäßer Einbau
kann zu Schäden am Fahrzeug und am Radical-Gerät führen.
HINWEIS:
-Das Zielfahrzeug muss mit einem Radio- oder Navigationssystem ausgerüstet sein. Das Radical-
Gerät ist nicht mit Fahrzeugen kompatibel, welche ab Werk mit einem Hybrid- oder Elektroantrieb
ausgestattet sind.
-Diese Installationsanleitung gilt für die Fahrzeugplattformen, welche in der Kompatibilitätsliste
aufgeführt sind und den Zustand, wie er vom jeweiligen Fahrzeughersteller angeboten wird.
Davon abweichende Ausstattungen und Installationen können zu Komplikationen und
Fehlfunktionen führen.
LIEFERUMFANG:
Nr.
Artikel
Menge
1
Radical-Gerät
1
2
GPS-Antenne
1
3
WIFI-Antenne
1
4
Externe BT MIC und Kabel 3m
1
5
USB-Kabel 4P to 4P,USB-B
Weiblich, Lila
1
6
USB-Kabel 4P to 6P,USB-B
Weiblich, Grün
1
7
AUX+RCA Kabel 10PIN
1
8
SUBWOOFER Kabel
1
9
Sicherung 15A250V
1
10
Montagewerkzeug
Kunstoffgriff
1
11
Hauptanschlusskabel für
BMW
1
12
CAN-BUS für BMW E39
1
13
ISO-DIN Antennenadapter
1
14
FM Antennenadapter Single
FAKRA
1
15
Montagehalterung
1
16
Doppelseitiges Klebepad
1
17 Kurzanleitung 1
18 Schrauben 8
MARKE
MODELL
TYP
MODELLYAHR
BMW
5-series
E39
1995 > 2004
19 DAB Antenne 1

EINBAUBEISPIEL BMW E39
DEMONTAGE UND VORBEREITUNG:
1. Lösen Sie mit dem beiliegenden
Entriegelungswerkzeug (Nr. 10)
den das Originalgerät
umgebenden Plastikrahmen aus
seiner gesteckten Verankerung.
Danach entfernen Sie die mit
der Mittelkonsole verbundenen
2.Ziehen Sie nun das Werksradio aus
dem Schacht ganz heraus und lösen
das Kabel aus der Verbindung.
3.Lösen Sie mit dem beiliegenden
Entriegelungswerkzeug (Nr. 10) die
beiden Plastikverblendungen am
oberen Ende des Schachtes.
4.Lösen Sie nun mit einem
Kreuzschraubendreher alle
verbindenden Schrauben der
Mittelkonsole (siehe Bild), abhängig
von ihrem jeweiligen Modell.

5.Um die metallische Radiohalterung
aus dem Schacht entfernen zu
können, müssen Sie nun alle mit der
Mittelkonsole verbundenen
Schauben, links wie rechts im
Handschuhfach, lösen. Nur dann
können Sie die Halterung aus dem
Schacht herausnehmen, da diese
etwas in den Umgebungsraum
hineinragt. Dafür müssen Sie die
Mittelkonsole etwas in den
Fahrgastraum herausziehen.

INSTALLATION:
1. Nehmen Sie nun die
mitgelieferte Montagehalterung
(Nr. 15) und setzen sie passend
in den Radioschacht.
Verschrauben Sie diese fest mit
dem Kreuzschraubendreher auf
der Innenseite des Schachtes.
2. Verbinden Sie das jeweilige
Hauptanschlusskabel (Nr. 11/12)
des Radical-Geräts (Nr. 1) mit dem
Quadlockstecker/ISO des Fahrzeugs
und schließen Sie den
Verriegelungsmechanismus des
Steckers. Verbinden Sie
anschließend das CAN-Bus
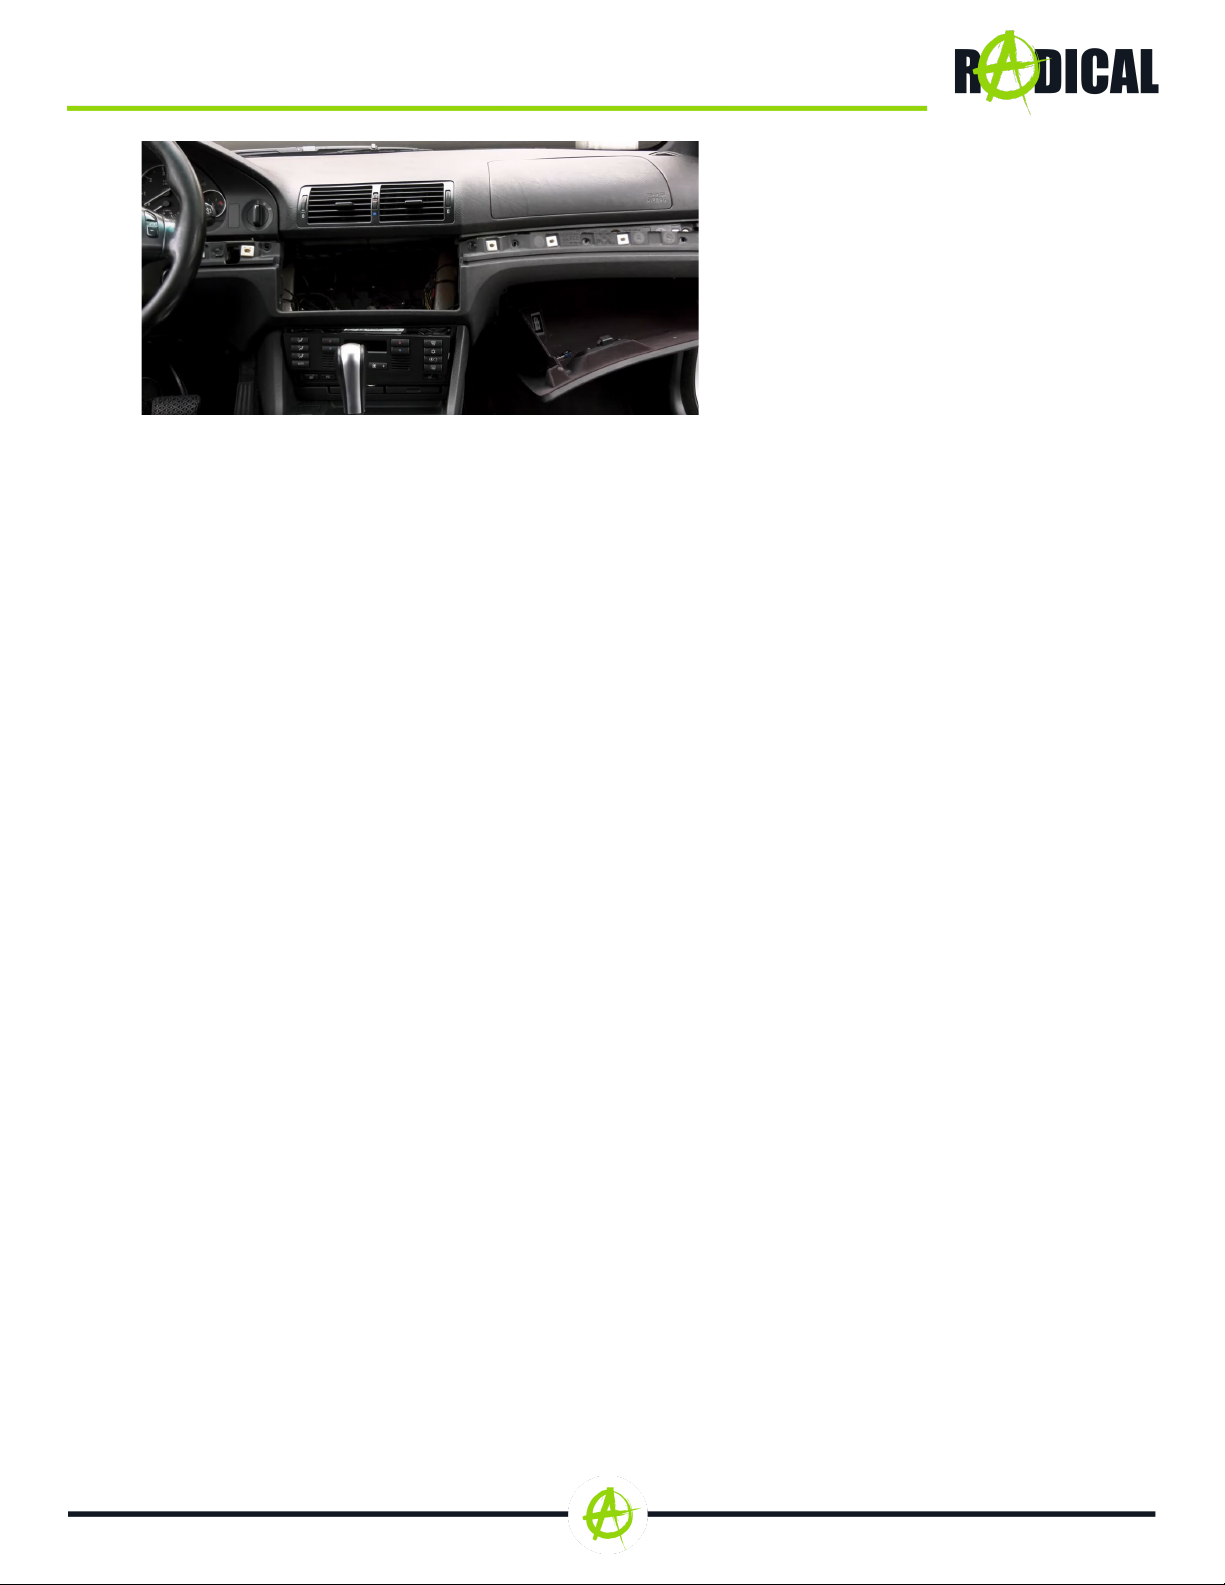
3. Verlegen Sie die diversen
Anschlusskabel des Radical-
Geräts sorgfältig im unteren
Bereich der Radioschachts.
Fixieren Sie das Gerät mit den
beiden mitgelieferten
Schrauben fest an der
Mittelkonsole. Setzten Sie
wieder alle Schrauben, die Sie
zuvor gelöst haben, wieder ein
und drehen sie fest. Befestigen
Sie danach die
Plastikverkleidungen wieder an
dem gewohnten Platz.
Der Einbau des R-C11BM3 ist hiermit
beendet.

DAB-Antenne
Verlegen Sie das Antennenkabel an der A-Säule herab im Armaturenbrett entlang in den
Radioschacht.
BESTIMMEN DER ANTENNEEINBAUPOSITION

ANSCHLUSSSCHEMA:
My-Radical.com
EU Legal Representative:
ACR S & V GmbH ∙ Industriestraße 35 ∙ D-79787 Lauchringen ∙ Germany
RADICAL ∙ Bohrturmweg 1 ∙ CH-5330 Bad Zurzach ∙ Switzerland
Hiermit erklärt ACR Brändli + Vögeli AG, dass der verwendete Funkanlagentyp der Richtlinie 2014/53/EU
entspricht. Der vollständige Text der EU-Konformitätserklärung ist unter der folgenden Internetadresse
verfügbar: http://www.acr.ch/de/home/ (siehe Link „Dokumente zur Produktkonformität“ im Fussbereich).

COMPATIBILITY LIST
PLEASE NOTE:
-The installation of the Radical device should be carried out by an authorized installer. Specific
knowledge and tools are required to do the installation. Incorrect installation can cause damage to
the vehicle and the Radical device.
CAUTION:
-The target vehicle must be equipped with a radio or navigation system. The Radical unit is not
compatible with vehicles that are factory fitted with a hybrid or electric drive.
-This device installation manual applies to vehicle platforms appearing in the compatibility list on
the previous page, and in a condition as offered by the respective vehicle manufacturer. Other
differing configurations and installations may result in complications and malfunctions.
THE KIT INCLUDES:
Nr.
Artikel
Menge
1
Radical device
1
2
GPS antenna
1
3
WIFI Antenna
1
4
External BT MIC and Cable
3m
1
5
USB Cable 4P to 4P,USB-B
Female, Purple
1
6
USB Cable 4P to 6P,USB-B
Female, Green
1
7
AUX+RCA Cable 10PIN
1
8
SUBWOOFER Cable
1
9
Fuse 15A250V
1
10
Installation Tool Plastic
Handle
1
11
Power Cables for BMW
1
12
CAN BUS for BMW E39
1
13
ISO-DIN antenna adapter
1
14
FM antenna adapter single
FAKRA
1
15
Mounting brackets
1
16
3M double Sticker
1
17
Quick start guide
1
18
Screws
8
BRAND
MODEL
TYPE
MODEL YEAR
BMW
5-series
E39
1995 > 2004
19 DAB Antenna1

EXAMPLE OF INSTALLATION BMW E39
REMOVAL WORK AND PREPARATION:
1 Use the supplied release tool (#
10) to release the trim frame. Then
remove the screws connected to the
center console.
2 Now pull the factory radio out of
the shaft completely and disconnect the
cable from the connection.
3 Take the supplied release tool
(# 10), and loosen the two plastic panels
at the top of the shaft.
4 Use a Phillips screwdriver to
loosen all connecting screws of the
center console (see picture), depending
on your model.

5 To be able to remove the
metallic radio bracket from the shaft, you
must now loosen all the screws
connected to the center console, left and
right in the glove box. Only then can you

INSTALLATION:
1 Now take the supplied mounting
bracket (No. 15) and place it in the radio
slot. Screw these tightly with the Phillips
screwdriver on the inside of the shaft.
2 Connect the respective main
connection cable (No. 11/12) of the
Radical device (# 1) with the Quadlock
plug / ISO of the vehicle and close the
Locking mechanism ofthe Plug.
Connect then the CAN bus interface
(No. 14) with the Main cable. Connect
all before in the radio shaft laid cables
and the original Antenna cable with the
Radical 1stdevice (No. 1).
3Carefully lay the various
connection cables of the Radical device
in the lower area of the radio shaft. Fix
the device firmly to the center console
with the two supplied screws. Reinstall
all the screws you loosened previously
and turn them tight. Then attach the
plastic panels back to their usual place.
The installation of the R-C11BM3 is
hereby finished.

DAB antenna
Route the antenna cable downwards along the A-pillar, along the dashboard and into the
radio bay.
WORKING OUT THE INSTALLATION POSITION OF THE ANTENNA

CONNECTION DIAGRAM:
My-Radical.com
EU Legal Representative:
ACR S & V GmbH ∙ Industriestraße 35 ∙ D-79787 Lauchringen ∙ Germany
RADICAL ∙ Bohrturmweg 1 ∙ CH-5330 Bad Zurzach ∙ Switzerland
Hereby, ACR Brändli + Vögeli AG declares that the type of radio equipment used complies with the
2014/53/EU Directive. The full text of the EU Declaration of Conformity is available at the following Internet
address: http://www.acr.ch/en/home/ (see link „Product Conformity Documents“ in the footer are of the page).
Table of contents
Languages:
Other RADICAL Car Receiver manuals