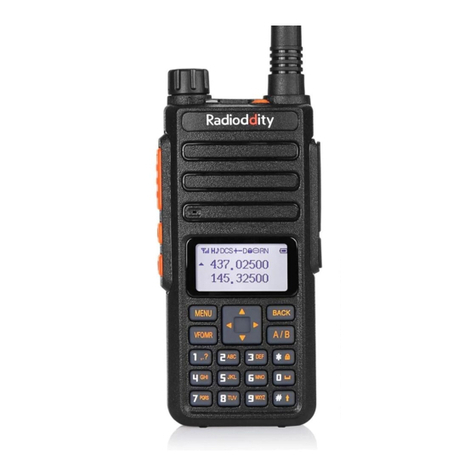
Radioddity GT-82 User manual

GT-82

Table of Contents
Chapter1. Geng Started 5.3 Making a call 13
1.1 Regulaons and Safety Warnings 01 5.4 Channel selecon 13
1.2 Content of the packaging 04 5.5 Frequency (VFO) mode 13
1.3 Main features 04 5.6 Channel (MR) mode 14
Chapter2. Charging the Baery Chapter6. Advanced Features
2.1 Charging the Baery Pack 05 6.1 Frequency scanning 14
2.2 Charger Supplied 05 6.2 Channel scanning 14
2.3 Use Cauon with the Li-ion Baery 05 6.3 CTCSS scanning 15
2.4 How to Charge 06 6.4 DCS scanning 16
2.5 LED Indicator 06 6.5 Cursor▼▲Conversion (A/B) 17
6.6 High/low power fast selecon 17
Chapter3. Installaon of Accessories 6.7 Keypad lock 17
3.1 Installing / Removing the Antenna 07 6.91000Hz, 1450Hz, 1750Hz Tone-burst 18
3.2 Installing the belt clip 07 6.10 Manual Programming (Channels Memory) 18
3.3 Installing the baery pack 08 6.11 Repeaters Programming 18
3.4 Addional Speaker/Microphone (Oponal) 08 Chapter7. Working the MENU System
Chapter4. Radio Overview 7.1 Basic use 22
4.1 Buons and controls of the radio 09 7.2 Using short-cuts 22
4.2 Display of the radio 10 7.3 Funcons and operaons 22
4.3 Status Indicaons 11 Appendix A. - Technical Specicaons 23
4.4 Main keypad controls 11 Appendix B. - Trouble shoong guide 24
Chapter5. Basic Operaons Appendix C. - Shortcut Menu operaons 25
5.1 Power on the radio 12
5.2 Adjusng the volume 12

1
Chapter1. Getting Started
1.1 Regulations and Safety Warnings
EU Regulatory Conformance
As certified by the qualified laboratory, the product is in compliance with the essential requirements and other relevant provisions of
the Directive 2014/53/EU. All applicable EU regulations are regarded (2006/66/EC, 2011/65/EU, (EU)2015/863, 2012/19/EU).
NOTE: It can beoperating under 2000m.
WARNING!European Users should note that operation of this unit in Transmit mode requires the operator to have a valid Amateur
Radio License from their respective Countries Amateur Radio Licensing Authority for the Frequencies and Transmitter Power levels
that this Radio transmits on. Failure to comply may be unlawful and liable for prosecution. At this subject, refer tothe “EU”
specification guide 2014/53/EU.
Please note that the above information is applicable to EU countries only.
Compliance with RF Exposure Standards
The radio complies with the following RF energy exposure standards and guidelines:
• United States Federal Communications Commission, Code of Federal Regulations; 47 CFR § 1.1307, 1.1310 and 2.1093
• American National Standards Institute (ANSI) / Institute of Electrical and Electronic Engineers (IEEE) C95.1:2005; Canada RSS102
Issue 5 March 2015
•Institute of Electrical and Electronic Engineers (IEEE) C95.1:2005 Edition
RF Exposure Compliance and Control
Guidelines and Operating Instructions
To control your exposure and ensure compliance with the occupational/ controlled environmental exposure limits, always adhere to
the following procedures.
Guidelines:
• Do not remove the RF Exposure Labelfrom the device.

2
• User awareness instructions should accompany device when transferred to other users.
• Do not use this device if the operational requirements described herein are not met.
Operating Instructions:
• Transmit no more than the rated duty factor of 50% of the time. To transmit (talk), press the Push-to-Talk (PTT) key. To receive calls,
release the [PTT] key. Transmitting 50% of the time, or less, is important because the radio generates measurable RF energy only
when transmitting (in terms of measuring for standards compliance).
• Keep the radio unit at least 2.5cm away from the face. Keeping the radio at the proper distance is important as RF exposure
decreases with distance from the antenna. The antenna should be kept away from the face and eyes.
• When worn on the body, always place the radio in an approved holder, holster, case, or body harness or by use of the correct clip for
this product. Use of non-approved accessories may result in exposure levels which exceed the FCC's occupational/ controlled
environmental RF exposure limits.
• Use of non-approved antennas, batteries, and accessories causes the radio to exceed the FCC RF exposure guidelines.
• Contact your local dealer for the product's optional accessories.
■Precautions for Portable Terminals
Operating Prohibitions
To protect you against any property loss, bodily injury or even death, be sure to observe the following safety instructions:
1. Do not operate the product in a location containing fuels, chemicals, explosive atmospheres and other flammable or explosive
materials. In such location, only an approved Ex-protection model is allowed for use, but any attempt to assemble or disassemble
it is strictly prohibited.
2. Do not operate the product near or in any blasting area.
3. Do not operate the product near any medical or electronic equipment that is vulnerable to RF signals.
4. Do not hold the product while driving.
5. Do not operate the product in any area where use of wireless communication equipment is completely prohibited.
Important Tips
To help you make better use of the product, be sure to observe the following instructions:
1. Do not use any unauthorized or damaged accessory.
2. Keep the product at least 2.5 centimeters away from your body during transmission.
3
3. Do not keep the product receiving at high volume for a long time.
4. For vehicles with an air bag, do not place the product in the area over the air bag or in the air bag deployment area.
5. Keep the product and its accessories out of reach of children and pets.
6. Please operate the product within the specified temperature range.
7. Continuoustransmission for a long time may lead to heat accumulation within the product. Inthis case, please keep it at a proper
location for cooling.
8. Handle the product with care.
9. Do not disassemble, modify or repair the product and its accessories without authorization.
■Precautions for Batteries
Charging Prohibitions
To protect you against any property loss, bodily injury or even death, be sure to observe the following safety instructions:
1. Do not charge or replace your battery in a location containing fuels, chemicals, explosive atmospheres and otherflammable or
explosive materials.
2. Do not charge your battery that is wet. Please dry it with a soft and clean cloth prior to charge.
3. Do not charge your battery suffering deformation, leakage and overheat.
4. Do not charge your battery with an unauthorized charger.
5. Do not charge your battery in a location where strong radiation is present.
6. Overcharge shall always be prohibited for it may shorten the life of your battery.
Maintenance Instructions
To help your battery work normally or prolong its life, be sure to observe the following instructions:
1. Accumulated dust on charging connector may affect normal charging. Please use a clean and dry cloth to wipe it on a regular
basis.
2. It is recommended to charge the battery under 5℃~40℃. Violation of the said limit may cause battery life reduction or even
battery leakage.
3. To charge a battery attached tothe product, turn it off to ensure a full charge.
4. Do not remove the battery or unplug the power cord during charging to ensure a smooth charging process.
5. Do not dispose of the battery in fire.
6. Do not expose the battery to direct sunlight for a long time nor place it close to other heating sources.

4
7. Do not squeeze and penetrate the battery, nor remove its housing.
Transportation Instructions
1. Damaged batteries must not be transported.
2. To avoid short circuit, separate the battery from metal pars or from each other if two or more batteries are transported in one
packaging.
3. The radio must be switched off and secured against switch-on, if the battery is attached.
The content of the shipment must be declared in the shipping documents and by a Battery Shipping Label on the packaging. Contact
yourhauler for the local regulations and further information.
1.2 Content of the packaging
• 1 GT-82 Radio • 1 Li-Ion battery pack
• 1 Fast desktop charger • 1 Wall adaptor
• 1 Antenna • 1 Belt clip
If any item is missing, please verify with your dealer.
1.3 Main features
•Frequency band: VHF/UHF (Frequency limited) • VHF and UHF bands and channel name displayed
• Up to 128 memory channels • Squelch adjustable in 9 levels
• 50 CTCSS tones and 210 DCS codes • 1750Hz tone for repeaters
• SOS Emergency function • LCD display with backlight adjustable in 3 colors
• FM radio receiver (87.5-108MHz) • VOX, Scan, Dual Watch functions
• Channel or frequency mode selection • Power Save
• TOT (Time out timer) • DTMF function
• Reverse function • Alarm function
• CTCSS and DCS codes research • Setting and storing of channel names
• Busy Channel Lockout function (BCL) • High/low power selection
•Frequency step: 2.5/5/6.25/10/12.5/25KHz • Frequency offset (adjustable): 0-69.990MHz
• Repeater shift • 2pin Kenwood accessory jack
• VOICE: vocal indication of the function selected • Keypad lock
• Li-Ion battery pack • Battery allows direct charging from the DC port

5
Chapter2. Battery Information
2.1 Charging the Battery Pack
The Li-ion battery pack is not charged at the factory; please charge it before use. Charging the battery pack for the first time after
purchase or extended storage (more than 2 months) may not bring the battery pack to its normal maximum operating capacity. Best
operation will require fully charging/ discharging the battery two or three times before the operating capacity will reach its best
performance. The battery pack life may be depleted when it’s operating time decreases even though it has been fully and correctly
charged. If this is the case, replace the battery pack.
2.2 Charger Supplied
Please use the specified charger provided by Radioddity. Other models may cause explosion and personal injury. After installing
the
battery pack,
and if the radio displays low battery with a voice prompt,
please charge the battery.
2.3 Use Caution with the Li-ion Battery
a. Do not short the battery terminals or throw the battery into a fire. Never attempt to remove the casing from the battery pack, as
Radioddity
cannot
be held responsible for any accident
caused by modifying the battery.
b. The ambient temperature should be between 5℃-40℃(40˚F - 105˚F) while charging the battery. Charging outside this range may
not fully charge the battery.
c. Please turn off the radio before inserting it into the charger. It may otherwise interfere with correct charging.
d. To avoid interfering with the charging cycle, please do not cut off the power or remove the battery during charging until the green
light is on.
e. Do not recharge the battery pack if it is fully charged. This may shorten the life of the battery pack or damage the battery pack.
f. Do not charge the battery or the radio if it is damp. Dry it before charging to avoid damage.
WARNING
!
When keys, ornamental chain or other electric metals contact the battery terminal, the battery may become damage or
injure a human. If the battery terminals are short circuited it will generate a lot of heat. Take care when carrying and using
the battery. Remember to put the battery or radio into an insulated container. Do not putitinto a metal container.

6
2.4 How to Charge
a. Plug the AC adaptor into the AC outlet, and then plug the cable of the AC adaptor into the DC jack located on the back of the
charger. The indicator light blinks orange and is then readyto charge a battery.
b. Plug the battery or the radio into the charger. Make sure the battery terminals are good in contact with charging terminals. The
indicator light turns to red--- charging begins.
c. It takes approximately 2-5 hours to fully charge the battery. When the lamp lights green, the charging is completed. Remove the
battery or the radio unit with its battery from socket.
When charging a radio (with battery) the indicating lamp will not turn into green to show the fully charged status if the radio
is powered on. Only when the radio is switched off will the lamp indicate normal operation. The radio consumes energy
when itispower-on, and the charger cannotdetect the correct battery voltage when the battery has been fully charged. So
the charger will charge the battery in constant voltage mode and fail to indicate correctly when the battery has been fully
charged.
2.5 LED Indicator
NOTE
:
Trouble means battery too warm, battery short-circuited or charger
short-circuited.
STATUS
LED
No Battery
Green and red alternately flashing
Charge Normally
Red
Fully Charged
Green
Trouble
Red blinks fast for a long time

7
Chapter3. Installation of Accessories
Before the radio is ready for use we need to aach the antenna and baery pack, as well as charge the baery.
3.1 Installing/ Removing the Antenna
a. Installing the Antenna: Screw the antenna into the connector on the top of the transceiver by holding the antenna at its
base and turning it clockwise unl secure.
b. Removing the Antenna: Turn the antenna counter-clockwise to remove it.
3.2 Installing the belt clip
a. At the back of the radio there are two parallel screws mounted above the baery, remove these and thread them through
the holes on the belt clip as you screw them back into the radio body.
b. Removing the Belt Clip: Unscrew counter-clockwise to remove the belt clip.
3.3 Installing the baery pack
Before aaching or removing the baery make sure your radio is turned oby turning the power/volume knob all the way
counter-clockwise.
a. Make sure the baery is aligned in parallel with the radio body with the lower edge of the baery about 1-2cm below

8
the edge of the radio.
b. Once aligned with the guide-rails, slide the baery upward unl you hear a click as the baery locks in place.
Remove the baery pack
To remove the baery, press the baery release above the baery pack, as you slide the baery downward.
3.4 Installing the Addional Speaker/Microphone (Oponal)
Pry open the rubber MIC-Headset jack cover and then insert the Speaker / Microphone plug into the double jack.

9
Chapter4. Radio Overview
4.1 Buttons and controls of the radio
1. Antenna
6. Keypad
11. Speaker and microphone
2. LED ashlight
7. Monitor key
12.Baery release latch
3. Power / Volume knob
8. FM/SOS key
13. Accessory jack
4. Status LED
9. PTT B - Push to talk B
14. Baery pack
5. Two-line LCD
10. PTT A - Push to talk A

10
4.2 Main controls and parts of the radio
LCD Display
Icon
Descripon
Icon
Descripon
Memory channel
R
Reverse funcon enabled
Least signicant modiers.
N
Narrowband enabled
CT
CTCSS enabled
Baery level indicator
DCS
DCS enabled
Keypad lock enabled
+- Frequency shidirecon if enabled in VFO H,L
Transmit power level indicator
According to Power (High, Low)
S
Dual watch enabled
Indicates acve band or channel
VOX
VOX enabled
Squelch Open/ Close Indicator
Note: Even though it is a seven character by two-line display, channel memories are only configurable to
six character names.
Baery Level Indicator
When the baery level indicator reads the baery is depleted. At this point the radio will start beeping periodically as
well as ash the backlight of the display and when voice prompts are enabled, a "Low Voltage" announcement will be heard,
indicating that you need to change your baery or put your radio in the charger.

11
4.3 Status Indications
The status LED has a very simple and tradional design. When you receive a signal it turns green, when you transmit it turns
red, and it's oin standby.
LED Indicator
Radio Status
Constant Red
Transming.
Constant Green
Receiving.
4.4 Main keypad controls
•[F/SOS] key: Press it for a short me to turn on the FM radio. Press it again to turn it o.
If you press it for a long me you will acvate the alarm funcon. Press it again to turn othis feature.
•[M/LAMP] key: Press it for a short me to light up the ashlight. If you push this buon again, the ashlight will light up to
strobe mode. Press [MONI] a third me to turn othe ashlight.
To acvate the Monitor funcon presses the buon for a long me.
•[MENU] key: It is used for acvang the MENU, choose each MENU selecon and conrm the parameter.
The radio turns o, press and hold the [MENU] key to turn on the radio to switches between Frequency (VFO) mode and
Memory (MR) mode.
Memory mode is somemes also referred to as Channel mode.
To save frequencies to channel memory you must be in Frequency (VFO) mode.
•[▲] key: Press it for more than 2 seconds, the channel and frequency will move upwards rapidly; in SCAN mode, press [▲]
to move the scanning upwards.
• [▼]key: Keep it pressed it for more than 2 seconds, the channel and frequency will move downwards rapidly; in SCAN
mode, press this control to move the scanning downwards.
•[EXIT/AB] key: push this buon to exit the funcons and sengs.
Press it for switches between A (upper) and B (lower) displays. The frequency or channel on the selected display becomes
the acve listening and transmit frequency or channel.
To save frequencies to channel memory you must be on the A display.
When listening to broadcast FM, the [EXIT/AB] key switches between 65-75 MHz and 76-108 MHz band

12
•Numeric keypad
With these keys you can input the informaon or your selecons on the radio.
In tx mode, push the number keys to send a corresponding DTMF code.
•*SCAN Key
A short momentary press of the key enables the reverse funcon.
When listening to broadcast FM a momentary press will start the scanning.
Scanning in broadcast FM will stop as soon as an acve staon is found,
regardless of scanner resume method.
To enable the scanner, press and hold the [*SCAN] key for about two seconds.
•Zero 0 Key
The Radioddity GT-82 features a baery voltage meter that the current voltage of the baery on
the
display.
To see the voltage displayed, press and hold the [0SQL] key for about two seconds.
•# key
If you press shortly [# ]you will switch to High or Low output power.
If you press this buon for more than 2 seconds you will lock/unlock the keypad.
Chapter5. Basic Operations
5.1 Power on the radio
To turn the unit on, simply rotate the Volume/Power knob clockwise unl you hear a "click". If your radio powers on
correctly there should be an audible double beep aer about one second and the display will show a message or ash the
LCD depending on sengs for about one second. Then it will display a frequency or channel. If the Voice prompt is enabled,
the voice will announce "frequency mode" or "channel mode".
Turn the Volume/Power knob counter-clock wise all the way unl you hear a "click". The unit is now o.
5.2 Adjusting the volume
To turn up the volume, turn the Volume/Power knob clock-wise. To turn the volume down, turn the Volume/Power knob

13
counter-clock-wise. Be careful not to turn it too far, as you may inadvertently turn your radio o.
5.3 Making a call
NOTE: Press the [EXIT/AB] key to switch the main channel to the other channel if there is 2 channels shown on the display.
Turn offthe radio and press and hold the [MENU] key to turn on the radio to switch between VFO and channel mode display.
•Channel mode call: Aer selecng a channel, hold down the [PTT] key to iniate a call to the current channel. Speak into
the microphone with normal tone. Iniate a call, the red LED is on.
•Frequency mode call: Turn othe radio and press and hold the [MENU] key to turn on the radio to switch to frequency
mode, the frequency range allowed entering, press the [PTT]key, a call to the current channel. Speak into the microphone
with normal tone. Iniate a call, the red LED is on.
•Receive a call: When you release the [PTT]key, you can answer it without any acon.
When receiving a call, the green LED is on.
NOTE: To ensure the best recepon volume, keep the distance between the microphone and the mouth at the me of
transmission from 2.5 cm to 5 cm.
5.4 Channel selection
There are two modes of operaon: Frequency (VFO) mode, and Channel or Memory (MR) mode.
For everyday use, Channel (MR) mode is going to be a whole lot more praccal than Frequency (VFO) mode. However,
Frequency (VFO) mode is very handy for experimentaon out in the eld. Frequency (VFO) mode is also used for
programming channels into memory.
In Channel (MR) mode you can navigate up and down the channel by using the ▲and ▼keys.
Umately which mode you end up using will depend enrely on your use case.
5.5 Frequency (VFO) mode
In Frequency (VFO) mode you can navigate up and down the band by using the ▲and ▼keys. Each press will increment or
decrement your frequency according to the frequency step you've set your transceiver to.
You can also input frequencies directly on your numeric keypad with kilohertz accuracy.
The following example assumes the use of a 12.5 kHz frequency step.
Example. Entering the frequency 432.6125 MHz on display A
a. Turn othe radio and press and hold the [MENU] key to turn on the radio to switch to frequency mode,

14
b. Press [EXIT/AB] unl the icon appears next to the upper display.
c. Enter [4][3][2][6][1][2][5] on the numeric keypad.
WARNING!
Just because you can program in a channel does not mean you're automacally authorized to use that
frequency. You may be tempted to use PMR446, FRS, GMRS and MURS (in USA) frequencies. Do note however
that there are restricons on these bands that make this transceiver illegal for use. Contact your local
regulatory body for further informaon on what laws, rules and regulaons apply to your area.
5.6 Channel (MR) mode
The use of Channel (MR) mode is dependent on actually having programmed in some channels to use.
Once you have channels programmed and ready, you can use the ▲and ▼keys to navigate between channels.
Note: If you have channels programmed with Transmit power set to Low, you can use the [# ]key to
momentarily switch over to mid or high power if you're having trouble getting through.
Chapter6. Advanced Features
6.1 Frequency scanning
This funcon can scan the frequency.
a. In frequency mode, press [*/scan] key for more than 2 seconds. The radio will start scanning the frequency according to
the set frequency step.
b. You can change the scanning direcon with the ▲and ▼ keys.
c. Press any key to stop the scanning.
Note: for Scan mode, see Menu No.18.
6.2 Channel scanning
This funcon can scan the channels.
a. In channels mode, press [*scan] key for more than 2 seconds. The radio will start scanning according to the channel you
set.

15
b. You can change the scanning direcon with the ▲and ▼keys.
c. Press any key to stop scanning.
Note: for Scan mode, see Menu No.18.
6.3 Tone Scanning
Scanning for CTCSS and DCS Tones/Codes
Scanning for a CTCSS tone or DCS code can be done while Frequency Mode (VFO) or Channel Mode (MR) is selected. Only
when VFO mode is selected, can the detected tone/code be saved to menu 11/10.
CTCSS tone and DCS code scanning mode can be accessed with or without a signal being present. The scanning process itself
only occurs while a signal is being received.
Not all repeaters requiring a CTCSS tone or DCS code for access will transmit one back. In that case, the transmier of a
staon that can access the repeater would need to be scanned. In other words: this would be done by listening to staons on
the repeater's input frequency.
• Scanning for CTCSS Tone
1. Press the [MENU] [1] [1] to come to Menu 11: R-CTCS
2. Press the [MENU] key to select. Insure you have a tone acvated (and it is not o)
3. Press the [*SCAN] to begin CTCSS scanning
A ashing "CT" will be in the lestatus display to indicate the radio is in CTCSS scanning mode. In this mode, whenever the
radio is receiving an RF signal on the selected MR channel or VFO frequency, the lower display will cycle through the CTCSS
tones as they are being tested. Once the frequency of the received CTCSS tone is determined, the "CT" indicator will stop
ashing.
Press the [MENU] key to save the scanned tone into memory (VFO Mode Only) then press the [EXIT/AB] key to exit the
menu.
Don't forget to set VFO menu 11 back to OFF when the CTCSS tone is no longer required.
• Scanning for a DCS tone
1. Press the [MENU] [1] [0] to come to Menu 10: R-DCS
2. Press the [MENU] key to select. Insure you have a tone acvated (and it is not o)

16
3. Press the [*SCAN] to begin DCS scanning
A ashing "DCS" will be in the lestatus display to indicate the radio is in DCS scanning mode. In this mode, whenever the
radio is receiving an RF signal on the selected MR channel or VFO frequency, the lower display will cycle through the DCS
codes as they are being tested. Once the bits of the received DCS code are determined, the "DCS" indicator will stop
ashing.
Press the [MENU] key to save the scanned tone into memory (VFO Mode Only) then press the [EXIT/AB] key to exit the
menu.
Don't forget to set VFO menu 10 back to OFF when the DCS tone is no longer required.
6.4 Dual Watch
The Radioddity GT-82 features Dual Watch funconality (single receiver) with the ability to lock the transmit
frequency
to
one of the two channels it monitors.
• Enabling or disabling Dual Watch mode
1. Press the [MENU] [7] to get to MENU 7: TDR.
2. Press [MENU] key to select.
3. Use the ▲and ▼keys to enable or disable.
4. Press the [MENU] key to conrm.
5. Press the [EXIT/AB] key to exit the menu.
Due to the way the
Radioddity GT-82 is constructed , whenever one of the A or B Frequencies (VFO/MR) goes acve, it will
default to transmit on that channel. This behavior can be inconvenient, especially if when monitoring
a
frequency,
you
should
not
transmit
on.
There
is
a
menu
opon
available
to
lock
the
transmier
to
one
of
the
A
or
B
channels.
• Locking the Dual Watch transmit channel
1. Press the [MENU] [3][4] to get to MENU 34: TDR-AB.
2. Press [MENU] key to select.
3. Use the ▲and ▼keys to select A (upper) or B (lower) display.
4. Press the [MENU] key to conrm.

17
5. Press the [EXIT/AB] key to exit the menu.
If you want to momentarily override the lock without having to seng the menu opon to OFF, you can do so by pressing
the [EXIT/AB] key an instant before pressing the PTT.
Another opon is to disable menu [7] (TDR) to override the lock. Then re-enable TDR when you want the lock resumed
6.5 Cursor▼▲Conversion (A/B)
Directly press [EXIT/AB] key to move the cursor up and down. Then, you can modify or conrm the parameters indicated by
the cursor.
Important1: GT-82 has a dual-frequency display funcon. In frequency mode, you will see on the display two di
erent
receiving and transming frequencies; while in channel mode the two dierent channels will be displayed.
Important2: In frequency or channel mode, press the [EXIT/AB] key to shibetween the main channel A and the
sub-channel B
▲on the display indicates on which channel (main channel A or sub channel B) you are operang.
▼is displayed next to the channel.
6.6 High/low power fast selection
In channel mode, press [# ] key to shibetween high and low power.
6.7 Keypad lock
This funcon locks the keypad to prevent accidental pressure of the controls.
To unlock the keypad, press [# ]for more than 2 seconds.
6.8 FM Radio (FM)
The frequency ranges to listen to the radio is 65-108MHz. When listening to broadcast FM, press [EXIT/AB] key switches
between 65-75 MHz and 76-108 MHz band.
a. In frequency or channel mode, Press [F/SOS] to turn on the radio.
b. Select the desired radio frequency with the ▲ or ▼keys or input the frequency. or
•Press [* SCAN] to automacally search a radio staon.

18
c. Press [F/SOS] to exit FM radio.
Note: while you are listening to the radio, the frequency or channel of A/ B receiving signal will automatically switch
to the frequency or channel mode for normal transmitting and receiving.
Whenthe signal disappears the radio will automatically switch again to FM radio mode.
6.9 Flashlight
This funcon is very useful for night illuminaon.
To turn it on press [MON/LAMP]; push it again, the ash light will be strobe; push it again: it will turn o.
6.10 1000Hz, 1450Hz, 1750Hz Tone-burst
To send out a tone-burst (selectable by MENU 41); press the [F/SOS] key while holding down the [PTT].
A common tone burst frequency used by many amateur radio systems in Europe is 1750 Hz.
you can select from 2100, 1750,1450, or 1000Hz Tone Burst Opons. These opons are found on the Menu 41(R-TONE).
6.11 Manual Programming (Channels Memory)
Memory channels are an easy way to store commonly used frequencies so that they can easily be retrieved at a later date.
The
Radioddity GT-82 features 128 memory channels that each can hold: Receive and transmit frequencies, transmit
power,
group
signaling
informaon,
bandwidth,
ANI/
PTT-ID
sengs
and
a
six-character
alphanumeric
idener
or
channel
name
1.
Frequency
Mode
vs.
Channel
Mode
Switch
between
modes
by
using
holding
the
[MUNU]
buon
during
a
power
cycle
of
the
GT-82 EU
(volume
knob
o/on
).
These
two
modes
have
dierent
funcons
and
are
oen
confused.
Frequency
Mode
(VFO):
Used
for
a
temporary
frequency
assignment,
such
as
a
test
frequency
or
quick
eld
programming
if
permied.
Channel
Mode
(MR):
Used
for
selecng
preprogrammed
channels.
Ex
1.
Programming
a
Channel
Repeater
Oset
with
CTCSS
Tone
EXAMPLE
New
memory
in
Channel
10:
RX
=
432.000
MHz
TX
=
437.000
MHz
(This
is
a
(+
5)
Oset)
Table of contents
Other Radioddity Two-way Radio manuals

Radioddity
Radioddity FS-T3 User manual

Radioddity
Radioddity GA-510 User manual

Radioddity
Radioddity GA-2S User manual

Radioddity
Radioddity FS-T1 User manual

Radioddity
Radioddity GD-73 Series User manual

Radioddity
Radioddity GS-5B User manual

Radioddity
Radioddity PR-T6 PMR EU User manual

Radioddity
Radioddity FS-T7 FRS US User manual

Radioddity
Radioddity GA-5E User manual

Radioddity
Radioddity GC-5 Series User manual