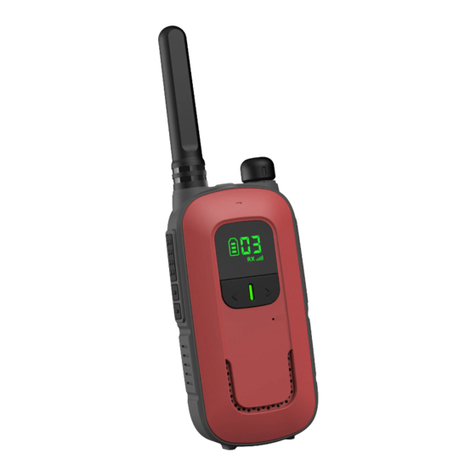
Radioddity PR-T6 PMR EU User manual

PR-T6 PMR EU


1
User Manual -English
Thanks for choosing Radioddity! PR-T6 is a FM two-way radio transceiver suitable for use in the 446 private mobile
radio service (PMR446). Programmed with the 16 PMR446 frequencies, Max Transmission power 500 mW,
Bandwidth 12.5 kHz, Maximum transmission time limit 180 seconds, fixed antenna, no registration or fees. but
restrictions of use may apply in some Non-EU countries. For further information, we suggest you look at the
“Restrictions on the use” chart.
ATTENTION!
Before using this product, read the RF Energy Exposure and Product Safety Guide that ships with the radio which
contains instructions for safe usage and RF energy awareness and control for compliance with applicable standards
and regulation.
Radioddity PR-T6 is a multi-task PMR446 transceiver.
Combining the latest technology in radio communication along with a sturdy mechanical frame, PR-T6 is the ideal
and effective solution for the professionals who need to stay in touch with the working team (in construction sites,
buildings, shows, trade fairs or hotels) or for leisure users that just want to keep up with friends and family.
Coverage
The maximum range depends on terrain condition and is obtained during use in an open space.
The only limitation to maximum possible range are environmental factors such as blockage caused by trees,
buildings, or other obstructions. Inside a car or a metallic construction, the range can be reduced. Normally the
coverage in the city, with buidings or other obstructions is about 1 or 2 Km. In open space but with obstructions like
trees, leafs or houses the maximum possible range is about 4-6 Km. In open space, without obstructions and in
sight, like for example in mountain, the coverage can be 10 Km.

2
Frequency Chart
Ch. Freq. (MHz) Ch. Freq. (MHz) Ch. Freq. (MHz) Ch. Freq. (MHz)
1 446.00625 5 446.05625 9 446.10625 13 446.15625
2 446.01875 6 446.06875 10 446.11875 14 446.16875
3 446.03125 7 446.08125 11 446.13125 15 446.18125
4 446.04375 8 446.09375 12 446.14375 16 446.19375
Main features
• 16 PMR446 Channels • Output power: ч0.5W
• 2 Channels Watch • Sub-Codes Scan and Store
• Channel Monitor • Channel Scan Function
• 155 Sub-Codes (50 CTCSS codes/ 105 DCS codes) • 10 Selectable Call Tone Alerts
• Hands-Free Operation (VOX) • Call Alert
• Roger Beep Tone • Keypad Lock
• Battery Level Meter • Emergency Strobe Light
• Battery/Power Saver • Backlit LCD Display
• Low Battery Audible Alert • TOT (Time out timer)
*Range may vary depending on environmental and/or topographical conditions.
Recharging the Li-Ion battery pack ‘LB-T22’
Place your transceiver in the desktop charger cradle or connect the wall adapter to the correct socket on the radio.
Recharge of the Li-Ion battery is managed by a radio processor and the battery status can be checked by the icon
on the screen and by seeing it on the desktop charger:
• Charging status is indicated by the LED on the desktop charger and by the flashing battery icon on the radio
display.
• When charging is complete, the led will be off and the battery icon on the
screen will be full of bars
Recharge NI-MH Batteries (3 x AA, Optional)
Place your transceiver in the desktop charger cradle or connect the wall
adapter to the correct socket on the radio. A full charge takes about 5 hours.
We suggest you detach the wall adapter from the radio or remove the radio
from the desktop charger cradle after 5 hours.
The battery icon on the radio display will flash during the entire charging

3
process, as well as the red led will be on on the desktop charger.
Installing and Removing Belt Clips
With the belt clip, you can easily attach the radio to the belt. However, the belt clip must be removed to install or
replace the battery.
To remove the belt clip, follow the illustration. Fasten the clip into the slot on the unit in the radio's rear rail until it
snaps into the square.
Removing/Installing the Battery Pack
• Remove
1) Remove the belt clip as previously described.
2) Open the battery compartment as shown in the figure;
3) Remove the battery pack from the device;
4) Snap the belt clip back into place.
5) Close the battery compartment with the cover and put the belt clip back in place.
• Install
1) Remove the belt clip as described in the previous
paragraph.
2) Insert the battery pack into the appropriate compartment
of the device.
3) Close the battery compartment with the cover and put the
belt clip back in place
Main controls and parts of the radio
1. Antenna
2. LCD Display
3. UP button - Press to increase the volume. Menu mode to change
settings in MENU.
4. /MENU- Press this control to enter the radios MENU. If you keep
it pressed for about 3 seconds, the keypad lock is activated.
5. /CALL - To send a call to the selected channel. keep pressed to
turn on/off the radio.
6. DOWN button - Press to reduce the volume. menu mode to
change settings in MENU.

4
7. Speaker and Built-in microphone
8. LED Flashlight
9. Belt Clip
10. MONI button: Keep pressed to activate the Monitor function (for weak signal monitoring).
11. SPK | MIC (under the protective cover) - To connect to external audio devices such as microphones, headphones, etc
12. /SCAN button - Press this button once to activate SCAN.
13. USB port for the recharge of the radio
14. PTT button (Push-To-Talk)
15. LAMP/ Emergency button - When the radio is switched on, press shortly to turn on/off the LED flashlight. keep pressed to turn
on/off the emergency alerts.

5
LCD DISPLAY
Basic Operations
In order to get the most out of your new radio, read this reference guide completely before attempting to operate
the unit.
Power on/off and volume adjustment
To turn the radio on, keep pressed the /CALL button.
To adjust the volume level as you prefer, press the or button.
In case the radio does not pick up any signal, activate momentarily the Monitor function that allows to detect also
weak signals. Then, adjust the volume to the desired level.
To turn the radio off, keep pressed the /CALL button until a switch off tone is heard.
Keypad Lock
To avoid accidentally changing the radio settings, press the /MENU button for 3 seconds. The icon will
appear on the display. [PTT], , [ /CALL] and [MONI] keys will still be active. Repeat the same procedure to
unlock the keypad.
Talking on Your Radio
To talk to others using the radio:
1. Scan Indicator
2. Activate the VOX function
3. Dual Channel Monitor
4. Select the DCS/CTCSS type of squelch method
5. Channel (1-16)
6. Battery Indicator
7. Emergency alert function activated
8. Transmit Status
9. Receive Status
10. Keypad Lock
11.
Transmit power indicator. Low power only in PMR mode
12. Displays the set CTCSS tone or DCS code (CTCSS:
1-50; DCS: 1-105)

6
1) Press and hold the [PTT] button and speak in a clear, normal voice about 2-3 inches away from the microphone.
While you are transmitting, the TXÆicon appears on the display. To avoid cutting off the first part of your
transmission, pause slightly after pressing the [PTT] button before you start talking.
2) When you have finished speaking, release the [PTT] button. You can now receive incoming calls. While receiving,
RXÅdisplays.
Monitor Mode Feature
Your radio allows you to listen for weak signals on the current channel at the press of a key. To turn on Monitor
mode: Press the [MONI] button to activate the monitor function. The receiver circuit stays open, and both noise
and weak signals can be heard. The RXÅicon blinks. To turn off Monitor mode: Press the [MONI] button again to
return to normal modeˈand the RXÅicon stops blinking and disappears.
Channel Scanning
PR-T6 can automatically search for signals throughout the PMR bands by scanning, i.e. selecting the channels in
rapid sequence. When a signal is detected, the scanning pauses on that channel and you can transmit by pushing
[PTT]. If you press [PTT] during scanning you can transmit on the channel from which the scanning started. The
scroll buttons or allow you to change the direction of scanning (from lower channels to higher ones or vice
versa) and therefore to skip communications which are of no interest.
Press briefly the button /SCAN to start scanning.
If you want to stop it, press again /SCAN. Your transceiver will go back to the channel from which the scanning
originally started.

7
Scanning Sub-Codes
Press and hold /SCAN button to enter the Sub-Codes scanning.
A flashing "CTC/DCS" will be in the left status display to indicate the radio is in Sub-Codes scanning mode.
In this mode, the lower display will cycle through the Sub-Codes as they are being tested. Once the bits of the
received Privacy code are determined, the "CTC/DCS" indicator will stop flashing.
Press the [PTT] button to save the scanned tone into memory.
During scanning, press and hold /SCAN button to exit Sub-Code scanning.
Using the Flashlight
You can use this radio in an emergency. If you press button, the radio turns on the high-intensity LED flashlight
on your radio.
• Your radio operates normally when the emergency strobe is activated.
1) Press button once, it will turn on continuously. (Always On mode)
2) And then, press button once, the Strobe Light emits the emergency signal. (Strobe emergency mode)
3) And then, press button once, the light will be turned off.
Emergency Alert
The Emergency Alert feature can be used to signal members in your group for help. The emergency alarm
function is activated by menu operation.
To activate the emergency alert function, press and hold the button for 3 seconds. The radio will send out a
loud siren sound and the flashlight will flash.
Press the button to exit the emergency alert function.
WARNING: The Emergency Alert feature should only be used in the even of an actual emergency.

8
Menu Options
Selecting the Channel
The channel is the frequency of the radio uses to transmit. Your radio has 16 channels and 155 Sub-Codes you can
use to talk to others. In order to speak to someone, both your radios must be set to the same channel and Privacy
code.
1) Press and hold the /CALL button until the radio is turned on.
2) Press /MENU button until the channel number starts to flash.
3) Press or to change the channel. Long press on these keys allows you to scroll through the channels
rapidly to browse the codes.
4) Press PTT button to exit menu or /MENU button to continue set up.
If the /MENU button is locked, please press and hold the /MENU button for 3 seconds to unlock.
CTCSS/DCS tones selection
Radioddity PR-T6 can receive in two modes:
• Open traffic: in this case you will hear any communication transmitted on the selected channel;
• Group mode CTCSS/DCS: CTCSS/DCS tones are access keys that allow you to receive only messages coming from
parties using the same channel and code. The speaker will remain muted until the correct tone is received.
To activate 1 of 50 different CTCSS/105 DCS tones in RX and TX
1) To select CTCSS/DCS, press /MENU twice until the display shows CTC or DCS (flashing on the lower left).

9
2) By pushing the or button the display will show CTCSS (ct blinking) or DCS (dc blinking); press /MENU
to enter the CTCSS or DCS tones. Now select the desired tone with the or buttons.
3) Press the PTT button to exit menu or /MENU button to continue set up.
VOX function
Radioddity PR-T6 enables hands free conversations through VOX function.
1) To activate VOX function press the /MENU button 4 times and ‘VOX’ will appear on the display.
2) Use the or buttons to select the desired setting:
The VOX sensitivity can be set in 3 different levels:
• 1 = high sensitivity (normal voice with no background noise)
• 2 = Medium Sensitivity for most environments
• 3 = low sensitivity (useful in very noisy areas or if you talk loudly)
3) Press the PTT button to exit menu or /MENU button to continue set up.
To disable the VOX function follow the instructions above and select option oF (OF: Disabled).
Setting and Transmitting Call Tones
Radioddity PR-T6 can transmit different call tones to other radios in your group so you can alert them that you want
to talk. Your radio has 10 call tones for you to choose from.
To select the call tones:
1) Press the /MENU button 5 times and " " will appear on the display.
2) Press or to change and listen to the call tone.
3) Press the PTT button to exit menu or /MENU button to continue set up.
• To disable the Call Tones follow the instructions above and select option oF (OF: Disabled).
In order to transmit your call tone to other radios, set up the same channel and Sub-Code on your radio and press
the /CALL button.
Emergency alarm type
With the emergency alert feature, you can signal to your group members that you need help. The alarm signal can
only be signaled that you need help by pressing and hold the button after the emergency alarm function of the
PR-T6 is activated.
Select an emergency alert type:
1) To activate emergency alert function press the /MENU button 6 times and until the display shows “ ”.

10
2) Use the or buttons to select the desired setting:
oF: Disabled
1. Local alarm, the radio itself emits an alarm sound;
2. Send an alarm tone on the current channel to signal to group members that you need help.
3) Press the PTT button to exit menu or /MENU button to continue set up.
WARNING: The Distress Alert feature should only be used in a true emergency. If the receiving group does not
respond to the distress signal, Radioddity will not assume any responsibility.
Keypad beep
To deactivate the keypad beep, follow these steps:
1) Press the /MENU button 7 times and until “ ” is displayed.
2) Use the or buttons until the display shows “ ”.
3) Press the PTT button to exit menu or /MENU button to continue set up.
Now you won’t hear any beep at the pressure of any button.
ROGER BEEP (End transmission tone)
When your transmission is finished (PTT released), Radioddity PR-T6 gives out a sound that indicates to the other
party that s/he can start talking. This function is enabled by default.
To deactivate it:
1) Press the /MENU button 8 times and until the display shows “ ”;
2) Using the buttons or select “off” and “ ” will be displayed;
3) Press the PTT button to exit menu or /MENU button to continue set up.
Dual Watch Mode
Your radio has a DUAL WATCH function, to enable user to scan 2 channels for any activity. The first channel will be
the current channel setting and the second channel will be the selected channel on the.
To set another channel and start Dual Watch:
1) Press the /MENU button 9 times and until the display shows “ ”;
2) Using the buttons or select the channel, then press /MENU.
3) Using the buttons or select the CTCSS/DCS, then press /MENU.
4) The radio starts to Dual Watch.
The screen will alternate between home channel and Dual Channel Monitor channel.

11
Note: If you set the same channel and Sub-code as the current channel, Dual Watch doesn’t work.
5) Press the /SCAN button to turn the Dual Watch mode OFF.
Maintenance
Your PR-T6 was designed to fulfill any warranty obligations and to enjoy this product for many years.
As for all the electronically devices, we recommend you to follow this few suggestions:
• Do not attempt to open the unit. Non-expert handling of the unit may damage it and/or annul the warranty.
• When using regulated power supply, take notice of power voltage that must be 5V to avoid damages.
• High temperatures can shorten the life of electronic devices, and warp or melt certain plastics. Do not store the
radio in dusty or dirty areas.
• Keep the Radio dry. Rainwater or damp will corrode electronic circuits.
• If it appears that the Radio diffuses peculiar smell or smoke, please shut off its power immediately and take off
the charger or battery from the Radio.
• Do not transmit without antenna.
EU Declaration of Conformity
Radioddity and Pofung hereby declares that the radio equipment type listed in Technical Specifications is in
compliance with Directive 2014/53/EU. The full text of the EU Declaration of Conformity is available at the
following link: http://www.pofung.cn/download.asp?EnBigClassName=EU%20DOC. Via your local Radioddity
helpdesk, your dealer from where you purchased this radio or send an email to wangjianhui@Radioddityradio.com.
This product is an FM two-way radio transceiver suitable for use in the 446 private mobile radio service(PMR446).
This is a license exempt service, but restrictions of use may apply in some Non-EU countries.

12
Technical Specifications
General Part
Frequency Range
446.00625- 446.19375 MHz (PMR446)
Channels
16 PMR446
Working temperature
-10ȭto +50ȭ
Operation Voltage
DC 3.7 V ±10%
Operation Mode
Simplex
Dimensions
168mm×57mm×34.5mm (without Antenna)
Weight
150g (Battery pack included)
Antenna Impedance
50ohm
Category
B
Transmitter Part
Frequency Stability
±2.5ppm
RF Output Power
ч500mW ERP
Max frequency deviation
чϮϱ<,nj
Audio distortion
чϯй
Adjacent Channel Power
ͻ60dB
Receiver Part
Receive Sensitivity
ͻ0.2ʅs@20dB SINAD
Audio distortion
чϯй
Audio response
300 Hz ~ 3 KHz

13
Manuel utilisateur -Français
Merci d'avoir choisi Radioddity! Le PR-T6 est un émetteur-récepteur radio FM bidirectionnel pouvant être utilisé
dans le service de radio mobile privé 446 (PMR446). Programmé avec les 16 fréquences PMR446ˈPuissance
d'émission 500 mWˈBande passante 12,5 kHzˈDélai d'envoi max180 secondesˈantenne fixeˈpas d'inscription ni
de frais.mais des restrictions d'utilisation peuvent s'appliquer dans certains pays hors UE. Pour plus d'informations,
nous vous suggérons de consulter la charte « Restrictions d'utilisation ».
ATTENTION!
Avant d'utiliser ce produit, lisez le guide Sécurité des produits et exposition aux fréquences radio fourni avec la
radio. Il contient des instructions de fonctionnement relatives à la sécurité et à l'exposition aux fréquences radio,
ainsi que des informations sur le contrôle de conformité aux normes et réglementations applicables.
Radioddity PR-T6 est un émetteur-récepteur PMR446 multitâche
Le PR-T6 associe la technologie la plus récente en matière de communication radio avec une solide structure
mécanique, c'est la solution idéale et efficace pour les professionnels ayant besoin de garder le contact avec leur
équipe de travail (sur les sites de construction, dans les bâtiments, les salons, les foires commerciales ou les hôtels)
ou bien pour les loisirs afin de garder le contact avec ses amis et sa famille.
Couverture
La portée maximale dépend de l’état du terrain et est obtenu lors de l’utilisation dans un espace ouvert. La seule
limitation à la portée maximale possible sont des facteurs environnementaux tels que le blocage causé par les
arbres, les bâtiments, ou autres obstacles. L’intérieur d’une voiture ou une construction métallique, la portée peut
être réduite. Normalement la couverture dans la ville, avec des bâtiments ou d’autres obstacles est d’environ 1 ou 2
km. Dans l’espace ouvert, mais avec des obstacles comme les arbres, feuilles ou des maisons de la portée maximale
possible est d’environ 4-6 km. Dans l’espace ouvert, sans obstacles et en vue, comme par exemple en montagne, la
couverture peut être plus de 10 km.

14
Tableau de fréquences
Canal Fréq. (MHz) Canal Fréq. (MHz) Canal Fréq. (MHz) Canal Fréq. (MHz)
1 446.00625 5 446.05625 9 446.10625 13 446.15625
2 446.01875 6 446.06875 10 446.11875 14 446.16875
3 446.03125 7 446.08125 11 446.13125 15 446.18125
4 446.04375 8 446.09375 12 446.14375 16 446.19375
Fonctions et caractéristiques
• Emetteur-récepteur PMR446 ͻWƵŝƐƐĂŶĐĞĚĞƐŽƌƚŝĞчϱϬϬŵtZW
• 16 canaux PMR. • 155 sous-codes (50 codes CTCSS et 105 codes DCS)
ͻƐƉĂĐĞŵĞŶƚĚĞƐĐĂŶĂƵdžϭϮϱ<,nj • Economies de batterie
• Moniteur • Squelch
• Lampe de poche • Fonction VOX pour communiquer en main-libre
• Lampe à LED • 10 alertes de tonalités d'appel au choix
• Écran LED segmenté • Tonalité de confirmation
• Indicateur du niveau de la batterie • Contrôle des canaux
• Balayage des canaux • Double contrôle des canaux
• Verrouillage du clavier • Réglage silencieux automatique
• Alerte de batterie faible • Tonalités clavier (activé/désactivé)
• Mode silencieux • Fonctions d'urgence
• Source d’alimentation: batterie Li-ion
• Durée de vie de la batterie: jusqu'à 18 heures (dans des conditions normales d'utilisation)

15
Rechargement du pack batterie Li-Ion ‘LB-T22’
Placez votre émetteur-récepteur dans le berceau du chargeur de bureau ou de connecter l’adaptateur mural à la
bonne prise de la radio.
La recharge de la batterie Li-Ion est géré par un processeur de la radio et de l’état de la batterie peut être vérifié
par l’icône sur l’écran et en le voyant sur le chargeur de bureau:
• Le statut de recharge est indiquée par la LED sur le chargeur de bureau et par l’icône de la batterie clignote sur
l’écran de la radio.
• Lorsque la recharge est terminée, la led sera éteint et l’icône de batterie sur l’écran sera plein de bars et
correctif.
Commandes principales et elements de la radio
Rechargement des batteries NIMH (3 x AA)
Placez votre émetteur-récepteur dans le berceau du chargeur de bureau ou de connecter l’adaptateur mural à la
bonne prise de la radio. Une recharge complète dure environ 5 heures. Nous vous suggérons de détacher
l’adaptateur mural de la radio ou de supprimer radio à partir du socle chargeur de bureau après 5 heures.
L’icône de la batterie sur l’écran de la radio clignote pendant tout le processus de charge, ainsi que la led rouge sera
allumé sur le chargeur de bureau.
Installation et retrait du clip ceinture
Avec le clip ceinture, vous pouvez facilement fixer le récepteur à votre
ceinture. Le clip doit cependant être retiré afin d’installer ou changer les piles.
Pour retirer le clip ceinture suivre l’indication de l’image. Pour fixer le clip de
retour à la fente de l’appareil dans les guides à l’arrière de
l’émetteur-récepteur jusqu’à ce qu’il clique en place.
Installation/retrait du pack batterie
Retrait
1) Retirer le clip ceinture comme indiqué au paragraphe «Installation et
retrait du clip ceinture “;
2) KƵǀƌĞnjůĞĐŽŵƉĂƌƚŝŵĞŶƚĚĞůĂďĂƚƚĞƌŝĞĐŽŵŵĞŝŶĚŝƋƵĠĚĂŶƐůĂůŝŵĂŐĞ
3) Retirez la batterie;
4) Fermez le couvercle de la batterie et fixer le clip ceinture.
Installation
1) Retirer le clip ceinture comme indiqué au paragraphe «Installation et retrait du clip ceinture “;
2) Insérez la batterie dans le compartiment de la batterie;
3) Fermez le couvercle de la batterie et fixer le clip ceinture.

16
Boutons de commande et écran de la radio
1. Antenne
2. Écran LCD
3. Bouton UP ( ) - Appuyez pour augmenter le volume.
mode menu pour modifier les paramètres dans MENU.
4. /MENU - Appuyez sur cette commande pour entrer dans
le MENU de la radio. Si vous le maintenez enfoncé pendant
environ 3 secondes, le verrouillage du clavier est activé.
5. /CALL - Pour envoyer un appel au canal sélectionné.
maintenez enfoncé pour allumer/éteindre la radio.
6. Bouton BAS ( ) - Appuyez pour réduire le volume. mode
menu pour modifier les paramètres dans MENU.
7. Haut-parleur et microphone intégré
8. Lampe de poche LED
9. Clip de ceinture
10. Bouton MONI - Maintenez-le enfoncé pour activer la
fonction Monitor (pour la surveillance des signaux
faibles).
11. SPK | MIC (sous le couvercle de protection) - Pour se connecter à des appareils audio externes tels que des
microphones, des écouteurs, etc.
12. Bouton SCAN - Appuyez une fois sur ce bouton pour activer le balayage des canaux. Appuyez et maintenez
enfoncé pendant 3 secondes pour balayer le CTCSS/DCS du canal actuel.
13. Port USB pour la recharge de la radio
14. Bouton PTT (Push-To-Talk)
15. Bouton / Urgence - Lorsque la radio est allumée, appuyez brièvement pour allumer/éteindre la lampe de
poche LED. maintenez enfoncé pour activer/désactiver les alertes d'urgence.
Affichage LCD
1. Indicateur de balayage
2. Activate the VOX function
3. Double contrôle des canaux
4. Type de tonalité sub-audio sélectionné
5.Canal (1-16)
6. Indicateur de batterie [3 niveaux]
7. Fonction d'alerte d'urgence activée

17
Fonctionnement de base
Allumer / éteindre et ajuster le volume
Pour allumer la radio, restez appuyé sur le bouton /CALL.
Pour ajuster le niveau du volume, appuyez sur le ou .
Dans le cas où la radio ne capte aucun signal, activer momentanément la fonction Moniteur qui permet également
de détecter des signaux faibles. Ensuite, ajuster le niveau de volume désiré.
Pour éteindre la radio, restez appuyé sur le bouton /CALL jusqu’à entendre le son qui indique que la radio va
s’éteindre.
8. Émission Tx
9. Réception Rx
10. Verrouillage du clavier
11. Indicateur de puissance d'émission.
Faible puissance uniquement en mode PMR
12. Affiche la tonalité CTCSS ou le code DCS défini (CTCSS : 1-50 ;
DCS : 1-105)

18
Emission et réception
Pour transmettre:
1) Assurez-vous que personne d’autre ne parle actuellement sur le canal sélectionné.
2) Touche PTT fermement pressé Gardez: TXÆapparaît sur l’écran.
3) Avant de commencer à parler attente pour une fraction de seconde puis parlez normalement, dans la direction
du microphone, et tenir l’appareil à une distance d’environ 5 cm.
4) Lorsque vous avez terminé, relâchez le PTT: TXÆdisparaîtra de l’écran.
5) Lorsque la radio est en mode de réception (PTT pas pressé) vous recevrez automatiquement toute
communication (RXÅRX affiché).
Lors de la transmission et la réception essayer, autant que possible, de garder l’antenne en position verticale et
d’éviter les obstacles vers la direction de l’autre partie.
Bouton MONI (Moniteur)
Le bouton [MONI] est pour exclure temporairement (ouverture) le silencieux, afin d’écouter les signaux qui sont
trop faibles pour les garder squelch ouvert en permanence. En excluant le silencieux vous éviter d’écouter la
communication “haché” par le silencieux. Pour activer la fonction de moniteur, de manière à écouter tout le trafic
sur le canal sélectionné, Appuyez brièvement sur le bouton [MONI]. Appuyez à nouveau brièvement sur le bouton
[MONI] pour quitter la fonction de surveillance.
Scan de tous les canaux
Radioddity PR-T6 peut automatiquement rechercher des signaux à travers les PMR par balayage, à savoir la
sélection des canaux en séquence rapide. Quand un signal est détecté, le balayage fait une pause sur ce canal et
vous pouvez transmettre en poussant PTT. Si vous appuyez sur PTT pendant le balayage vous pouvez émettre sur
le canal à partir de laquelle le balayage a commencé. Les boutons de défilement ou vous permettent de
changer la direction de balayage (de canaux inférieurs à ceux élevés ou vice versa) et donc de sauter
communications qui sont sans intérêt.
Appuyez brièvement sur le bouton /SCAN pour lancer le balayage.
Si vous voulez arrêter, appuyez à nouveau /SCAN. Votre émetteurrécepteur reviendra à la chaîne à partir de
laquelle le balayage à l’origine commencé.
Verrouillage du clavier
Gardez pressé /MENU pendant environ 3 secondes et sera affiché comme une confirmation. Seulement
Table of contents
Languages:
Other Radioddity Two-way Radio manuals

Radioddity
Radioddity GA-5S User manual

Radioddity
Radioddity FS-T3 User manual

Radioddity
Radioddity FS-T1 User manual

Radioddity
Radioddity GD-73 Series User manual

Radioddity
Radioddity GA-510 User manual

Radioddity
Radioddity FS-T7 FRS US User manual

Radioddity
Radioddity FS-T2 User manual

Radioddity
Radioddity GC-5 Series User manual

Radioddity
Radioddity GA-5E User manual

Radioddity
Radioddity GT-82 User manual