9. Switch o all units and switch them on again, the baby monitor is now ready for
operation.
10. In case the PU and BU cannot communicate with each other, repeat pairing
process again.
N.B. If originally there was only one BU working with PU, after purchasing the new
extra BU at a later stage, it is necessary to perform pairing process again with all
units together.
11. The pairing between BU and movement sensor mat should be performed after the
successful pairing between BU and PU or otherwise the system will not operate
properly.
12. Set the BU into pairing mode by repeating step 5 above.
13. Switch on the movement sensor mat by turning the knob 20 clockwise, now press
the feeder timer button 4, the transmit indicator 12 turns on and two beep
sound will be heard from the BU, indicating the pairing is successful.
14. Switch o the BU and then switch on again for normal operation; you will hear the
abnormal breathing alarm from the PU after 20 seconds if nothing is placed on the
movement sensor mat. Gently tap the mat a few times and the alarm will stop, this
shows the system is working properly.
N.B. When it is no longer necessary to monitor the baby’s breathing as he
grows older, the movement sensor mat should be unpaired from the BU
to avoid false alarms due to MAT LINK LOST. To achieve this, peform the
pairing process again between the PU and BU by repeating steps 1-9 above,
but leave out steps 12-14.
BABY UNIT (BU)
1. Set the power ON/OFF switch 1to ON position, the power on indicator 11
should light up steady green, if it starts ashing, the battery has run out. Either
replace them with new batteries or use the AC adapter as a power supply. The
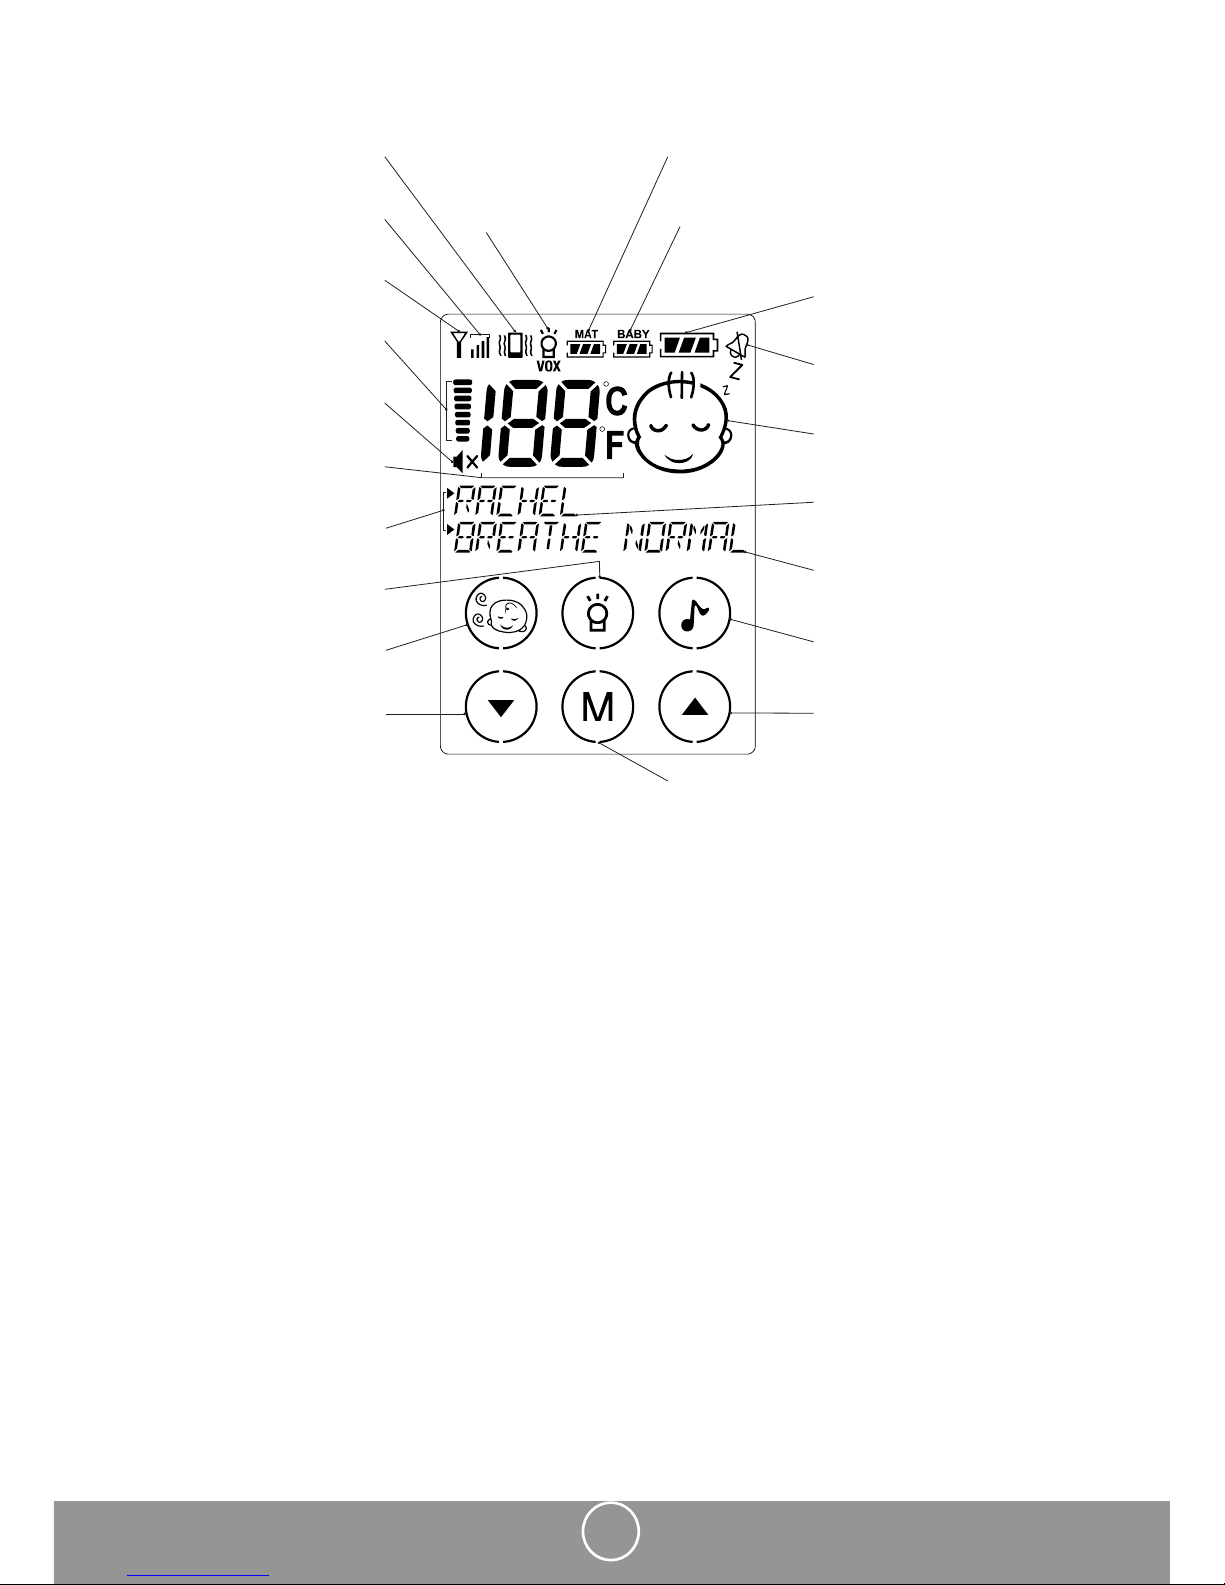
battery level of the BU is also shown as on the LCD of the PU, reminding the
parents to replace the batteries in case they are running low.
2. Place the BU about 1m away from the baby’s crib with the microphone 7facing
towards the baby.
3. Adjust the microphone sensitivity using the + - button 23such that the unit will
be set to transmit whenever the microphone 7picks up a sound at your desired
sound sensitivity level. The transmit indicator 12 will blink every time these
buttons are pressed, more blinks mean the microphone is more sensitive to sound
(maximum is 5 blinks and the minimum is 1 blink). Press + to increase and – to
decrease the microphone sensitivity.
4. Once the BU is in transmit mode, the transmit indicator 12 will turn red. The unit
will return to standby mode a few seconds after the microphone 7stops picking
up any sound and the transmit indicator 12 will turn o.
5. This baby monitor is equipped with a talk back and music function so that the
parent can speak or play lullabies to comfort the baby. The volume of the parent’s
voice or music from the speaker 8can be adjusted using the + - button 23.