2
Subject to change without noce. Specicaons without guarantee. / 08.01.2021
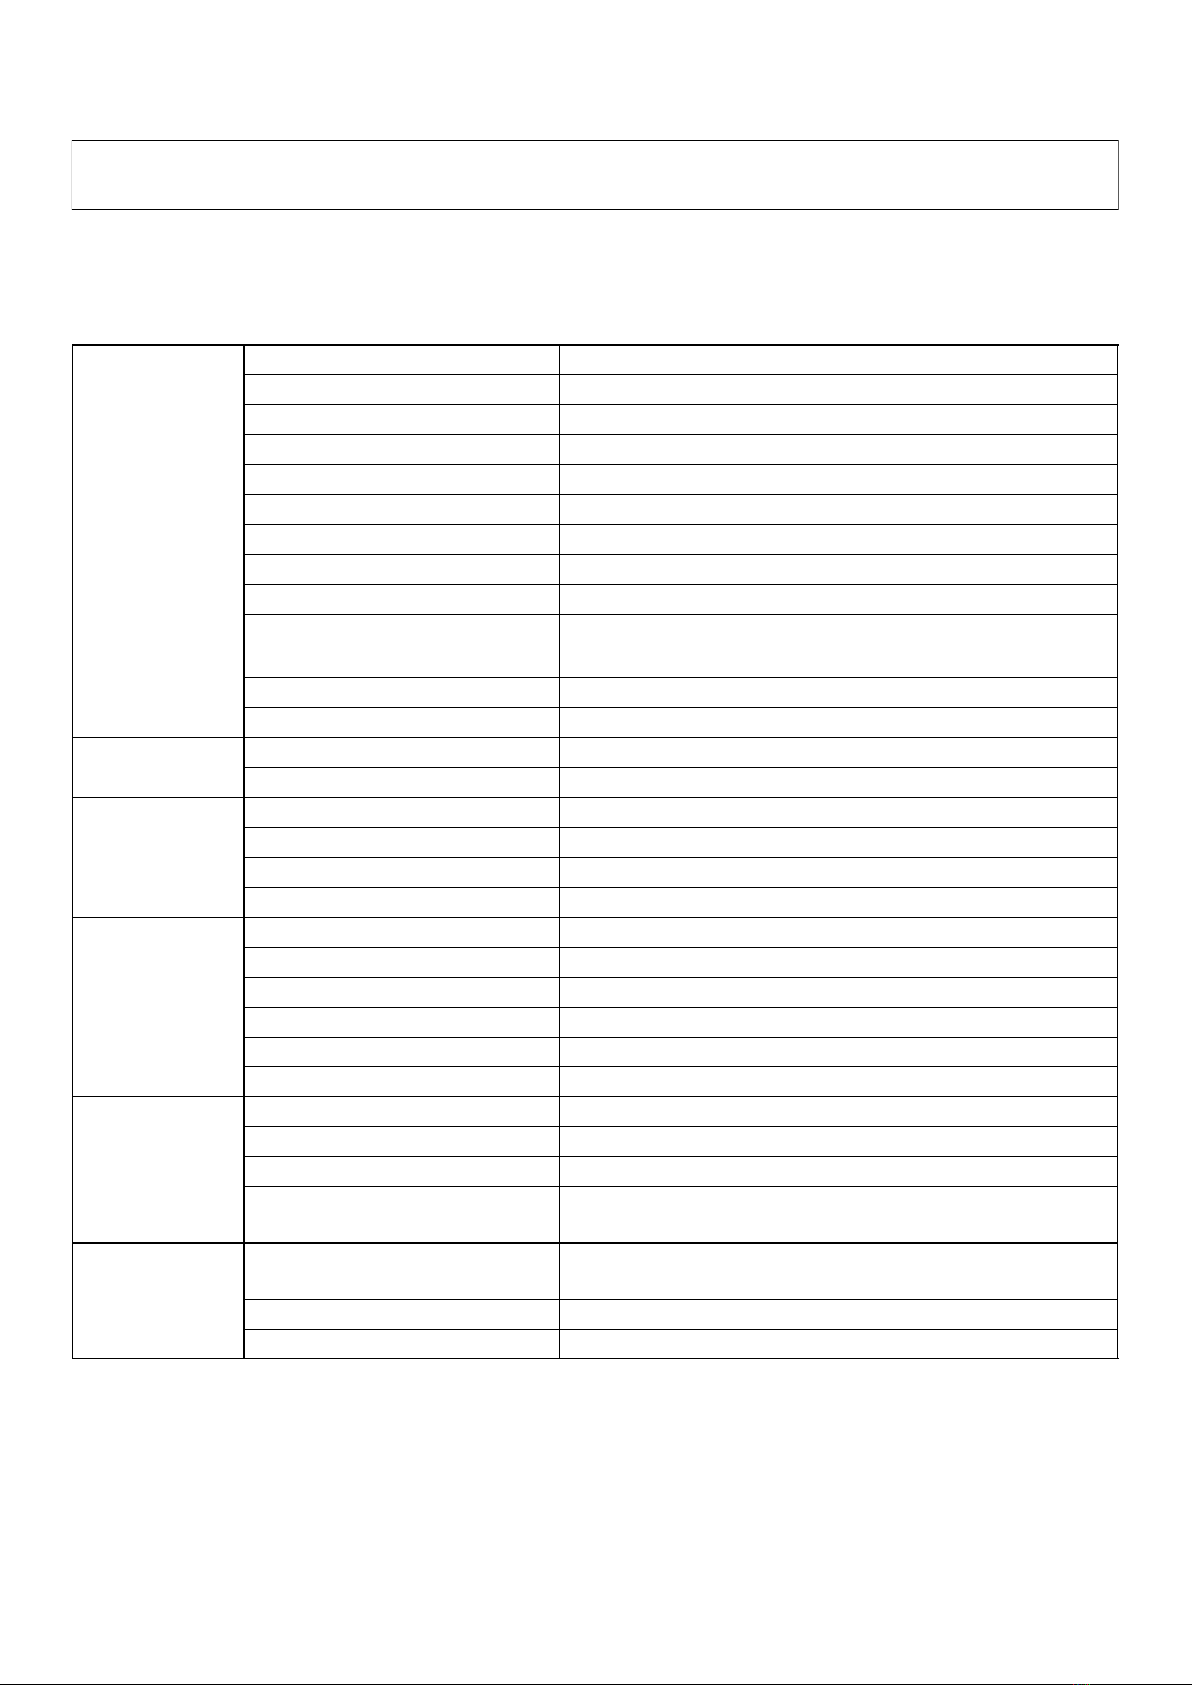
Technical Data
INPUT
Voltage Range 200-240VAC
Frequency Range 50/60Hz
Power Factor (typ.) >0.9@230VAC
Total Harmonic Distoron THD ≤ 15% (@ full load /230VAC)
Eciency typ. 83% @ 230VAC full load
AC Current (typ) 0.17A @ 230VAC
Inrush Current (typ) Cold start max. 2A@230VAC
Leakage Current < 0.5mA/230VAC
OUTPUT
LED Channel 2
Selectable Current
250mA/300mA/350mA/400mA/450mA/500mA/600mA/
700mA/800mA/900mA/1000mA/1100mA/1200mA/1300mA/
1400mA/1500mA
DC Voltage range 8-48VDC
Rated Power 30W/CH, CH1+CH2=<30W
PROTECTION Short Circuit Yes, recovers automacally aer fault condion is removed
Over Temperature Yes, recovers automacally aer fault condion is removed
CONTROL
Dimming Interface ZigBee 3.0, TouchLink
Dimming Range 0.1% - 100%
Dimming Methode PWM, 1.5kHz
Dimming Curve Logarithmic
ENVIRONMENT
Working Tempetrature -20°C - + 45°C
Max. Case Temperature 85°C (Ta=45°C)
Working Humidity 10%-95% RH non-condensing
Storage Temperature -40°C - +80°C
Storage Humidity 10% - 95% RH
IP Rang IP20 (suitable for indoor LED lighng applicaons)
Safety & EMC
Safety Standards ENEC EN61347-1, EN61347-2-13 approved
Withstand Voltage I/P-O/P: 3.75KVAC
EMC Emission EN55015, EN61000-3-2, EN61000-3-3
EMC Immunity
EN61547, EN61000-4-2,3,4,5,6,8,11, , surge immunity Line-
Line 1KV
Others
MTBF 189400H, MIL-HDBK-217F @ 230VAC at full load and 25°C
ambient temperature
Dimension 170 x 53.4 x 28mm
Warranty 5 years