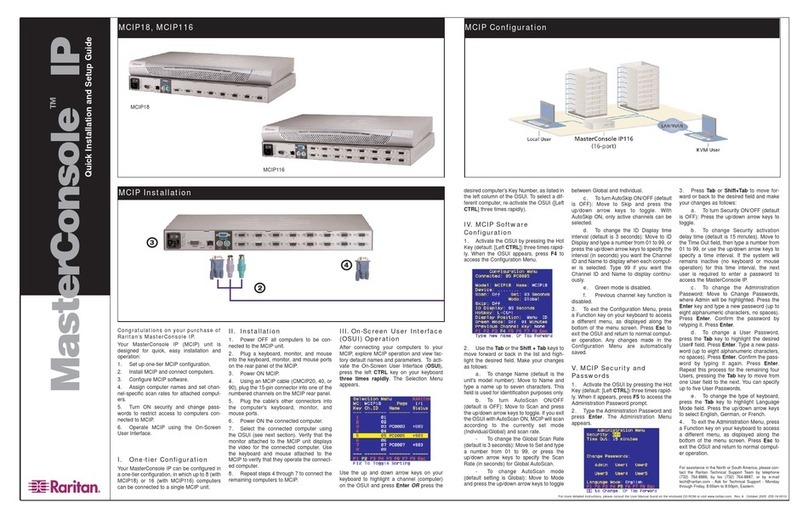
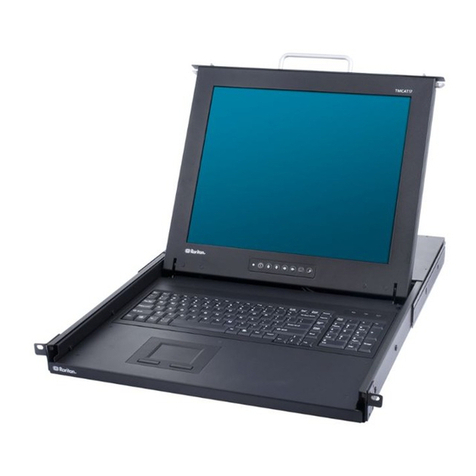
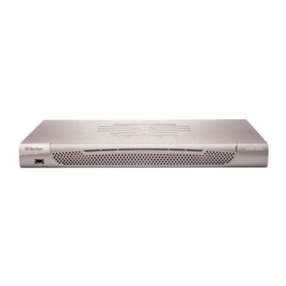
manuals.online logo
Brands
  1. Home
  2. •
  3. Brands
  4. •
  5. Raritan
  6. •
  7. Switch
  8. •
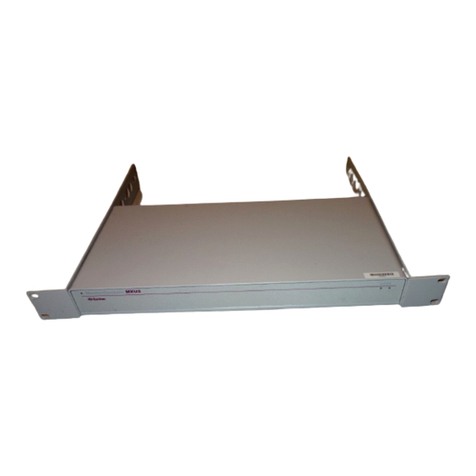
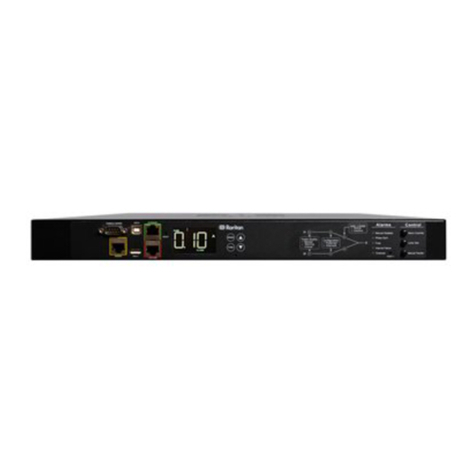
  9. Raritan SwitchMan SW2-USB User manual

Raritan SwitchMan SW2-USB User manual

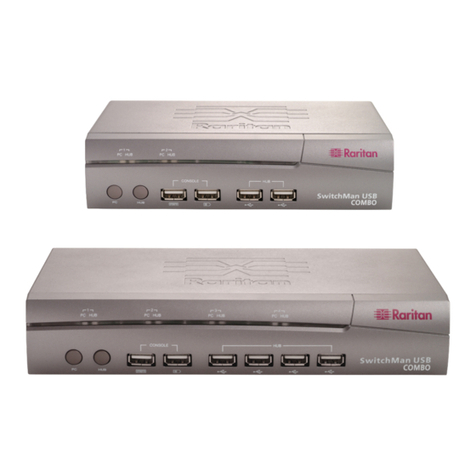
SwitchMan™ USB
Quick Installation and Setup Guide
To view this guide in other languages, please see the enclosed User’s Manual CD-ROM Rev. A June 2004 255-00-2010
SwitchMan USB (SW2-USB, SW4-USB)
Your SwitchMan USB shipment includes: (1) SwitchMan USB unit (either the SW2-USB 2-switch unit or the SW4-USB 4-
switch unit), (1) SwitchMan Stand, (1) Power Adapter, (2) CSWUSB18 USB cables, (1) printed Quick Installation and
Setup Guide, (1) Raritan User’s Manual CD-ROM, and Registration and Warranty papers. Please contact Raritan right
away at (732) 764-8886 between 8:00 a.m. and 8:00 p.m. EST (or call your local Raritan office) and ask for Customer
Service if you do not receive all of these items.
I. SwitchMan Features and Benefits
II. Overview and Specifications
Features:
- Compliant with USB 2.0 specifications - delivers up to
480Mbps and supports USB hot Plug and Play
- Supports Microsoft Intellimouse 3 ~ 5 Key Mouse and
Microsoft Natural Keyboard Pro series
- LED display for easy status monitoring
- Supports high resolution video up to 1920X1440@75Hz
- Supports VGA, SVGA and Multisync monitors
- Easy installation - no software
- Works with Windows 98, 2000, ME, NT, XP, Linux, and MAC
- Audio buzzer with lock-on / off function
- Supports audio (speaker/microphone) for multi-media
applications
Benefits:
- Control two or four USB computers, depending on
model, and multiple USB peripheral devices from one
USB console
- Switch from port to port easily using Hot keys or easy-
to-use push buttons
- Asynchronously switch between USB computers and
multiple USB peripheral devices using Hot Keys and Push
Buttons
- AutoScan for fast monitoring of computers
- Firmware Flash Updates via the Internet
CCoonnnneeccttiinnggtthheeCCoonnssoollee
These step numbers correspond with the dia-
gram numbers, below.
PPlleeaasseeppoowweerrOOFFFFaallllccoommppuutteerrssbbeeffoorreeyyoouussttaarrtt..
1. Connect your USB keyboard and mouse
directly to the USB keyboard and mouse con-
sole ports on the front panel of the SwitchMan
unit.
2. Connect the male VGA connector (HDDB-
15 pin) from your monitor to the console VGA
port on the rear panel of the SwitchMan unit.
3. If using speakers, connect the male 3.5mm
plug to the SPEAKER (green) port on the rear
panel of the SwitchMan unit.
4. If using a microphone, connect the male
3.5mm plug to the MIC (pink) port on the rear
panel of the SwitchMan unit.
CCoonnnneeccttiinnggtthheeCCoommppuutteerrss
5. Connect the B-type USB connector plug of
one of the provided cables to the PC1 USB port
on the rear panel of the SwitchMan unit.
Connect the other end of the cable (the USB A-
type connector plug) to an available port on
your USB computer or to a USB hub that is
attached to your computer.
6. Connect the VGA plug of the provided
cable to the monitor port in the PC1 area on the
rear panel of the SwitchMan unit. Plug the other
end into the video port on your computer.
7. Connect the speaker plug of the same
cable to the speaker port in the PC1 area panel
on the rear panel of the SwitchMan unit. Plug
the speaker plug at the other end of the cable
into the speaker port on your computer.
8. Connect the MIC plug of the same cable to
the microphone port in the PC1 area on the rear
panel of the SwitchMan unit. Plug the MIC plug
at the other end of the cable into the MIC port
on your computer.
9. Repeat steps 6-9, connecting the remaining
ports of on the rear panel of the SwitchMan unit
to the ports of your computers.
10. Plug the included power adapter into an AC
power source, and then plug the power adapter
cable into DC port on the rear panel of the
SwitchMan unit.
11. Power ON your computers. Your operating
system should recognize the SwitchMan KVM
switch and automatically install the HID USB
driver if it is not already installed on your com-
puter.
CCoonnnneeccttiinnggUUSSBBPPeerriipphheerraallDDeevviicceess
12. Connect USB devices such as printers,
cameras, etc., to the HUB ports on the front
panel of the SwitchMan unit.
NNootteess::
>>SSwwiittcchhMMaann''ssddeeffaauullttlliinnkkiissttootthheeffiirrssttccoomm--
ppuutteerrppoowweerreeddOONNiinntthheeiinnssttaallllaattiioonn..
>>YYoouummaayyhhaavveettooeennaabblleeUUSSBBssuuppppoorrttoonnyyoouurr
ssyysstteemmBBIIOOSSffoorrffuullllssuuppppoorrtt..PPlleeaasseerreeffeerrttoo
yyoouurrccoommppuutteerr''ssuusseerrgguuiiddeeoorryyoouurrmmootthheerr--
bbooaarrdduusseerrgguuiiddeeffoorrffuurrtthheerrddeettaaiillssoonnhhoowwttoo
eennaabblleeUUSSBBssuuppppoorrtt..
HHoottKKeeyyss::Hot Key combinations
allow you to use designated key
commands to switch computers,
connected USB devices, and micro-
phone/speaker. Control multiple
computers using a simple Hot Key
sequence on your keyboard.
AAuuttooSSccaann::The AutoScan function
allows you to automatically scan and
monitor all computers that are con-
nected to your KVM Switch.
FFrroonntt--PPaanneellPPCCaannddHHuubbSSeelleeccttoorrss::
Push buttons conveniently located
on the front face of the KVM Switch,
which allow for simple, manual PC,
USB Hub, and Audio port selection.
LLEEDDDDiissppllaayy::Front panel PC and
HUB LEDs allow for easy status
monitoring.
FFllaasshhUUppggrraaddeess::The upgrade ability
allows you to obtain the latest
firmware upgrades for your KVM
Switch. These upgrades allow con-
stant compatibility with the latest
devices and computers.
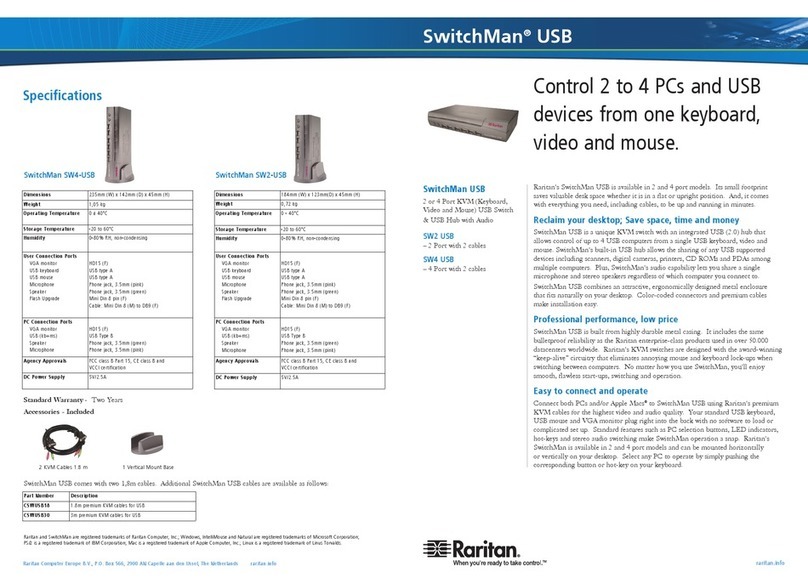
Specifications
DDiimmeennssiioonnss::
SW2-USB unit
7.24" (W) x 4.84" (D) x 1.73" (H)
184mm (W) x 123mm (D) x 45mm (H)
SW4-USB unit
9.25" (W) x 5.54" (D) x 1.73" (H)
235mm (W) x 142mm (D) x 45mm (H)
WWeeiigghhtt:
SW2-USB: 1.58 lbs (0.72 kg)
SW4-USB: 2.33 lbs (1.05 kg)
OOppeerraattiinnggTTeemmpp::
32° to 104° F (0° to 40° C)
SSttoorraaggeeTTeemmpp::
-4° to 140° F (-20° to 60° C)
HHuummiiddiittyy::
0-80% RH, non-condensing
III. Installation
IImmppoorrttaanntt::Before beginning installation, power OFF all devices and ensure that all devices are properly grounded. Failure to do so may result in damage
to computers and/or to the SwitchMan unit. NNoottee::AAvvooiiddppllaacciinnggccaabblleessnneeaarrmmaacchhiinneessssuucchhaassfflluuoorreesscceennttlliigghhttiinngg,,aaiirrccoonnddiittiioonniinnggeeqquuiippmmeenntt,,eettcc,,tthhaattccrreeaattee
eelleeccttrriiccaallnnooiissee..FFoorrUUSSBBccoommppuutteerrss::UUSSBBssiiggnnaallssaarreetthheessttrroonnggeessttwwhheennttrraannssmmiitttteedduuppttoo1155ffeeeett((44..55mm))bbeettwweeeenntthheeKKVVMMaannddtthheeCCPPUU..BBeeyyoonndd1155ffeeeett((44..55mm)),,
pprroobbaabbiilliittyyooffssiiggnnaallddeeggrraaddaattiioonnccaannooccccuurr,,ccaauussiinnggtthheeddeevviicceettooffaaiill..
SW2-USB
SW4-USB
SSWW22--UUSSBBIInnssttaallllaattiioonn
SSWW44--UUSSBBIInnssttaallllaattiioonn
1
111
2
2
3 3 4
4
55
6 7 7
6
88
1010
12 12
Selecting Ports
There are two methods of selecting ports using
SwitchMan:
1. Use preconfigured Hot Key Commands.
2. Use Manual Port Selectors - the PC and HUB
push buttons on the front panel of the SwitchMan
unit.
SwitchMan’s default control mode is KKVVMMaanndd
AAuuddiioooonnllyy; but both port selection methods
above allow you to control port switching in five
different modes::
> KVM only
> USB Devices only
> Audio only
> KVM and Audio only
> KVM and Audio and USB devices
Hot Key Commands
Activate Hot Key mode by pressing the SSCCRROOLLLL
LLOOCCKKkey twice rapidly. A beep will sound, indi-
cating that you have entered Hot Key mode. The
Hot Keys: ZZ,,SS,,CC,,HH,,AA,,TT,,LL,,UU,,and MMare nnoott
case sensitive. When an invalid Hot Key com-
mand is attempted, three short beeps will
sound.
You must complete a Hot Key command within
five (5) seconds from the time you press the
SSCCRROOLLLLLLOOCCKK++SSCCRROOLLLLLLOOCCKKcombination. If
you do not complete the command within this
time, start the combination from the beginning.
Three short beeps will sound if you must re-enter
the Hot Key command from the beginning.
Go to previous active port
SSCCRROOLLLLLLOOCCKK++SSCCRROOLLLLLLOOCCKK++Ç
Go to next active port
SSCCRROOLLLLLLOOCCKK++SSCCRROOLLLLLLOOCCKK++È
Activate AutoScan mode
SSCCRROOLLLLLLOOCCKK++SSCCRROOLLLLLLOOCCKK++ZZ
Turn buzzer ON or OFF
SSCCRROOLLLLLLOOCCKK++SSCCRROOLLLLLLOOCCKK++SS
Go to a specific port
SSCCRROOLLLLLLOOCCKK++SSCCRROOLLLLLLOOCCKK++CC++XX
(where CCindicates “select port” and XX= port
number 1,2,3, or 4 - When KVM switch and Audio
switch are set to operate separately, this Hot Key
command switches KVM devices only.)
Toggle PC button to link/unlink KVM+Audio+USB
SSCCRROOLLLLLLOOCCKK++SSCCRROOLLLLLLOOCCKK++TT
Link KVM switch and Audio to switch together
SSCCRROOLLLLLLOOCCKK++SSCCRROOLLLLLLOOCCKK++LL
Separate KVM switch and Audio from switching
together
SSCCRROOLLLLLLOOCCKK++SSCCRROOLLLLLLOOCCKK++UU
Selecting USB Hub Devices and
Connected Computers
SwitchMan’s built-in 2-port or 4-port USB 2.0 hub
allows you to connect additional shared periph-
erals. Please refer to the SwitchMan Operations
Quick Reference Table, below right, for more
information.
Buzzer Alert
During Hot Key operation, a beep sound indi-
cates errors or mode changes. When SwitchMan
is first powered ON, one short beep will sound.
After you press SSCCRROOLLLLLLOOCCKK++SSCCRROOLLLLLLOOCCKK
to start Hot Key combinations: one short beep
sounds.
1. SSCCRROOLLLLLLOOCCKK++SSCCRROOLLLLLLOOCCKK++SS-
enabling / disabling buzzer: one short beep
(buzzer enabled) / two short beeps (buzzer dis-
abled).
2. SSCCRROOLLLLLLOOCCKK++SSCCRROOLLLLLLOOCCKK++Ç- go
to previous port: one short beep.
3. SSCCRROOLLLLLLOOCCKK++SSCCRROOLLLLLLOOCCKK++È--go
to next port: one short beep.
4. SSCCRROOLLLLLLOOCCKK++SSCCRROOLLLLLLOOCCKK++TT- tog-
gle PC button: one short beep.
5. SSCCRROOLLLLLLOOCCKK++SSCCRROOLLLLLLOOCCKK++LL- link
KVM switch and Audio to switch together: one
short beep.
6. SSCCRROOLLLLLLOOCCKK++SSCCRROOLLLLLLOOCCKK++UU--sep-
arate KVM switch and Audio from switching
together: one short beep.
7. SSCCRROOLLLLLLOOCCKK++SSCCRROOLLLLLLOOCCKK++'C', 'H',
'A', or 'M', plus port number: one short beep.
8. If no Hot Key is pressed 5 seconds after
SSCCRROOLLLLLLOOCCKK++SSCCRROOLLLLLLOOCCKKis pressed:
three short beeps.
9. If a non-Hot Key is pressed after SSCCRROOLLLL
LLOOCCKK++SSCCRROOLLLLLLOOCCKKis pressed: three short
beeps.
10. SSCCRROOLLLLLLOOCCKK++SSCCRROOLLLLLLOOCCKK++ZZ++ppoorrtt
- enable scan mode: one long beep, then two
short beeps.
11. During AutoScan, when switching from one
port to another: one short beep.
12. Pressing any keystroke except CCTTRRLL,,AALLTT,,
SSHHIIFFTT,,and WWiinnddoowwKKeeyyto abort from scan
mode: one short beep.
AutoScan
SwitchMan’s AutoScan feature allows you to
monitor the activity of your connected computers
at regular intervals. Use AutoScan to scan
through the computers without having to manual-
ly switch the channels or use Hot key combina-
tions to view each port.
Activate AutoScan mode by pressing SSCCRROOLLLL
LLOOCCKK++SSCCRROOLLLLLLOOCCKK++ZZ..Only active chan-
nels will be scanned. The default scan time is
three (3) seconds.
Exit AutoScan by pressing any key (except
CCTTRRLL,,AALLTT,,SSHHIIFFTT,,and WWiinnddoowwKKeeyy). No other
keyboard or mouse control will function until you
exit AutoScan mode.
SCROLL LOCK + SCROLL LOCK + Z: Starts to
scan automatically after 5 seconds; scan rate is
the scan rate set in the last AutoScan session.
SCROLL LOCK + SCROLL LOCK + Z + 1: Sets
scan rate of 3 seconds for each active port.
SCROLL LOCK + SCROLL LOCK + Z + 2: Sets
scan rate of 6 seconds for each active port.
SCROLL LOCK + SCROLL LOCK + Z + 3: Sets
scan rate of 9 seconds for each active port.
SCROLL LOCK + SCROLL LOCK + Z + 4: Sets
scan rate of 12 seconds for each active port.
Manual Port Selectors
When the "link" between the KVM + Audio switch
and the USB devices switch is disabled, KVM +
Audio, and USB devices are switched independ-
ently (SSCCRROOLLLLLLOOCCKK++SSCCRROOLLLLLLOOCCKK++TT).
When using the PC or HUB buttons, only active
ports can be switched; inactive ports will be
skipped in the switching sequence. Please refer
to the SwitchMan Operations Quick Reference
Table, below, for more information.
HUB Switch Button
The HUB button is disabled when "link" is
enabled. If you press the HUB button when “link”
is enabled, you will hear three short beeps.
LED Display
The LEDs on SwitchMan’s front panel indicate the
status of each PC channel:
BBlluueeLLEEDD((KKVVMM++AAuuddiioosseelleeccttiioonn))
OFF: channel is not selected.
ON (solid): channel is selected, and this selected
PC is active.
ON (blinking): channel is selected, but this
selected PC is inactive.
BBlluueeLLEEDD((AAuuddiioosseelleeccttiioonn))
ON: Press and hold the PC Push Button for two
seconds. The port to which Audio is connected
will blink once.
ON: To change the port to which Audio is con-
nected, continue to hold the PC Push Button, and
press the HUB Push Button. The new port to
which Audio is connected will blink once.
After these two buttons are released, the blue
LED will return to its original state to indicate that
KVM is connected to the PC channel.
GGrreeeennLLEEDD((UUSSBBddeevviicceesssseelleeccttiioonn))
OFF: channel is not selected.
ON (solid): channel is selected.
Firmware Flash Updates
SwitchMan USB Firmware can be updated easi-
ly by connecting the ADMIN port on the rear
panel of your SwitchMan unit to the Serial port of
your PC with a custom flash cable.
Firmware Updates are located on the Raritan
Web site www.raritan.com. Navigate to the
Support -Firmware Upgrades page and scroll to
SwitchMan USB (http://www.raritan.com/support/
sup_upgrades.aspx).
The following are required for firmware updates:
- A separate computer running Windows 98,
2000, NT, XP, or ME (this computer must not be
connected to the CPU ports on your KVM switch)
- An available serial port on the computer
- A custom flash cable (8 pin to RS232)
IV. Selecting Ports: Hot Key Mode V. Selecting Ports: Push Button Mode
Switching Mode
Condition
Hot Keys to enable Operation
Push Button Operation
Hot Key Operation
If KVM+Audio+USB are linked together
No pre-operation
KVM+Audio+USB
Devices
If KVM, Audio and USB are separated
Scroll Lock + Scroll Lock + T (to link
KVM+Audio+USB)
Press PC to move to next port
Scroll Lock + Scroll Lock + A + Port #
If KVM+Audio+USB are linked together
Scroll Lock + Scroll Lock + T (to unlink
KVM+Audio and USB)
If KVM+Audio and USB are separated
(default setting after power up)
No pre-operation
KVM+Audio Only
If KVM and Audio are separated
Scroll Lock + Scroll Lock + L (to link
KVM+Audio)
Press PC to move to next port
Scroll Lock+Scroll Lock +C + Port #
If KVM+Audio+USB are linked together
Scroll Lock + Scro ll Lock + T (to unlink
KVM+Audio and USB)
USB Devices Only
If KVM+Audio and USB are separated
(default setting after power up)
No pre-operation
Press HUB to move to next port
Scroll Lock+Scroll Lock +H + Port #
If KVM+Audio+USB are linked together
Scroll Loc k + Scroll Lock + T (to unlink
KVM+Audio and USB).
Scroll Lock + Scroll Lock + U (to unlink KVM
and Audio)
If KVM+Audio and USB are separated
(default setting after power up)
Scroll Loc k + Scroll Lock + U (to unlink KVM
and Audio)
KVM Only
If KVM and Audio are separated
No pre-operation
Press PC to move to next port
Scroll Lock+Scroll Lock +C + Port #
If KVM+Audio+USB are linked together
Scroll Lock + Scroll Lock + T (to unlink
KVM+Audio and USB).
Scroll Lock + Scroll Lock + U (to unlink KVM
and Audio)
If KVM+Audio and USB are separated
(default setting after power up)
Scroll Lock + Scroll Lock + U (to unlink KVM
and Audio)
Audio Only
If KVM and Audio are separat ed
No pre-operation
Press and hold PC
Press HUB to move to next port
Scroll Lock+Scroll Lock +M + Port #
SW2-USB, mounted vertically
SwitchMan Operations Quick Reference Table

This manual suits for next models

1

Other Raritan Switch manuals

Raritan DOMINION KSX - User manual

Raritan

Raritan DOMINION KSX - User manual

Raritan Dominion KX User manual

Raritan

Raritan Dominion KX User manual

Raritan Dominion KX II User manual

Raritan

Raritan Dominion KX II User manual

Raritan dominion kx III User manual

Raritan

Raritan dominion kx III User manual

Raritan Paragon Manager Operating instructions

Raritan

Raritan Paragon Manager Operating instructions

Raritan Dominion KX II User manual

Raritan

Raritan Dominion KX II User manual

Raritan TeleReach TR361 User manual

Raritan

Raritan TeleReach TR361 User manual

Raritan dominion kx III Service manual

Raritan

Raritan dominion kx III Service manual

Raritan Paragon II P2-UMT1664M User manual

Raritan

Raritan Paragon II P2-UMT1664M User manual

Raritan Dominion KX User manual

Raritan

Raritan Dominion KX User manual

Raritan UST-IP User manual

Raritan

Raritan UST-IP User manual

Raritan Switch User manual

Raritan

Raritan Switch User manual

Raritan Paragon II P2-UMT1664M User manual

Raritan

Raritan Paragon II P2-UMT1664M User manual

Raritan dominion kx III Service manual

Raritan

Raritan dominion kx III Service manual

Raritan Dominion KX II User manual

Raritan

Raritan Dominion KX II User manual

Raritan DOMINION KSX - User manual

Raritan

Raritan DOMINION KSX - User manual

Raritan MCCAT18 User manual

Raritan

Raritan MCCAT18 User manual

Raritan Dominion KX II User manual

Raritan

Raritan Dominion KX II User manual

Raritan PX3TS-1464R Owner's manual

Raritan

Raritan PX3TS-1464R Owner's manual

Raritan Dominion KX II User manual

Raritan

Raritan Dominion KX II User manual

Raritan Paragon II P2-UMT1664M User manual

Raritan

Raritan Paragon II P2-UMT1664M User manual

Raritan MasterConsole CAT User manual

Raritan

Raritan MasterConsole CAT User manual

Raritan KX II Instruction Manual

Raritan

Raritan KX II Instruction Manual

Raritan Dominion KX User manual

Raritan

Raritan Dominion KX User manual

Popular Switch manuals by other brands

LIBERTY AV SOLUTIONS DL-PSMV62 user manual

LIBERTY AV SOLUTIONS

LIBERTY AV SOLUTIONS DL-PSMV62 user manual

socomec 14715111 instruction sheet

socomec

socomec 14715111 instruction sheet

Planet GSD-800 user manual

Planet

Planet GSD-800 user manual

NETGEAR ProSafe GS108 installation guide

NETGEAR

NETGEAR ProSafe GS108 installation guide

Inline 62602I operating instructions

Inline

Inline 62602I operating instructions

Domosys Corporation E-PBM-0100-A user manual

Domosys Corporation

Domosys Corporation E-PBM-0100-A user manual

Di-soric KDC 12 M 04 PSK-IBSL quick start guide

Di-soric

Di-soric KDC 12 M 04 PSK-IBSL quick start guide

3Com SuperStack 3 3812 Getting started guide

3Com

3Com SuperStack 3 3812 Getting started guide

IPGARD SDVN-8S quick start guide

IPGARD

IPGARD SDVN-8S quick start guide

gofanco Switcher3P user guide

gofanco

gofanco Switcher3P user guide

Intellinet IPS-54GM06-10G-450W instructions

Intellinet

Intellinet IPS-54GM06-10G-450W instructions

Omnitron Systems Technology 1Fx+4U User instructions

Omnitron Systems Technology

Omnitron Systems Technology 1Fx+4U User instructions

Roland V-800HD MKII Reference manual

Roland

Roland V-800HD MKII Reference manual

D-Link DGS-3130-30PS Quick installation guide

D-Link

D-Link DGS-3130-30PS Quick installation guide

ATEN CS-102U user manual

ATEN

ATEN CS-102U user manual

DigiGrid S user guide

DigiGrid

DigiGrid S user guide

Moxa Technologies PowerTrans PT-7828 Hardware installation guide

Moxa Technologies

Moxa Technologies PowerTrans PT-7828 Hardware installation guide

IBM FC5022 user guide

IBM

IBM FC5022 user guide

manuals.online logo
manuals.online logoBrands
  • About & Mission
  • Contact us
  • Privacy Policy
  • Terms and Conditions

Copyright 2025 Manuals.Online. All Rights Reserved.