Rath 2100-VOIP2CS User manual

IP Interface 2100-VOIP2CS
Installation & Operations Manual
N56W24720 N. Corporate Circle Sussex, WI 53089
800-451-1460 www.rathcommunications.com
RP8500CATA2
Ver. 2
03/21
2 Year Warranty

Thank you for purchasing RATH’s IP Interface. We are the largest Emergency Communication
Manufacturer in North America and have been in business for over 35 years.
We take great pride in our products, service, and support. Our Emergency Products are of the highest
quality. Our experienced customer support teams are available to remotely assist with site preparation,
installation, and maintenance. It is our sincere hope that your experience with us has and will continue
to surpass your expectations.
Thank you for your business,
®
N56W24720 N. Corporate Circle Sussex, WI 53089
800-451-1460 www.rathcommunications.com
Table of Contents
Items Needed . . . . . . . . . . . . . . . . . . . . . . . . . . . . . . . .
IP Interface Set-Up . . . . . . . . . . . . . . . . . . . . . . . . . . .
Testing the IP Interface . . . . . . . . . . . . . . . . . . . . . . . .
Reset Button . . . . . . . . . . . . . . . . . . . . . . . . . . . . . . . .
Troubleshooting . . . . . . . . . . . . . . . . . . . . . . . . . . . . .
Page 3
Page 3
Page 4
Page 4
Page 5

• RATH®2100 Series Analog Phone or RATH®Area of Refuge System
• Static IP Address for IP Interface (provided by building)
• IP Address of SIP Server or Web Address of ITSP (Internet Telephony Service Provider) (provided by building)
• Name, Authentication Password, and Authentication IP for SIP Extension (provided by building)
• Battery backed up 120vac power source (RATH®RP7700100)
• Standard Analog Telephone
1. Supply power to the IP Interface using battery backed up 120vac power source
2. Connect the Ethernet port of the 2100-VOIP2CS to either a laptop or network using supplied Ethernet Cable
Note: If plugging the 2100-VOIP2CS into the network make sure computer is also connected to the same network.
3. Turn off wireless card on computer (if applicable)
4. Change Computer IP Address
a. Navigate to Control Panel
b. Open Network and Sharing Center
c. Click Change Adapter Settings from left-hand side menu
d. Right click on Local Area Connection (or Ethernet) then click Properties
e. Double-click on Internet Protocol Version 4 (TCP/IPv4)
f. Click dot next to Use the Following IP Address
g. Set the IP Address to 192.168.1.100
h. Click in Subnet Mask, should auto-populate to 255.255.255.0
i. Click “OK” at the bottom of the window
j. Click “OK” in the Local Area Connection Properties window
5. Log into IP Interface
a. Enter IP Address of 2100-VOIP2CS (192.168.1.160) into web browser (Google Chrome or Mozilla Firefox
preferred)
b. Log into interface (LOGIN: admin PASSWORD: admin)
6. Under QUICK SETUP in Line 1 section enter SIP Server information
a. Enter IP Address of SIP Server or web address of ITSP into PROXY box
b. Enter extension name in DISPLAY NAME
c. Enter Authentication ID in USER ID
d. Enter Authentication Password in PASSWORD
e. Click SUBMIT at the bottom of the page (unit will automatically reboot)
Note: If using both ports on 2100-VOIP2CS, repeat above steps in Line 2 section of QUICK SETUP (Line 2 will
require a different Name and Authentication ID than Line 1).
7. After unit reboots, change IP settings on 2100-VOIP2CS
a. Click Network Setup under the menu options on the top of the screen
b. Enter desired IP Address, Subnet Mask, and Default Router for IP Interface
c. Click SUBMIT at the bottom of the page (unit will automatically reboot)
Note: If the 2100-VOIP2CS is plugged directly into computer, plug it into the network at this time. Computer
needs to be connected to the network as well.
Items Needed
IP Interface Set-Up
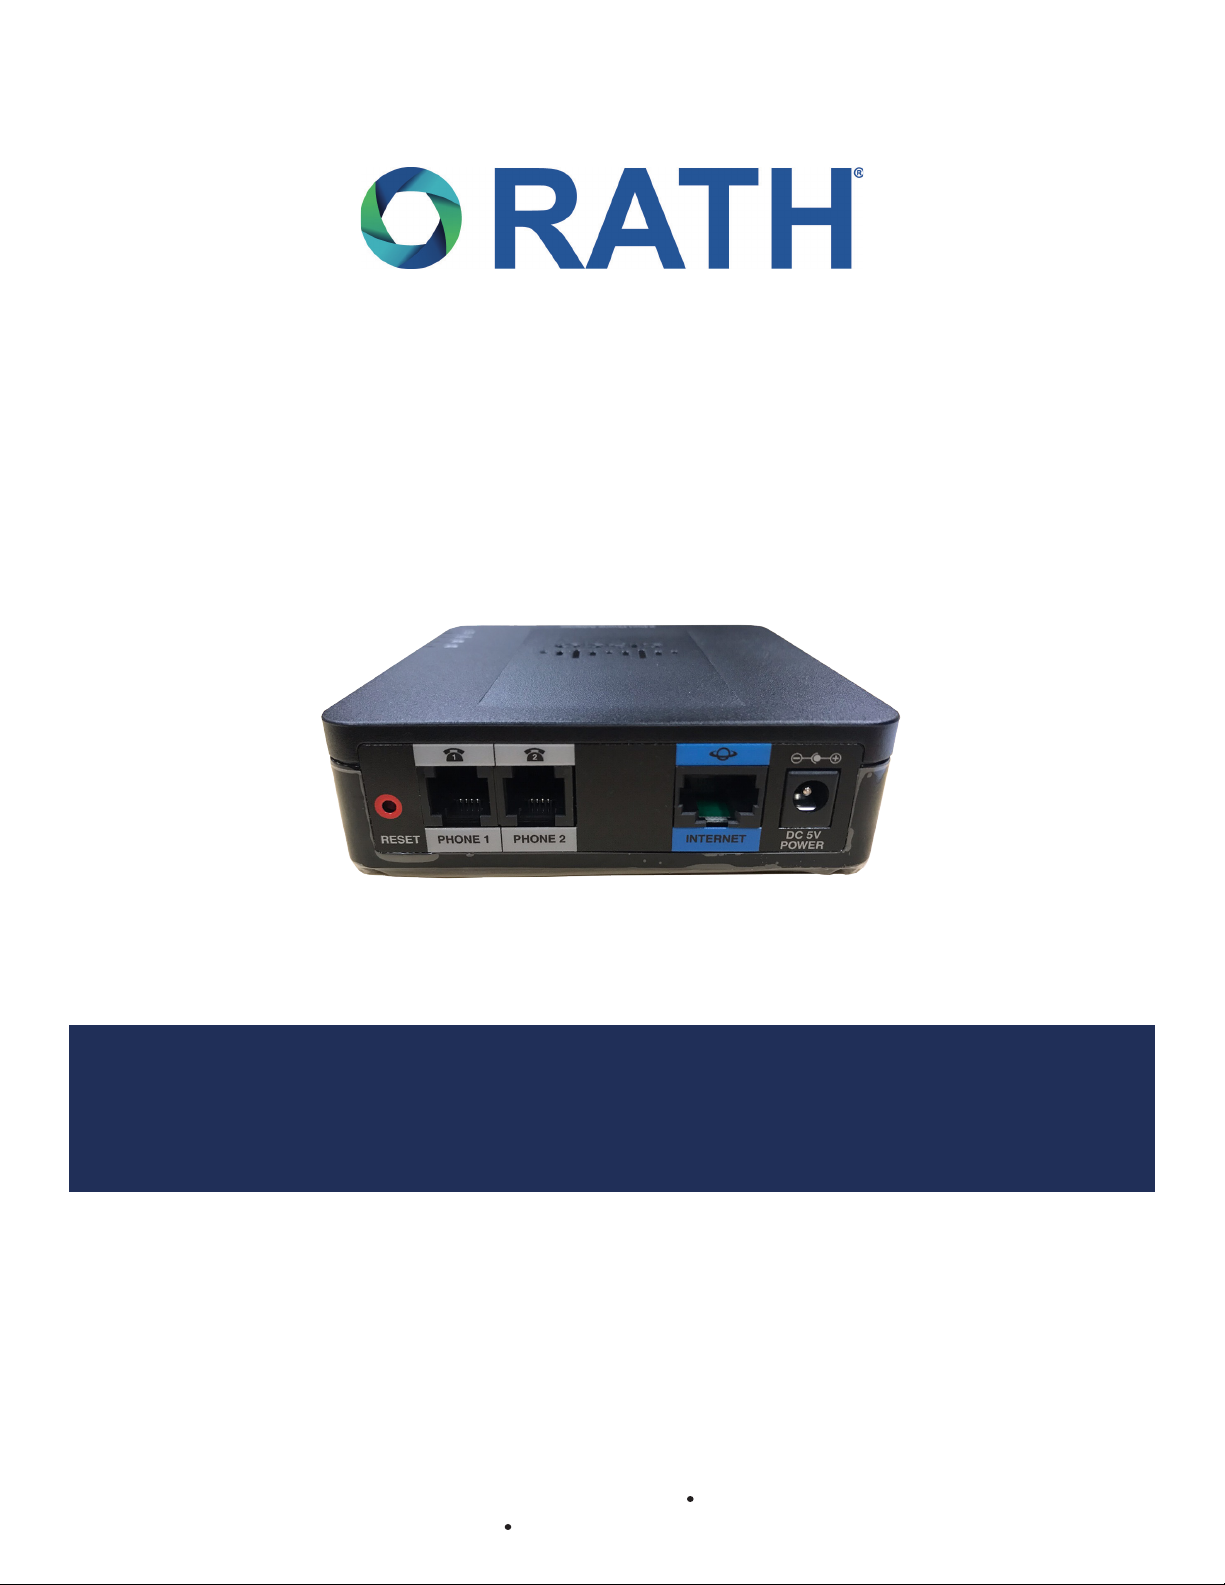
The RATH®2100-VOIP2CS is an IP interface meant to convert an extension on an IP based phone system or Internet
Telephony Service Provider to an analog signal to use with RATH®2100 Series Phones or Area of Refuge Systems.
Page 3

Page 4
Testing the IP Interface
1. Plug analog telephone into Phone 1 port on the 2100-VOIP2CS.
2. If the test call is successful, the unit is ready for operation.
3. Unplug analog phone from Phone 1 port then connect the RATH®2100 Series Analog Phone or Area of Refuge.
Reset Button
To reset all information entered into the 2100-VOIP2CS, unplug the Ethernet cable from the Ethernet port then press
and hold the red reset button for 20 seconds. THIS WILL DEFAULT THE UNIT TO DHCP (you will no longer be able
to log into the device using 192.168.1.160). The 2100-VOIP2CS will have to be connected to a network capable of
DHC. Plug Ethernet cable back into the Ethernet port on the 2100-VOIP2CS then to log back into the unit. Perform
one of the following steps:
1. Set the Network Interface Card of the PC to “Obtain an IP Address Automatically” (see Step 4 under IP
Interface Set-Up above). Use a network scanner loaded onto the PC to search for the device on the network (name
of device will display as SPA112 or SPA191). The network scanner should display the address the unit it now using.
2. Plug an analog telephone into the Phone 1 port on the 2100-VOIP2CS.
a. Lift the handset on the analog phone and dial *, *, *, *
b. Dial 110 then #(phone will state IP address of unit)
c. Dial 120 then #for Subnet Mask
d. Dial 130 then # for Gateway
e. Hang up analog phone
8. After unit reboots, follow instructions in Step 4 to change IP Address of Computer to an address in the same net
work scheme as 2100-VOIP2CS.
9. Log back into IP Interface using IP Address assigned to the unit in Step 7
10. Click on VOICE under the menu options on the top of the screen
11. Under Line 1 Status, verify next to Registration State unit shows Registered. If unit shows Registered, it is ready
for use. If unit shows Not Registered please verify SIP information or see Troubleshooting Section.

Troubleshooting
Problem Possible Cause & Solutions
Device won’t show as
registered:
• Verify the SIP extension settings entered into the 2100-VOIP2CS match the
SIP Server.
• Double check the Authentication Password (verify password meets complexity
requirements is applicable).
• Verify the IP Address isn’t being blacklisted or blocked by network.
• Verify nothing else on the network is sharing the same IP Address as the
2100-VOIP2CS.
• Verify you can PING the SIP Server from the same network switch that the
2100-VOIP2CS is connected to.
• Verify Firewall on network isn’t blocking device.
• If using an ITSP, verify they do not require any additional information to be
entered into the device.
• Power down the unit by unplugging the power plug then waiting 30 seconds
before reconnecting it.
Can’t login to device: • Verify Ethernet port on computer is set to an address that is in the same network
scheme as the 2100-VOIP2CS and is connected to the same network.
• Verify Ethernet port on computer isn’t set to same IP Address as the
2100-VOIP2CS.
• Plug an analog telephone into the Phone 1 port on the 2100-VoIP2CS and
perform the following to verify IP information entered into device:
1. Lift the handset on the analog phone and dial *, *, *, *
2. Dial 110 then #(phone will state IP Address of unit)
3. Dial 120 then #for Subnet Mask
4. Dial 130 then #for Gateway
5. Hang up analog phone
Device was working, but now
is not:
• Verify nothing was changed on the network (such as IP scheme or network
equipment).
• Verify port on network switch that 2100-VOIP2CS is connected to doesn’t have a
power save mode that disabled the port.
• Verify SIP server can be pinged from the same network switch that the
2100-VOIP2CS is connected to.
• Verify device is not being blocked by building’s rewall.
• Verify device was not blacklisted or blocked by the SIP server.
Page 5
Table of contents
Other Rath Recording Equipment manuals
Popular Recording Equipment manuals by other brands

Campbell
Campbell Campbell Scientific SC532A instruction manual

HMS Networks
HMS Networks Intesis INBACMHI001R000 quick start guide

FM Electronics
FM Electronics FM4040 installation instructions

Velleman
Velleman KSR10/USBN user manual

Sharper Image
Sharper Image 207717 user guide

Alesis
Alesis MULTIMIX 8 USB FX quick start guide