Rauland-Borg RANHHELD User manual

Special KI-1955
RANHHELD Remote
Rauland-Borg Corporation
Issued: 07/08/98
Page 1 of 7

General
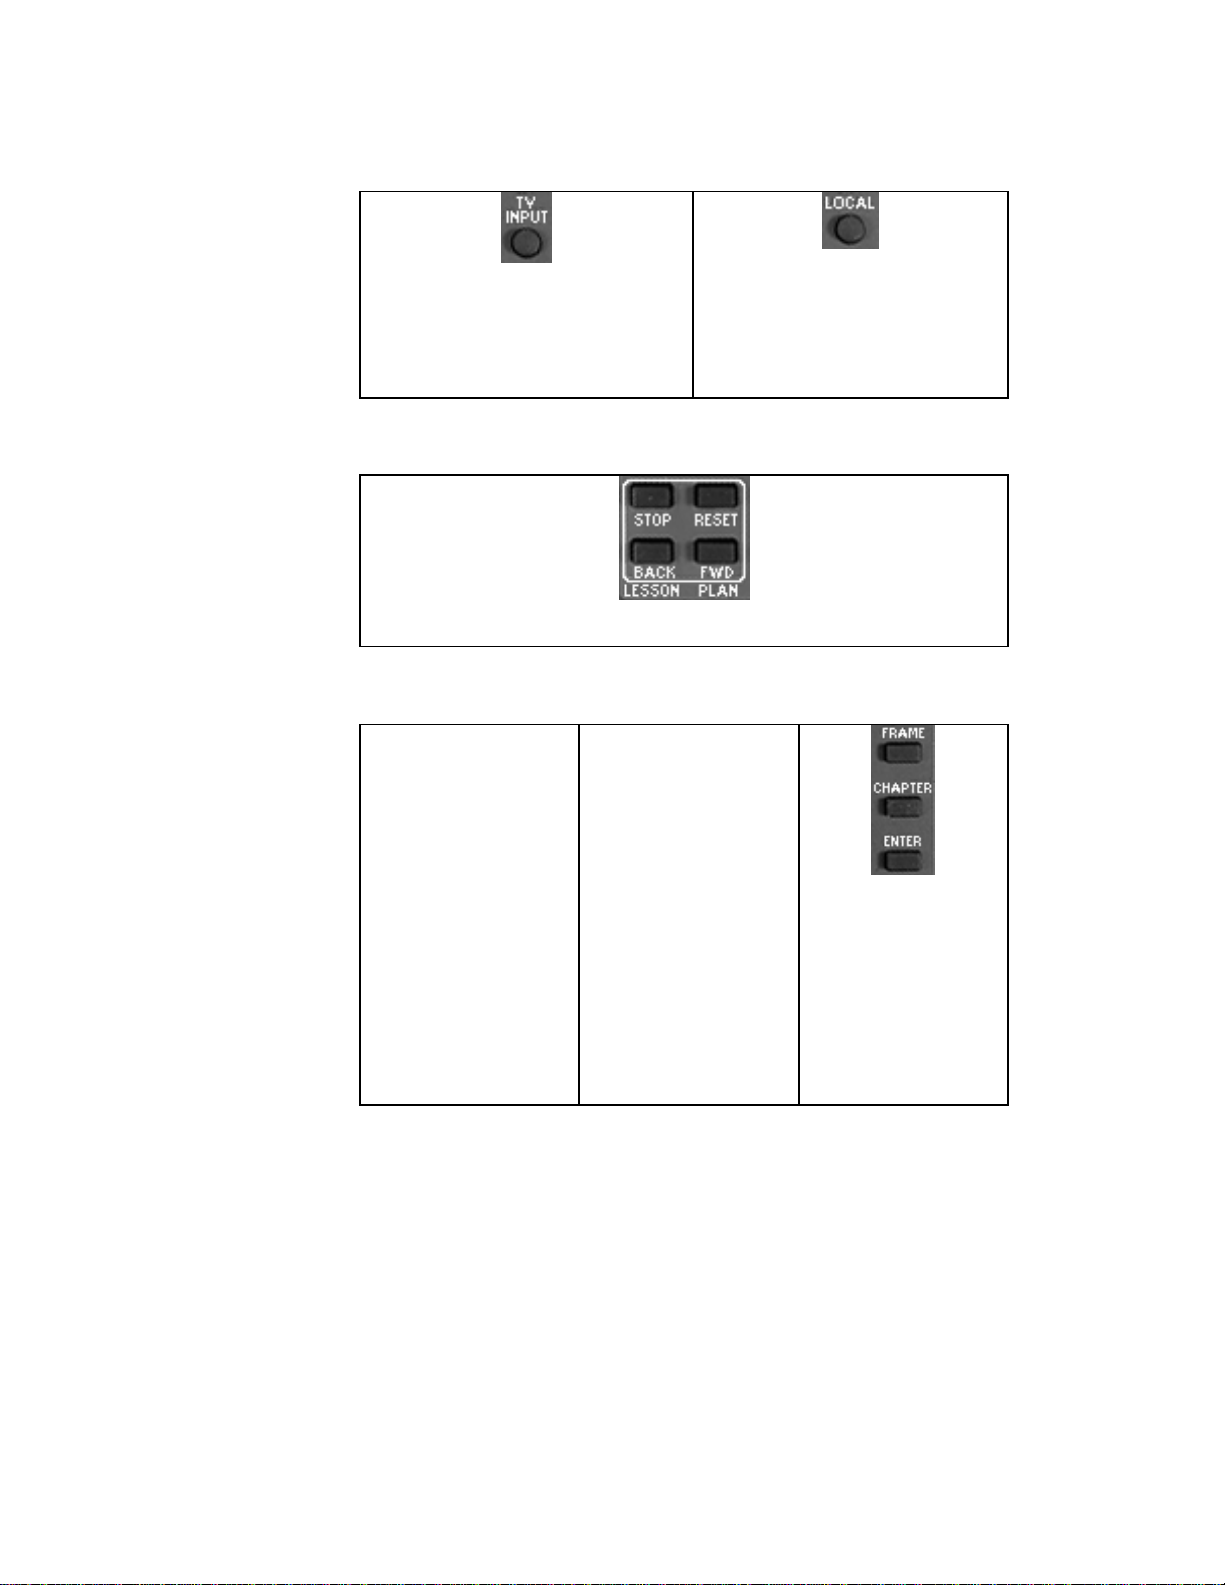
TV Input: changes between baseband (video) and broadband (RF) inputs of the TV.
The red LED will flash whenever you push a button on the remote. If it does not flash, change the batteries
The Set button has no function
Power: turns the TV on/off.
CC: activates closed captioning if the TV is equipped with this function
Local: changes between headend and local (in room) inputs for classroom viewing.
Menu: displays on-screen selections available to the classroom. Each selection may contain submenus.
Volume: changes the volumelevel of the TV.
Frame: use this button and the number buttons to go to a specific frame in the courseware.
Mute: mutes the TV audio
Search: use in conjunction with the menu button. Steps through the on-screen menu selections
Play: use to move forward in the selected courseware; also use for “up” mouse control
Stop: stops the courseware, also toggles the Vflop on and off
Rewind: rewinds and reverses playback of the courseware; also use for “left” mouse control.
Chapter: use in conjunction with the number buttons to go to a specific chapter in the courseware
The red button has no function
Enter: Use in conjunction with other buttons to activate a selection.
Fast Forward: fast forwards the courseware; also use for “right” mouse control.
Clear: clears the last numeric command entered
Pause: pauses the courseware; also use for “down” mouse control
Display: toggles the displaymode of the selected courseware machine.
Step Forward: moves the selected courseware forward a frame at a time.
Lesson Plan Block: for controlling a scheduled lesson plan
Audio: changes the audio mode of a laser disc player

Classroom Control
1. Press Power to
toggle the classroom
TV power. If the
system requires login,
log in using the
classroom panel.
2. Press Vol to raise
the volume up an
increment at a time.
Press Vol to lower
the volume.
3. Press Mute to
toggle the sound
On/Off for the
program that you are
watching.
Select a Source
1. Press Menu to
access the on-screen
menu display.
2. The on-screen
menu system displays
choices that are
available in the
classroom. Note: Each
menu item shown
contains additional
selections.
3. Use the Search
keys to move the
selection arrow.
Press Enter to select.
Once an item is
selected, use these
keys to switch to
resources within that
menu.
TV Menu
4. Select TV to view
TV programs that are
always available.
Press Enter to view
the program. Select
Menu to return to the
main menu.
Courseware Menu
5. Select Courseware
from the main menu to
choose items you have
reserved. Press Enter
to view. Select Menu
for the main menu.
Lesson Plan Menu
6. Select Lesson
Plan from the main
menu to choose a
Lesson Plan you
have reserved. Select
Fwd to view. Select
Menu for the main
menu.

Toggling a Computer Source or Input
Device
1. Push TV Input to cycle between
TV monitor inputs (e.g., V1, V2,
Ext. 1, Ext. 2). Note: You must have
the appropriate scan conversion
hardware to connect a computer
source to the classroom monitor.
2. Push Local to switch between
the media center (headend) video
source and classroom video
source.
LP Control
1. Reset resets a lesson plan to the first step. Fwd moves a lesson forward.
Back moves a lesson plan back to the last user step. Stop pauses an LP.
VCR Control
1. To start a tape press
Play ( ). To halt a
program momentarily,
press Pause (❙❙). To
stop a program for
more than one minute,
press Stop (ϒ).
2. To rapidly move
ahead, press Fast
Forward ().To
rapidly move back
press Rewind ().
3. To time search,
the VCR must be in
the Stop or Play
mode. Press Frame
+ <playing time to
skip> (H:MM) +
Enter. Press or
to indicate
direction. The tape
plays after search.

Video Floppy Control
1. If after selecting a
video floppy source
the monitor shows no
image, the machine
may be off. To turn
on, press Stop and
wait 5-10 seconds.
2. Step or Step
moves a video floppy
disc backward or
forward a frame at a
time. Play starts the
Auto Advance Mode
(default time interval
is 4 seconds). Push
Play again to stop
auto advance.
3. Frame + <Frame
#> + Enter will
move to a specific
frame.
4. Display toggles
the frame numbers
display on the
monitor.
CD-I Control
1. Play starts a program and is the
equivalent of a mouse click. Use the
, ,
Play
(),andPause (❙❙)
keys to control the cursor and
emulate the CD-I mouse or joystick.
2. Play ()
moves the cursor up.
Pause (❙❙)moves the cursor down.
moves the cursor left.
moves the cursor right. Press Play
when prompted to make a
selection.
Laser Disc Control
1. To start a disc press
Play ( ). To halt,
press Pause (❙❙). To
step forward or
backward between
frames press Step or
Step . Note: do not
press Stop to
temporarily halt a
laser disc.
2. Fast Forward ()
or Rewind ()
moves a CAV disc
backwards or forward
by frame. Holding
either key down scans
CLV discs.
3. On CAV discs,
Chapter +
<Chapter #> +
Enter will move to a
specific chapter.
Frame + <Frame #>
+Enter will move to
a specific frame.
4. On CLV discs, press Frame +
<H:MM:SS> + Enter to move to a
specific time location on the disc.
To start a program press Play.
5. To view the chapter or frame
numbers (time on CLV discs) press
Display. Repeat the procedure to
toggle the display off.
Table of contents