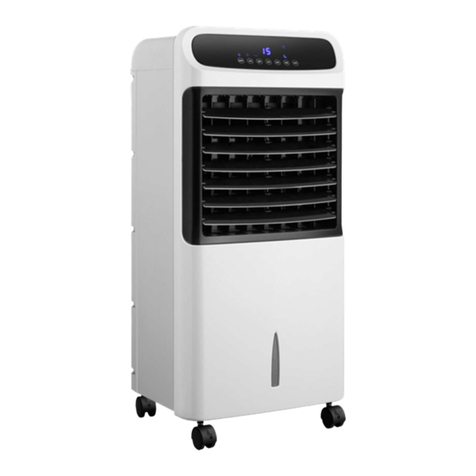
Ravanson KR-1011 User manual

MODEL:
KR-1011/ KR-2011
Producent:
RAVANSON LTD Sp. z o.o.
ul. Mazowiecka 6, 9-1 Płońsk, Polska
tel.: 48 23 662 68 1, fax: 48 23 662 68 2
www.ravanson.pl
PL Instrukcja oryginalna Klimator
E G User’s manual The climator
DE Original-Bedienungsanleitung Klimagerät
RUS Инструкция по обслуживанию Климатор
CZ ávod na obsluhu Přenosná klimatizace
SK ávod na obsluhu Prenosná klimatizácia
SL avodila za uporabo Klimator
LT audojimo instrukcija Kondicionierius
ET Kasutusjuhend Kliimaseadet
LV Oriģināla instrukcija Mitrinātājs

PL
Przed przystąpieniem do użytkowania, należy przeczytać
wszystkie wskazówki i ostrzeżenia dotyczące
bezpieczeństwa użytkowania.
ieprzestrzeganie podanych niżej ostrzeżeń, dotyczących
bezpieczeństwa i wskazówek bezpieczeństwa, może być
przyczyną porażenia prądem elektrycznym, pożaru i/lub
poważnych obrażeń.
Zachowaj wszystkie ostrzeżenia i wskazówki dotyczące
bezpieczeństwa, aby móc skorzystać z nich w przyszłości.
OGÓL E WSKAZÓWKI BEZPIECZEŃSTWA
To urządzenie może być używane przez dzieci w wieku od 8 lat
i powyżej, osoby o ograniczonej sprawności fizycznej, sensorycznej
czy umysłowej, osoby bez doświadczenia i wiedzy, jeśli odbywa się to
pod nadzorem lub zgodnie z instrukcją użytkowania urządzenia
w sposób bezpieczny i osoby te zrozumiały niebezpieczeństwa
związane z użytkowaniem urządzenia.
Dzieci nie powinny bawić się urządzeniem.
Czyszczenie i konserwacja nie mogą być wykonywane przez dzieci bez
nadzoru.
Dzieci nie zdają sobie sprawy z niebezpieczeństw, które mogą
powstać podczas używania urządzeń elektrycznych.
Trzymaj urządzenie i jego przewód poza zasięgiem dzieci.
Nie używaj urządzenia, jeżeli przewód zasilający jest uszkodzony.
Jeżeli przewód zasilający ulegnie uszkodzeniu, to powinien on być
wymieniony u wytwórcy lubw specjalistycznym zakładzie
naprawczym albo przez wykwalifikowaną osobę, w celu uniknięcia
zagrożenia.
Nigdy nie ciągnij za przewód podczas wyciągania wtyczki z gniazda
zasilającego. Wyłączać urządzenie z sieci, trzymając wtyczkę; nie
ciągnąc za przewód.
Pilnować, żeby przewód i wtyczka nie miały kontaktu z wodą lub
wilgocią.
Wtyczka urządzenia musi pasować do gniazdek.
Nie należy w żaden sposób przerabiać wtyczki.

Nie rozpylać żadnych cieczy na urządzenie.
Uważaj, żeby przewód zasilający nie stykał się z ostrymi krawędziami
ani nie przebiegał w pobliżu gorących powierzchni. Uszkodzenie
przewodu może przyczyną porażenia prądem elektrycznym.
Nigdy nie stawiaj urządzenia na gorących powierzchniach.
Nie używaj urządzenia na zewnątrz. Nie wystawiaj urządzenia na
deszcz. Chroń przed wilgocią.
Nie obsługuj urządzenia mokrymi rękoma.
Nie używać urządzenia w bezpośrednim sąsiedztwie wanny, prysznica
albo basenu pływackiego.
Nigdy nie włączać do sieci urządzenia, które nie jest kompletnie
zmontowane.
Nie wolno usuwać żadnych części obudowy.
Należy zwracać uwagę na wystające części garderoby, długie włosy,
które mogą zostać wplątane w ruchome części urządzenia.
Przed włączeniem urządzenia do sieci upewnić się, że napięcie
podane na tabliczce znamionowej odpowiada napięciu w sieci.
Odłączyć urządzenie od sieci, jeśli ma być przeniesione albo nie
będzie używane przez dłuższy czas.
Urządzenie jest przeznaczone wyłącznie do domowego użytku i nie
powinno być stosowane przemysłowo.
W celu obsługi, napraw elektrycznych i mechanicznych zawsze
zgłaszać się do autoryzowanych serwisów.
Przed czyszczeniem, konserwacją i przed napełnieniem zbiornika
wodą należy wyjąć wtyczkę z gniazdka zasilającego.
Pomimo stosowania urządzenia zgodnie z przeznaczeniem
i przestrzegania wszystkich wskazówek bezpieczeństwa nie można
całkowicie wyeliminować określonych czynników ryzyka resztkowego.
Zaleca się podłączeniu urządzenia do sieci elektrycznej wyposażonej
w wyłącznik różnicowoprądowy (RCD) o prądzie wyłączenia 3 mA lub
mniejszym.
UWAGA! Nie wolno zakrywać obudowy siatkowej klimatora.
UWAGA! Nie wolno wkładać żadnych elementów w siatkę klimatora
podczas jego pracy.

SCHEMAT ELEKTRYCZ Y
PRZEZ ACZE IE
Kilmator przeznaczony jest uzyskania komfortu cieplnego w pomieszczeniu za pomocą podmuchu powietrza.
Klimator jest urządzeniem działającym na zasadzie wentylatora.
Poprawa komfortu cieplnego uzyskiwana jest poprzez parowanie wody. Chłodzenie powietrza poprzez
parowanie jest naturalnym sposobem chłodzenia, podobnym do efektu, jaki daje wiatr nad zbiornikiem
wodnym. Ochładza temperaturę i ma relaksujący, chłodzący wpływ na ludzi.
Kiedy zimna woda dostaje się do powierza, rezultatem jest powstanie mieszanki powietrza i cząsteczek wody.
Ta zmiana wymaga wyższej temperatury, zatem energia lub ukryte ciepło pobierane jest z cząsteczek wody –
chłodzących aktualną temperaturę powietrza.
Dzięki tej funkcji kurz, pyłki i inne zanieczyszczenia powietrza mogą być również usunięte, zapewniając chłodne,
świeże i czyste powietrze.
Silniejszy efekt schłodzenia można uzyskać poprzez zastosowanie wkładów chłodniczych.
Wkłady należy napełnić wodą w ilości oznaczonej na opakowaniu. Zamrozić wodę (wkład) w domowej
chłodziarce, a następnie zanurzyć go w zimnej wodzie, znajdującej się w zbiorniku urządzenia.
Dozwolone jest również dodawanie kostek lodu do pojemnika na wodę w urządzeniu.
KOMPLETACJA
1. Klimator
2. Nóżki - 4 szt.
3. Wkłady chłodnicze -2 szt.
4. Pilot zdalnego sterowania (KR-2 11 )
UWAGA!
Dostarczone z urządzeniem wkłady chłodnicze oraz zbiorniczek na wodę są puste. ależy uzupełnić je wodą
do oznaczonego poziomu „MAX”.
I STRUKCJA UŻYTKOWA IA
Uruchomienie
UWAGA!
Przed przystąpieniem do użytkowania należy upewnić się czy źródło zasilania, do którego ma być podłączone
urządzenie, odpowiada parametrom podanym na tabliczce znamionowej.
UWAGA!
Przed każdym użyciem sprawdzić urządzenie pod kątem ewentualnych uszkodzeń mechanicznych. Sprawdzić
przewód zasilający. Jeżeli przewód zasilający jest uszkodzony nie wolno podłączać urządzenia do źródła
zasilania.
1. Wyjmij produkt z opakowania i sprawdź jego kompletność.
2. Przed pierwszym użyciem urządzenia zamontować nóżki. Montaż nóżek odbywa się poprzez wkręcenie
ich w odpowiednie gniazda w podstawie klimatyzatora.
3. Uzupełnij zbiorniczek wodą.
4. Zawsze używaj czystej, świeżej wody. Przed każdym uruchomieniem urządzenia wymień wodę.

5. Podłącz urządzenie do źródła zasilania.
6. Włącz urządzenie przyciskiem głównym (Rys. 1)
Przycisk znajduje się z tyłu klimatora
KR-1 11/ KR-2 11
(Rys. 1)
KR-1011 – Panel sterowania
1-2-3 Uruchamianie wentylatora klimatyzatora (1, 2, 3 – prędkości pracy wentylatora)
0 Wyłączanie wentylatora
SWI G Włączanie/wyłączanie funkcji oscylacji nawiewu
HUMIDIFER Włączanie/wyłączanie pompki wody, wprowadzającej w obieg urządzenia wodę znajdującą się
w zbiorniczku
UWAGA!
ie używać funkcji HUMIDIFER jeżeli w zbiorniczku nie ma wody.
KR-2011 – Panel sterowania
1 Przycisk uruchamiania wentylatora klimatora
Po uruchomieniu wentylatora, pracuje on z najmniejszą prędkością
TIMER Ustawianie czasu pracy klimatora
Możliwe jest ustawienie czasu pracy klimatora od ,5h do 4h. Każde przyciśnięcie przycisku
zwiększa czas pracy o ,5h. Ustawiony czas pracy sygnalizowany jest odpowiednią kombinacją
lampek kontrolnych umieszczonych nad przyciskiem. W celu rezygnacji z ustawienia czasu
pracy, należy wciskać przycisk TIMER do momentu, gdy nie będzie świeciła żadna lampka
kontrolna nad przyciskiem. Klimator przejdzie w stan pracy ciągłej
SWI G Włączanie/wyłączanie funkcji oscylacji nawiewu
A IO Włączanie/wyłączanie funkcji jonizacji powietrza
COOL Włączanie/wyłączanie pompki wody, wprowadzającej w obieg urządzenia wodę, znajdującą
się w zbiorniczku
UWAGA!
ie używać funkcji COOL jeżeli w zbiorniczku nie ma wody.

SPEED Ustawienie prędkości wentylatora (H – najszybsze, M – średnie; L – wolniejsze)
WI D TYPE Przycisk służy do wyboru cyrkulacji powietrza
ormal wind – normalne powietrze
atural wind – naturalne powietrze
Sleeping wind – kojące powietrze w czasie spania
UWAGA!
Podczas pracy z wybranym trybem cyrkulacji, wentylator przyspiesza, zwalnia oraz może wyłączyć się
całkowicie – jest to prawidłowe zjawisko.
UWAGA!
Opisane funkcje dotyczą również funkcji pilota zdalnego sterowania.
Uzupełnianie wody w zbiorniczku
UWAGA!
Przed uzupełnieniem wody odłączyć urządzenie od źródła zasilania!
W celu uzupełnienia wody w zbiorniczku należy:
Przekręcić blokadę zbiorniczka (Rys. 2) i wysunąć zbiorniczek. Uzupełnić wodę, wsunąć zbiorniczek na miejsce
i zabezpieczyć przed wysunięciem, przekręcając blokadę.
(Rys. 2)
UWAGA!
Podczas napełniania zbiorniczka nie przekraczać poziomu oznaczonego symbolem„MAX”.
Opróżnianie zbiorniczka
W celu opróżnienia zbiorniczka na wodę, należ wysunąć zbiorniczek, wymontować pompkę wody, wyjąć
zbiorniczek i opróżnić go. Ponownie umieścić zbiorniczek na miejscu docelowym, montując uprzednio pompę
wody.
W celu wymontowania pompy wody należy przekręcić blokady pompy (Rys. 3), aż do jej uwolnienia i wysunąć
pompę z miejsca jej zamontowania.
UWAGA!
ie należy ciągnąć za pompę. Pompa musi pozostać w urządzeniu.
(Rys. 3)
Czyszczenie filtrów
Filtr powietrza znajduje się na tylnej ścianie urządzenia. W celu wyczyszczenia filtra należy:
Wcisnąć zaczepy filtra i wyjąć filtr, pociągając go do przodu (Rys. 4A).

KR-1011/KR-2011
(Rys. 4A)
UWAGA!
Filtry te chronią urządzenie przed większymi zanieczyszczeniami.
Filtr wodny (ociekacz)
Po zdjęciu filtra powietrza można wymontować, w celu wyczyszczenia, filtr wodny (ociekacz).
CZYSZCZE IE I KO SERWACJA
Klimator czyść zwilżoną (nie mokrą) ściereczką z użyciem neutralnego detergentu, nigdy z użyciem benzyny
czy innych rozpuszczalników.
Filtr powietrza czyść ściereczką z użyciem neutralnego detergentu, nigdy z użyciem benzyny czy innych
rozpuszczalników. Filtr ten można płukać pod bieżącą wodą.
UWAGA!
Przed zamontowaniem filtra powietrza, należy go wysuszyć.
Filtr wodny (ociekacz) czyścić pod czystą, bieżącą wodą.
Zbiorniczek na wodę czyść ściereczką z użyciem neutralnego detergentu, nigdy z użyciem benzyny czy innych
rozpuszczalników
TRA SPORT I PRZECHOWYWA IE
Transportować i przechowywać w miejscu niedostępnym dla dzieci, w opakowaniu chroniącym przed kurzem,
wilgocią i uszkodzeniami mechanicznymi
USTERKI
W przypadku, gdy klimator nie działa, należy sprawdzić czy w występuje napięcie w gnieździe zasilającym.
Wszelkie naprawy mogą być wykonywane tylko przez uprawnione osoby.
SPECYFIKACJA TECH ICZ A
Napięcie zasilania 22 – 24 V
Częstotliwość znamionowa 5 /6 Hz
Klasa ochronności II
Znamionowy pobór mocy 75 W

Model KR-1 11 KR-2 11
Opis Symbol Jednostka Wartość Wartość
Maksymalne natężenie przepływu wentylatora [F] m
3
/min 6,7 6,7
Moc wentylatora [P] W 75W 75W
Wartość eksploatacyjna [SV] (m
3
/min)/W . 9 . 9
Pobór mocy w trybie czuwania [P
SB
] W / /
Poziom mocy akustycznej wentylatora [L
WA
] dB(A) 6 6
Maksymalna prędkość powietrza [c] m/s 8 8
Norma dla pomiaru wartości eksploatacyjnej IEC 6 879
Dodatkowych informacji udziela
RAVANSON LTS. Sp. z o.o.
ul. Mazowiecka 6, 9-1 Płońsk
Pilot zdalnego sterowania:
Model KR-2011 – zasilanie 2xCR2 25
Producent zastrzega sobie prawo do zmian technicznych!
Takie oznakowanie informuje, że sprzęt ten, po okresie jego użytkowania nie może być umieszczany
łącznie z innymi odpadami pochodzącymi z gospodarstwa domowego.
Użytkownik jest zobowiązany do oddania go prowadzącym zbieranie zużytego sprzętu elektrycznego
i elektronicznego. Prowadzący zbieranie, w tym lokalne punkty zbiórki, sklepy oraz gminne jednostki,
tworzą odpowiedni system umożliwiający oddanie tego sprzętu.
Właściwe postępowanie ze zużytym sprzętem elektrycznym i elektronicznym przyczynia się do uniknięcia szkodliwych dla
zdrowia ludzi i środowiska naturalnego konsekwencji, wynikających z obecności składników niebezpiecznych oraz
niewłaściwego składowania i przetwarzania takiego sprzętu.
W urządzeniu ograniczono niektóre substancje mogące negatywnie oddziaływać na środowisko w okresie użytkowania tego
produktu oraz po ich zużyciu.

E
Before first use, always read the safety instructions and
warnings included in this guide.
Failure to observe the below mentioned safety warnings
and safety guidelines for may cause to electric shock, fire
and/or serious injuries
Keep safety instructions and warnings at hand for future
reference.
GE ERAL SAFETY GUIDELI ES
This appliance is not intended for use by children under the age of 8
or other persons, without assistance or supervision, if their physical,
sensory or mental capabilities prevent them from using it safely or by
persons without experience and knowledge on the use thereof.
People using this product must understand the risks related to the
use of the appliance. Do not allow children to use the appliance as a
toy. Cleaning and maintenance by children without supervision is not
allowed.
Children are not aware of dangers that may arise during the use of
electric devices. Keep the appliance and corresponding cord out of
the reach of children under the age of 8.
Children should be supervised to ensure that they do not play with
the appliance.
Do not operate the appliance with a damaged cord.
Damaged power cord must be replaced by manufacturer, authorized
service centre or other qualified persons in order to avoid risk.
The plug must fit the socket.
The plug must not be modified in any way.
Do not allow the power cord to touch sharp edges or hot surfaces.
Damaged cord poses a risk of electric shock.
Do not place the appliance on hot surfaces.
Do not use outside. Do not expose to rain. Protect against humidity.
Do not operate with wet hands.
During operation keep clothing, long hair away from the moving parts
of the appliance.
Do not plug the device in unless it is fully assembled.

Do not remove any parts of the housing.
Do not use the device in the immediate vicinity of a bathtub, shower
or swimming pool.
Prevent the cord and plug from any contact with water or moisture.
Do not spray any liquid on the device.
Unplug the device holding the plug; do not pull the cord.
Unplug the device if it is to be moved or is not going to be used for a
longer time.
Do not use the device with the protection grid removed.
Transport in an original package protecting from mechanical
damages.
The appliance must be repaired by a qualified person using only
original spare parts.
Despite operating the unit in accordance with its intended use and in
accordance with all safety guidelines, it is impossible to eliminate all
residual risk factors.
The appliance is intended for home use only.
The appliance should only be used for private use, as intended for the
appliance. This appliance is not intended for commercial use.
Unplug the device before cleaning, maintenance and filling the tank
with water.
OTE! Do not cover the mesh cover of the climator unit.
OTE! Do not put anything into the protection grid.
It is recommended to connect the device to the power supply
network equipped with a residual current device (RCD) with a switch-
off current of 3 mA or less.

ELECTRIC DIAGRAM
DESIG ATIO
The climator unit is designated for ensuring temperature comfort in a room by means of air blow. The climator
unit is a fan-like device.
Thermal comfort is improved by water evaporation. Cooling the air by evaporation is a natural cooling method
resembling the effect of wind at a water reservoir which lowers temperature and has a relaxing, cooling impact
on people.
When cold water enters the air, the result is a mixture of air and water particles. This change requires a higher
temperature which is why energy or latent heat are taken from water particles that lower the existing air
temperature.
Thanks to this function, it is possible also to remove any dust, pollen and other pollutants, ensuring cool, fresh
and clean air.
A stronger cooling effect can be obtained by using freezer packs.
The packs should be filled with water in the amount marked on the packaging. Freeze the water (pack) in a
household refrigerator and then insert it in cold water in the device tank.
It is also possible to add ice cubes into the device water tank.
PARTS
1. The climator.
2. Feet 4 pcs.
3. Cooling container 2pcs.
4. The remote control (KR-2 11)
PLEASE OTE!
The freezer packs supplied together with the device are empty. Fill them with water to ‘MAX’ level indicated
on the pack.
The feet
The feet shall be installed by screwing them in the appropriate sockets in the climator unit base.
OPERATI G I STRUCTIO S
Start-up
ATTE TIO !
Make sure that the power source to which the appliance is to be connected is accordant with the parameters
specified on the rating plate.
Attention!
Before every use, inspect the device for any signs of mechanical damage. Inspect the power cord. If the
power cord is damaged, do not plug the device in.
1. Take the product out from the packaging
2. Always use clean, fresh water. Replace water before every use of the device
3. Fill the tank with water
4. Plug the device
5. Switch the device on with the main switch (fig. 1)
The switch is situated at the climator unit back.
KR-1 11; KR-2 11
(Fig. 1)

KR-1011
1-2-3- switching on the climator unit fan (1, 2, 3 – fan speed)
0 – fan switched off
SWI G – switching on/off the blow oscillation function
HUMIDIFER – switching on/off water pump circulating the water in the tank (see Designation)
PLEASE OTE!
Do not use the HUMIDIFER function if there is no water in the tank.
KR-2011
1 – Fan ON switch.
After switching on, the fan operates with the lowest speed.
TIMER – Setting the climator unit operating time.
It is possible to set the climator unit operating time from .5 h to 4 h. Press the button once to
increase the operating time by .5 h. The set operating time is signaled by a specific combination of
control lights above the button. To resign from the operating time setting, press TIMER button until no
control light is lit above the button. The climator unit will go to the continuous operation mode.
SWI G – switching on/off the blow oscillation function
A IO – switching on/off air ionization function
SPEED – setting fan speed (H – highest, M – medium; L – lowest)
WI D TYPE – the button is used for selecting air circulation: “Normal wind”, “Natural wind” and “Sleeping
wind” (soothing air at nighttime).
COOL – switching on/off water pump circulating the water in the tank (see Designation)
PLEASE OTE!
Do not use the COOL function if there is no water in the tank.
PLEASE OTE!
While operating in a selected circulation mode, the fan increases or decreases its speed, and it can even
switch off entirely which is perfectly correct.
PLEASE OTE!
The described functions refer also to the remote control.
Filling up water
PLEASE OTE!
Unplug the device before you fill up water.
To fill the tank with water:
Turn the tank lock (fig. 2), remove the tank, fill up water, put the tank in place and safeguard against accidental
sliding out.

(Fig. 2)
PLEASE OTE!
Do not exceed the “MAX” level while filling the tank.
To empty the tank
To empty the tank, slide it out, disassemble the water pump, remove the tank and empty it. Put the tank in
place, having installed the water pump before.
To disassemble the water pump, turn pump locks (fig. 3) until the pump is released and slide it out from its
location.
PLEASE OTE! Do not pull the pump. It must stay in the device.
(Fig. 3)
To clean the filters
Air filter is located at the back wall of the device. To clean it, you should:
Press filter clips and remove the filter by pulling it forwards.
KR-1011; KR-2011
PLEASE OTE! The filters protect the device against major pollutants.
Water filter (draining unit)

After you remove the air filter, you can remove also the water filter (draining unit) to clean it.
CLEA I G A D CARE
Clean the climator with moist (never wet) cloth with a neutral detergent. Do not use petrol or other solvents.
Clean the air filter with moist (never wet) cloth with a neutral detergent. Do not use petrol or other solvents.
PLEASE OTE! Dry the air filter before installing.
Clean the water filter (draining unit) under clean tap water.
Clean the tank with moist (never wet) cloth with a neutral detergent. Do not use petrol or other solvents.
TRA SPORTATIO A D STORAGE
Before putting the device away, wait until it cools down. Transporting and store in a package protecting from
humidity and mechanical damages.
TROUBLESHOOTI G
If the climator does not start, check the power supply in the mains. Repairs must be carried out solely by the
authorised personnel.
Technical parameters
Voltage 22 –24 V
Frequency 5 /6 Hz
Class: II
Model KR-1 11 KR-2 11
Description Symbol Unit Value Value
Maximum fan flow rate [F] m
3
/min
6,7 6,7
Fan power [P] W
75W 75W
Service value [SV] (m
3
/min)/W
. 9 . 9
Power consumption in standby mode [P
SB
] W
/ /
Fan sound power [L
WA
] dB(A)
6 6
Maximum air speed [c] m/s
8 8
Standard for measuring the service value IEC 6 879
Further information can be obtained from
RAVANSON LTD Sp. z o.o.
ul. Mazowiecka 6, 9-1 Płońsk
The remote control:
KR-2011 –2xCR2 25
The manufacturer reserves the right to introduce technical modifications!
The symbol presented below indicates that the used equipment cannot be placed together with other
household waste. The user is obliged to bring this item to the waste electrical and electronic equipment
collection point where a suitable system is created to allow safe disposal of these items.
Dangerous components present in electrical and electronic equipment have negative consequences for
the environment and human health therefore correct handling of the equipment is very important. Certain substances
which may adversely affect the environment over the life of the product and after use have been limited in this device.

DE
Lesen Sie vor dem Gebrauch alle Sicherheitshinweise und
Warnungen.
Die ichtbeachtung der folgenden Sicherheits- und
Warnhinweise kann zu Stromschlag, Brand und/oder
schweren Verletzungen führen.
Bewahren Sie alle Warnungen und Sicherheitshinweise an einem
sicheren Ort auf, um diese in Zukunft nutzen zu können.
ALLGEMEI E SICHERHEITSHI WEISE
Dieses Gerät kann von Kindern ab 8 Jahren, Personen mit
eingeschränkter körperlicher, sensorischer oder geistiger Fitness,
Personen ohne Erfahrung und Wissen verwendet werden, wenn dies
unter Aufsicht oder in Übereinstimmung mit der
Gebrauchsanweisung des Geräts auf sichere und für diese Personen
verständliche Weise erfolgt, in Bezug auf die Gefahren im
Zusammenhang mit der Verwendung des Geräts.
Kinder sollten nicht mit dem Gerät spielen.
Reinigung und Pflege dürfen nicht von Kindern ohne Beaufsichtigung
durchgeführt werden.
Kinder sind sich der Gefahren, die beim Umgang mit Elektrogeräten
entstehen können, nicht bewusst.
Bewahren Sie das Gerät und das Kabel außerhalb der Reichweite von
Kindern auf.
Verwenden Sie das Gerät nicht, wenn das Netzkabel beschädigt ist.
Wenn das Netzkabel beschädigt ist, sollte es vom Hersteller oder
einer Fachwerkstatt oder von einer qualifizierten Person
ausgetauscht werden, um Gefahren zu vermeiden.
Ziehen Sie niemals am Kabel, wenn Sie den Netzstecker ziehen.
Trennen Sie das Gerät vom Stromnetz, indem Sie den Stecker
festhalten; ohne am Kabel zu ziehen.
Stellen Sie sicher, dass das Kabel und der Stecker nicht mit Wasser
oder Feuchtigkeit in Berührung kommen.
Der Stecker des Geräts muss zur Steckdose passen.
Verändern Sie den Stecker in keiner Weise.
Sprühen Sie keine Flüssigkeiten auf das Gerät.

Stellen Sie sicher, dass das Netzkabel nicht mit scharfen Kanten in
Berührung kommt oder in der Nähe von heißen Oberflächen verläuft.
Ein beschädigtes Kabel kann einen Stromschlag verursachen.
Stellen Sie das Gerät niemals auf heiße Oberflächen.
Verwenden Sie das Gerät nicht im Freien. Setzen Sie das Gerät
keinem Regen aus. Vor Nässe schützen.
Bedienen Sie das Gerät nicht mit nassen Händen.
Verwenden Sie das Gerät nicht in unmittelbarer Nähe einer
Badewanne, einer Dusche oder eines Schwimmbades.
Schließen Sie niemals ein Gerät an, das nicht vollständig
zusammengebaut wurde.
Entfernen Sie keine Gehäuseteile.
Achten Sie auf hervorstehende Kleidung und lange Haare, die sich in
beweglichen Teilen des Geräts verfangen können.
Stellen Sie vor dem Anschließen des Geräts an das Stromnetz sicher,
dass die auf dem Typenschild angegebene Spannung mit der
Netzspannung übereinstimmt.
Trennen Sie das Gerät vom Netzwerk, wenn es transportiert werden
soll oder längere Zeit nicht verwendet wird.
Das Gerät ist nur für den Heimgebrauch bestimmt und sollte nicht
industriell verwendet werden.
Wenden Sie sich für Wartungs-, Elektro- und mechanische
Reparaturarbeiten immer an autorisierte Servicezentren.
Ziehen Sie vor der Reinigung, Wartung oder Befüllung des Tanks mit
Wasser den Stecker aus der Steckdose.
Trotz bestimmungsgemäßer Verwendung des Gerätes und Einhaltung
aller Sicherheitshinweise können bestimmte Restrisikofaktoren nicht
vollständig beseitigt werden.
Es wird empfohlen, das Gerät an ein elektrisches Netz anzuschließen,
das mit einem Fehlerstromschutzschalter (RCD) mit einem
Auslösestrom von 3 mA oder weniger ausgestattet ist.
ACHTUNG! Das Gerät ist nicht für den Betrieb mit externen
Zeitschaltuhren oder einer separaten Fernbedienung vorgesehen

ACHTUNG! Decken Sie das Netzgehäuse der Klimaanlage nicht ab.
ACHTUNG! Setzen Sie während des Betriebs keine Elemente in das
Netz des Klimageräts ein.
ELEKTRISCHER SCHALTPLA
BESTIMMU G
Das
Klimagerät ist dazu bestimmt, durch einen Luftstoß thermischen Komfort in einem Raum zu erreichen.
Das Klimagerät ist ein auf Lüfterbasis funktionierendes Gerät.
Die Verbesserung des thermischen Komforts wird durch Verdampfung von Wasser erreicht. Die Kühlung der
Luft durch Verdunstung ist eine natürliche Art der Kühlung, ähnlich wie Wind über dem Wasser erzeugt. Es
kühlt die Temperatur und wirkt entspannend und kühlend auf Menschen.
Wenn kaltes Wasser in die Luft gelangt, entsteht eine Mischung aus Luft- und Wassermolekülen. Diese
Änderung erfordert eine höhere Temperatur, sodass den Wassermolekülen Energie oder verborgene Wärme
entzogen wird, wodurch die aktuelle Lufttemperatur gekühlt wird.
Dank dieser Funktion können Staub, Pollen und andere Luftverschmutzungen entfernt werden, wodurch kühle,
frische und saubere Luft entsteht.
Ein stärkerer Kühleffekt kann durch Verwendung von Kühlpatronen erzielt werden.
Patronen sollten in der auf der Verpackung angegebenen Menge mit Wasser gefüllt werden. Das Wasser (die
Patrone) im Kühlschrank einfrieren und dann in das kalte Wasser im Tank des Geräts tauchen.
Es ist auch zulässig, Eiswürfel in den Wassertank der Maschine zu füllen.
LIEFERUMFA G
1. Klimagerät
2. Füße - 4 Stk.
3. Kühlpatronen -2 Stk.
4. Fernbedienung (KR-2 11)
ACHTU G!
Die mit dem Gerät gelieferten Kühlpatronen und der Wassertank sind leer. Füllen Sie Wasser bis zur
Markierung "MAX" nach.
BEDIE U GSA LEITU G
Inbetriebnahme
ACHTU G!
Stellen Sie vor der Verwendung des Geräts sicher, dass die Stromquelle, an die das Gerät angeschlossen
werden soll, den auf dem Typenschild angegebenen Parametern entspricht.

ACHTU G!
Überprüfen Sie das Gerät vor jedem Gebrauch auf mechanische Beschädigungen. Überprüfen Sie das
etzkabel. Wenn das etzkabel beschädigt ist, schließen Sie das Gerät nicht an eine Stromquelle an.
1. Nehmen Sie das Produkt aus der Verpackung und überprüfen Sie es auf Vollständigkeit.
2. Installieren Sie die Füße, bevor Sie das Gerät zum ersten Mal verwenden. Die Füße werden installiert,
indem sie in die entsprechenden Öffnungen im Boden des Klimageräts geschraubt werden.
3. Füllen Sie den Tank mit Wasser.
4. Verwenden Sie immer sauberes, frisches Wasser. Tauschen Sie das Wasser vor jedem Gebrauch aus.
5. Schließen Sie das Gerät an eine Stromquelle an.
6. Schalten Sie das Gerät mit dem Hauptschalter ein (Abb. 1)
Die Taste befindet sich auf der Rückseite des Klimageräts
KR-1 11/ KR-2 11
(Abb. 1)
KR-1011 - Bedienfeld
1-2-3 Inbetriebnahme der Lüftung des Klimageräts (1, 2, 3 – Betriebsgeschwindigkeiten des Lüfters)
0 Ausschalten des Lüfters
SWI G Ein-/Ausschalten der Schwingungsfunktion des Gebläses
HUMIDIFER Ein-/Ausschalten der Wasserpumpe, die das Wasser aus dem Tank in den Kreislauf des Geräts
einleitet
ACHTU G!
Verwenden Sie die HUMIDIFIER Funktion nicht, wenn sich kein Wasser im Tank befindet.
KR-2011 - Bedienfeld
1 Taste zum Starten des Lüfters des Klimageräts
Nach dem Lüfterstart ist dieser mit der kleinsten Geschwindigkeit in Betrieb
TIMER Einstellung der Arbeitszeit der Klimaanlage
Es ist möglich, die Arbeitszeit des Klimageräts zwischen ,5 h bis 4 h einzustellen. Jeder
Tastendruck erhöht die Arbeitszeit um ,5 h. Die eingestellte Arbeitszeit wird durch eine
entsprechende Kombination von Kontrollleuchten über der Taste angezeigt. Um die

Einstellung der Arbeitszeit abzubrechen, drücken Sie die Taste TIMER, bis keine
Kontrollleuchte über der Taste leuchtet. Das Klimagerät geht in Dauerbetrieb
SWI G Ein-/Ausschalten der Schwingungsfunktion des Gebläses
A IO Ein-/Ausschalten der Funktion der Luftionisation
COOL Ein-/Ausschalten der Wasserpumpe, die das Wasser aus dem Tank in den Kreislauf des Geräts
einleitet
ACHTU G!
Verwenden Sie die COOL Funktion nicht, wenn sich kein Wasser im Tank befindet.
SPEED Einstellung der Lüftergeschwindigkeit (H – am schnellsten, M – mittel; L – am langsamsten)
WI D TYPE Die Taste dient zur Auswahl der Luftzirkulation
ormal wind – normale Luft
atural wind – natürliche Luft
Sleeping wind – wohltuende Luft während des Schlafens
ACHTU G!
Wenn Sie mit dem ausgewählten Zirkulationsmodus arbeiten, wird der Lüfter schneller, verlangsamt sich und
kann vollständig ausgeschaltet werden - dies ist eine ordnungsgemäße Erscheinung.
ACHTU G!
Die beschriebenen Funktionen gelten auch für die Funktionen der Fernbedienung.
Wasser im Tank nachfüllen
ACHTU G!
Trennen Sie das Gerät vor dem Auffüllen von der Stromversorgung!
So füllen Sie Wasser in den Tank:
Drehen Sie die Tankverriegelung (Abb. 2) und schieben Sie den Behälter heraus. Füllen Sie Wasser nach,
schieben Sie den Behälter in die richtige Position und sichern Sie ihn durch Drehen der Sperre gegen
Herausschieben.
(Abb. 2)
ACHTU G!
Überschreiten Sie beim Befüllen des Behälters nicht den mit dem Symbol "MAX" gekennzeichneten
Füllstand.
Behälter leeren
Um den Wassertank zu leeren, ziehen Sie den Wassertank heraus, entfernen Sie die Wasserpumpe, nehmen Sie
den Wassertank heraus und leeren Sie ihn. Setzen Sie den Tank wieder in seine endgültige Position ein, wobei
Sie zuvor die Wasserpumpe einbauen.
Zum Entfernen der Wasserpumpe die Pumpensperren drehen (Abb. 3) bis zum Lösen der Pumpe und schieben
Sie diese aus ihrer Einbaustelle.

ACHTU G!
Ziehen Sie nicht an der Pumpe. Die Pumpe muss im Gerät bleiben.
(Abb. 3)
Reinigung der Filter
Der Luftfilter befindet sich auf der Rückseite des Geräts. So reinigen Sie den Filter:
Drücken Sie auf die Filterlaschen und entfernen Sie den Filter, indem Sie ihn nach vorne ziehen (Abb. 4A).
(Abb. 4A)
ACHTU G!
Diese Filter schützen das Gerät vor größerer Verunreinigung.
Wasserfilter (Tropfschale)
Nach dem Entfernen des Luftfilters kann der Wasserfilter (Tropfschale) zur Reinigung entfernt werden.
REI IGU G U D PFLEGE
Reinigen Sie das Klimagerät mit einem feuchten (nicht nassen) Tuch und einem neutralen Reinigungsmittel.
Verwenden Sie niemals Benzin oder andere Lösungsmittel.
Reinigen Sie den Luftfilter mit einem Tuch und einem neutralen Reinigungsmittel, niemals mit Benzin oder
anderen Lösungsmitteln. Dieser Filter kann unter fließendem Wasser abgespült werden.
ACHTU G!
Trocknen Sie den Luftfilter vor dem Wiedereinbau.
Reinigen Sie den Wasserfilter (Tropfschale) unter fließendem Wasser.
Reinigen Sie den Wassertank mit einem Tuch und einem neutralen Reinigungsmittel, niemals mit Benzin oder
anderen Lösungsmitteln
TRA SPORT U D LAGERU G
Transport und Lagerung außerhalb der Reichweite von Kindern in einer Verpackung, die vor Staub, Feuchtigkeit
und mechanischen Beschädigungen schützt
This manual suits for next models
1
Table of contents
Languages:
Other Ravanson Temperature Controllers manuals