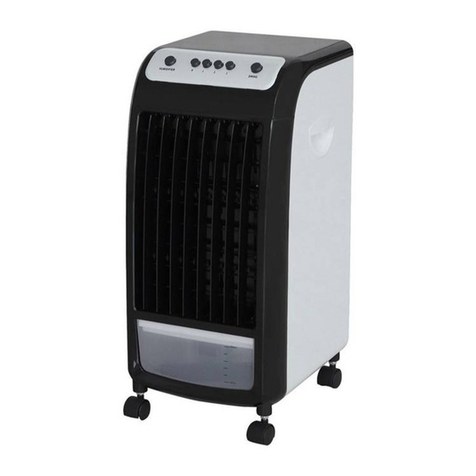
Ravanson KR9000H+ User manual

MODEL:
KR9000H+; KR9000
Producent/Manufacturer/ Výrobce:
RAVANSON LTD Sp. z o.o.
ul. Mazow ecka 6, 09-100 Płońsk, Polska
tel.: 0048 23 662 68 01, fax: 0048 23 662 68 02
www.ravanson.pl
PL Instrukcja oryginalna Klimator
E G User’s manual The climator

PL
Przed przystąpieniem do użytkowania, należy przeczytać
wszystkie wskazówki i ostrzeżenia dotyczące
bezpieczeństwa użytkowania.
ieprzestrzeganie podanych niżej ostrzeżeń, dotyczących
bezpieczeństwa i wskazówek bezpieczeństwa, może być
przyczyną porażenia prądem elektrycznym, pożaru i/lub
poważnych obrażeń.
Zachowaj wszystkie ostrzeżenia i wskazówki dotyczące
bezpieczeństwa, aby móc skorzystać z nich w przyszłości.
OGÓL E WSKAZÓWKI BEZPIECZEŃSTWA
To urządzen e może być używane przez dz ec w w eku od 8 lat
powyżej, osoby o ogran czonej sprawnośc f zycznej, sensorycznej czy
umysłowej, osoby bez dośw adczen a w edzy, jeśl odbywa s ę to pod
nadzorem lub zgodn e z nstrukcją użytkowan a urządzen a w sposób
bezp eczny osoby te zrozum ały n ebezp eczeństwa zw ązane
z użytkowan em urządzen a.
Dz ec n e pow nny baw ć s ę urządzen em.
Czyszczen e konserwacja n e mogą być wykonywane przez dz ec bez
nadzoru.
Dz ec n e zdają sob e sprawy z n ebezp eczeństw, które mogą powstać
podczas używan a urządzeń elektrycznych.
Trzymaj urządzen e jego przewód poza zas ęg em dz ec .
N e używaj urządzen a, jeżel przewód zas lający jest uszkodzony.
Jeżel przewód zas lający ulegn e uszkodzen u, to pow n en on być
wym en ony u wytwórcy lub w specjal stycznym zakładz e naprawczym
albo przez wykwal f kowaną osobę, w celu un kn ęc a zagrożen a.
N gdy n e c ągn j za przewód podczas wyc ągan a wtyczk z gn azda
zas lającego. Wyłączać urządzen e z s ec , trzymając wtyczkę; n e
c ągnąc za przewód.
P lnować, żeby przewód wtyczka n e m ały kontaktu z wodą lub
w lgoc ą.
Wtyczka urządzen a mus pasować do gn azdek.
N e należy w żaden sposób przerab ać wtyczk .
N e rozpylać żadnych c eczy na urządzen e.

Uważaj, żeby przewód zas lający n e stykał s ę z ostrym krawędz am
an n e przeb egał w pobl żu gorących pow erzchn . Uszkodzen e
przewodu może przyczyną porażen a prądem elektrycznym.
N gdy n e staw aj urządzen a na gorących pow erzchn ach.
N e używaj urządzen a na zewnątrz. N e wystaw aj urządzen a na
deszcz. Chroń przed w lgoc ą. N e obsługuj urządzen a mokrym
rękoma.
N e używać urządzen a w bezpośredn m sąs edztw e wanny, pryszn ca
albo basenu pływack ego.
N gdy n e włączać do s ec urządzen a, które n e jest kompletn e
zmontowane.
N e wolno usuwać żadnych częśc obudowy.
Należy zwracać uwagę na wystające częśc garderoby, dług e włosy,
które mogą zostać wplątane w ruchome częśc urządzen a.
Przed włączen em urządzen a do s ec upewn ć s ę, że nap ęc e podane
na tabl czce znam onowej odpow ada nap ęc u w s ec .
Odłączyć urządzen e od s ec , jeśl ma być przen es one albo n e będz e
używane przez dłuższy czas.
Urządzen e jest przeznaczone wyłączn e do domowego użytku n e
pow nno być stosowane przemysłowo.
W celu obsług , napraw elektrycznych mechan cznych zawsze zgłaszać
s ę do autoryzowanych serw sów.
Przed czyszczen em, konserwacją przed napełn en em zb orn ka wodą
należy wyjąć wtyczkę z gn azdka zas lającego.
Pom mo stosowan a urządzen a zgodn e z przeznaczen em
przestrzegan a wszystk ch wskazówek bezp eczeństwa n e można
całkow c e wyel m nować określonych czynn ków ryzyka resztkowego.
Zaleca s ę podłączen u urządzen a do s ec elektrycznej wyposażonej w
wyłączn k różn cowoprądowy (RCD) o prądz e wyłączen a 30mA lub
mn ejszym.
UWAGA! N e wolno zakrywać obudowy s atkowej kl matora.
UWAGA! N e wolno wkładać żadnych elementów w s atkę kl matora
podczas jego pracy.

PRZEZ ACZE IE
Kilmator przeznaczony jest uzyskan a komfortu c eplnego w pom eszczen u za pomocą podmuchu pow etrza.
Kl mator jest urządzen em dz ałającym na zasadz e wentylatora.
Poprawa komfortu c eplnego uzysk wana jest poprzez parowan e wody. Chłodzen e pow etrza poprzez
parowan e jest naturalnym sposobem chłodzen a, podobnym do efektu, jak daje w atr nad zb orn k em wodnym.
Ochładza temperaturę ma relaksujący, chłodzący wpływ na ludz .
K edy z mna woda dostaje s ę do pow erza, rezultatem jest powstan e m eszank pow etrza cząsteczek wody. Ta
zm ana wymaga wyższej temperatury, zatem energ a lub ukryte c epło pob erane jest z cząsteczek wody –
chłodzących aktualną temperaturę pow etrza.
Dz ęk tej funkcj kurz, pyłk nne zan eczyszczen a pow etrza mogą być równ eż usun ęte, zapewn ając chłodne,
św eże czyste pow etrze.
S ln ejszy efekt schłodzen a można uzyskać poprzez zastosowan e wkładów chłodn czych.
Wkłady należy napełn ć wodą w lośc oznaczonej na opakowan u. Zamroz ć wodę (wkład) w domowej
chłodz arce, a następn e zanurzyć go w z mnej wodz e, znajdującej s ę w zb orn ku urządzen a.
Dozwolone jest równ eż dodawan e kostek lodu do pojemn ka na wodę w urządzen u.
Specyfikacja
1 Panel kontrolny 2 Żaluzja 3 Okno nspekcyjne
4 Kółka 5 Przełączn k funkcj (KR9000H+) 6 Włączn k zas lan a
7 Przewód zas lający 8 Zabezp eczen e pojemn ka wody 9 Uchwyt przewodu
10 Wkręt 11 F ltr 12 Mata chłodząca
13 Pojemn k wody

Montaż
1. Wyjm j urządzen e z opakowan a, uważając, aby n e uszkodz ć plast kowego korpusu nożyczkam lub nożem
2. Montaż kół: um eść 4 koła w otworach znajdujących s ę w podstaw e urządzen a.
3. Ustaw urządzen e na stab lnym poz omym podłożu, z dala od źródeł c epła otwartego ogn a.
4. Napełn an e wodą: Ustaw blokadę zb orn ka na wodę w pozycj poz omej, wysuń zb orn k na wodę, włóż
pojemn k z lodem dodaj do zb orn ka czystą wodę z kranu. Upewn j s ę, że poz om wody w zb orn ku n e
przekracza poz omu „MAX”, który znajduje s ę z tyłu zb orn ka.
5. Wepchn j zb orn k wody do obudowy ustaw blokadę zb orn ka w pozycj p onowej.
6. Zdalne sterowan e: P lot zas lany jest bater ą guz kową CR2025. Przed użyc em wyjm j kartę włożoną do
przyc sku p lota.
I STRUKCJA UŻYTKOWA IA
Uruchomienie
UWAGA!
Przed przystąpieniem do użytkowania należy upewnić się czy źródło zasilania, do którego ma być podłączone
urządzenie, odpowiada parametrom podanym na tabliczce znamionowej.
UWAGA!
Przed każdym użyciem sprawdzić urządzenie pod kątem ewentualnych uszkodzeń mechanicznych. Sprawdzić
przewód zasilający. Jeżeli przewód zasilający jest uszkodzony nie wolno podłączać urządzenia do źródła
zasilania.
Uwaga!
Podczas napełniania zbiornika wodą należy odłączyć urządzenie od źródła zasilania.
Obsługa
Włóż wtyczkę do gn azdka elektrycznego. Włącz urządzen e za pomocą wyłączn ka zas lan a. Rozlegn e s ę krótk
sygnał dźw ękowy, wyśw etlacz temperatury pokaże b eżącą temperaturę, urządzen e przełączy s ę w tryb
gotowośc . Funkcjam urządzen a można sterować za pomocą panelu sterowan a lub za pomocą p lota zdalnego
sterowan a.
Obsługa funkcji chłodzenia:
Ustaw przełączn k funkcj (5) w pozycj chłodzen a – KR9000H+
1. WŁ. / WYŁ – przyc sk ON/OFF.: Nac śn j przyc sk „ON / OFF” na panelu sterowan a lub nac śn j przyc sk ON /
OFF na p loc e, aby włączyć urządzen e. Jednostka uruchom s ę przy n sk ej prędkośc wentylatora. Aby wróc ć
do trybu gotowośc , wystarczy nac snąć przyc sk ON / OFF na panelu sterowan a lub przyc sk ON / OFF na p loc e
zdalnego sterowan a.
2. Prędkość – przyc sk SPEED : Prędkość przepływu pow etrza można ustaw ć na 3 poz omy jako n sk - średn -
wysok , nac skając przyc sk „Prędkość”. Za każdym nac śn ęc em przyc sku „Prędkość” na ekran e pojaw s ę kona
wskazująca aktualny poz om prędkośc .

3. Nadmuch – przyc sk WIND: Nac śn j przyc sk „W nd”, aby wybrać rodzaj w atru. Za każdym nac śn ęc em tego
przyc sku na ekran e zaśw ec s ę wskaźn k wskazujący rodzaj nadmuchu. Do wyboru są 3 rodzaje w atrów :
Normalny — Naturalny — Sleep (kojące pow etrze w czas e span a)
4. T mer – przyc sk TIMER: Nac śn j przyc sk „T mer”, aby ustaw ć czas pracy wentylatora na 0–12 godz n, co
spowoduje przełączen e urządzen a w tryb gotowośc po ustaw onym czas e. Za każdym nac śn ęc em przyc sku
godz ny będą s ę zw ększać a wskaźn k czasu zostan e podśw etlony.
Aby anulować stoper, wystarczy nac snąć przyc sk, aż wskaźn k pokaże „00”
5. Sw ng – przyc sk SWING: Nac śn j przyc sk „Sw ng”, aby zm en ć k erunek w atru. Ikona huśtawk pojaw s ę na
ekran e, gdy funkcja jest aktywna. Nac śn j ponown e przyc sk, aby zatrzymać oscylację. K erunek przepływu
pow etrza w p on e można regulować ręczn e, k erując żaluzje wylotowe w górę w dół.
6. Chłodzen e – przyc sk COOLER/COOL: Aby włączyć funkcję chłodzen a pow etrza, nac śn j przyc sk „Cooler”.
Pompa wody pob erze wodę ze zb orn ka wyleje ją na matę chłodzącą. Mata chłodząca pochłan a c epło wody,
a odparowane pow etrze jest wydmuch wane za pomocą wentylatora. Chłodny w etrzyk z chłodn cy obn ża
temperaturę zapewn a relaksujący efekt chłodzen a.
Uwaga: Jeśl poz om wody jest n sk lub w zb orn ku n e ma wody, n e włączaj funkcj chłodzen a „Cooler”.
Sprawdź poz om wody jeśl to kon eczne dolej wodę,. Wym eń zużytą wodę na św eżą. Zaleca s ę wym anę wody
w zb orn ku co najmn ej raz w tygodn u.
7. Jon zator – przyc sk ION: Nac śn j przyc sk „ION”, aby włączyć funkcję jon zatora. Ikona Ion na ekran e zaśw ec
s ę rozpoczn e s ę uwaln an e an onów ujemnych. An ony przyc ągają małe cząsteczk w pow etrzu, tak e jak kurz,
pyłk , zarodn k pleśn tp., powodują to, że stają s ę zbyt c ężk e, aby unos ć s ę w pow etrzu.
Obsługa funkcji ogrzewania: - tylko KR9000H+
Ustaw przełączn k funkcj (5)w pozycj ogrzewan a
1. WŁ. / WYŁ – przyc sk ON/OFF: Nac śn j przyc sk „ON / OFF” na panelu sterowan a lub nac śn j przyc sk ON / OFF
na p loc e, aby włączyć urządzen e. Jednostka uruchom s ę przy normalnym nadmuchu n sk m stopn u
ogrzewan a (1000 W).
Po drug m nac śn ęc u przyc sku ogrzewan e wyłączy s ę, wentylator będz e pracował jeszcze 30 sekund,
następn e urządzen e wróc do trybu gotowośc .
2. Prędkość – przyc sk SPEED: Ta funkcja jest n edostępna.
3. Nadmuch – przyc sk WIND: Nac śn j przyc sk „WIND”, aby wybrać stop eń ogrzewan a. Za każdym nac śn ęc em
tego przyc sku na ekran e zaśw ec s ę wskaźn k wskazujący rodzaj etapu grzan a. Do wyboru są 2 stopn e
ogrzewan a : n sk (1000 W) - wysok (2000 W)
4. T mer – przyc sk TIMER: Nac śn j przyc sk „T mer”, aby ustaw ć czas pracy wentylatora na 0–12 godz n, co
spowoduje przełączen e urządzen a w tryb gotowośc po ustaw onym czas e. Za każdym nac śn ęc em przyc sku
godz ny będą s ę zw ększać a wskaźn k czasu zostan e podśw etlony.
Aby anulować stoper, wystarczy nac snąć przyc sk, aż wskaźn k pokaże „00”
5. Sw ng – przyc sk SWING: Nac śn j przyc sk „Sw ng”, aby zm en ć k erunek w atru. Ikona huśtawk pojaw s ę na
ekran e, gdy funkcja jest aktywna. Nac śn j ponown e przyc sk, aby zatrzymać oscylację. K erunek przepływu
pow etrza w p on e można regulować ręczn e, k erując żaluzje wylotowe w górę w dół.
6. Chłodzen e – przyc sk COOLER/COOL: Ta funkcja jest n edostępna.
7. Jon zator – przyc sk ION: Nac śn j przyc sk „ION”, aby włączyć funkcję jon zatora. Ikona ION na ekran e zaśw ec
s ę rozpoczn e s ę uwaln an e an onów ujemnych. An ony przyc ągają małe cząsteczk w pow etrzu, tak e jak kurz,
pyłk , zarodn k pleśn tp., powodują to, że stają s ę zbyt c ężk e, aby unos ć s ę w pow etrzu.
Zbiornika wody
Często sprawdzaj poz om wody w zb orn ku. Upewn j s ę, że poz om wody n e znajduje s ę pon żej oznaczen a
„MIN”, które znajduje s ę na zb orn ku na wodę. Aktywacja funkcj „Cool” przy n ewystarczającej lośc wody może
spowodować n epraw dłowe dz ałan e pompy wodnej, uszkodzen e jej. Tak e uszkodzen e pompy spowoduje
utratę gwarancj .
Przed uzupełn en em wody obróć urządzen e do pozycj „Wył.”, Nac skając przełączn k znajdujący s ę na panelu
tylnym odłącz przewód zas lający.

Korzystanie z wkładów chłodzących
Aby zw ększyć efekt chłodzen a, można użyć wkładów chłodzących. Przed użyc em włóż je na k lka godz n do
zamrażaln ka lodówk . Następn e um eść je w dużej częśc zb orn ka dodaj wodę do poz omu „MAX”. Użyc e
wkładów chłodzących spowoduje obn żen e temperatury pow etrza wypływającego z urządzen a, co zapewn
bardz ej efektywny efekt chłodzen a.
CZYSZCZE IE I KO SERWACJA
Po dług m okres e pracy kurz nagromadzony w f ltrze przec wpyłowym lub na mac e chłodzącej może wpływać
na przepływ pow etrza. Dlatego zaleca s ę regularne czyszczen e wentylatora. Wykonaj pon ższe czynnośc , aby
wyczyśc ć urządzen e.
Wyłącz urządzen e odłącz przewód zas lający przed czyszczen em konserwacją.
F ltr przec wpyłowy
Aby wyjąć f ltr przec wpyłowy, wykręć śrubę, a następn e nac śn j zamk ob ema rękam wyc ągn j. Użyj
neutralnego środka czyszczącego szczotk , aby usunąć kurz brud z f ltra. Aby zamocować czysty f ltr, najp erw
um eść dolną część f ltra, a następn e popchn j górną część, aż zostan e mocno zablokowana
Mata chłodząca
Po wyjęc u f ltra przec wpyłowego w dać matę chłodzącą. Nac śn j blokadę na środku del katn e ją wyc ągn j.
Użyj czystej lub m ękk ej szczotk , aby usunąć kurz brud z maty. W raz e potrzeby spłucz wodą pozostaw do
wyschn ęc a na wolnym pow etrzu. N gdy n e używaj żadnych chem cznych środków czyszczących, które mogłyby
uszkodz ć matę
.
Zb orn k wody
Odłącz wtyczkę zas lan a. Wyc ągn j zb orn k, wylej wodę zb orn k czyśc ć m ękką śc ereczką z użyc em
neutralnego detergentu.
UWAGA. W celu całkowitego wyjęcia zbiorniczka należy odkręcić śrubę pod podstawą oraz odkręcić śrubę
mocującą pompę wody.
Czyszczen e pow erzchn zewnętrznych
Wyczyść zewnętrzną obudowę wentylatora m ękką w lgotną śc ereczką z wyjątk em panelu sterowan a. N gdy
n e używaj twardego środka czyszczącego, który może uszkodz ć obudowę. Upewn j s ę, że urządzen e jest suche
przed uruchom en em.
Uwaga: igdy nie dopuszczaj do kontaktu wody z panelem sterowania. Zawsze czyść go miękką suchą
ściereczką.
IGDY IE STOSOWAĆ MATERIAŁÓW ŚCIER YCH A I ROZPUSZCZAL IKÓW.
USTERKI
W przypadku, gdy kl mator n e dz ała, należy sprawdz ć czy w występuje nap ęc e w gn eźdz e zas lającym.
Wszelk e naprawy mogą być wykonywane tylko przez uprawn one osoby.
Typowe usterk
Usterka Przyczyna Postępowan e
Urządzen e n e dz ała 1. Brak zas lan a
2. N e włączony przyc sk
zas lan a z tyłu urządzen a
3. N e wc śn ęty przyc sk
ON/OFF na panelu
kontrolnym
1. Sprawdź zas lan e, sprawdź
poprawność podłączen a przewodu
2. Przełączyć włączn k zas lan a z tyłu
urządzen a
3. Wc snąć przyc sk ON/OFF na panelu
sterowan a
Słabe dz ałan e
urządzen a
1. Zan eczyszczony f ltr
pow etrza
2. Wylot pow etrza
zablokowany obcym
przedm otem
1. Wyjm j wyczyść f ltr pow etrza
2. Usuń obce przedm oty z wylotu
pow etrza

TRA SPORT I PRZECHOWYWA IE
Transportować przechowywać w m ejscu n edostępnym dla dz ec , w opakowan u chron ącym przed kurzem,
w lgoc ą uszkodzen am mechan cznym
SPECYFIKACJA TECH ICZ A
KR9000H+ KR9000
Nap ęc e zas lan a 220 – 240 V 220 – 240 V
Częstotl wość znam onowa 50/60 Hz 50/60 Hz
Klasa ochronnośc II II
Znam onowy pobór mocy 2000 W (80 W w funkcj chłodzen a) 80 W
Pilot zdalnego sterowania:
3 V d.c. 1 x CR2025
Producent zastrzega sob e prawo do zm an techn cznych!
Tak e oznakowan e nformuje, że sprzęt ten, po okres e jego użytkowan a n e może być um eszczany
łączn e z nnym odpadam pochodzącym z gospodarstwa domowego.
Użytkown k jest zobow ązany do oddan a go prowadzącym zb eran e zużytego sprzętu elektrycznego
elektron cznego. Prowadzący zb eran e, w tym lokalne punkty zb órk , sklepy oraz gm nne jednostk ,
tworzą odpow edn system umożl w ający oddan e tego sprzętu.
Właśc we postępowan e ze zużytym sprzętem elektrycznym elektron cznym przyczyn a s ę do un kn ęc a szkodl wych dla
zdrow a ludz środow ska naturalnego konsekwencj , wyn kających z obecnośc składn ków n ebezp ecznych oraz
n ewłaśc wego składowan a przetwarzan a tak ego sprzętu.
W urządzen u ogran czono n ektóre substancje mogące negatywn e oddz aływać na środow sko w okres e użytkowan a tego
produktu oraz po ch zużyc u.
Parametry techn czne
Model KR9000H+
KR9000
Op s Symbol Jednostka Wartość
Maksymalne natężen e przepływu wentylatora F m
3
/m n 7,5
Moc wentylatora P W 80
Wartość eksploatacyjna SV
(m
3
/m n)/W 0,09
Pobór mocy w tryb e czuwan a P
SB
W 0
Poz om mocy akustycznej wentylatora L
WA
dB(A) 65
Maksymalna prędkość pow etrza c m/s 10
Norma dla pom aru wartośc eksploatacyjnej IEC 60879
Dodatkowych nformacj udz ela
RAVANSON LTS. Sp. z o.o.ul.
Mazow ecka 6, 09-100 Płońsk

E
Before first use, always read the safety instructions and
warnings included in this guide.
Failure to observe the below mentioned safety warnings
and safety guidelines for may cause to electric shock, fire
and/or serious injuries
Keep safety instructions and warnings at hand for future
reference.
GE ERAL SAFETY GUIDELI ES
Th s appl ance s not ntended for use by ch ldren under the age of 8 or
other persons, w thout ass stance or superv s on, f the r phys cal,
sensory or mental capab l t es prevent them from us ng t safely or by
persons w thout exper ence and knowledge on the use thereof. People
us ng th s product must understand the r sks related to the use of the
appl ance. Do not allow ch ldren to use the appl ance as a toy. Clean ng
and ma ntenance by ch ldren w thout superv s on s not allowed.
Ch ldren are not aware of dangers that may ar se dur ng the use of
electr c dev ces. Keep the appl ance and correspond ng cord out of the
reach of ch ldren under the age of 8.
Ch ldren should be superv sed to ensure that they do not play w th the
appl ance.
Do not operate the appl ance w th a damaged cord.
Damaged power cord must be replaced by manufacturer, author zed
serv ce centre or other qual f ed persons n order to avo d r sk.
The plug must f t the socket.
The plug must not be mod f ed n any way.
Do not allow the power cord to touch sharp edges or hot surfaces.
Damaged cord poses a r sk of electr c shock.
Do not place the appl ance on hot surfaces.
Do not use outs de. Do not expose to ra n. Protect aga nst hum d ty.
Do not operate w th wet hands.
Dur ng operat on keep cloth ng, long ha r away from the mov ng parts
of the appl ance.
Do not plug the dev ce n unless t s fully assembled.
Do not remove any parts of the hous ng.

Do not use the dev ce n the mmed ate v c n ty of a bathtub, shower
or sw mm ng pool.
Prevent the cord and plug from any contact w th water or mo sture.
Do not spray any l qu d on the dev ce.
Unplug the dev ce hold ng the plug; do not pull the cord.
Unplug the dev ce f t s to be moved or s not go ng to be used for a
longer t me.
Do not use the dev ce w th the protect on gr d removed.
Transport n an or g nal package protect ng from mechan cal damages.
The appl ance must be repa red by a qual f ed person us ng only
or g nal spare parts.
Desp te operat ng the un t n accordance w th ts ntended use and n
accordance w th all safety gu del nes, t s mposs ble to el m nate all
res dual r sk factors.
The appl ance s ntended for home use only.
The appl ance should only be used for pr vate use, as ntended for the
appl ance. Th s appl ance s not ntended for commerc al use.
Unplug the dev ce before clean ng, ma ntenance and f ll ng the tank
w th water.
It s recommended to connect the dev ce to the power supply network
equ pped w th a res dual current dev ce (RCD) w th a sw tch-off current
of 30mA or less.
NOTE! Do not cover the mesh cover of the cl mator un t.
NOTE! Do not put anyth ng nto the protect on gr d.
DESIG ATIO
The climator unit s des gnated for ensur ng temperature comfort n a room by means of a r blow. The cl mator
un t s a fan-l ke dev ce.
Thermal comfort s mproved by water evaporat on. Cool ng the a r by evaporat on s a natural cool ng method
resembl ng the effect of w nd at a water reservo r wh ch lowers temperature and has a relax ng, cool ng mpact
on people.
When cold water enters the a r, the result s a m xture of a r and water part cles. Th s change requ res a h gher
temperature wh ch s why energy or latent heat are taken from water part cles that lower the ex st ng a r
temperature.
Thanks to th s funct on, t s poss ble also to remove any dust, pollen and other pollutants, ensur ng cool, fresh
and clean a r.
A stronger cool ng effect can be obta ned by us ng freezer packs.
The packs should be f lled w th water n the amount marked on the packag ng. Freeze the water (pack) n a
household refr gerator and then nsert t n cold water n the dev ce tank.
It s also poss ble to add ce cubes nto the dev ce water tank.

Specifications
1 Control panel 2 Louver 3 Water tank nspect on w ndow
4 Wheel 5 Change-over sw tch (KR9000H+) 6 Power sw tch
7 Cable 8 Water tank lock 9 Cable holder
10 Screw 11 F lter 12 Cool ng pad
13 Water tank
Assembly of the Air Cooler
1.Remove the packag ng carefully tak ng care not to damage the plast c body w th the sc ssors or kn fe
2.Installat on of Wheels: place 4 wheels to the holes located at the base of the a r cooler. Insert the wheels t ghtly
to the a r cooler’s body.
3.Set the un t on a stable and hor zontal base, keep ng t away from rad at ng heat sources and naked flame.
4. F ll ng Water: Turn the water tank lock to hor zontal pos t on, tak ng out the water tank, put n the ce boxes
and add clean tap water to the tank. Be sure that water level n the tank does not exceed the level “MAX” wh ch
s located at the back of the tank.
5. Push the water tank to ts hous ng and turn the tank lock to the vert cal pos t on.
6. Remote control: It s w th CR2025 button cell. Before use, please pull out the card wh ch s nserted at the
button of the remote control.
OPERATI G I STRUCTIO S
Start-up
ATTE TIO !
Make sure that the power source to which the appliance is to be connected is accordant with the parameters
specified on the rating plate.
Attention!
Before every use, inspect the device for any signs of mechanical damage. Inspect the power cord. If the power
cord is damaged, do not plug the device in.
Attent on: cut the power when you pour the water nto the tank.

Operating the Air Cooler
Insert plug to the electr cal outlet. Turn the un t on w th the power sw tch. Then t w ll beep short, and the
temperature d splay w ll show the current temperature and the a r cooler sw tches to the stand by pos t on. The
funct ons of the un t can be controlled v a board control panel or by remote control.
Operating the cooling function:
Turn the Change-over sw tch (5) on cool ng pos t on - KR9000H+
1.ON/OFF: Press the “ON/OFF” button on the control panel or press the ON/OFF button on the remote control
to turn the un t on. The un t w ll start at low speed and normal w nd. To sw tch back to the standby pos t on,
s mply press the ON/OFF button on control panel or press the ON/OFF button on the remote control.
2. Speed: W nd speed can be adjusted to 3 levels as low---m d—h gh by press ng the ‘Speed’ button. Each t me
the ‘Speed’ button s pressed, an con w ll appear on the screen nd cat ng the current speed level.
3. W nd: Press the ‘W nd’ button to choose the w nd type. Each t me th s button s pressed, an nd cator w ll l ght
on the screen to nd cate the type of w nd. There are 3 types of w nds to choose: Normal—Natural—Sleep
4. T mer: Press ‘T mer’ button to set the fan runn ng t me between 0-12 hours, wh ch sw tches the un t to standby
after preset t me. Each t me the button s pressed, the hours w ll ncrease one by one and the t me nd cator w ll
l ght on the screen.
To cancel the t mer, s mply press the button unt l the nd cator shows”00”
5. Sw ng: Press 'Sw ng' button to change the w nd d rect on. The sw ng con w ll appear on the screen when the
funct on s act vated. Press the button aga n to stop the osc llat on. The vert cal d rect on of a r flow can be
adjusted manually by d rect ng the outlet louvers up and down.
6. Cooler: To act vate the a r cooler funct on, please press the 'Cooler' button. Water pump w ll take the water
from the tank and pour t onto the cool ng pad. Cool ng pad absorbs the heat of the water and the evaporated
a r s blown out by the help of fan. The cool breeze blown by the cooler drops the temperature and creates a
relax ng cool ng effect.
Caut on: If the water level s low or there s no water n the tank, do not act vate the ‘Cooler’ funct on. Check the
water level and add water f needed. Replace the stale water w th fresh water. It s recommended to replace
water n the tank at least once n a week.
7.Ion zer: Press ‘Ion’ button to act vate the on zer funct on. Ion con on the screen w ll l ght and the negat ve
an on release w ll start. An ons attract to t ny part cles n the a r such as dust, pollen, mold spores etc. Wh ch
cause them to become too heavy to rema n a r borne. Th s feature let us to have dean a r n the env ronment.
Operating the heating function: only KR9000H+
Turn the Change-over sw tch (5)on cool ng pos t on.
1.ON/OFF: Press the “ON/OFF” button on the control panel or press the ON/OFF button on the remote control
to turn the un t on. The un t w ll start at normal w nd and low heat ng stage(1000W).
After second press the button, heat ng w ll sw tch off, the fan w ll work 30 seconds more, then the dev ce w ll
back to the standby pos t on.
2. Speed: th s button s not ava lable
3. W nd/heat: Press the ‘W nd/heat’ button to choose the heat ng stage. Each t me th s button s pressed, an
nd cator w ll l ght on the screen to nd cate the type of heat ng stage. There are 2 heat ng stages for choose:
low (1000W)—h gh(2000W)

4. T mer: Press ‘T mer’ button to set the fan runn ng t me between 0-12 hours, wh ch sw tches the un t to standby
after preset t me. Each t me the button s pressed, the hours w ll ncrease one by one and the t me nd cator w ll
l ght on the screen.
To cancel the t mer, s mply press the button unt l the nd cator shows”00”
5. Sw ng: Press 'Sw ng' button to change the w nd d rect on. The sw ng con w ll appear on the screen when the
funct on s act vated. Press the button aga n to stop the osc llat on. The vert cal d rect on of a r flow can be
adjusted manually by d rect ng the outlet louvers up and down.
6. Cooler: th s button s not ava lable
7.Ion zer: Press ‘Ion’ button to act vate the on zer funct on. Ion con on the screen w ll l ght and the negat ve
an on release w ll start. An ons attract to t ny part cles n the a r such as dust, pollen, mold spores etc. Wh ch
cause them to become too heavy to rema n a rborne. Th s feature let us to have dean a r n the env ronment.
Operating the Water Tank
Check the level of water n the tank frequently. Be sure that water level s not below the ‘MIN’ mark ng wh ch s
located on the water tank. Act vat ng the ‘Cool’ funct on w th nsuff c ent amount of water may cause
malfunct on of the water pump and the warranty of your product w ll be vo d.
Before ref ll ng water, turn your un t to ‘Off’ pos t on by press ng the sw tch located on the back panel and unplug
the power cord.
Using the Ice Boxes
In order to ncrease the cool ng effect of your fan, you can use ce boxes wh ch are suppl ed w th the un t. Before
us ng, place them n the freez ng compartment of your refr gerator for a few hours. Then place them nto the
large sect on of the tank and add water to the ‘MAX’ level. Us ng the ce boxes w ll drop the temperature of the
a r flow wh ch w ll create more effect ve cool ng effect.
CLE I G A D MA TE A CE
After operat on for long t me, the dust cumulated n the dust f lter or cool ng pad may nfluence the nflow of a r.
Therefore t s recommended to clean your fan regularly. Please follow the steps below to clean your dev ce.
Turn off the un t and unplug the power cord before clean ng and ma ntenance.
Dust F lter
To remove the dust f lter, f rst remove the screw, then s mply press the locks w th both hands and pull t out. Use
neutral clean ng agent and brush to clean the dust and d rt on the f lter. To attach the clean f lter, place the
bottom of the f lter f rst and then push upper part unt l t s locked t ghtly.
Cool ng Pad
After remov ng the dust f lter you can see the cool ng pad. Press the lock n the m ddle and gently pull out the
pad. Use a clean or soft brush to remove dust and d rt from the pad. R nse w th water f needed and leave t to
dry n open a r. Never use any chem cal clean ng solut on that can harm pad.
Water Tank
Turn the water tank lock to hor zontal pos t on and pull the tank. Use soft clean ng agents for clean ng. Wash
w th water and r nse the place t to ts hous ng by push ng gently. Turn the lock to vert cal pos t on.
Exter or Clean ng
Clean the exter or case of the fan w th a soft damp cloth except control panel. Never use hard clean ng agent
that can harm the case. Make sure the un t s dry before operat ng t.
Caut on: Never let water contact w th the control panel. Always clean t w th a soft dry cloth.
Attent on:
Must unplug the power plug when clean ng.
Don't make the water nto the control panel.
DO OT USE A Y DETERGE TS, PETROL OR ABRASIVES

TRA SPORTATIO A D STORAGE
Before putt ng the dev ce away, wa t unt l t cools down. Transport ng and store n a package protect ng from
hum d ty and mechan cal damages
TROUBLESHOOTI G
If the cl mator does not start, check the power supply n the ma ns. Repa rs must be carr ed out solely by the
author sed personnel.
Technical parameters
KR9000H+ KR9000
Voltage 220–240 V 220 – 240 V
Frequency 50/60 Hz 50/60 Hz
Class: II II
Nom nal power consumpt on 2000 W (80 W cool ng funct on) 80 W
Remote control:
3 V d.c. 1 x CR2025
The manufacturer reserves the r ght to ntroduce techn cal mod f cat ons!
The symbol presented below nd cates that the used equ pment cannot be placed together w th other
household waste. The user s obl ged to br ng th s tem to the waste electr cal and electron c equ pment
collect on po nt where a su table system s created to allow safe d sposal of these tems.
Dangerous components present n electr cal and electron c equ pment have negat ve consequences for the
env ronment and human health therefore correct handl ng of the equ pment s very mportant. Certa n
substances wh ch may adversely affect the env ronment over the l fe of the product and after use have been l m ted n th s
dev ce.
Malfuct on Poss ble reasons Solut on
No act on 1.Power off or poor connect on
2.Not press the power at the back of
body.
3.Not Press the "ON/OFF" key on the
control panel.
1.Plug the power cord and make sure t
connects well.
2.Press the power at the back of body.
3.Press the "ON/OFF" key on the control
panel.
Poor result of
dedust ng
1. Block the a r f lter screen w th dust.
2. Block the a r nlet w th corpus al en.
1.Remove and clean the a r f lter screen.
2.Remove corpus al en from the a r nlet.
Model KR9000H+
KR9000
Descr pt on Symbol Un t Value
Max mum fan flow rate [F] m
3
/m n 7,5
Fan power [P] W 80
Serv ce value [SV] (m
3
/m n)/W 0,09
Power consumpt on n standby mode [P
SB
] W 0
Fan sound power [L
WA
] dB(A) 65
Max mum a r speed [c] m/s 10
Standard for measur ng the serv ce value IEC 60879
Further nformat on can be obta ned from
RAVANSON LTD Sp. z o.o.
ul. Mazow ecka 6, 09-100 Płońsk
This manual suits for next models
1
Table of contents
Languages:
Other Ravanson Temperature Controllers manuals