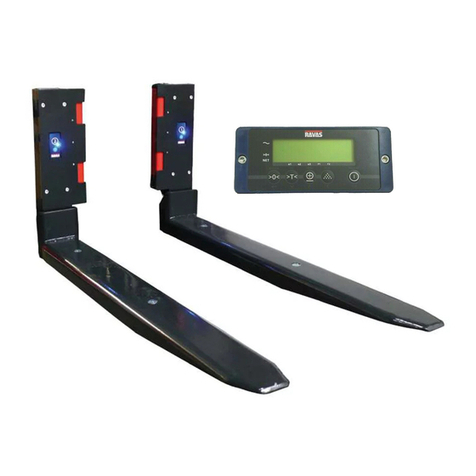
Ravas iForks User manual

SERVICE MANUAL –iForks
1
SERVICE MANUAL
iForks
Rev.28.09.09

SERVICE MANUAL –iForks
2
Table of contents
page
1. Calibration 3
1.1 Corner calibration 3
1.2 Zero calibration 6
1.3 Weight calibration 7
2. Parameter settings 11
3. Indicator power supply from fork lift truck battery - connection 12

SERVICE MANUAL –iForks
3
1. Calibration
1.1 Corner calibration
e1 e2 e3 F1 F2
NET
ID CODE PT TOTAL PCS KG/LB
CLR
2 sec.
????
2
1
6
3
4
5
e1 e2 e3 F1 F2
NET
ID CODE PT TOTAL PCS KG/LB
CLR
Start up the indicator.
Press the on/off key.
e1 e2 e3 F1 F2
NET
ID CODE PT TOTAL PCS KG/LB
CLR
e1 e2 e3 F1 F2
NET
ID CODE PT TOTAL PCS KG/LB
CLR
Put an empty pallet on
the iForks.
e1 e2 e3 F1 F2
NET
ID CODE PT TOTAL PCS KG/LB
CLR
10 sec.
??
Check if the calibration-
jumper is installed on the
board of the indicator

SERVICE MANUAL –iForks
4
8
7
12
9
10
11
B A
CD
Put load M (100–500kg) on
position A of the pallet.
e1 e2 e3 F1 F2
NET
ID CODE PT TOTAL PCS KG/LB
CLR
e1 e2 e3 F1 F2
NET
ID CODE PT TOTAL PCS KG/LB
CLR
AB
CD
e1 e2 e3 F1 F2
NET
ID CODE PT TOTAL PCS KG/LB
CLR
e1 e2 e3 F1 F2
NET
ID CODE PT TOTAL PCS KG/LB
CLR
Put load M (100–500kg) on
position B of the pallet.

SERVICE MANUAL –iForks
5
14
13
18
15
16
17
e1 e2 e3 F1 F2
NET
ID CODE PT TOTAL PCS KG/LB
CLR
AB
CD
e1 e2 e3 F1 F2
NET
ID CODE PT TOTAL PCS KG/LB
CLR
e1 e2 e3 F1 F2
NET
ID CODE PT TOTAL PCS KG/LB
CLR
AB
CD
Put load M (100–500kg) on
position C of the pallet.
Put load M (100–500kg) on
position D of the pallet.

SERVICE MANUAL –iForks
6
1.2 Zero calibration
2
1
3
4
e1 e2 e3 F1 F2
NET
ID CODE PT TOTAL PCS KG/LB
CLR
Start up the indicator.
Press the on/off key.
Empty forks !
e1 e2 e3 F1 F2
NET
ID CODE PT TOTAL PCS KG/LB
CLR
10 sec.
??

SERVICE MANUAL –iForks
7
1.3 Weight calibration
2
1
6
3
4
5
e1 e2 e3 F1 F2
NET
ID CODE PT TOTAL PCS KG/LB
CLR
Start up the indicator.
Press the on/off key.
EXAMPLE:
M1 = 500
M2 = 1500
M3 = 2500
M = total calibration
weight loaded onto the
iForks (incl. pallet if used)
e1 e2 e3 F1 F2
NET
ID CODE PT TOTAL PCS KG/LB
CLR
e1 e2 e3 F1 F2
NET
ID CODE PT TOTAL PCS KG/LB
CLR
1x
e1 e2 e3 F1 F2
NET
ID CODE PT TOTAL PCS KG/LB
CLR
e1 e2 e3 F1 F2
NET
ID CODE PT TOTAL PCS KG/LB
CLR
10 sec.
??
Check if the calibration-
jumper is installed on the
board of the indicator

SERVICE MANUAL –iForks
8
8
7
12
9
10
11
e1 e2 e3 F1 F2
NET
ID CODE PT TOTAL PCS KG/LB
CLR
Change if needed !
e1 e2 e3 F1 F2
NET
ID CODE PT TOTAL PCS KG/LB
CLR
5x
3x
e1 e2 e3 F1 F2
NET
ID CODE PT TOTAL PCS KG/LB
CLR
1x
e1 e2 e3 F1 F2
NET
ID CODE PT TOTAL PCS KG/LB
CLR
M1
e1 e2 e3 F1 F2
NET
ID CODE PT TOTAL PCS KG/LB
CLR
3 sec.

SERVICE MANUAL –iForks
9
e1 e2 e3 F1 F2
14
13
18
15
16
17
e1 e2 e3 F1 F2
NET
ID CODE PT TOTAL PCS KG/LB
CLR
M2
e1 e2 e3 F1 F2
NET
ID CODE PT TOTAL PCS KG/LB
CLR
Change the value if
needed, by pressing
the >0< key shortly.
e1 e2 e3 F1 F2
NET
ID CODE PT TOTAL PCS KG/LB
CLR
3 sec.
e1 e2 e3 F1 F2
Afterwards, repeat this
cycle for load M3 -> move
the pointer to e3
Move the
pointer to e2
1x

SERVICE MANUAL –iForks
10
e1 e2 e3 F1 F2
NET
ID CODE PT TOTAL PCS KG/LB
CLR
20
19
21
1x
e1 e2 e3 F1 F2
NET
ID CODE PT TOTAL PCS KG/LB
CLR
Change gravitation
value if needed (enter
the g-value of the
current location)
Or confirm with enter
22
e1 e2 e3 F1 F2
NET
ID CODE PT TOTAL PCS KG/LB
CLR
??
e1 e2 e3 F1 F2
NET
ID CODE PT TOTAL PCS KG/LB
CLR

SERVICE MANUAL –iForks
11
2. Parameter settings
To enter the parameter menu by:
- Switch on the indicator and HOLD the ON/OFF key for at least 30 seconds.
- After 30 seconds the indicator shows automatically: P_ _ 00.
Par.
Function
Default settings
EU US
Settings
01
Calibration and start-up units (and print units)
kg
lb
kg;lb
02
Smallest graduation step for multirange
1
2
0.1/0.2/0.5/1/2/5/10/20/50
03
Biggest graduation step for multirange
2
5
0.1/0.2/0.5/1/2/5/10/20/50
04
Number of divisions for every range
1000
1000
0000 - 9999 divisions
05
Weighing capacity system (full scale)
2500
5000
0-99999
06
Motion tolerance for stable
2
2
off/0.5/1/2/4/8/16/32 grad./sec
07
Filter size
8
8
off; 1-12 (1 light filtering, 12 high filtering)
08
Auto zero range (zero track)
0.5
0.5
off/0.5/1/3 grad./sec
09
Zero range positive (+)
10
10
0-100 % of span
10
Zero range negative (-)
10
10
0-100 % of span
11
Test function (display service mode)
basic
basic
basic/count/res10
12
Power on –automatic zero
no
no
Yes/no
13
Approved / non-approved version
no
no
No/ntep/oiml
14
Sampling quantity
10
10
1/2/5/10/20/50/95
15
Units switch mode active
yes
yes
no/yes
16
Setpoint function
0
0
0 (not used); 1 (gross overload); 2 (net overload); 3 (fill
manual tare); 4 (fill auto tare); 5 (gross overload not
authorize to change gross setting); 6 (net overload not
authorize to change net setting); 7(gross overload
delayed); 8 (net overload delayed); 9 (gross overload
delay not authorize to change gross setting); 10 (net
overload delay not authorize to change net setting)
17
Number of wires per loadcell (sence active)
4
4
4/6
18
Gravity value working area
9.812
9.797
9.750-9.850
19
Print format date/time
EU
US
EU (dd/mm/yy);US (mm/dd/yy)
20
Baudrate com1
9600
9600
600/1200/2400/4800/9600/19200
21
Setting com1
8_n_1
8_n_1
8_n_1; 8_n_2; 7_n_1; 7_n_2
24
End character com1
cr
cr
cr;lf;crlf
25
Protocol com1
5
5
0(PC bi-directional NU); 1(PC Excel format on print
command); 2 (remote display); 3 (printer protocol with
power control); 4 (printer protocol without power
control); 5 (Bluetooth master)
26
Number of linefeeds com1
4
4
0-9
27
Handshake com1
soft
soft
soft (Xon/Xoff)/hard (CTS)
28
Printout format for com1 and com2
stnd
stnd
stnd;total;confi
29
Header lines added
0
0
0 - 3
30
Baudrate com2
9600
9600
600/1200/2400/4800/9600/19200
31
Setting com2
8_n_1
8_n_1
8_n_1; 8_n_2; 7_n_1; 7_n_2
34
End character com2
cr
cr
cr/lf/crlf
35
Protocol com2
0
0
0(PC bi-directional NU); 1(PC Excel format on print
command); 2 (remote display); 3 (printer protocol with
power control); 4 (printer protocol without power
control); 5 (Bluetooth master)
36
Number of linefeeds com2
4
4
0-9
37
Handshake com2
soft
soft
soft (Xon/Xoff)/hard (CTS)
40
Level sensor
no
no
no/ls nc/ls no/cs fa/cs ra
41
Delay trigger time level sensor
3
3
0 -1 0 sec
43
Compensation factor correction factor
1
1
0.1-10.0
44
Compensation factor X-direction
1
1
0.1-10.0
45
Compensation factor Y-direction
1
1
0.1-10.0
60
Battery used
6
6
6V /12V
61
Low Bat switch-off time
2
2
0 = never off; 1-99 min
62
Auto shut-off time indicator
2
2
0 = never off; 1-99 min
63
Auto shut-off time forks
3
3
0 = never off; 1 = 30min; 2 = 1h; 3 = 2h
64
Sleep time indicator if used
0
0
0 = not used; 1 to 99 min
65
Auto shut-off time backlight
20
20
off/20/40/80/160/320 sec
66
Backlight brightness
100
100
100%/ 75%/ 50%/ 25%/ 0% (off)
67
Low bat switch off time forks
10
10
0 = never off; 1-99 min
68
Buzzer function active
off
off
off/ on (direct); on (2 sec. delay)
80
Digital corner calibration active
0
0
0 (enabled); 1 (disabled)
81
Compensation factor digital corner A
1.000
1.000
Do not change value after digital corner calibration

SERVICE MANUAL –iForks
12
82
Compensation factor digital corner B
1.000
1.000
Do not change value after digital corner calibration
83
Compensation factor digital corner C
1.000
1.000
Do not change value after digital corner calibration
84
Compensation factor digital corner D
1.000
1.000
Do not change value after digital corner calibration
85
Matching Bluetooth forks
Only enter this parameter to establish a complete new
Bluetooth connection! Enter last 6 characters of MAC-
address of fork1 and 2 or cancel by pressing CLR
90
Default settings without changing calibration
91
Default settings with changing calibration
96
Printout parameter setup
Pr-C1
Pr-C1
Pr-C1; Pr-C2
97
Key test function (buzzer and nr)
98
Scale id number
0
0
0 - 9999
99
Software version
Leave the parameter-menu and store all entries by pressing 2 times shortly on the CLR key.
3. Indicator power supply from fork lift truck battery - connection
Only possible when indicator is equipped with an integrated voltage converter or voltage stabilizer.
+-
+
_Black
Red
Blue
Brown
EU US
Other manuals for iForks
3
Table of contents
Other Ravas Lifting System manuals
Popular Lifting System manuals by other brands

King Tony
King Tony 9TYC11 manual

HOLZMANN MASCHINEN
HOLZMANN MASCHINEN SHT150XF user manual

Tesco
Tesco ML50-20 Operation and maintenance manual

ATH-Heinl
ATH-Heinl ATH-Single Lift 12P operating instructions

Rotary
Rotary VLXS7 installation instructions

ACCO Brands
ACCO Brands ACCOLIFT series instruction manual