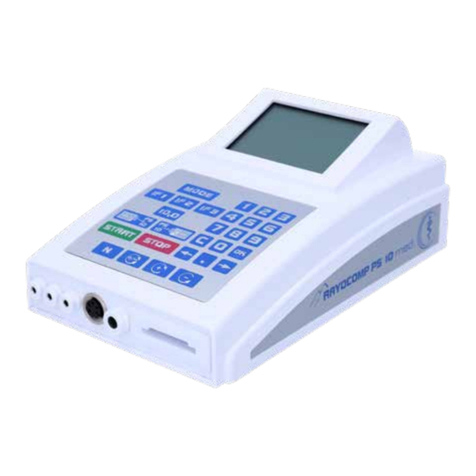
Rayonex Rayocomp PS 10 User manual

Rayocomp PS 10
Portable High-Performance Bio-Resonator
User Manual
Art.-Nr.: 9100EN
In spite of all the information, advice and suggestions for solving problems, this book cannot
replace a visit to an alternative practitioner or a doctor orientated to natural healing. Also,
we must point out that the classic orthodox medicine still does not accept or acknowledge
the interrelations presented in this manual.

1.Contents Page2
1. Contents 2
2. Conformity Declaration 4
3. Basics of the Rayocomp PS 10 5
3.1 Volume of Delivery 5
3.2 Technical Data 5
3.3 Safety Instructions as to Operation 6
3.4 Guarantee 6
3.5 Cleaning 6
3.6 Understanding the Device 7
3.6.1 Front View 7
3.6.2 Rear View 8
3.6.3 Keyboard 9
3.6.4 Display 10
4. User Manual 11
4.1 General Directions for Operation 11
4.1.1 Literature Relating to the Bio-Resonance
According to Paul Schmidt 11
4.1.2 Charging the Integrated Power Pack 12
4.1.3 Switching the Device On and Off 13
4.1.4 Selecting the Menu with the Mode Key 14
4.1.5 Operating the Integrated Polariser and Sensor 18
4.1.6 Basic Information for RAH ‘Green Card’ 20
4.1.7 Error Display 21
4.2 Menu Item “Direct“ 22
4.2.1 Testing and Harmonising a Fundamental Frequency
Value with the Integrated Polariser and Sensor 22
4.2.2 Setting Up Individual Fundamental Frequency Values 23
4.2.3 Automatic programme sequence by using a RAH ‘
Green Card’ 24
4.3 Menu Item “F1“ 25
4.3.1 Basics Concerning the Use of Integrated Programs 25
4.3.2 Composing and Harmonising Various
Harmonising Programs 26
4.3.3 Loading Fundamental Frequency Values from
Memory Cards and Harmonising 29
4.3.4 Fundamental Frequency Values from the Menu
Item “Test“ - Taking Over and Harmonising 29
4.3.5 Utilising the Harmonising Programs of the new RAH 30

1. Contents Page 3
4.4 Menu Item “Test“ 35
4.4.1 Testing Range Values 37
4.4.2 Testing with Memory Card Values 38
4.4.3 Testing with Integrated Programs 38
4.4.4 Testing with Integrated Test Programs 39
4.4.5 RAH-Module 10: Level test 40
4.4.6 RAH Module 10: Test with integrated test protocols 44
4.4.7 RAH Module 10: Test with the RAH ‘Green-Card’ 45
4.4.8 Important tips and tricks for testing with the RAH-
Module 10 46
4.5 Menu Item “Setup“ 49
4.5.1 Set-Up of Background Illumination 50
4.5.2 Deleting Double Values in the F1 Programs 50
4.5.3 Adjusting the ‘Attention’ Sound (Beep) 51
4.5.4 Pre-Setting the Test Range Values 51
4.5.5 Presetting the harmonisation time for Fundamental
Frequency Values 52
4.5.6 Activating and Deactivating Modules 53
4.5.7 Storing Fundamental Frequency Values on
Memory Cards 54
4.5.8 Displaying Memory Card Information 55
4.5.9 Providing Read-Protection for a Memory Card 56
4.5.10 Providing Write-Protection for a Memory Card 56
4.5.11 Deleting a Memory Card Completely 57
4.5.12 Initialising a Memory Card 57
4.5.13 Motor Test Run of the Frequency Module 58
4.6 Menu Item “Info“ 59
4.7 Special Function Keys 61
4.7.1 Using the IF-Keys 61
4.7.2 Using the 10.0-Key 61
5. Appendix 62
5.1 Summary of the Integrated Test Programs 62
5.2 Summary of the Integrated Rayonex Programs 63
5.3 Summary of the Integrated Acupuncture Programs 64
5.4 Summary of the Integrated Special Programs 65
5.5 Summary of the Integrated Programs by Dr. Ulrich 66
5.7 Summary of the Modules for Integration 67
5.8 Summary of the Possible Error Messages 68
6. Private Documents 70

2. Conformity Declaration Page 4

3. Basics of the Rayocomp PS 10 Page 5
3. Basics of the Rayocomp PS 10
3. 1 Volume of delivery
The delivery volume consists of: 1. The RAYOCOMP PS 10
2. Integrated polariser
3. Integrated power pack
4. Battery charger
5. User Manual
6. Transport case
7. Cardboard packing box
It is absolutely necessary to keep the packing; in case you have to return the
device for maintenance (e.g. for servicing), please send it back in its
transport case and the cardboard box. We cannot take over the guarantee for
insufficient packing.
If the old packing material gets lost, we can replace it on request, liable to
costs.
When sending back the device, please make sure that all additional parts
and accessories are secured inside the case! In case you intend to send
back the PS10, please always include the appurtenant charging set.
3.2 Technical Data
Weight of the Rayocomp PS 10: 1.6 kg
Weight including case and accessories: 9.7 kg
Height: 100 mm
Width: 160 mm
Depth: 260 mm
Power supply for charging: 100 – 240 V alternating current,
17V/8.4 V secondary direct
current
Max. reception capacity for charging: 24 W
Operation time with a fully charged
power pack: 8 hours (at least)
Range of the operation temperature: 15° C - 35° C
The device should not be exposed to great thermal fluctuations, otherwise
you run the risk of condensation build-up inside.
If the instrument has cooled down (i.e. during transportation) to very low
temperatures (below 5° C), you have to make sure it is sufficiently
acclimatised within the working temperature range mentioned above before
switching it on.

3. Basics of the Rayocomp PS 10 Page 6
3.3 Safety Instructions as to Operation
The Rayocomp PS 10 is charged with a direct current. The charging rate
is 800mA. Please note that the Rayocomp PS 10 may only be used with a
battery charger supplied by Rayonex.
• Therefore, make sure that no humidity can penetrate the power pack
(short-circuit risk).
• Prevent any persons, i.e. children, from poking sharp metal items into
the device (power stroke risk).
• Make sure that the connection cables belonging to the delivery
volume of the detectors are only used for connecting the device with
the detectors.
• Use the Rayocomp PS 10 in power pack mode only and never with the
charging cable plugged in.
When using the detectors (especially the pointed detector for
acupuncture points), be sure to handle them with care (risk of eye injury,
...).
3.4 Guarantee
The warranty period runs for 1 year from the date of delivery on and is only
valid for instruments that have not been opened, with the intact guarantee
seal as evidence. Improper use of the device invalidates the warranty claim.
In conformity to general conditions for inspection, service is liable to costs,
even if this becomes due within the warranty period.
3.5 Cleaning
The surface of the device should be cleaned with a soft cloth and a small
amount of alcohol once a week. Never treat the device with strong cleaning
agents.
The detectors, which come into close contact with the patients (i.e. hand and
foot detectors), need cleaning after every use - preferably with alcohol.

3.6 Understanding the device Page 7
3.6 Understanding the Device
In the chapters of this user manual, you will often find instructions referring
to keys or segments of the Rayocomp PS 10. In the following, you can see
pictures of the device accompanied by short descriptions in order to simplify
the assignment.
3.6.1 Front View
1
2
4
3
67
5
Front view of the Rayocomp PS 10
Caption:
1: Display
2: Keyboard
3: Three exit hubs for connecting the hand, foot or Velcro detectors and the
measuring and protection cups
4: Sensor connection. For a correct connection, please insert the sensor plug
and then fasten it by twisting the knurled screw.
5: Entry hub
6: Memory card
7: Memory card insert

3.6.2 Rear View Page 8
3.6.2 Rear View
2
1
3
5
4
Rear view of the Rayocomp PS 10
Caption:
1: ON-OFF switch
2: Charging socket
3: Charging plug which is inserted in the charging socket for the charging
process
4: Interface for program updates
5. Sticker indicating the serial number, year of construction etc.

3.6.3 Keyboard Page 9
3.6.3 Keyboard
1
2
3
6
8 910 11
12
13
14
7
5
4
Keyboard of the Rayocomp PS 10
Caption:
1: Mode key for selecting the menu item
2: IF1 – IF3 keys for determining frequently used fundamental frequency
values
3: 10.0 key for the rapid access to this special value and for activating the
M10 test protocol.
4: Key for loading the values from a memory card into the device
5: Key for storing values from the device on a memory card
6: Start key for starting F1 programs, for example
7: Stop key for interrupting an automatic run or for deleting the function
8: N key of the polariser to switch the polariser to neutral
9: +/– key of the polariser to switch on the bipolar function
10: + key of the polariser to activate a polarisation gyrating to the right
11: - key of the polariser to activate a polarisation gyrating to the left
12: Arrow-left key, i.e. for selecting the previous value during an automatic
program course
13: Arrow-right key, i.e. for selecting the following value during an automatic
program course
14: Numerical block for entering digits, numbers, fundamental frequency
values – Cdeletes, the decimal point indicates a precise value (i.e. 12.75).

3.6.4Display Page10
3.6.4 Display
1
2
3
8
4
9
75
6
Display of the Rayocomp PS 10
Caption:
1/2: Numbering the modules. All in all, the Rayocomp PS 10 is intended for
the activation of 12 different modules. If you select the menu item “Info”
the modules already activated in the device are displayed.
3: Here, the current service state of the device is indicated. After approx.
6000 operation hours or when your device hasn’t been in service for
about three years, it will indicate 100 % (service is due).
4: In the menu item “F1“, you can read the remaining total harmonising
time here.
5: This displays the polarisation type which is currently set.
6. Here you can read, which menu item has been selected.
7. This symbol shows you the charge status of the battery pack. If all 4
bars can be seen on the display, the accumulator is full. If no bar is
indicated, the accumulator is empty.
8. During harmonisation with BnPS-programmes, the remaining duration of
the harmonising appertaining to the current basic frequency value will
be shown at this place.
9. Here, the currently set fundamental frequency value is indicated. We
have selected a large numeral display for better reading comfort.

4. User Manual Page 11
4. User Manual
4.1 General Directions for Operation
4.1.1 Literature Relating to the Bio-Resonance According to Paul Schmidt
It cannot be the ambition of a user manual to
explain all facets and possibilities of a method
within such a complex area as bio-resonance as
developed by Paul Schmidt.
Meanwhile, there is sufficient literature on the
market from which you can take the application
possibilities of the method. For example, we
recommend the book "Bio-resonance as
developed by Paul Schmidt“ with a total of 424
pages.
This book can be obtained from the publisher.
The address is:
Spurbuchverlag
Am Eichenhügel 4
96148 Braunach, Germany
Phone: +49 (0)9544 1561
Internet: www.spurbuch.de
E-mail: [email protected]

4.1.2 Charging the Integrated Power Pack Page 12
4.1.2 Charging the Integrated Power Pack
The Rayocomp PS 10 posseses an integrated battery pack to enable the
application of the device without needing to connect it to the mains supply.
As a matter of principle, the Rayocomp PS 10 should never be used while
it is still being charged.
The Rayocomp PS 10 is charged in the quickest way when switched off. An
empty battery pack requires approx. 4 hours for complete charging.
In order to avoid unnecessary electro-magnetic pollution, please unplug the
charging unit when it is not being used.
And this is how you charge the Rayocomp PS 10:
1. Switch off the device
2. Connect the charging unit to the mains supply
3. Plug the charging cable into the rear of the device
(see chapter 3.6.2)
4. The charging unit indicates the various charging
processes. When the LED turns green, the charging
process is complete and you can use the device
again.
5. Please disconnect both the plug from the rear
panel of the device and the charging set from the
electrical outlet.
Function yellow green
Standby: charging device in stand-by mode, ready
to charge glows
Pre-charge: tests whether charging is required blinks
slowly
Rapid charge: power pack is charged with constant current blinks
rapidly
Maintain: charging power is reduced blinks
slowly
Error: charging cannot start blinks
rapidly
Ready: the Rayocomp PS 10 is ready for use glows
Wait: charging device is not ready yet blinks
slowly
blinks
slowly
Note: The charging status of the power pack is always displayed. This bar
indicator allows you to estimate the length of time left for operation before it
becomes necessary to recharge the device.

4.1.3 Switching the Device On and Off Page 13
4.1.3 Switching the Device On and Off
On the rear wall of the Rayocomp
PS 10, you will find the switch for
switching the device on and off.
When switching on, please make
sure that no memory card is
inserted in the device. In case your
PS 10 is not under supervision for a
longer period of time (overnight,
for example), make sure that the power pack is charged sufficiently. Total
discharge, even if it happens only once, damages the power pack
permanently.
After the device is switched on, a short trial run is started. A mechanical test
is performed, along with a check of the power pack. If you receive the
message “Er 29”, the power pack must be recharged before you can work
with the device. Then the device switches over to the menu item “Direct” and
is immediately ready for action. The display shows:
It is not necessary to move to a certain menu item before switching off the
device. This means you can switch off the device at any time. Please keep in
mind that the resonance values and the found RAH programmes detected in
the menu item “Test” are lost when the device is switched off. When the
status of the power pack goes down until its functions can no longer be
guaranteed, a ‘blip’ can be heard several times. In this case, the power pack
must be recharged immediately to avoid damage.
Important information:
You cannot damage your device by switching it off arbitrarily. Neither
will the integrated harmonising programs be lost nor will your hardware
suffer damage.

4.1.4 Selecting the Menu with the Mode Key Page 14
4.1.4 Selecting the Menu with the Mode Key
The Rayocomp PS 10 has a selection of menu items. Every menu item
provides certain application possibilities. Therefore, partitioning into single
menu items serves as a means for simplifying operation. The following menu
items are available:
1. Menu Item "Direct": Use this menu item for the rapid output of single
fundamental frequency values. You could say this
menu item covers the functions of the old Rayometer.
2. Menu Item “F1“: As a matter of principle, the Menu Item “F1” includes
two separated programmes. On the one hand, the
BnPS programme, which is indicated by “BnPS” on the
display. After a short time, the representation will
switch over to P_.__. By means of the BnPS-
programmes, you can automatically run the
harmonising programmes installed in the device or
prepared by yourself on the memory card, provided
the modules have already been activated in the device.
The RAH programme, which is also found under the
Menu Item F1, is shown only if it has effectively been
activated. The RAH module is marked by the
indication “RAH” in the display. After a short time, the
RAH prompt _ _ . _ _.will appear. In the following
explanations, the menu item RAH will be indicated
with “F1-RAH”, in the same way, the Fundamental
Frequency Values are harmonised in “F1-BnPS”.
3. Menu Item “Test“: This menu item provides all possibilities for testing
fundamental frequency values. If the M10 module is
activated, RAH-programmes can also be tested. The
display is identic to menu item “F1”. The manual
differentiates between “test-BnPS” and “test-RAH”.
4. Menu Item “Setup“: With this menu item, you can alter pre-settings of the
device, call up information concerning the memory
cards, activate or de-activate modules and perform a
device test.
5. Menu Item “Info“: Select this menu item to gain information concerning
the serial number of the device. It will also indicate
the current state of the integrated software and the
existing hardware. Particularly important: you can see
directly, which modules are integrated in the
Rayocomp PS 10.

4.1.4 Selecting the Menu with the Mode Key Page 15
When the Rayocomp PS 10 is switched on, the display of the device shows the
menu item “Direct”:
Now press the key:
The Rayocomp PS 10 changes over to
the menu item “F1-BnPS“ and
displays:
Press the following key again:
If now the Mode key is not pressed
again for a short moment, the PS10
will automatically start the input
mask, allowing you to enter the
BnPS programmes.
By pressing the Mode key again, the
Rayocomp PS 10 will switch over to
the RAH module. However, this will
only occur if the modules have
effectively been activated. Thus, if
either the Module 8, Module 9 or
Module 10 is activated, “RAH” is
indicated in the display for a short
moment. Subsequently, the RAH
programmes can be entered via the
input mask _ _ . _ _.

4.1.4 Selecting the Menu with the Mode Key Page 16
After having pressed
again, the Rayocomp PS 10 changes
to the menu item “Test” and shows
on the display:
If the module 10 is activated, the menu item “Test RAH” will be shown on the
display after the menu item “Test-BnPS”. By pressing on the key “mode” once
again, this menu item can be selected.
If the key “mode” isn’t pressed once more, after having selected the menu
item “Test-BnPS”, the following prompt will appear:
Here, BnPS fundamental frequency
values can be tested. For further
information take a look at chapter
4.4
Please press again the key:

4.1.4 Selecting the Menu with the Mode Key Page 17
The Rayocomp PS 10 changes to the menu item “Setup” and shows on the
display:
The Rayocomp PS 10 changes over to the menu item “Info“ and displays:
If you press the key no you will move back to the
menu item “Direct“. Once more, the display will show:
Once again, press the key:

4.1.5 Operating the Integrated Polariser and Sensor Page 18
4.1.5 Operating the Integrated Polariser and Sensor
Just like the Rayocomp PS 1000 polar, the Rayocomp PS 10 has an integrated
polariser to improve comfortable operation.
The functions of the integrated polariser can be activated in two different
ways, with the keyboard or the sensor. Because the use of the keyboard is
rather bothering when performing tests, we recommend using the button of
the sensor to carry out the functions of the integrated polariser right from
the start.
Basically, the use of the polariser in connection with the Raycocomp PS 10
posesses the following advantages:
• While testing, the polariser helps you to find out, whether a
disturbance is strong or weak and shows you the optimal polarity.
• Specially when harmonising, the bi-polar function (+/-) intensifies the
effect.
These four keys enable the utilisation of the polariser functions via
keyboard:

4.1.5 Operating the Integrated Polariser and Sensor Page 19
However, the functions of the polariser can also be set to the sensor directly
while testing. Moving the sensor button in direction of the connection cable
backward, the current polarisation of the frequencies is altered. In the
following, you will find a summary of the sensor functions (green):
Wooden handle
Changing the
polarisation
Next fundamental
frequency value
Previous fundamental
frequency value
in the internal memory
of the PS 10
Storing a resonance
Wire spring
Sensor button
Configuration of the sensor while testing Fundamental Frequency Values.
This function is explained under the menu item “TEST-BnPS”.
You can take the exact course of a test and harmonisation from the menu
item 4.2.1.
Look at the display to see the
currently set polarisation:

4.1.6 Basic Information for the Rayonex ‘Green Card’ Page 20
4.1.6 Basic Information for the Rayonex ‘Green Card’
The idea of the new RAH ‘Green Card’ is as simple as it is brilliant. Previously,
when harmonising programmes were determined with the Rayocomp PS 1000
polar or Rayocomp PS10 by means of RAH, for future use, these had to be
noted or printed. With the new RAH ‘Green Card’ these programme
compilations can now be stored on a special memory card. Thus, it is now
possible to, e.g. , store the tested programmes of the Rayocomp PS 1000
polar on an RAH ‘Green Card’ and to give the RAH ‘Green Card’ to the patient
for his home therapy with the Rayocomp PS 10. Both devices work together
hand in hand.
As the RAH-programmes are often harmonised with different times, an RAH
‘Green Card’ can not only store the RAH-programmes, but also its individual
harmonising times. The RAH ‘Green Card’ works perfectly with the new test
possibilities of the module 10. Just imagine, you want to select and test all
relevant RAH-programmes dealing with hypertension. All RAH-programmes,
that need to be harmonised can be analysed and can be stored on the RAH
‘Green Card’ after the test. While storing, both, the PS 1000 polar and the PS
10, add automatically well-proven harmonising times. Furthermore, the
values stored on the RAH ‘Green Card’ can be read in for a further test. This
saves a lot of time and avoids entering errors.
Up to 200 RAH-programmes with their individual harmonsing times can be
stored on an RAH ‘Green Card’. Of course, you can delete the RAH ‘Green
Card’, store new values on it and alter it with write protection. But, that’s not
all! An RAH ‘Green Card’ combines the Bioresonance according to Paul
Schmidt and RAH seamlessly. As the use of RAH-programmes is often
accompanied by single frequencies of the Bioresonance according to Paul
Schmidt (e.g. from an individual range value test), the Rayonex engineers
found a way, to store single frequencies (up to 500 different values), as well
as RAH-programmes on the RAH ‘Green Card’. In addition, a special function
was created under the main menu item of the Rayocomp PS 1000 polar and
the Rayocomp PS 10. If you insert an RAH ‘Green Card’, an automatic
harmonisation sequence begins. At first, the single frequencies, stored on
the RAH ‘Green Card’, are harmonised with the time according to the setup,
and after that the stored RAH-programmes with their individual harmonising
time.
Thus, an RAH ‘Green Card’, compiled by the therapist, can easily be used by
the patient at home. After inserting the RAH ‘Green Card’ in the menu
“Direct”, the harmonisation run starts automatically.
Table of contents
Other Rayonex Medical Equipment manuals
Popular Medical Equipment manuals by other brands

Vicks
Vicks VIH200 use and care manual

Fahl
Fahl OPTIFLAUSCH SLIM K PED Instructions for use

Nasco
Nasco Life/form LF00855U instruction manual

Allied Healthcare
Allied Healthcare ResusciTIMER manual

GE
GE LOGIQ 100 PRO Technical publication

Halotherapy Solutions
Halotherapy Solutions HaloGX Mobile instructions