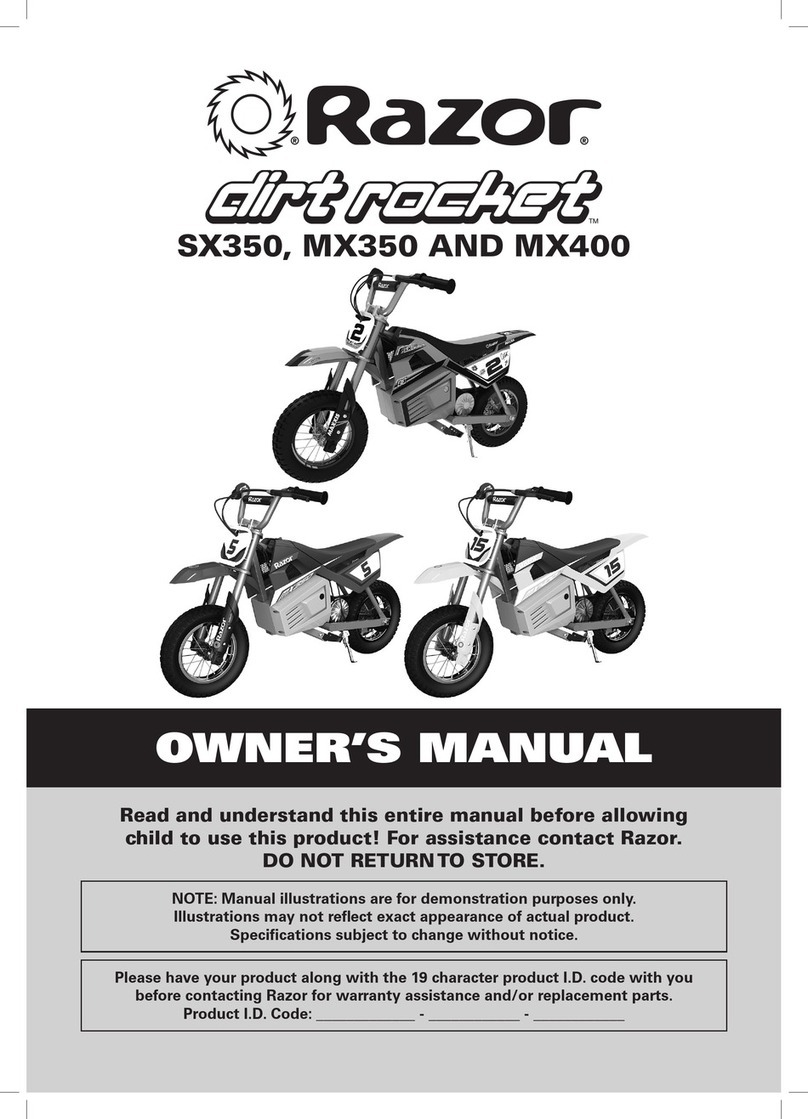
Razor Electric Wagon User manual

OWNER’S MANUAL
Read and understand this entire manual before
allowing child to use this product!
Item Numbers:
25144070
Español.............Página 10
Français............Page 20
ELECTRIC WAGON

WARNING: Riding in the Electric Wagon can be a hazardous
activity. Certain conditions may cause the equipment to fail without
fault of the manufacturer. Like other wheeled products, the Electric
Wagon can and is intended to move, and it is therefore possible to
lose control, fall off and/or get into dangerous situations that no
amount of care, instruction or expertise can eliminate. If such things
occur, your child can be seriously injured or die, even when using
safety equipment and other precautions. USE COMMON SENSE.
This manual contains many warnings and cautions concerning the
consequences of failing to maintain, inspect or properly use your
Electric Wagon. Because any incident can result in serious injury or
even death, we do not repeat the warning of potential serious injury
or death each time such a possibility is mentioned.
APPROPRIATE RIDER USE AND PARENTAL SUPERVISION
Direct adult supervision is required at all times. This manual contains
important safety information. It is your responsibility to review
this information and make sure that all children obey all warnings,
cautions, instructions and safety topics and assure that young riders
are able to safely use this product. Razor recommends that you
periodically review and reinforce the information in this manual
with young riders, and that you inspect and maintain your children’s
wagon to insure their safety.
Any child unable to fit comfortably on the Electric Wagon should not
attempt to ride it.
A parent’s decision to allow his or her child to ride in this
product should be based on the child’s maturity, skill
and ability.
Rider weight does not necessarily mean a child’s size is appropriate
to fit in the Electric Wagon.
Refer to the section on safety for additional warnings.
ACCEPTABLE RIDING PRACTICES AND CONDITIONS
Direct parental supervision is required. The Electric Wagon is meant
to be used only in controlled environments free of potential traffic
hazards and not on public streets. Do not allow your child to ride
in the Electric Wagon in any areas where vehicle traffic is present.
Never use near steps, sloped driveways, hills, roadways, alleys or
swimming pool areas.
Do not ride the Electric Wagon in wet weather. The Electric Wagon
is intended for use on solid, flat, clean and dry surfaces such as
pavement or level ground. Wet, slick or uneven and rough surfaces
may impair traction and contribute to possible accidents. Do not ride
the Electric Wagon in mud, ice, puddles or water. Avoid excessive
speeds that can be associated with downhill rides. Never risk
damaging surfaces such as carpet or flooring by use of a Electric
Wagon indoors. Do not ride at night or when visibility is impaired.
USING THE CHARGER
The charger supplied with the Electric Wagon should be regularly
examined for damage to the cord, plug, enclosure and other parts,
and in the event of such damage, the batteries must not be charged
until the charger has been repaired or replaced.
Use only with the recommended charger.
The charger is not a toy.
Always disconnect from the charger prior to wiping down and
cleaning your Electric Wagon with liquid.
Contains sealed lead acid battery. Battery must be recycled.
FAILURE TO USE COMMON SENSE AND HEED THE
ABOVE WARNINGS INCREASES RISK OF SERIOUS
INJURY. USE WITH APPROPRIATE CAUTION AND
SERIOUS ATTENTION TO SAFE OPERATION.
SAFETY WARNINGS
1
Safety Warnings ............................................................ 1
Before You Begin........................................................... 2
Set-Up ........................................................................ 3-4
Operating the Wagon .................................................... 5
Electric Wagon Parts .................................................. 5-6
Warranty........................................................................ 8
CONTENTS
2
Need Help? Visit our web site for replacement parts, product support, live chat and a list of
authorized service centers at www.razor.com or call toll-free at 866-467-2967 Monday - Friday
8:00 AM - 5:00 PM Pacific Time.
Power Adapter
Remove contents from box. Remove the foam separators that protect the components. Inspect the contents of the box
for dents or kinked cables that may have occurred during shipping.
q Estimated Assembly and Set-Up Time
Razor recommends assembly by an adult.
Allow up to 20 minutes for assembly, not including initial charge time.
Allow up to 12 hours for initial charge (see page 3 for charging information).
BEFORE YOU BEGIN
WARNING: DO
NOT USE NON-RAZOR
PRODUCTS WITH YOUR
RAZOR ELECTRIC WAGON.
The Electric Wagon has been
built to certain Razor design
specifications. The original
equipment supplied at the time of
sale was selected on the basis of
its compatibility with the body and
all other parts. Certain aftermarket
products may or may not be
compatible.
q Required Tools
Rubber mallet/hammer
Body
Rear Axle
2 front wheels
2 rear wheels
Rear Board
Side Board (Left)
Side Board (Right)
Front Board
Fixed clips
Clip tool
Handle
Handle Axle
Umbrella/cup holder

SET-UP
q Charging the Battery
Your Electric Wagon may not have a fully charged battery; therefore you must charge the battery prior to use.
•Initial charge time: 12 hours • Run time: up to 40 minutes
•Recharge time: up to 8 hours • Average battery life: 250 charge/discharge cycles
•Fully charge once a month when not in use • Do not store below 32 degrees - this can damage the battery.
1Align the groove on the charger
port with the corresponding tab
on the Electric Wagon socket and
insert into socket.
Note: The charger works with the
power switch in either the on or off
position.
2Plug the charger plug into a
wall outlet.
WARNING:
Rechargeable batteries are only to
be charged under adult supervision.
Always disconnect your Electric
Wagon from the charger before
cleaning with liquid.
Note: If your charger does not
look like the one illustrated,
your unit has been supplied
with an alternative charger.
The specifications and charging
procedure would not change.
The charger has a small window
with an LED to indicate the charge
status. Refer to the illustration
on the charger unit for the actual
“charging” and “charged” status
indications for your model charger.
Chargers have built-in over-charge
protection to prevent battery from
being over-charged.
Be sure to properly align the
groove on the charger port with
the corresponding socket on the
body; otherwise, no charging
action will occur.
Charger
Plug Charger
Port
q Assembling the Wagon
1Position the Wagon with
the body up side down on a flat
surface.
2Insert the rear axle into the
hole in the gearbox and slide it
through to the other side.
3Locate the 2 rear wheels
(Rear wheels have gears on the
inside). Slide one wheel over
the axle until it interlocks with
gearbox.
4Insert a fixed clip into the clip
tool.
5Position the fixed clip and
clip tool over the end of the
axle. Using a rubber mallet/
hammer, strike the tool to
securely attach the clip onto the
rear axle.
3

SET-UP
7Repeat steps 5 and 6 to
attach the other rear wheel and
the 2 front wheels.
8Flip the body assembly over. 9Plug the hole on the front
board with the rubber ring.
10 Align holes on the handle
with the holes on the front
board and slide the handle axle
through to the other side.
11 Attach a fixed clip to both
ends of the handle axle to secure
the handle to the front board.
12 Position the front board
assembly to the body and
connect the wires from the
handle to the wires from the
body.
13 Feed the excess wires into
the opening on the main body.
14 Align the front board with the
main body. Lean the front board
slightly forward to hook the side
pegs (See arrows), then pull back to
the upright position while pushing
down on the front board until it
attaches securely into the main
body.
15 To attach the rear board,
lean board slightly forward,
then pull back while pushing
down until rear board is
attached securely to the main
body.
16 Attach the left side board. Make
sure side board is aligned properly
with the front and rear boards before
pushing down.
Note: You may need to push against
the rear board in order to securely
attach the side boards into place.
17 Repeat step 16 for right side
board.
4
18 Attach umbrella/cup holder
and tighten knob.

5
1 Rear board w/Razor logo
2 Side board (left)
3 Side board (right)
4 Front board
5 Handle axle
6 Fixed clip
7 Rubber ring (front board)
8 Handle
9 Pan Phillips Screw
10 Forward/Reverse direction
switch
11 Pan Phillips Tapping Screw
12 Forward/Reverse Direction/
Start switch bracket
13 Forward/Reverse direction
Switch button
14 Start switch button
15 Pan Phillips tapping screw
16 Forward/Reverse direction/
start switch shell
17 Wire connector
18 Protector switch
19 Protect switch fixed socket
20 Hex nut
21 Pan Phillips screw
22 Press spring
23 Protector switch button
24 Protector switch shell
25 Front axle plug
26 Hex nylon lock nut (front axle)
27 Flat washer
28 Fixed clip
29 Axle bushing
30 Wheel cover
31 Wheel strap
32 Rear wheel
33 Front axle bushing
34 Flat washer
35 Front axle (R)
36 Front axle (L)
37 Front wheel
38 Rubber ring
39 Clip nut
40 Rear axle
41 Gear box
42 Main body
43 Charger socket cover
44 Charger socket
45 On/Off switch
46 Wire strap
47 Double face line tie
48 Pan Phillips tapping screw
49 Control module
50 Block of foam (battery)
51 Battery (12V/4.5)
52 Flat Phillips tapping screw
53 Battery cover
54 Seat board
55 Bottom plate
56 Pans Phillips screw
57 Motor
58 Absorber ring
Keep your Electric Wagon running for years with genuine Razor parts. Visit our web site to purchase replacement parts.
(Specifications subject to change without notice.)
OPERATING THE WAGON
Battery Care and Disposal
Periodically recharge battery when not in use or the battery may deplete to a level at which it will not recharge.
Do not store the battery in temperatures above 75° or below -10° F.
Disposal: Your Razor product uses sealed lead-acid batteries which must be recycled or disposed of in an
environmentally sound manner. Do not dispose of a lead-acid battery in a fire. The battery may explode or leak. Do not
dispose of a lead-acid battery in your regular household trash. The incineration, land filling or mixing of sealed lead-
acid batteries with household trash is prohibited by law in most areas. Return exhausted batteries to a federal or state
approved lead-acid battery recycler or a local seller of automotive batteries. If you live in Florida or Minnesota, it is
prohibited by law to throw away lead-acid batteries in the municipal waste stream.
WARNING: If a battery
leak develops, avoid contact with
the leaking acid and place the
damaged battery in a plastic bag.
Refer to the disposal instructions at
left. If acid comes into contact with
skin or eyes, flush with cool water
for at least 15 minutes and contact
a physician.
ELECTRIC WAGON PARTS
1Turn the power switch on.
Located on the wagon body.
2Use the forward/reverse
direction switch to select a
forward or reverse motion.
3Squeeze the button on the
handle to activate power.
CONTAINS SEALED NON-SPILLABLE LEAD BATTERY.
BATTERY MUST BE RECYCLED.

ELECTRIC WAGON PARTS
6
15
16
17
18
19
20
21
22
23
25
26
27
28
29
30
31
32
33
34
35
29
37
40
41
42
43
44
45
46
47
48
49
56
50
51
52
53
54
1
23
36
34
33
14 13 12 11 10 9 8 7 6
24
5 4
38
55
58
57
39

SB 1918 (CALIFORNIA) DECLARATION
YOUR INSURANCE POLICIES MAY NOT PROVIDE COVERAGE FOR ACCIDENTS
INVOLVING THE USE OF THIS ELECTRIC VEHICLE. TO DETERMINE IF COVER-
AGE IS PROVIDED, YOU SHOULD CONTACT YOUR INSURANCE COMPANY OR
AGENT.
7

Razor Limited Warranty
The manufacturer warranties this product to be free of manufacturing defects
for a period of 6 months from date of purchase. This Limited Warranty does
not cover normal wear and tear or any damage, failure or loss caused by
improper assembly, maintenance, or storage or use of the Electric Wagon.
This Limited Warranty will be void if the product is ever
• used in a manner other than for recreation;
• modified in any way;
• rented.
The manufacturer is not liable for incidental or consequential loss or damage
due directly or indirectly to the use of this product.
WARRANTY
Need Help? Visit our web site for replacement parts, product support, live chat and a list of
authorized service centers at www.razor.com or call toll-free at 866-467-2967 Monday - Friday
8:00 AM - 5:00 PM Pacific Time.
Patent Pending
Printed in China for:
Razor USA LLC
PO Box 3610
Cerritos, CA 90703
Copyright © 2007 Razor USA, LLC. All rights reserved. RAZOR and the Razor Logo Design
are among the registered trademarks of Razor USA LLC in the United States and/or select
foreign countries.
Razor does not offer an extended warranty. If you have purchased an
extended warranty, it must be honored by the store at which it was
purchased.
For your records, save your original sales receipt with this manual and write
the serial number below.
__________________________________________
Item Number:
25144070
8110107
DO NOT RETURN TO STORE
Do not use this wagon for the first time until you
charged the battery for at least 12 hours.
Failure to follow these instructions may damage
your vehicle and void your warranty.


MANUAL DEL PROPIETARIO
Favor de leer y entender completamente este manual antes
de permitir a su hijo de utilizar este producto
Números de artículo:
25144070
COCHECITO ELÉCTRICO
10

ADVERTENCIA: Conducir el Cochecito Eléctrico puede resultar
una actividad peligrosa. Ciertas condiciones pueden hacer fallar el
equipo sin que ello sea responsabilidad del fabricante. Como sucede
con otros vehículos, el Cochecito ha sido ideado para trasladarse
y, por lo tanto, es posible perder el control, caer y/o encontrarse
en situaciones peligrosas que ningún cuidado extremo, instrucción
o experiencia pueden evitar por completo. En caso de que tales
situaciones se produzcan, su niño puede resultar gravemente herido
o morir, aun cuando se haga uso de equipo de seguridad y otras
precauciones. APLIQUE SIEMPRE EL SENTIDO COMUN.
Este manual contiene muchas advertencias y precauciones acerca de
las consecuencias de no realizar el mantenimiento y las inspecciones
o no utilizar su Cochecito Eléctrico de manera adecuada. Como
cualquier accidente puede producir lesiones e incluso la muerte, no
repetimos la advertencia sobre posibles lesiones serias o muerte
cada vez que se mencione tal posibilidad.
USO APROPIADO DEL JUGUETE Y SUPERVISIÓN DE LOS PADRES
Se requiere la supervisión directa de un adulto todo el tiempo.
Este manual contiene importante información de seguridad. Es
su responsabilidad examinar esta información y asegurarse que
todos los niños comprendan todas las advertencias, precauciones,
instrucciones y pautas sobre la seguridad y garantizar que los
conductores jóvenes sean capaces de hacer un uso seguro y
responsable de este producto. Razor le recomienda que en forma
periódica revise y refuerce la información de este manual con los
conductores jóvenes y que inspeccione y realice el mantenimiento
del vehículo de sus niños para garantizar su seguridad.
Todo conductor que no se sienta cómodo sentado en el Cochecito
Eléctrico debe evitar conducirlo.
La decisión de los padres de permitir a su niño conducir
este producto debe estar basada en la madurez, habilidad y
capacidad del niño para seguir las reglas.
El peso del conductor no necesariamente significa que el tamaño
de una persona es el adecuado para sentirse cómodo o mantener el
control del Cochecito Eléctrico.
Consulte otras advertencias en la sección sobre seguridad.
PRÁCTICAS Y CONDICIONES ACEPTABLES DE USO
Se requiere la supervisión directa de los padres. El Cochecito
Eléctrico fue diseñado para utilizarse bajo condiciones controladas
en lugares donde no hay peligros potenciales de tráfico. Por lo
tanto, no lo conduzca por las vías públicas ni sobre las aceras. No
permita a su niño conducir el Cochecito Eléctrico en áreas algunas
donde está presente tráfico de vehículos. Nunca utilizarlo cerca de
escalones, caminos inclinados particulares, cuestas, carreteras,
pasadizos estrechos o piscinas.
No conduzca el Cochecito Eléctrico con clima húmedo. Use el juguete
sólo sobre superficies sólidas, lisas, limpias y secas, pavimentadas
o niveladas. Las superficies húmedas, resbaladizas, desiguales o
ásperas pueden dañar la tracción y propiciar posibles accidentes. No
conduzca el Cochecito Eléctrico en lodo, hielo, charcos o agua. Evite
las velocidades excesivas asociadas a los descensos por cuestas.
Nunca se arriesgue a dañar superficies tales como alfombras o pisos
por utilizar el Cochecito en interiores. No conducir durante la noche o
cuando se vea perjudicada la visibilidad.
USO DEL CARGADOR
El cargador provisto con el Cochecito Eléctrico debe ser examinado
con regularidad para determinar la existencia de daños en el cable
de conexión, enchufe, compartimiento y demás piezas y, en caso de
que tal daño exista, no se deberá cargar la batería hasta que sea
reparado o reemplazado el cargador.
Use sólo el cargador recomendado.
El cargador no es un juguete.
Antes de frotar con un trapo su cochecito y limpiarlo con líquido,
siempre desconéctelo del cargador.
CONTIENE BATERÍA SELLADA DE PLOMO. SE DEBE RECICLAR LA
BATERÍA.
SI NO APLICA EL SENTIDO COMÚN Y NO PRESTA
ATENCIÓN A LAS ADVERTENCIAS ARRIBA
MENCIONADAS, AUMENTA EL RIESGO DE SUFRIR
LESIONES SERIAS. USE EL JUGUETE CON LA
DEBIDA PRECAUCIÓN Y PRESTE MUCHA ATENCIÓN
PARA UTILIZAR ESTE JUGUETE DE MANERA
SEGURA.
ADVERTENCIAS DE SEGURIDAD
11
Advertencias de seguridad ......................................... 11
Para comenzar............................................................ 12
Preparación ........................................................... 13-14
Utilizar el Cochecito.................................................... 15
Piezas del Cochecito Eléctrico............................... 15-16
Garantía ...................................................................... 18
CONTENTS

12
¿Necesita asistencia? Visite nuestro sitio web para obtener actualizaciones, chat en vivo por
Internet y una lista de centros de servicio autorizados en www.razor.com o comuníquese gratis al
866-467-2967 de lunes a viernes de 8:00 AM a 5:00 PM hora del Pacífico.
Adaptador de alimentación
Retire el contenido de la caja. Retire los separadores de espuma que evitan que los componentes se dañen durante el
transporte. Revise el contenido de la caja, para corroborar que no haya abolladuras ni cables enrollados, lo que podría
haber ocurrido durante el transporte.
q Tiempo estimado de armado y preparación
Razor recomienda el armado por un adulto.
Calcule hasta unos 20 minutos para el armado, sin incluir el tiempo de carga inicial.
Deje transcurrir hasta 12 horas para la carga inicial (vea la página 13, donde encontrará información sobre la
operación de carga).
ANTES DE COMENZAR
ADVERTENCIA:
ADVERTENCIA: NO USE
PRODUCTOS QUE NO
SEAN DE MARCA RAZOR
CON EL COCHECITO
ELÉCTRICO RAZOR.
El Cochecito ha sido
construido según ciertas
especificaciones de
fabricación de Razor. El
equipo original suministrado
con el cochecito al
momento de la venta fue
seleccionado con base en
su compatibilidad con el
bastidor y el resto de las
piezas del juguete. Ciertos
productos del mercado
secundario podrían no ser
compatibles.
q Herramientas requeridas
Martillo/mallete de hule
Bastidor
Eje trasero
2 Ruedas delanteras
2 Ruedas traseras
Panel trasero
Panel lateral (izquierdo)
Panel lateral (derecho)
Panel delantero
Sujetadores fijos
Herramienta de sujeción
Palanca
Eje de palanca
Parasol / Portatazas

PREPARACIÓN
q Cargar la batería
Su Cochecito Eléctrico puede tener la batería no totalmente cargada; por eso, se recomienda cargar la batería antes
del uso.
• Tiempo de carga inicial: 12 horas • Tiempo de funcionamiento: hasta de 40 minutos
• Tiempo de recarga: hasta de 8 horas • Duración promedio de la batería: 250 ciclos de carga y descarga
• Si está fuera de uso, cargue completamente • No debe guardar la batería debajo de 32˚F, para evitar daño
el vehículo una vez al mes alguno en la misma
1Alinear la ranura en el puerto de
cargador con la oreja del receptáculo
del cochecito y enchufar.
Nota: El cargador funciona
independientemente de que el
interruptor de encendido esté en
posición encendido o apagado.
2Conecte la clavija del cargador
en una toma de corriente de pared.
ADVERTENCIA:
Las baterías recargables deben
cargarse únicamente bajo la
supervisión de un adulto. Siempre
desconecte su Cochecito Eléctrico
del cargador antes de limpiarlo con
líquido.
Nota: Si el cargador no es similar
al que se ve en la ilustración, el
cargador suministrado con su
vehículo es un modelo alternativo.
Sin embargo, las especificaciones
y el procedimiento de carga no
deberían cambiar.
El cargador tiene una ventanilla
con uno o dos diodos luminosos
(LED) que indican el estado de la
carga. Remítase a la ilustración en
la unidad del cargador para saber
cuándo el modelo específico que
usted tiene se está cargando o se
terminó de cargar.
Los cargadores incorporan una
protección de sobrecarga para no
recargar la batería.
Alinear debidamente la
ranura sobre el puerto del
cargador con el receptáculo
correspondiente del bastidor;
de lo contrario, la carga no se
realizará.
Clavija del
cargador Puerto del
cargador
q Armar el Cochecito
1Colocar el Cochecito en una
superficie plana con el bastidor
al revés.
2Insertar el eje trasero en el
agujero de la caja de engranajes y
deslizarlo hacia el otro lado.
3Localizar las 2 ruedas
traseras (tienen engranajes en
el interior). Deslizar una rueda
sobre el eje hasta que se encaje
con la caja de engranajes.
4Introducir el sujetador fijo en la
herramienta de sujeción.
5Posicionar el sujetador fijo
y la herramienta de sujeción
sobre el extremo del eje.
Utilizando un mallete/martillo
de hule, golpear la herramienta
para fijar seguramente el
sujetador en el eje trasero.
13

PREPARACIÓN
7Repetir las etapas 5 y 6 para
fijar la otra rueda trasera y las 2
ruedas delanteras.
8Poner al revés el conjunto de
bastidor.
9Taponar con el anillo de
hule el agujero en el panel
delantero.
10 Alinear los agujeros en
la palanca con los agujeros del
panel delantero y deslizar el eje
de palanca hacia el otro lado.
11 Juntar un sujetador fijo a
ambos extremos del eje de palanca
para sujetarlo al panel delantero.
12 Posicionar el conjunto
de panel delantero al bastidor
y conectar los cables desde
la palanca a los cables del
bastidor.
13 Introducir los cables
de exceso en la abertura del
bastidor principal.
14 Alinear el panel delantero con el
bastidor principal. Haga inclinar el panel
delantero ligeramente hacia adelante
para sujetar las patas laterales (véase
las flechas), luego tirar hacia atrás en la
posición vertical y presionar hacia abajo
en el panel delantero, hasta que se encaje
firmemente en el bastidor principal.
15 Para sujetar el panel
trasero, inclinar ligeramente
hacia adelante el panel, luego
tirar hacia atrás y presionar
hacia abajo, hasta que se
encaje firmemente en el
bastidor principal.
16 Fijar el panel lateral izquierda.
Asegurarse que el panel lateral
se alinea adecuadamente con los
paneles delantero y trasero antes de
presionarlos hacia abajo.
Nota: Puede ser que necesita presionar
en el panel trasero para encajar los
paneles laterales.
17 Repetir el paso 16 para el
panel derecho.
14
18 Sujetar el parasol /
portatazas y apretar la perilla.

15
1 Panel trasero con logotipo
Razor
2 Panel lateral (izquierda)
3 Panel lateral (derecho)
4 Panel delantero
5 Eje de palanca
6 Sujetador fijo
7 Anillo de hule{(panel delantero)
8 Palanca
9 Tornillo Phillips
10 Interruptor de marcha
adelante/atrás
11 Tornillo taladrador Phillips
12 Soporte de interruptor de
marcha adelante/atrás y de
arranque
13 Botón de interruptor de marcha
adelante/atrás
14 Botón de interruptor de
arranque
15 Tornillo taladrador Phillips
16 Casco de interruptor de marcha
adelante/atrás y de arranque
17 Conector de cable
18 Interruptor protector
19 Enchufe fijo de interruptor
protector
20 Tuerca hexagonal
21 Tornillo Phillips
22 Resorte de presión
23 Botón de interruptor protector
24 Casco de interruptor protector
25 Tapón de eje delantero
26 Tuerca hexagonal de nilón (eje
delantero)
27 Arandela plana
28 Sujetador fijo
29 Cojinete de eje
30 Cubre-rueda
31 Correa de rueda
32 Rueda trasera
33 Cojinete de eje delantero
34 Arandela plana
35 Eje delantero (Der.)
36 Eje delantero (Izq.)
37 Rueda delantera
38 Anillo de hule
39 Tuerca de sujetador
40 Eje trasero
41 Caja de engranajes
42 Bastidor principal
43 Cubierta de receptáculo de
cargador
44 Receptáculo de cargador
45 Interruptor de encendido
On/Off
46 Correa de alambre
47 Enlace de doble cara
48 Tornillo taladrador Phillips
49 Módulo de control
50 Almohadilla de espuma
(batería)
51 Batería (12 V/ 4,5)
52 Tornillo taladrador plano
Phillips
53 Cubre-batería
54 Panel de asiento
55 Placa de fondo
56 Tornillo Phillips
57 Motor
58 Anillo absorbente
Mantenga su Cochecito Eléctrico en buenas condiciones de funcionamiento durante años con las piezas de repuesto originales de Razor. Visíte nuestro sitio web
para comprar piezas de repuesto. (Las especificaciones están sujetas a cambios sin previo aviso.)
UTILIZAR EL COCHECITO
Cuidado y desecho de la batería
Recargar periódicamente la batería si está fuera de uso; de otra manera la batería puede agotarse hasta el punto de
que ya no se puede recargarla.
No almacenar la batería a temperaturas superiores a 75° F (24 oC) o inferiores a -10° F (-24o).
Desecho: El juguete Razor que usted ha adquirido contiene baterías selladas de plomo que se deben reciclar o
desechar sin perjudicar el medio ambiente. No deseche una batería de plomo ácido arrojándola al fuego. Podría
explotar o tener fugas. No deseche una batería de plomo ácido arrojándola al cubo de basura doméstica. La
incineración, enterramiento o mezcla de este tipo de baterías con la basura de la casa están prohibidos por ley en la
mayoría de las áreas. Devuelva las baterías viejas a un agente autorizado de reciclaje de baterías de plomo ácido o
bien a un vendedor de baterías de automóviles. Si vive en Florida o Minnesota, la ley prohíbe arrojar baterías de plomo
ácido al flujo de residuos municipales.
ADVERTENCIA:
Si la batería presenta una fuga,
evite hacer contacto con el ácido
e introdúzcala en una bolsa de
plástico. Consulte las instrucciones
de desecho a la izquierda. Si el
ácido hace contacto con la piel
o los ojos, enjuáguela con agua
fresca durante 15 minutos como
mínimo y consulte al médico.
PIEZAS DEL COCHECITO ELÉCTRICO
1Encender el Cochecito con
el interruptor situado en el
bastidor.
2Utilizar el interruptor de
marcha adelante/atrás para
moverse.
3Oprimir el botón en la palanca
para activar la potencia.
CONTIENE UNA BATERÍA SELLADA DE PLOMO NO VERTIBLE .
DEBE RECICLARSE LA BATERÍA.

UTILIZAR EL COCHECITO
16
15
16
17
18
19
20
21
22
23
25
26
27
28
29
30
31
32
33
34
35
29
37
40
41
42
43
44
45
46
47
48
49
56
50
51
52
53
54
1
23
36
34
33
14 13 12 11 10 9 8 7 6
24
5 4
38
55
58
57
39

DECLARACIÓN SOBRE LA LEY DEL SENADO 1918 (CALIFORNIA)
ES POSIBLE QUE SU PÓLIZA DE SEGURO NO CUBRA ACCIDENTES
RELACIONADOS CON EL USO DE ESTE COCHECITO / VEHÍCULO ELÉCTRICO.
PARA DETERMINAR SI TIENE COBERTURA, DEBERÁ PONERSE EN CONTACTO
CON LA EMPRESA DE SEGUROS O SU AGENTE.
17

Garantía limitada de Razor
El fabricante garantiza que este producto se encuentra libre de defectos de
fabricación por un período de seis (6) meses a partir de la fecha de compra.
Esta garantía limitada no cubre el desgaste normal, los neumáticos, cámaras
o cables ni ningún otro daño, falla o pérdida causado por el incorrecto
armado, mantenimiento, almacenamiento o uso del Cochecito Eléctrico.
Esta Garantía limitada se anula si alguna vez el producto:
• se utiliza de otro modo que no sea para fines recreativos;
• se modifica de cualquier forma;
• se renta.
GARANTÍA
¿Necesita asistencia? Visite nuestro sitio web para obtener actualizaciones, chat en vivo por
Internet y una lista de centros de servicio autorizados en www.razor.com o comuníquese gratis al
866-467-2967 de lunes a viernes de 8:00 AM a 5:00 PM hora del Pacífico.
Patent Pending
Impreso en China para:
Razor USA LLC
PO Box 3610
Cerritos, CA 90703
© Copyright 2007 Razor USA, LLC. Todos los derechos reservados. RAZOR ® y el diseño
del logotipo Razor se encuentran entre las marcas registradas de Razor USA LLC y/o sus
sociedades afiliadas en los Estados Unidos y en países extranjeros selectivos.
El fabricante no es responsable de daños incidentales o consecuentes, ni de
daños debidos directa o indirectamente del uso de este producto.
Razor no ofrece garantías extendidas. Si usted adquirió una garantía
extendida, debe cumplirla la tienda donde la adquirió.
Para sus propios expedientes, guarde el recibo original de venta junto con
este manual y anote debajo el número de serie.
__________________________________________
Número de artículo:
25144070
18 110107
NO DEVUELVA EL
COCHECITO A LA TIENDA
No utilice este cochecito por la primera vez, a
menos que haya cargado la batería por lo menos
durante 12 horas.
El desacatamiento de estas instrucciones podría
dañar su vehículo y anular la garantía.

Other manuals for Electric Wagon
1
This manual suits for next models
1
Table of contents
Languages:
Other Razor Toy manuals

Razor
Razor Bumper Buggie User manual

Razor
Razor POCKET ROCKET User manual

Razor
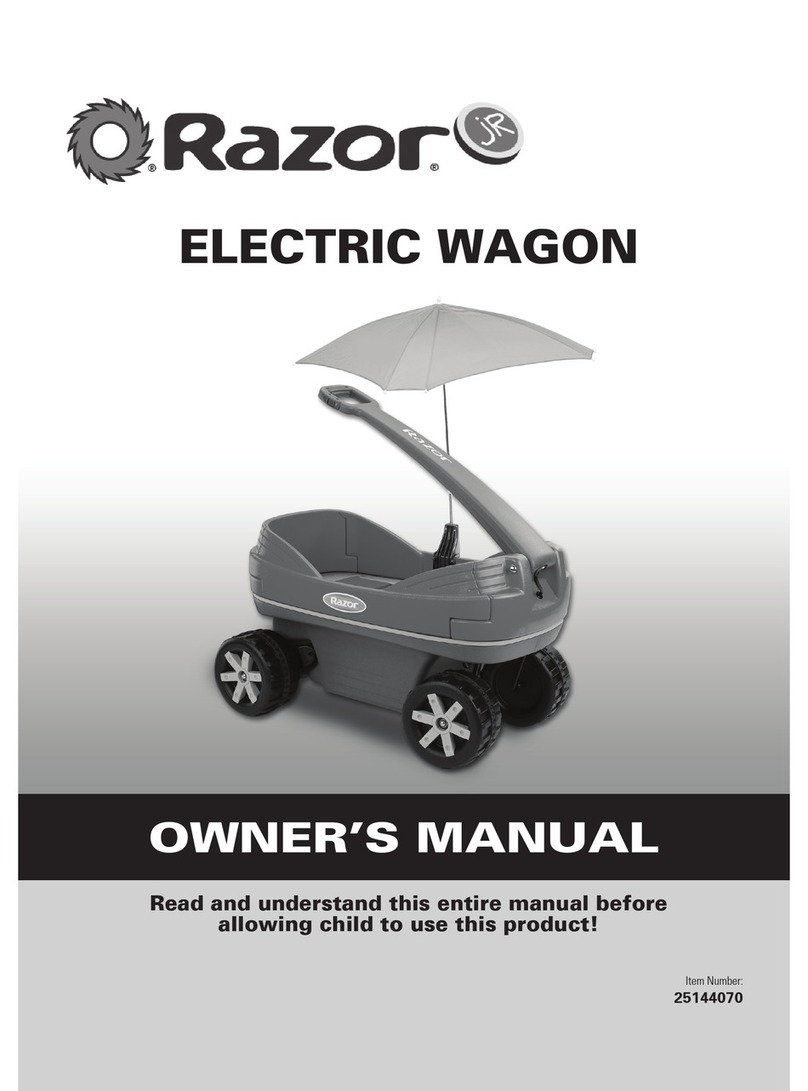
Razor Dirt Rocket SX350 User manual

Razor
Razor Crazy Cart User manual

Razor
Razor Crazy Cart User manual

Razor
Razor Crazy Cart User manual

Razor
Razor Electric Wagon User manual

Razor
Razor Dirt Rocket MX125 User manual

Razor
Razor Dirt Quad User manual