RCA RACM5000-D-AH User manual

Before using your air conditioner, please read
this manual carefully and keep it for future reference.
WINDOW/WALL TYPE
ROOM AIR CONDITIONER
-
Before using your air conditioner, please read
this manual carefully and keep it for future reference.
WINDOW/WALL TYPE
ROOM AIR CONDITIONER
-
Before using your air conditioner, please read
this manual carefully and keep it for future reference.
WINDOW/WALL TYPE
ROOM AIR CONDITIONER
-
Before using your air conditioner, please read
this manual carefully and keep it for future reference.
WINDOW/WALL TYPE
ROOM AIR CONDITIONER
-
Before using your air conditioner, please read
this manual carefully and keep it for future reference.
WINDOW/WALL TYPE
ROOM AIR CONDITIONER
-
Before using your air conditioner, please read
this manual carefully and keep it for future reference.
WINDOW/WALL TYPE
ROOM AIR CONDITIONER
-
Before using your air conditioner, please read
this manual carefully and keep it for future reference.
WINDOW/WALL TYPE
ROOM AIR CONDITIONER
-
Before using your air conditioner, please read
this manual carefully and keep it for future reference.
WINDOW/WALL TYPE
ROOM AIR CONDITIONER
-
Before using your air conditioner, please read
this manual carefully and keep it for future reference.
WINDOW/WALL TYPE
ROOM AIR CONDITIONER
-
Before using your air conditioner, please read
this manual carefully and keep it for future reference.
WINDOW/WALL TYPE
ROOM AIR CONDITIONER
-
Before using your air conditioner, please read
this manual carefully and keep it for future reference.
WINDOW/WALL TYPE
ROOM AIR CONDITIONER
-
Before using your air conditioner, please read
this manual carefully and keep it for future reference.
WINDOW/WALL TYPE
ROOM AIR CONDITIONER
-
Before using your air conditioner, please read
this manual carefully and keep it for future reference.
WINDOW/WALL TYPE
ROOM AIR CONDITIONER
-
TABLE OF CONTENTS
“This product is manufactured and sold by Curtis International Ltd.
RCA, the RCA logo, the two dogs (Nipper and Chipper) logo, are registered trademarks or
trademarks of RCA Trademark
Management and are used under license by Curtis International Ltd.
Any other product, service, company, trade or product name and logo referenced herein are
neither endorsed nor sponsored by
RCA Trademark Management or its affiliates.”
RACM5000-D-AH
RACM5000-E
Installation Instructions
.................................................8
4-7
Normal Sounds
.................................... ......................................
Important Safety Instructions ..........................1-3
Troubleshooting Tip 11-12
.....................................
Air Conditioner Features 8-9
..............................
Care and Cleaning 9
................................................
Specification 10

IMPORTANT SAFETY INSTRUCTIONS
Inside you will find many helpful hints on how to use and maintain your air conditioner
properly. Just a little preventive care on your part can save you a great deal of time
and money over the life of your air conditioner. You'll find many answers to common
problems in the chart of troubleshooting tips. If you review our chart of Troubleshooting
Tips first, you may not need to call for service at all.
To prevent injury to the user or other people and property damage, the following
instructions must be followed. Incorrect operation due to ignoring of instructions may
cause harm or damage. The seriousness is classified by the following indications.
This symbol indicates the possibility of death or serious injury.
Always do this.
Never do this.
CAUTION
This symbol indicates the possibility of injury or damage to property.
WARNING
WARNING
Plug in power plug
properly.
Do not modify power cord length or share the
outlet with other appliances.
Always ensure effective
grounding.
Unplug the unit if strange
sounds, smell, or smoke
comes from it.
Keep firearms away.
Ventilate room before operating air conditioner if there is
a gas leakage from another appliance.
Otherwise, it may cause electric
shock or fire due to excess heat
generation.
It may cause electric shock or fire due to heat generation.
Incorrect grounding may cause
electric shock.
It may cause fire and electric
shock.
It may cause fire.
It may cause explosion, fire and, burns.
It may cause electric shock or fire
due to heat generation.
It may cause electric shock.
It may cause failure of machine
or electric shock.
It may cause fire and electric
shock.
It may cause fire and electric
shock.
It may cause electric shock or fire.
If the power cord is damaged, it must be replaced by the
manufacturer or an authorised service centre or a similarly
qualified per son in order to avoid a hazard.
This could damage your health.
Incorrect installation may cause
fire and electric shock.
It may cause electric shock.
It may cause an explosion or fire.
It may cause failure and electric shock.
Do not operate or stop the
unit by inserting or pulling
out the power plug.
Do not operate with wet
hands or in damp
environment.
Do not allow water to run
into electric parts.
Do not use the socket if it is
loose or damaged.
Do not use the power cord
close to heating appliances.
Do not damage or use an unspecified power
cord.
Do not direct airflow at room occupants only.Always install circuit
breaker and a dedicated
power circuit.
Do not open the unit during operation.
Do not use the power cord near flammable gas
or combustibles, such as gasoline, benzene,
thinner, etc.
Do not disassemble or modify unit.
!!
!!
!!
!!
!!
!!
!!!!
READ THIS MANUAL
1

When the air filter is to be
removed, do not touch the metal
parts of the unit.
It may cause an injury.
Do not clean unit when power is on
as it may cause fire and electric shock,
it may cause an injury.
Operation with windows opened
may cause wetting of indoor and
soaking of household furniture.
When the unit is to be cleaned,
switch off, and turn off the circuit
breaker.
Use caution when unpacking and
installing. Sharp edges could cause injury.
Do not clean the air conditioner
with water.
Water may enter the unit and
degrade the insulation. It may
cause an electric shock.
This could injure the pet or plant.
It may cause electric shock and
damage.
Do not put a pet or house plant
where it will be exposed to direct
air flow.
Ventilate the room well when
used together with a stove, etc.
An oxygen shortage may occur.
Do not use this air conditioner to
preserve precision devices, food,
pets, plants, and art objects.It may
cause deterioration of quality, etc.
It may cause failure of product or
fire.
Do not use for special purposes.
If water enters the unit, turn the unit off at the power
outlet and switch off the circuit breaker. Isolate
supply by taking the power-plug out and contact a
qualified service technician.
!!
!!
!!
!!
It may cause failure of appliance
or accident.
Appearance may be deteriorated
due to change of product color or
scratching of its surface.
If bracket is damaged, there is
concern of damage due to falling
of unit.
There is danger of fire or electric
shock.
Operation without filters maycause
failure.
It contains contaminants and
could make you sick.
Stop operation and close the
window in storm or hurricane.
!!
Do not use strong detergent
such as wax or thinner but use
a soft cloth.
Ensure that the installation bracket of the
outdoor appliance is not damaged due
to prolonged exposure.
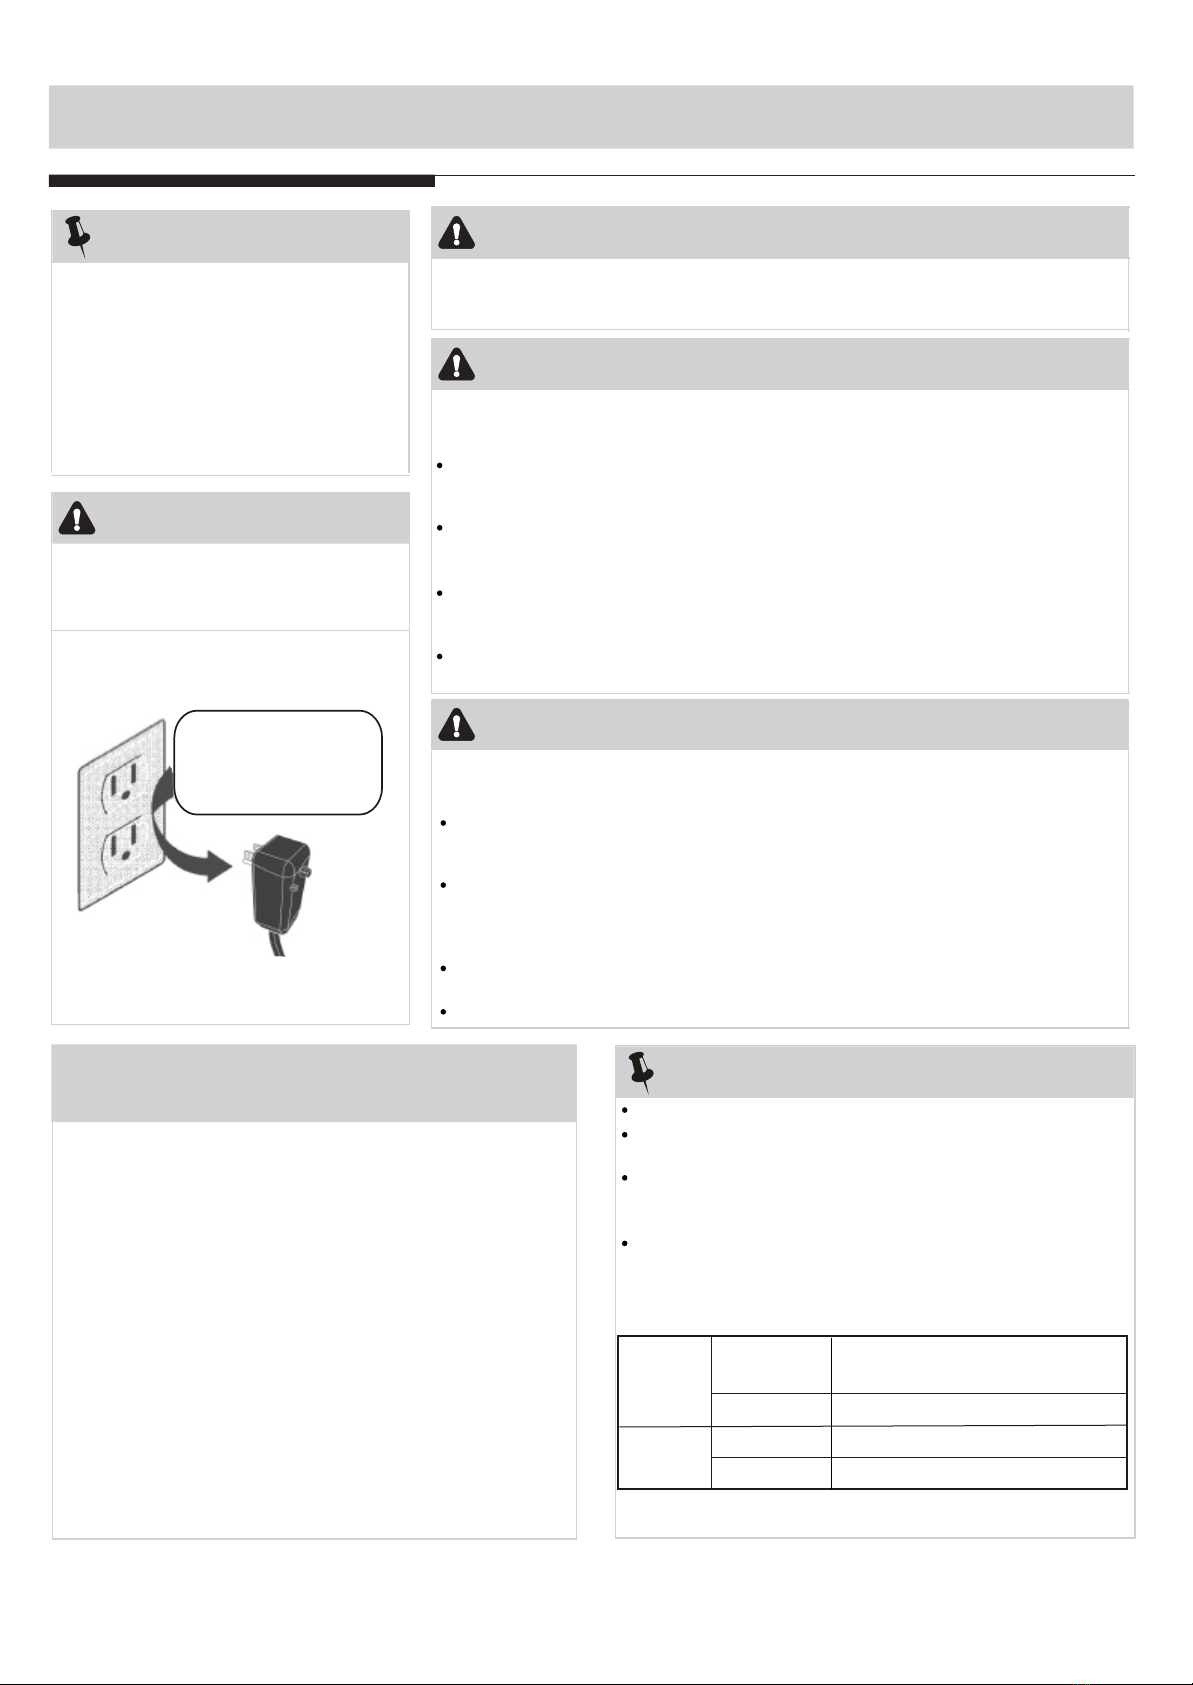
Hold the plug by the head of the
power plug when taking it out.
!!
Turn off the main power
switch when not using the
unit for a long time.
!!
!!
!!
Always insert the filters securely.
Clean filter once every two weeks.
!!
Do not place heavy object on the power
cord and ensure that the cord is not
compressed.
Do not drink water drained
from air conditioner.
This appliance is not intended for use by persons
(including children) with reduced physical ,sensory
or mental capabilities or lack of experience and
knowledge,unless they haveb eengivensu pervision
or instruction concerning use of the appliance by
a person responsible for their safety.
Children should be supervised to ensure that they
do not play with the appliance.
If the supply cord is damaged, it must be replaced
by the manufacturer, its service agent or similarly
qualified persons in order to avoid a hazard.
CAUTION
2
CAUTION
Do not place obstacles around
air-inlets or inside of air-outlet.
The appliance shall be installed in accordance
with national wiring regulations.
Do not operate your air conditioner in a wet room
such as a bathroom or laundry room.
The appliance with electric heater shall have at
least 1 meter space to the combustible materials.
Contact the authorised service technician for
repair or maintenance of this unit.
Contact the authorised installer for installation
of this unit.
IMPORTANT SAFETY INSTRUCTIONS

Do not, underany
circumstances, cut,
remove, or bypass
the grounding prong.
Power supply cord
with 3-prong groundingplug
and current detection device
Grounding type wall
receptacle
WARNING
NOTE:
The power supply cord with this air
conditioner contains a current detection
device designed to reduce the risk of fire.
Please refer to the section Operation
of Current Device for details.In the event
that the power supply cord is damaged,
it cannot be repaired-it must be replaced
withac ordf romtheP roductM anufacturer.
Avoid fire hazard or electric shock. Do not
use an extension cord or an adaptor plug.
Do not remove any prong from the power
cord.
WARNING
For Your Safety
WARNING
Prevent Accidents
WARNING
Electrical Information
Do not store or use gasoline or other flammable vapors and liquids in the vicinity
of this or any other appliance.
Operation of Current Device
(Applicable to the unit adopts current detection
device only )
The power supply cord contains a current device that senses
damage to the power cord. To test your power supply cord do
the following:
1. Plug in the Air Conditioner.
2. The power supply cord will have TWO buttons on the plug
head. Press the TEST button, you will notice a click as the
RESET button pops out.
3. Press the RESET button, again you will notice a click as
the button engages.
4. The power supply cord is now supplying electricity to the
unit. (On some products this it also indicated by a light on
the plug head.)
3
To reduce the risk of fire, electrical shock, or injury to persons when using your
air conditioner, follow basic precautions, including the following:
Be sure the electrical service is adequate for the model you have chosen. This
information can be found on the serial plate, which is located on the side of the
the cabinet and behind the grille.
If the air conditioneri s to be installed in a window, you will probably want to clean
both sides of the glass first.I f the windowis a triple-track type with a screen panel
included, remove the screen completely before installation.
Be sure the air conditionerhas been securely and correctly installed according to
the installation instructions in this manual. Save this manual for possible future
use in removing or installing this unit.
When handling the air conditioner, be careful to avoid cuts from sharp metal fins
on front and rear coils.
The complete electical rating of your new room air conditioner is stated on the
serial plate. Refer to the rating when checking the electrical requirements.
Be sure the air conditioner is properly grounded. To minimize shock and fire
hazards, proper grounding is important. The power cord is equipped with a
three-prong grounding plug for protection against shock hazards.
Your air conditioner must be used in a properly grounded wall receptacle. If the
wall receptacle you intend to use is not adequately grounded or protected by a
time delay fuse or circuit breaker, have a qualified electrician install the proper
receptacle. Ensure the receptacle is accessible after the unit installation.
Do not run air conditioner without side protective cover in place.This could
result in mechanical damage within the air conditioner.
Do not use an extension cord or an adapter plug.
IMPORTANT SAFETY INSTRUCTIONS
Do not use this device to turn the unit on or off.
Always make sure the RESET button is pushed in for
correct operation.
The power supply must be replaced if it fails reset when
either the TEST button is pushed, or it cannot be reset. A
new one can be obtained from the product manufacturer.
If power supply cord is damaged, it cannot be repaired. It
MUST be replaced by one obtained from the product
manufacturer.
NOTE:
NOTE:This air conditioner is designed to be operated
under condition as follows:
Cooling
operation
Outdoor temp:
Indoor temp:
Heating
operation
Outdoor temp: O
O
23-76 F/-5-24 C
Indoor temp: O
O
32-80 F/0-27 C
OO OO
64-109 F/18-43 C (64-125 F/18-52 C
for special tropical models)
O
O
62-90 F/17-32 C
Note: Performance may be reduced outside of these
operating temperatures.

4
INSTALLATION INSTRUCTIONS
Read these instructions completely
and carefully.
IMPORTANT- Save these
instructions for local inspector s use.
IMPORTANT- Observe all
governing codes and ordianaces.
Note to Consumer- Keep these
instructions for futrue reference.
Note to Installer- Be sure to leave these
instructions with the Consumer.
Completion time- Approximately 1 hour.
Skill level- Installatio of this appliance
requires basic mechanical skills.
We recommend that two people install
this product.
Proper installation is the responsibility
of the installer.
Product failure due to improper installation
is not covered under the Warranty.
You MUST use all supplied parts and use
proper installation procedures as described
in these instructions when installing this air
conditioner.
BEFORE YOU BEGIN
Do not, under any circumstances, cut or
remove the third (ground) prong from the
power cord.
CAUTION
Do not change the plug on the power cord
of the air conditioner.
Aluminum house wiring may present special
problems- consult a qualified electircian.
When handling unit, be careful to avoid cuts from
sharp metal edges and aluminum fins on front and
rear coils.
TOOLS YOU WILL NEED
Screwdriver
Level
TOOLS YOU MAY USE
Screwdriver
Pencil
Ruler or tape measure
Scissors or knife
Save Carton and these Installation Instructions
for future reference. The carton is the best way
to store unit during winter, or when not in use.
NOTE:
WINDOW REQUIREMENTS
Your air conditioner is designed to install in
standard double hung windows with opening
widths of 23 to 36 inches(584mm to 914mm).
INNER
INTERIOR
WALL
Wooden Windows
WINDOW SILL

5
INSTALLATION INSTRUCTIONS
PREPARE THE WINDOW
11
3/4 (or 1/ )
Screws
(7)
2 Lock Frame
(2)
Sash Lock
(1)
Mounting Hardware
Window sash
seal foam
(1)
PREPARE AIR CONDITIONER
22
C: Align the hole in the top rail with those in the top
of the unit as shown in Fig.B
D: Secure the top rail to the unit with the 3/8 Screws
as shown in Fig.C.
NOTE: For safety reasons, all four(4) screws MUST
be securely fastened.
INSTALL THE ACCORDION PANELS
33
NOTE: Top rail and Sliding Panels at each side are
offset to provide the proper pitch to the rear of (5/16 ).
This is
necessary for proper condensed water
utilization and drainage. If you are not using the Side
Panels for any reason, this pitch to the rear must be
maintained.
A.Place unit on floor, a bench or
a table. Hold the Accordion
Panel in one hand and gently
pull back the center to free the
open end. See Fig.1
Fig.1
Lower sash must open sufficiently to allow a clear
vertical opening of 13 inches (330mm). Side louvers
and the rear of the AC must have clear air space to
allow enough airflow through the condenser, for heat
removal. The rear of the unit must be outdoors, not
inside a building or garage.
A: Remove the air conditioner from the carton and
place on a flat surface.
B: Remove top rail from the rear of the packaging
material as shown in Fig. A.
Packaging
Fig.A
Top Rail
Fig.B
Fig.C
Top Rail Hardware
3/8 Screws
(4)
Top Rail
(1)
or
Top Rail Hardware
3/8 Screws
(4)
Top Rail
(1)
or

6
INSTALLATION INSTRUCTIONS
SECURE THE ACCORDION PANELS
44
B. Slide the free end " " section of the panel directly
into the cabinet as shown in Fig. 2. Slide the panel
down. Be sure to leave enough space to slip the
top and bottom of the frame into the rails on the
cabinet.
Fig.2
" "section
C. Once the panel has been installed on the side of
the cabinet, make sure it sits securely inside the
frame channel by making slight adjustments.
Slide the top and bottom ends of the frame into the
top and bottom rails of the cabinet. Fig.3.
D. Slide the panel all the way in and repeat on the
other side.
Top Rail
Bottom Rail
Fig.3
A.Keep a firm grip on the air conditioner, carefully
place the unit into the window opening so the bottom
of the air conditioner frame is against the window
sill (Fig.5). Carefully close the window behind the top
rail of the unit.
Fig.5
NOTE: Check that air conditioner is tilted back about
O
5/8 to 3/4 (tiltedabout 3 to4 downwardtothe outside).
After proper installation, condensate should not drain
from theoverflowdrain hole duringnormalu se,correct
the slope otherwise.
O
B.Extend the side panels out against the window
frame (Fig.6).
window
frame
Fig.6
INSTALL SUPPORT BRACKET
55
A.Place the frame lock between the frame
extensions and the window sill as shown(Fig.7).
Drive 3 / 4 (19mm)or 1 locking screws
through the frame lock and into the sill .
NOTE: To prevent window sill from splitting,drill
1 / 8" (3mm) pilot holes before driving screws.
/ 2 "(12.7mm)
"
Fig.7
NOTE: If storm window blocks AC, see Fig. 11.
Top Rail
Bottom Rail
Top left
Top right
Fig.4
Wooden Windows
INSIDE
OUTSIDE
About 5/8 to 3/4
Measure from the cabinet edge

7
INSTALLATION INSTRUCTIONS
B.Drive 1/2" (12.7mm) locking
screws through frame holes into window sash (Fig.8).
3/4" (19mm) or
Fig.8
C.To secure lower sash in place, attach right angle
sash lock with 3/4" (19mm) or 1 screw as
shown(Fig.9).
/2" (12.7mm)
Fig.9
D.Cut and insert it in the
space between the upper and lower sashes (Fig.10).
Window sash seal foam
Fig.10
FOAM SEAL
If AC is Blocked by Storm Window
Add wood as shown in Fig.11, or remove storm
window before air conditioner is installed.
If Storm Window Frame must remain, be sure the
drain holes or slots are not caulked or painted shut.
Accumulated Rain Water or Condensation must be
allowed to drain out.
Removing AC From Window
Turn AC off, and disconnect power cord.
Remove sash seal from between windows, and
unscrew safety sash lock.
Remove screws installed through frame and frame-
lock.
Close (slide) side panels into frame.
Keeping a firm grip on air conditioner, raise sash
and carefully remove.
Be carefully not to spill any remaining water while
lifting unit from window. Store parts WITH air
conditioner.
Board
thickness
as required,
for proper
pitch to rear,
along entire
sill. Fasten
with nails or
screws.
Fig.11
Storm window
frame or other
obstruction.
SASH
1-1/2"min
(38 mm)

NORMAL SOUNDS
All the illustrations in this manual are for explanation purpose only. Your air
conditioner may be slightly different. The actual shape shall prevail.
AIR CONDITIONER FEATURES
8
Sound of RushingAir
At the frontof the unit,you may
hear the soundof rushing air
being moved bythe fan
High Pitched Chatter
High efficiency compressors
may have ahigh pitched chatter
during the coolingcycle.
Gurgle/Hiss
Gurgling or hissing noise may
be heard dueto refrigerant
passing through evaporator
during normal operation.
Pinging or Switching
Droplets of waterhitting condenser
during normal operationmay cause
pinging or switching sounds.
Vibration
Unit may vibrateand make noise
because of poorwall or window
construction or incorrectinstallation.
NOTE:
CAUTION
Please always wait 3 minutes when turning unit off
then on again, and when changing from cool to fan
and back to cool. This prevents compressor from
overheating & possible circuit breaker tripping.
WARNING
!!
To reduce the risk of fire, electric shock, or injury to
persons, read the IMPORTANT SAFETY
INSTRUCTIONS before operating this appliance.
To begin operating the air conditioner, follow these steps:
1. Set the thermostat to the highest number (coldest or
cooler setting).
2. Set the selector control to the highest COOL setting.
3. Adjust the louver for comfortable air flow (see Air
Directional Louvers).
4. Once the room has cooled, adjust the thermostat to the
setting you find most comfortable.
5. Make sure that the air flow inside and outside are not
obstructed by anything.
Air Directional Louvers
Lever
Air Direction
The louvers will allow you to direct the air flow Left or
Right throughout the room as needed.
Move the Levers from side to side until the desired
Left/Right direction is obtained.

AIR CONDITIONER FEATURES
CARE AND CLEANING
CAUTION
Clean your air conditioner occasionally to keep it looking
new. Be sure to unplug the unit before cleaning to
prevent chock or fire hazards.
9
Air Filter Cleaning
The air filter should be checked at least once a month to see
if cleaning is necessary. Trapped particles in the filter can
build up and cause an accumulation of frost on the cooling
coils.
Air Filter Cleaning
Note: Never use hot water over 40 C(104 F) to clean the
air filter. Never attempt to operate the unit without the air
filter.
Cabinet Cleaning
Be sure to unplug the air conditioner to prevent shock or fire
hazard. The cabinet and front may be dusted with an oil-free
cloth or washed with a cloth dampened in a solution of warm
water and mild liquid dishwashing detergent. Rinse thoroughly
and wipe dry.
Never use harsh cleaners, wax or polish on the cabinet front.
Be sure to wring excess water from the cloth before wiping
around the controls. Excess water in or around the controls
may cause damage to the air conditioner.
Plug in air conditioner.
Remove the filter by sliding out from the right-hand side.
Wash the filter using liquid dishwashing detergent and warm
water. Rinse filter thoroughly. Gently shake excess water
from the filter. Be sure the filter is thoroughly dry before
replacing. Or, instead of washing you may vacuum the filter
clean.
UNIT CONTROL
TEMPERATURE
min
cool
max
cool
COOLING
1
4
5
6
7
2
3
lo
fan
lo
cool
hi
cool
hi
fan
OFF
The controls featured in this manual are representative of many available models.
Your model may offer slightly different features.
NOTE:
Cool Mode
The desired cool setting is selected by rotating the knob to the right to the
appropriate location.
HI COOL has maximum cooling effect and airflow.
LO COOL has minimum cooling effect and airflow.
Fan Mode
Rotate the knob to the left to select your choice of fan speeds for air circulation.
NOTE: When selecting a fan speed, the compressor will not run.
Thermostat
The thermostat is used to set the desired room temperature when the unit is being
operated in the COOL MODE.
To set the desired room temperature, rotate the thermostat switch to the desired
setting. After the set temperature is achieved the thermostat will automatically start
and stop the compressor in order to maintain the desired set temperature.
Rotate the thermostat selector clockwise for higher cool settings. Higher cool settings
will provide lower room temperature. Rotate the thermostat selector counter clockwise
for lower cool settings. Lower cool settings will provide higher room temperature.
Winter Storage
If you plan to store the air conditioner during the winter,
remove it carefully from the window according to the
installation instructions. Cover it with plastic or return it to
the original carton.


TROUBLESHOOTING TIPS
Before calling for service, review this list. It may save your time and expense. This list includes common
occurrences that are not the result of defective workman-ship or materials in this appliance.
Solution
Air conditioner
does not start
Wall plug disconnected. Push plug firmly into wall outlet.
House fuse blown or circuit breaker tripped. Replace fuse with time delay type or
reset circuit breaker.
Plug Current Device Tripped. Press the RESET button.
Problem
Air from unit does
not feel cold
enough
Set to a Lower temperature.
OO
Room temperature below 62 F(17 C ). Cooling may not occur until room temperature
OO
rises above 62 F(17 C).
Thermostat set too cold for night-time cooling. To defrost the coil, set to FAN ONLY
mode. Then, set temperature to a Higher setting.
Temperature sensing behind air filter element touching cold coil. Keep it from the cold
coil.
Air filter may be dirty. Clean filter. Refer to Care and Cleaning section. To defrost,
set to FAN ONLY mode.
Power is OFF. Turn power ON.
Air conditioner
cooling, but room
is too warm- ice
forming on cooling
coil behind
decorative front.
OO
Outdoor temperature below 64 F(18 C). To defrost the coil, set FAN ONLY mode.
Compressor stopped when changing modes. Wait for 3 minutes after set to the COOL
mode.
11
Dirty air filter- air restricted. Clean air filter. Refer to Care and Cleaning section.
Unit recently turned on in hot room. Allow additional time to remove Stored heat from
walls, ceiling, floor and furniture.
Air conditioner
cooling, but room
is too warm- NO
ice forming on
cooling coil behind
decorative front.
Temperature is set too High, set temperature to a Lower setting.
Air directional louvers positioned improperly. Position louvers for better air distribution.
Front of units is blocked by drapes, blinds, furniture, etc. - restricts air distribution.
Clear blockage in front of unit.
Doors, windows, registers, etc. Open- cold air escapes. Close doors, windows, registers.
Air conditioner turns on
and off rapidly
Noise when unit is
cooling
Dirty air filter- air restricted. Clean air filter.
Air movement sound. This is normal . If too loud, set to a slower FAN setting.
Outside temperature extremely hot. Set FAN speed to a Higher setting to bring air past
cooling coils more frequently.
Window vibration - poor installation. Refer to installation instructions or check with installer.

TROUBLESHOOTING TIPS
Solution
Problem
Water dripping
INSIDE when
unit is cooling.
Improper installation. Tilt air conditioner slightly to the outside to allow water drainage.
Refer to installation instructions - check with installer.
Water dripping
OUTSIDE when
unit is cooling.
Remote Sensing
Deactivating
Prematurely
(some models)
Remote control not located within range. Place remote control within 20 feet & 180 ,
radius of the front of the unit.
Remote control signal obstructed. Remove obstruction.
Room too cold
Set temperature too low. Increase set temperature.
Unit removing large quantity of moisture from humid room. This is normal during
excessively humid days.
12

The design and specifications are subject to change without prior notice for product
improvement. Consult with the sales agency or manufacturer for details.

CLIMATISEUR D'INTÉRIEUR
À INSTALLATION MURALE
OU AUX FENÊTRES
RACM5000-D-AH
RACM5000-E
TABLE DE MATIÈRES
Consignes de sécurité importantes ....... 1 à 3
Consignes d'installation......................... 4 à 7
Bruits normaux ...................................... 8
Avant d'utiliser votre climatiseur, veuillez lire
ce manuel et le conserver à titre de référence.
Ce produit est fabriqué et vendu par Curtis International Ltd.
RCA, le logo de la RCA, le logo de deux chiens (Nipper et Chipper), sont des marques
déposées ou des marques déposées de marque RCA
Gestion et sont utilisés sous licence par Curtis International Ltd.
Tout autre produit, service, entreprise, commerce ou produit nom et le logo mentionnés
aux présentes ne sont ni approuvés ni sponsorisés par
Gestion de marque RCA ou de ses filiales.
Caractéristiques du climatiseur ............. 8 à 9
Nettoyage et entretien ........................... 9
Caractéristiques techniques .................. 10
Conseils de dépannage......................... 11 à 12
MANUEL DE
L'UTILISATEUR

Ceci peut causer des décharges électriques ou un
incendie en raison d'une génération de chaleur.
Ceci peut causer des décharges électriques. Ceci peut nuire à votre santé.
1
CONSIGNES DE SÉCURITÉ IMPORTANTES
LISEZ CE MANUEL
Vous y trouverez des conseils utiles sur la manière d'utiliser et d'entretenir correctement votre climatiseur. Un
simple entretien préventif permet d'économiser beaucoup d'argent et de temps pour optimiser la durée de vie
de votre climatiseur. Des réponses aux problèmes rencontrés le plus fréquemment sont disponibles dans le
tableau dédié aux conseils de dépannage. Consulter le tableau dédié aux conseils de dépannage peut vous
épargner un appel au centre de réparation.
Afin d'empêcher toute blessure de l'utilisateur ou de toute autre personne ainsi que l'endommagement de
bien, veuillez respecter strictement les consignes suivantes. Un mauvais fonctionnement en raison du
non-respect des consignes peut résulter en un endommagement ou des blessures. Le niveau de gravité est
classé selon les indications suivantes.
AVERTISSEMENT
AVERTISSEMENT
Branchez la fiche de
manière adéquate.
Installez toujours un
disjoncteur ou un circuit
électrique dédié.
Assurez toujours une mise à la
terre adéquate.
Débranchez l'unité en cas de
bruits étranges, d'odeur ou de
fumée se dégageant.
N'utilisez pas de prise de
courant qui soit desserrée ou
endommagée.
N'ouvrez pas l'unité pendant son fonctionnement.
Conservez toute arme à feu
hors de portée.
N'utilisez pas le cordon
d'alimentation à proximité
d'appareils de chauffage.
N'utilisez pas le cordon d'alimentation à proximité d'une
source de gaz ou de combustibles inflammables,
notamment de l'essence, du benzène, des solvants, etc.
Assurez une bonne ventilation de la pièce avant de faire fonctionner
le climatiseur en cas de fuite de gaz d'un autre appareil.
Ne tentez pas de démonter ni de modifier l'unité.
Ne laissez en aucun cas de
l'eau pénétrer dans les
composantes électriques.
N'endommagez pas et n'utilisez pas de cordon
d'alimentation non agréé.
N'effectuez aucune manipulation
avec les mains humides ou dans
un environnement humide.
Ne dirigez pas l'écoulement de l'air uniquement vers
les occupants de la pièce.
Dans le cas contraire, ceci peut causer
des décharges électriques ou un
incendie en raison d'une génération de
chaleur excessive.
Une mauvaise installation peut causer un
incendie ou des décharges électriques.
Une mauvaise mise à la terre peut
causer des décharges électriques.
Ceci peut causer un incendie ou des
décharges électriques.
Ceci peut causer un incendie.
Ceci peut causer une explosion, un incendie ou des brûlures.
Ceci peut causer un incendie ou des
décharges électriques.
Ceci peut causer un endommagement de
la machine ou des décharges électriques.
Ceci peut causer un incendie ou des
décharges électriques.
Ceci peut causer des décharges électriques.
Ceci peut causer une explosion ou un incendie.
Ceci peut causer un endommagement ou des décharges électriques.
Ceci peut causer des décharges
électriques ou un incendie en raison
d'une génération de chaleur.
Ceci peut causer des décharges électriques ou un incendie.
Si le cordon d'alimentation est endommagé, celui-ci doit être remplacé par
le fabricant, un centre de réparation agréé ou une personne qualifiée afin
d'éviter tout risque.
N'opérez pas et n'arrêtez pas
l'unité en insérant ou en retirant
le cordon d'alimentation.
Ne modifiez pas la longueur du cordon d'alimentation
ni ne partagez la prise avec d'autres appareils.
Ce symbole indique le risque de blessures graves, voire de mort.
Ce symbole indique le risque de blessures ou d'endommagements de bien.
MISE EN GARDE
Ne jamais effectuer cette action. Toujours effectuer cette action.

CONSIGNES DE SÉCURITÉ IMPORTANTES
MISE EN GARDE
MISE EN GARDE
Lorsque le filtre à air doit être retiré,
veuillez ne pas toucher les pièces
métalliques de l'unité.
Ne placez aucun animal domestique ou
plante dans un emplacement directement
exposé à l'écoulement de l'air.
Assurez une bonne ventilation de la
pièce lorsqu'elle est associée à un
four, etc.
N'utilisez pas l'unité à des fins
spécifiques.
Assurez-vous que la fixation
d'installation pour la partie de l'appareil
située à l'extérieur n'est pas
endommagée en raison d'une
exposition prolongée.
Basculez le commutateur électrique
principal en position d'arrêt lorsque
vous n'utilisez pas l'unité pendant une
longue période.
Ne buvez en aucun cas l'eau
s'écoulant du climatiseur.
Ne nettoyez pas le climatiseur à l'eau.
Lorsque l'unité doit être nettoyée,
éteignez-la et désactivez le disjoncteur.
Ne tirez jamais le câble lorsque vous
débranchez la fiche électrique.
Ne placez aucun objet lourd sur le
cordon d'alimentation et assurez-vous
que le cordon n'est pas comprimé.
N'utilisez aucun détergent puissant,
notamment de la cire ou un solvant,
mais plutôt un chiffon doux.
Arrêtez d'utiliser l'unité et fermez la
fenêtre en cas d'orage ou d'ouragan.
Fixez toujours les filtres fermement.
Nettoyez le filtre une fois toutes les deux
semaines.
Ne placez aucun obstacle autour des
entrées d'air ou à l'intérieur des sorties
d'air.
Procédez au déballage et à l'installation avec
précaution. Des bords coupants peuvent causer
des blessures.
Si de l'eau pénètre l'unité, débranchez cette dernière
depuis la prise électrique et désactivez le disjoncteur.
Isolez l'alimentation en débranchant la fiche électrique et
contactez un technicien de service qualifié.
Cela peut causer une blessure. Ceci peut être nocif pour vos animaux de
compagnie et vos plantes.
Un manque d'oxygène risque de se produire.
Le climatiseur n'est pas destiné à être utilisé pour
conserver des appareils de précision, de la
nourriture ou des objets d'art, car cela pourrait,
entre autres, nuire à leur qualité, ou pour des
animaux de compagnie ou des plantes.
L'eau peut pénétrer l'unité et dégrader l'isolation.
Ceci peut causer des décharges électriques.
Ne nettoyez pas l'unité lorsqu'elle est sous tension
afin d'éviter les risques d'incendie ou de décharges
électriques, voire de blessures.
Ceci peut causer des décharges électriques ou des
dommages.
Cela peut endommager l'appareil ou
déclencher un incendie.
Il contient des contaminants et peut nuire à
votre santé.
Il existe un risque de décharges électriques ou
d'incendie.
Un endommagement de la fixation peut mener à
une chute de l'unité.
L'apparence peut être détériorée en raison de la
décoloration ou d'éraflures.
Un fonctionnement avec des fenêtres ouvertes peut
causer l'humidification de votre intérieur et des
meubles de maison.
Un fonctionnement sans filtre peut causer des
dommages.
Cela peut endommager l'appareil ou mener à un
accident.
Cet appareil n'est pas destiné à être utilisé par des personnes
(incluant des enfants) aux capacités physiques, sensorielles
ou mentales réduites ou par des personnes manquant
d'expérience et de connaissances. Exception peut être faite
lorsque cette utilisation est sous supervision ou que des
consignes sur la façon d'utiliser l'appareil leur ont été données
par la personne responsable de leur sécurité.
Les enfants devraient être surveillés afin de s'assurer qu'ils ne
jouent pas avec l'appareil.
Si le cordon d'alimentation est endommagé, celui-ci doit être
remplacé par le fabricant, son réparateur agréé ou une
personne qualifiée afin d'éviter un risque.
Le présent appareil devra être installé conformément aux
réglementations nationales en matière de câblage.
Vous ne devez pas faire fonctionner le climatiseur dans une
pièce humide (p. ex. dans une salle de bain ou une buanderie).
Les appareils équipés d'un radiateur électrique doivent être
situés à au moins 1 mètre des matériaux combustibles.
Contactez un technicien d'entretien agréé pour procéder aux
réparations ou aux opérations de maintenance sur cet appareil.
Contactez l'installateur agréé pour l'installation de cet appareil.

CONSIGNES DE SÉCURITÉ IMPORTANTES
REMARQUE : AVERTISSEMENT
AVERTISSEMENT
AVERTISSEMENT
Le cordon d'alimentation de ce climatiseur
contient un appareil de détection de courant
conçu pour réduire les risques d'incendie.
Veuillez vous reporter à la section
Fonctionnement de l'appareil de détection de
courant pour de plus amples informations. En
cas d'endommagement du cordon
d'alimentation, il ne peut être réparé et doit
être remplacé uniquement par un cordon
provenant du fabricant.
Le cordon d'alimentation électrique contient un appareil de courant
qui détecte les endommagements du cordon d'alimentation. Pour
tester votre cordon d'alimentation, suivez la procédure ci-dessous :
1. Branchez le climatiseur.
2. Le cordon d'alimentation électrique dispose de DEUX boutons
situés sur la tête de la fiche. Appuyez sur le bouton TEST
(ESSAI), vous entendrez un clic une fois que le bouton RESET
(RÉINITIALISER) se déclenche.
3. Appuyez sur le bouton RESET (RÉINITIALISER), vous entendrez
à nouveau un clic une fois que le bouton s'enclenche.
4. Le cordon d'alimentation permet alors le passage de l'électricité
vers l'unité. (Sur certains produits, l'alimentation de l'unité est
représentée par un voyant sur la tête de la fiche.)
Réceptacle mural avec
mise à la terre
En aucun cas et sous
aucune circonstance,
ne coupez, retirez, ni ne
dérivez la broche de
mise à la terre.
Le cordon d'alimentation électrique avec
une fiche à trois broches de mise à la terre
et un appareil de détection de courant
Évitez toute décharge électrique et tout risque
d'incendie. N'utilisez aucune rallonge électrique
ni aucun adaptateur pour prise.
Ne retirez aucune broche du cordon
d'alimentation.
Fonctionnement de l'appareil de détection
de courant
(Uniquement applicable à l'unité avec un appareil de
détection de courant)
Pour votre sécurité
Ne conservez ni n'utilisez d'essence ni tout autre liquide ou vapeur inflammables à
proximité de cette unité ou de tout autre appareil.
Prévention d'accidents
Afin de réduire les risques d'incendie, de décharges électriques ou de blessures lors de
l'utilisation de votre climatiseur, veuillez suivre les précautions de base suivantes :
● Assurez-vous que les caractéristiques électriques correspondent au modèle que vous avez
choisi. Ces informations sont disponibles sur la plaque signalétique située sur le côté du capot
et derrière la grille.
● Si le climatiseur doit être installé dans l'encastrement d'une fenêtre, vous devrez probablement
nettoyer la vitre des deux côtés. Si la fenêtre est à triple battant avec un panneau moustiquaire
inclus, veuillez retirer complètement la moustiquaire avant l'installation.
● Assurez-vous que le climatiseur est correctement installé selon les consignes d'installation
prévues dans ce manuel. Conservez ce manuel pour un démontage ou une installation futurs.
● Lorsque vous manipulez ce climatiseur, faites attention aux coupures en raison des ailettes
métalliques tranchantes des bobines à l'avant et à l'arrière.
Informations électriques
Les caractéristiques électriques complètes de votre nouveau climatiseur d'intérieur sont
mentionnées sur la plaque signalétique. Reportez-vous à ces caractéristiques lorsque vous
vérifiez les exigences électriques.
● Assurez-vous que le climatiseur est correctement mis à la terre. Afin de minimiser les risques
de décharges électriques et d'incendie, une mise à la terre minutieuse est importante. Le
cordon d'alimentation est équipé d'une fiche à trois broches de mise à la terre pour protéger
contre les risques de décharges.
● Votre climatiseur doit être utilisé avec un réceptacle mural correctement mis à la terre. Si le
réceptacle mural que vous souhaitez utiliser n'est pas correctement mis à la terre ni protégé
par un fusible temporisé ou un disjoncteur, veuillez faire installer un réceptacle adéquat par un
électricien qualifié. Assurez-vous que le réceptacle est accessible après l'installation de l'unité.
● Ne faites pas fonctionner le climatiseur sans capot de protection latéral, auquel cas, cela
engendrerait un endommagement mécanique au sein du climatiseur.
● N'utilisez aucune rallonge électrique ni aucun adaptateur pour prise.
● N'utilisez pas cet appareil pour allumer ou éteindre l'unité.
● Veuillez toujours vérifier que le bouton RESET (RÉINITIALISER) est
enfoncé pour assurer un bon fonctionnement.
● La source d'alimentation doit être remplacée en cas de
réinitialisation impossible lorsque le bouton TEST (ESSAI) est
enfoncé ou qu'il ne peut être réinitialisé. Une nouvelle source
d'alimentation peut être obtenue auprès du fabricant du produit.
● Si le cordon d'alimentation est endommagé, il ne pourra pas être
réparé. Il DOIT être remplacé par un autre obtenu auprès du
fabricant du produit.
REMARQUE : ce climatiseur est conçu pour fonctionner dans les
conditions suivantes :
Refroidissement Temp. extérieure : 18 à 43 °C (64 à 109 °F) (18 à 52 °C
[64 à 125 °F] pour les modèles
tropicaux spéciaux)
17 à 32 °C (62 à 90 °F)
-5 à 24 °C (23 à 76 °F)
0 à 27 °C (32 à 80 °F)
Temp. intérieure :
Temp. extérieure :
Temp. intérieure :
Chauffage
Remarque : les performances peuvent être réduites en cas de
températures de fonctionnement en dehors de celles mentionnées.
AVERTISSEMENT
REMARQUE :

584 à 914 mm
(23 à 36 pouces)
PAROI
INTÉRIEURE
APPUI DE
FENÊTRE
ERINNER
Fenêtres en bois
PAROI
EXTÉRIEURE
330 mm
(13 pouces)
au minimum
EXIGENCES POUR LES FENÊTRES
Votre climatiseur est conçu pour être installé dans des
fenêtres à guillotine double standard avec des
ouvertures de 584 à 914 mm (23 à 36 pouces) de large.
OUTILS DONT VOUS AUREZ
PEUT-ÊTRE BESOIN
Un tournevis
Un crayon
Une règle ou un ruban
à mesurer
Une paire de ciseaux ou
un couteau
REMARQUE :
OUTILS NÉCESSAIRES
Un tournevis
Un niveau
CONSIGNES D'INSTALLATION
PRÉCAUTIONS
Veuillez lire l'ensemble des consignes avec attention.
IMPORTANT : conservez ces consignes en
cas d'inspection locale.
IMPORTANT : respectez tous les codes et
ordonnances en vigueur.
Remarque pour l'installateur :
assurez-vous de suivre ces consignes avec le
consommateur.
Remarque pour le consommateur :
conservez ces consignes à titre de référence.
Niveau de compétence : l'installation de cet
appareil nécessite des compétences mécaniques de
base.
Durée d'installation : environ 1 heure.
Nous recommandons une installation de ce produit
par deux personnes.
Une installation adéquate ressort de la responsabilité
de l'installateur.
La défaillance du produit résultant d'une mauvaise
installation n'est pas couverte par la Garantie.
Vous DEVEZ utiliser toutes les pièces fournies et
suivre strictement les procédures d'installation
décrites dans ces consignes lors de l'installation de
ce climatiseur.
MISE EN GARDE
En aucun cas ni aucune circonstance, ne coupez ni
ne retirez la troisième broche (mise à la terre) du
cordon d'alimentation électrique.
Ne modifiez pas la fiche du cordon d'alimentation
du climatiseur.
Le câblage électrique en aluminium peut présenter
des problèmes plus spécifiques, veuillez consulter
un électricien qualifié.
Lors de la manipulation de l'unité, faites attention
aux coupures dues aux bords métalliques et aux
ailettes en aluminium tranchants des bobines à
l'avant et à l'arrière.
Conservez le carton d'emballage et ces consignes
d'installation à titre de référence. Le carton est le
meilleur moyen de conserver l'unité pendant
l'hiver, lorsqu'elle n'est pas utilisée.
DÉCALAGE
ARRÊT

CONSIGNES D'INSTALLATION
PRÉPARER LA FENÊTRE
L'ouvrant doit être suffisamment ouvert afin de permettre
un espace vertical net de 330 mm (13 pouces). Les
aérateurs latéraux et l'arrière du climatiseur doivent
disposer d'un espace suffisant pour permettre
l'écoulement de l'air à travers le condenseur et assurer
une bonne dissipation thermique. L'arrière de l'unité doit
toujours être situé à l'extérieur, en aucun cas à l'intérieur
d'un bâtiment ou d'un garage.
C : alignez le trou situé sur le rail supérieur avec ceux de la
partie supérieure de l'unité comme indiqué sur la Fig. B
A : retirez le climatiseur du carton et placez-le sur une
surface plane.
B : retirez le rail supérieur de l'arrière du matériau
d'emballage comme indiqué sur la Fig. A.
Vis 3/4 pouce
(ou 1/2 pouce)
(7)
Vis 3/8
pouce (4)
Rail supérieur (1)
Rail supérieur
Emballage
Fig. A
Verrou de
cadre (2)
Verrou de
châssis (1)
Joint en
mousse pour
guillotine de
fenêtre (1)
Matériel de montage
Fig. B
Fig. C
PRÉPARER LA FENÊTRE
Matériel du rail supérieur
Fig. 1
INSTALLER LES PANNEAUX EN ACCORDÉON
REMARQUE : le rail supérieur et les panneaux
coulissants de chaque côté sont décalés afin de fournir
l'espacement adéquat à l'arrière du système (5/16 pouce).
Cet espace est nécessaire pour une utilisation et un
drainage adéquats de l'eau condensée. Si vous n'utilisez
pas les panneaux latéraux pour quelque raison que ce
soit, il est important de conserver l'espace à l'arrière.
A : positionnez l'unité au sol, sur
un plan de travail ou une
table. Maintenez le panneau
en accordéon avec une main
et tirez délicatement le centre
pour laisser l'autre extrémité
ouverte. Voir Fig. 1.
D : fixez le rail supérieur à l'unité au moyen des vis 3/8 pouce"
selon la Fig. C.
REMARQUE : pour des raisons de sécurité, toutes les vis
(4) DOIVENT être correctement enfoncées.
ou
This manual suits for next models
1
Table of contents
Languages:
Other RCA Air Conditioner manuals
Popular Air Conditioner manuals by other brands

Mitsubishi Electric
Mitsubishi Electric MSZ-GE25VA operating instructions

Fujitsu
Fujitsu General ASHH30KMTB Service manual

Hitachi
Hitachi RAS-10GH5 installation manual

NuAire
NuAire UNI-X Series installation manual

Panasonic
Panasonic CU-QE12MKE Service manual

Mitsubishi Electric
Mitsubishi Electric Mr. Slim PUZ-M200YKA2.UK Service manual

Sanyo
Sanyo CH0971 Technical & service manual

Hitachi
Hitachi RAS-E10HB instruction manual

North American
North American INVENTER SPLIT-TYPE ROOM AIR CONDITIONER installation manual

Mitsubishi Electric
Mitsubishi Electric NTXFKs15a112a Series manual

Tycoon
Tycoon TS2MVI32-09 Service manual

Midea
Midea PD series manual