32
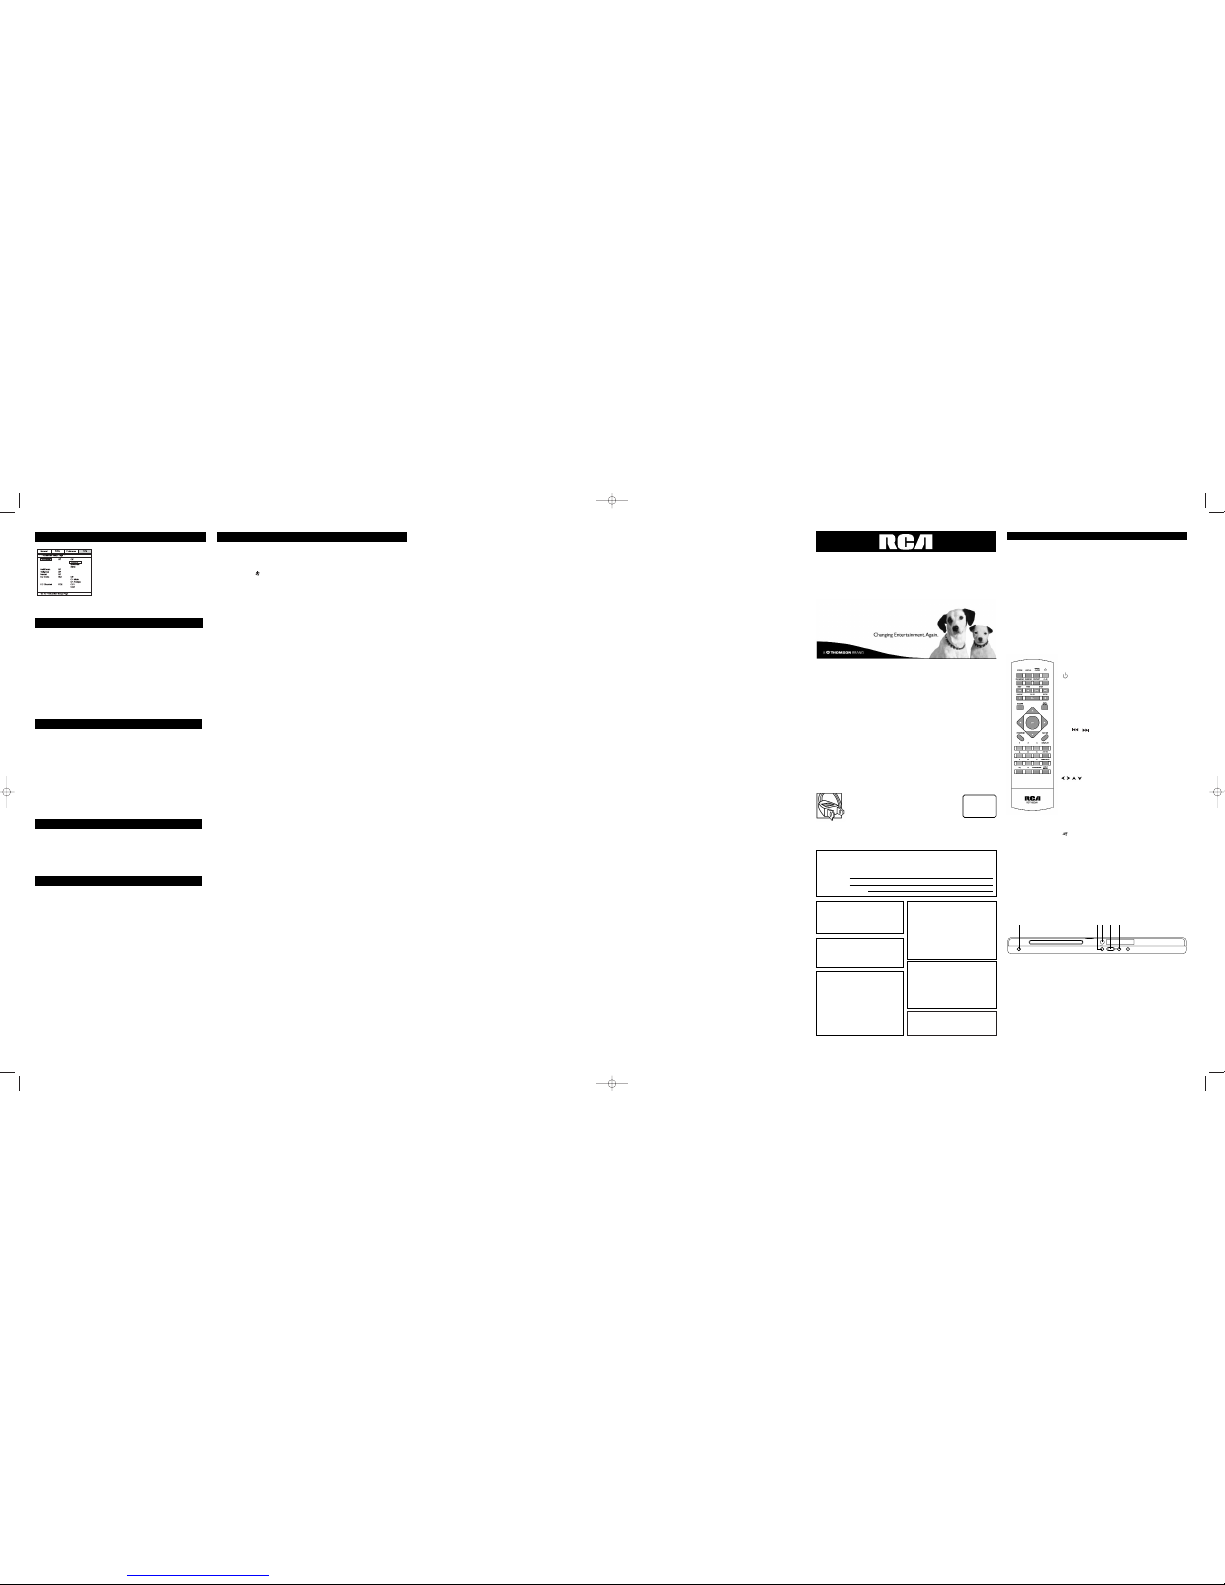
VIDEO OUT socket
Video cable (yellow)
Audio cables
(red and white)
AUDIO R and L
sockets
Other connection options
COMPONENT VIDEO OUT (Y, Pb, Pr) Jacks
TheY, Pb,Pr, jacks provide optimum picture quality
because the video signal is separated into three parts.
To ensure maximum picture quality, use three video-
grade cables (yellow) for the connection.You can also
buy bundled component video cables that are color-
coded to match theY, Pb,Pr jacks (green,blue and
red).
When using the COMPONENT VIDEO OUT (Y, PB,
PR) jacks of the DVD to connect to another
component with the same type jacks, remember to
change the Video Out setting in the General Setup
Page menu to YUV (Component).The default setting
is S-Video.
Note: Remember to connect the audio cables because the
component cable carries only the picture signal, not the sound.
VIDEO OUT socket
This socket (yellow) is also known as a composite
video socket.The video cable (not supplied) usually
comes with two audio cables (white and red).
AUDIO L (left) and AUDIO R (right) sockets
These are analogue audio output sockets.The AUDIO
L socket and cable are white, while the AUDIO R
socket and cable are red.Connect the DVD player’s
AUDIO L and R sockets to the television set’s AUDIO
L and R sockets using audio cables (not supplied).
Note: If your television set only has one audio socket connect it
to the DVD player’s left socket (white).
DIGITAL OUT COAXIALIOPTICAL (Audio)
Use one of these jatks to tonnett your DVD player to
a Dolby Digital reteiver or detoder. Some receivers
have either the COAXIAL or OPTICAL type of
Digital Audio Input jatk and some have both. Under
most conditions, optitul and toaxial tonnettions work
equally well—the only differente is the type of table
you tonnett to the jatk.
Note: If the player is tonnetted to a DTS receiver through
DIGITAL DUTis selected,there will be no sound"
I. Connect the audio cables to the AUDIO OUT Land R jacks on the back of your DVD player
and to the corresponding AUDlO INPUT jacks on yourTV.
2. Connect the video Cable.
2a. Basic connection — Connect the video cable to theVIDEO OUT jack on the back of
the your DVD player, and to theVIDEO INPUT jack on yourTV.
-OR-
2b S-Video (not shown) — If your TV has an S-Video jack,connect the S-Video cable
(not provided) to the S-VIDEO on the DVD to the S-VIDEO of yourTV.
Note: If yourTV doesn’t have Audio andVideo Input Jacks and only has an RF jack, you need to connect an RF
modulator (not provided).
Other Connection Options
Component Video Cables
Basic Playback Operations
Regional Coding
Both the DVD Player and the dista are toded by region.These regional todes must
match in order for the disc to play.This player’s code is Region 1.
Operating the DVD player
I. Switch on yourTV set.
2. Press the button on the remote control or the POWER button located on the DVD
player’s front panel.
Playback
I. Press the OPENICLOSE button on the front of the appliance or on the remote control
to open the disc tray.
2. Put the disc in with the printed side epwurds (in the case of a single-sided disc).
3. Press OPEN/CLOSE again to close the disc tray. Play starts automatically. Ifs menu
appears, one of its options can be selected to start playing the disc. Select it and press OK.
4. Press STOP to stop playback.
Notes:The player stares the paint where playback was interrupted If yes press PLAY again, playback resumes (mm
this paint Ta stay playback campletely ur tu start again (rum the beginning, press 5TOP twice.
If the player is left in STOP made fur mare than five minutes withaut any user interurban,a screen saver is arnivatnd.
Accelerated play
While the disc is playing, press the REV or FWD button one or more times to vary the speed
and direction of the accelerated play.
Still image
While the disc is playing, press PAUSE once for freeze frame.
Note:After five minutes in PAUSE with nu user interurban,the player guns late screen saver made.
Frame advance (all discs except audio CD,mp3,WMA and DivX)
1. While the disc is playing, press PAUSE once.
2. Press the PAUSE button a number of times to advance forward image by image.
3. Press PLAY to resume normal playback.
Variable slow motion (DVD andVCD only)
1. While the disc is playing, press PAUSE once.
2. Press the REV or FWD hutton a number of times to vary the speed and direction of the
slow motion.
3. Press PLAY to resume normal playback.
Note: Reverse alum mnnnn is nut punsible with aVideu Co.
Changing chapterltrack
While the disc is playing, press the SKIP or SKIP button to go immediately to the
next or previous chapter, or to the next or previous track.
For audio CD andVCD only:enter the truck number with the number buttons and then press
OK.
Zoom (DVD,VCD and DivX only)
I. While a disc is playing, press the ZOOM button until you reach the zoom size you reqe ire.
2. Move from one urea to another using the , , and buttons.
Note: under Zoom lunclion for JPEG file,press ZODM button goes to Zoom is mode , Ihen press Ihe REV or FWO
button a number of limes lo vary the Zoom sleps which you manl Ihen press Zoom lo qeit Zoom mode ;1
Play modes
Repeat playback
While the disc is playing, press the REPEAT button repeatedly no select a play mode:
DVD: Repeat Chapter,Repeat Title, Repeat Off;
VCD and audio CD: RepeucTruck, RepeucAll, Repeat Off;
A-B repeat
To repeat a sequence between two pointsA and B, press the A-B button at the beginning of
the sequence you want to repeuc.Then press the A-B button again at the end of the sequence.
Then the sequence is played repeatedly until you press A-B to resume normal playback.
Programme playback (DVD,VCD and audio CD)
With this option, you choose and programme the playback orderYou can store up to 20 tracks.
I. Insert a disc.
2. In Stop mode, press the PROGRAM butcon.The Program menu appears.
3. Use the number buttons to enter the title number and then the chapter number (for DVD)
or the track number (forVCD and Audio CD). Repeat Step 3 us often us necessary.
4. Use the , , and buttons to select Start and press OK to start playback.Tracks
are played in the order of the playback list. Playback stops once all tracks have been played.
5. Press the STOP button to stop the programme playback. Press the STOP button twite or
the OPEN/CLOSE button to cancel the programme playback.
Random playback (all discs except DVD)
You can play all the tratks on the disc in a random order (chosen by the player).
I. Insert a disc.
2. Press the RANDOM button during playback."Random" appears.Once all trucks have
been randomly played,the player automatically stops playback.
3. Press the RANDOM button again to stop random playback."Off" appears on theTV
screen.
Advanced functions
Audio (DVD,VCD and audio CD)
Some discs have several audio trucks used for different languages or different audio formats.To
change the language or audio format during play, press the AUDIO button one or more times
to select one of the available audio formats or languages.
Note:This aptian is anly available if the disc affers a number afdialague langsages ar audia furman.
Bookmarks
The player can store up to 12 disc locations as long us the disc remains in the player and the
unit remains switched on.
1. Press the BOOKMARK button during play.A menu is displayed.
2. To treate a bookmark, select a free bookmark using the and buttons and press the
PLAY button.
3. Repeat Step 2 us often as netessury.
4. To start playback from a bookmark, press the BOOKMARK button, select the bookmark
using the and buttons and then press the PLAY button.
5. To delete a bookmark, press the BOOKMARK button, select the bookmark using the
and buttons and then press the CLEAR button.
To exit the bookmark function, press the BOOKMARK button again.
Status menu
Press the DISPLAY button a number of times during playback to show in tern:
DVD:Ticle elapsed time,Title remaining time, Chapter elapsed time, Chapter remaining
time, Display Off.
VCD and audio CD: Single elapsed time, Single remaining time,Tocul elapsed cime,Totul
remaining time, Display Off.
mp3 and DivX: Single elapsed time, Single remuining time.
PBC (VCD)
The PlayBack Control function offers scenes and information which can be selected
interactively via a menu. It can also be used to display high-resolution pictures, if the disc
contains any.Press the DISC MENU button to access the PBC menu and the TITLE MENU
button to turn the PBC function on and off.
Preview (DVD andVCD)
1. Press the PREVIEW button during playback to display the Digest menu. It includes
various options depending on the type of disc:
DVD: Title Digest,Chapter Digest,Title Interval, Chapter Interval and Bookmark Digest;
VCD: Track Digest, Disc Interval and Track Interval.
2. Select one of the digest types:
- Title Digest/Chapter Digest/Track digest: shows a digest of all titles/chapters/ tracks
available on the disc.
- Title/Chapter/Disc/Track Interval: shows a digest of the current title/chapter/disc/
truck in 10 minutes interval.
- Bookmark Digest: shows a digest of all bookmarks created on the disc.
3. To display the next page, press the button or select Next in the menu and press OK.
To start playback from a particular title, chapter, truck, interval or bookmark, select it using
the , , and buttons and press OK,or input the corresponding number in the
Select box and press OK.
To return to the digest menu, select the Menu button, and press OK.
To leave the digest menu,select the Exit button and press OK or press the PREVIEW
button again.
IntroScan (audio CD)
This option plays the first five seconds of each track.
Press PLAY to start playback, then the DISPLAY button to display the Single elapsed time
and then the PREVIEW button to start the IntroScan. Press PLAY no continue playing the
current track.
Playback of mp3, WMA, JPEG and DivX files
mp3 is an audio file format which compresses recorded music. It was developed in
collaboration with . The main advantage of the mp3 format is that it means CD-
quality music tracks ran be stored on a personal computer in user-friendly compressed files.
WMA (Windows Media Audio) is another audio file format developed by Microsoft.JPEG
files are image files. Make sure that they have a resolution of less than S megapixels.Your player
is an Official DivX Certified product that plays DivX®S, DivX®4, DivX®3, and DivX®VOD
video content, in compliance with DivX Certified™ technical requirements.
Displaying JPEG files or playing mp3 orWMA or DivX files
Before inserting a disc, check that it is compatible with the player
I. Open the tray by pressing the OPEN/CLOSE button.
2. Place the disc with the printed side facing up and close the cray.The disc’s contents are
displayed.
3. Select a folder using the and buttons on the remote control, then press OK to see
the folder’s contents.
4. Select a file using the and buttons on the remote control,then press OK to start
playback.
5. Press the STOP button no stop playback.
6. To go back to the folder list, press the button in stop mode.
Note: During playback you can use the SKIP or SKIP button to go back to the previous file or go on to the
next one.
Playing JPEG and mp3 music files at the same time
You can display JPEG files while listening to mp3 music files recorded on the same disc.
I. Insert the disc containing the two types of file in the player
2. Select an mp3 music file using the and buttons, then press OK to confirm your
selection.
3. Then select a JPEG image file using the and buttons, then press OK to confirm your
selection.
Note:To delete year selecaun,press the CLEAR button.
4. Press OK to start playing the two files at the same time.
5. Press the STOP button to stop playback.
To rent (or purchase) DivX®VOD files
DivXVOD files are downloaded after paying a rental from certain commercial websites. Prior
to downloading VOD you need to input the registration number of your DVD player on the
purchase form on the site.
Follow the instructions below to find the registration number of your player: press the SET
UP button. Select the VOD option from the General Setup Menu and press OK.Write
down thisVOD 8-character registration number so that you can fill in the form on the website
you purchase your DivXVOD files from.
Note: If you cannot play a DivXVOO file recorded on a CD-R disc after downloading it, the rental period allocated
dunng purchasing frow the website may have expired. It is also possible that the recorded file is not compatible with
your player because of different version or incorrect download parameters.The parameters used when copying to
CD-R may be another reason for this. Since it is not possible here to supply all the information,parameters and
advice relating to the use of DivXVOD files, we recommend that you visit specialist websites such as
www.divx.com/vod.
DivX subtitle:
In order lo display properly sublitle in some language .you need lo select Ihe correct characler
set. During OivX playback, press several limes the TITLE/MENU bu/lon on the rewole conlrol
to choose a character sel.
Repeat playback
While the disc is playing, press the REPEAT button repeatedly to selects play mode;JPEG,
mp3 andWMA: Repeat One, Repeat Folder, Folder (mOff),
DivX: Repeat One , Repeat All, Repeat Off.
Programme playback (mp3 andWMA)
I. Insert a disc.
2. Use the , , and buttons no select the file you want to add to the playback list
and press the BOOKMARK button. Repeat this step as often as necessary.
3. Press the PROGRAM button to display the playback list and press PLAY to start playback.
Files are played in the order of the playback list. Playback stops once all files have been
played.
To delete a file from the list, press the PROGRAM button, use the and buttons to
select the file from the playback list and press BOOKMARK no delete it.
4. Press the OPEN/CLOSE button to delete the playback list.
Player menus
Using the player’s menus
Press the SET UP button no display the player’s main menu. Select a menu icon using the
and buttons.Then select one of the available options using the and buttons. Press the
button no access the submenu and use the and buttons to select an option.Then
press OK to confirm your selection. Return no a previous menu using the button. To exit
from the player menus,press the SET UP button uguin.
The General Setup menu
TV Display
Depending on the format of the DVD disc, you run choose the picture format best suited to
the format of yoerTV screen.
Selects format using the and buttons und press OK to confirm:
Normal/PS: reproduces a 4:3 picture without distortion,
Normal/LB: gives best reproduction of pictures recorded in this format (i.e. with
horizontal bands at the top and bottom of the screen) or in 16:9,
Widescreen; reproduces 16:9 format films in full on a 16:9 screen.
TV Type
In addition to PAL DVDs and VCDs, you can enjoy NTSC films as well (a 50Hz or 60Hz PAL
compatible TV set is required). If the pittures from the DVD being played appear in blatk and
white on your screen, cry changing the colour standard.
Set the function to PAL or NTSC and press OK to confirm.
Menu Language
To change the language of the player menus,choose the language using the and buttons
and press OK to confirm.
VOD
Refer to "To renn (or purchase) DinXVOD files".
The Dolby Digital Setup menu
Dolby and she dauble-O sywbel uw sredewerhs ef Dolby Lebereseries. Menufetsured under /cense
fraw Dalby l.eburesuries.
Dynamic
You can use this function to control the different sound levels viu dynumic compression.It
improves the quality of the sound track at a low volume and quienens the loudest sounds.
Select an option using the and buttons, and press OK to confirm.
Note:The funcsian is available unly an OVO discs recurded in Dulby Oigisu/
The Preferences Setup menu
Note:The Prvfvrvecvn Setup mveu is nut availably mhve shvrv in a disc in shy player
Audio
To change the dialogue language, choose the language using the and buttons and press
OK to confirm.
Subtitle
To change the subtitle language, choose the language using the and buttons and press
OK to confirm.
Disc menu
To change the language of the dist menus, choose the language using the and buttons and
press OK to confirm.
Ratings
Yo u tan control atcess to the player and the type of discs your family tan watth with the rating
function.There are eight levels of parental control.
Note:The disc pub/sher is respensible far ceding scenes eccerding te she rebng /wio.In Eur vpe,very few discs heve
ceded scenes.
I. Select the rating level using the and buttons.
2. Press OK no enter the Password Setup menu.
Note:Te access she Ratings submenu,yea muss input a fear-digit pnnsmerd If yea have net chesen ann yet yen urn
prewpsnd se de se when yea try se ercess is (see epben Passwnrd).
Password
This option ullows you to set or change the pussword.
1. Press OK to enter the Change Password menu.
2. To change the password, enter the current four-digit password in the "Old Password" box.
Then enter the new password in the "New Password" box.You are then prompted to enter
it again in the "Confirm Password" box to tonfirm and press OK.
Note: Password is not defined untd you set it
•The openings located on the top and bottom are for ventilation and must not be obstructed.
•During thunderstorms, we recommend that you isolate the appliance from the electrical
supply so that it is not damaged by electrical or electromagnetic surges.
•This appliance is designed for continuous use. Switching off the DVD player to stand-by mode
does not disconnect it from the mains supply.To completely isolate the equipment,remove the
plug from the mains socket as some components remain connected to the electrical supply.
•If you notice any burning or smoke, disconnect the appliance immediately to avoid any risk of
electrocution.
•Do not attempt to look inside the appliance through the disk tray opening or any other
opening.You may be electrocuted or exposed to laser radiation.
•This appliance is for domestic use only and must not be used for industrial purposes.
•Total or partial copying of recordings protected by copyright legislation, without the explicit
permission of the holder of the rights, contravenes current legislation. Copying or
downloading music files for sale or any other business purpose constitutes or could
constitute a violation of copyright law.
Cleaning
•Use a soft, dry, clean cloth.Regularly dust the vents at the back or sides.
•Using solvents, abrasive or alcohol-based products risks damaging the appliance.
•If an object or liquid enters inside the appliance, unplug it immediately and have it checked by
an authorised Technicians.
Handling and caring for discs
•Handle your discs with care. Hold the disc with your fingers at the edges or through the hole.
•Insert the disc with the label facing up (for a single-sided disc).
•Place the disc properly into the tray in the allotted holder.
•Use a soft cloth to clean discs if necessary, always wiping from the centre to the edge.
•Always put discs back in their cases after use and store in a vertical position.
•Do not close the tray with two discs in it or with a disc not sitting correctly in the holder.
•Do not play cracked,chipped or warped discs nor try to repair them with adhesive tape or
glue.
•Do not write on a disc.
•Do not move the player when a disc is being played.
•Do not scratch discs or store them in places exposed to direct sunlight, high humidity or high
temperatures.
•Do not use aerosol cleaners, benzene, anti-static liquids or any other solvent for cleaning
discs.When cleaning, wipe gently with a soft damp (water only) cloth from the centre to the
edge, avoiding circular motions, which could cause scratches and interference during playback.
Guarantee
•The type and production number of your appliance are printed on the guarantee certificate
supplied with your appliance. Keep this certificate as well as the invoice.These documents are
required in the event of claiming your guarantee rights.
•All repairs during the guarantee period must be carried out by an authorised engineer for
our brand. If this condition is not met,your rights will no longer be valid.
•Never open the appliance yourself, since this may put you at risk or damage the equipment.
THOMSON does not accept any liability if the appliance is used in any way other than in
accordance with this manual.
DISCLAIMER OF WARRANTIES:TO THE MAXIMUM EXTENT PERMITTED BYAPPLICABLE
LAW,DECLARATIONS ANDWARRANTIES OF NON-INFRINGEMENT OF COPYRIGHT OR
OTHER INTELLECTUAL PROPERTY RIGHTS RESULTING FROMTHE USE OF THE PRODUCT IN
CONDITIONS OTHERTHAN THOSE SPECIFIED ABOVEARE HEREBY DISCLAIMED.
http://www.thomson-europe.com
35985440 © CopyrightTHOMSON 2005
4
Discs you can play
In spite of progress made to ensure playability of all discs types,it is not possible to guarantee playback of discs whic h are
not in conformity with DVD,CD,VCD or SVCD standards.This unit may not play some recordings or files on CD-R, CD-RW,
DVD-R,DVD-RW,DVD+R, DVD+RW due to differences in recording formats,software used and disc types.
DVD-Video
Digital video discs - 12 cm and 8 cm, single or double sided,single or dual layer. DVDs are high-density
optical discs on which high quality picture and audio are recorded by means of digital signals.
DVD-R, DVD-RW, DVD+R, DVD+RW
Most DVD-R and DVD+R (one recording only),DVD-RW and DVD+RW discs (rewritable).
Depending on the DVD writer and discs used. Recordings using DVD-R and DVD-RW discs must
be made in Video DVD mode. Recordings using DVD+RW discs must be made in accordance with
the specifications for DVD+RW discs with a 4.7 GB capacity.
VCD - Video Compact Disc
CD on which you can record up to 74 min. ofVHS-quality video associated with still images, audio
tracks and interactive menus.
SVCD - Super Video Compact Disc
Most SVCDs comply with the IEC62107 standard. SVCDs can be used to record up to 70 minutes
of digital sound and images in accordance with MPEG-2 standards for video and MPEG-1 standards
for audio.
Audio CDs
Audio CDs (8 and 12 cm).
CD-R, CD-RW
Most CD-R (one recording only) and CD-RW discs (rewritable).
This player can play most CD-R discs. CD-Rs written during a multisession recording can also be
played, provided that the session has ended before the disc is played (depending on the write
software). However, depending on the condition of the CD-writer, computer and the disc used, you
may find that not all discs will play successfully. When playing a CD-R disc, it is completely normal
for the unit to take up to 20 seconds to recognise the disc before starting to play. If the disc is not
recognised after a period of 20 seconds, remove the disc, and then insert it again.
• Irrespective of the actual recording capacity of the CD-R, do not use its full capacity. • CD-Rs
should be preferably used instead of CD-RWs (rewritable CDs) as, in certain cases, CD-RW
playback may be faulty. • Use reliable, good-quality CD write software. • Close all other
applications on the computer to ensure reliable CD-R disc recording.
DivX files
DivX is the name of a revolutionary new video codec which is based on the new MPEG-4
compression standard for video. Whether DivX files play correctly on your player or not depends
on the preparation and production of the audio and video files, the codecs and the type of
recording equipment used, as well as on your computer’s parameters. It is therefore possible that
you cannot play a DivX file or that part or all of it is defective. It also sometimes happens that you
can play the images (video) but not the sound (audio).
DivX disc compatibility with this player is limited as follows: •The maximum resolution of the DivX
file is below 720x576 (W x H) pixels. • DivX filenames should not exceed 56 characters. • If the
video and audio structure of the recorded file is not interleaved, either video or audio is outputted.
• If the file is recorded with GMC, the unit supports only 1-point GMC. GMC is the acronym for
Global Motion Compensation. It is an encoding tool specified in the MPEG4 standard.Some
MPEG4 encoders, like DivX or XviD, have this option.There are different levels of GMC encoding,
usually called 1-point, 2-point,or 3-point GMC.
• DivX files with subtitles in .SRT, .SUB and .SMI formats can be played.Cor rect playback of all
languages may not be possible as some characters may be missing.
mp3 files
CD-R and CD-RW discs containing audio files in mp3 format.With regard to CD-R mp3 discs,
please follow all the recommendations for CD-R above, along with the comments below:
• Your mp3 files should be ISO 9660 or JOLIET format. ISO 9660 format and Joliet mp3 files are
compatible with Microsoft DOS and Windows, as well as with Apple Mac.These two formats are
the most widely used. • mp3 filenames should not exceed 8 character s and should end with the
“.mp3” extension. General name format:Title.mp3. When composing your title ensure that you use
8 characters or less, have no spaces in the name, and avoid the use of special characters including (.
,/, \ , = ,+). •The total number of files on a disc should be less than 999. The total number of
folders should be less than 499. • Use a decompression transfer rate of at least 128 kB/sec
(kilobytes/second) when recording mp3 files. Sound quality with mp3 files basically depends on the
rate of compression/ decompression you choose. Obtaining audio CD quality sound requires an
analogue/digital sampling rate, that is conversion to mp3 format, of at least 128 kB/sec and up to
160 kB/sec. Choosing higher rates, such as 192 kB/sec or more, only rarely produces even better
sound quality.Conversely, files with sampling rates below 128 kB/sec will not play properly. • Do
not try recording copyright-protected mp3 files. “Securized” files are encrypted and code-
protected to prevent illegal copying.You must not copy such files.
WMA (Windows Media Audio) files
CD-R with WMA files.
• WMA filenames should not exceed 8 character s, and should end with the “.wma” extension.
General name format:Title .wma.When composing your title ensure that you use 8 characters or
less, have no spaces in the name, and avoid the use of special characters including (., /, \, =,+).• The
total number of files on a disc should be less than 999.
Important:The above recommendations cannot be taken as a guarantee that the DVD player will play mp3
or WMA recordings,or as an assurance of sound quality.You should note that certain technologies and
methods for mp3 file recording on CD-Rs prevent optimal playback of these files on your DVD player (i.e.
degraded sound quality and even, in some cases, inability of the player to read the file).
JPEG files
• CD-R and CD-RW with JPEG files. Certain JPEG files, including progressive JPEG files, cannot be
read by this player.
Kodak Picture CDs
DVD copy protection
In accordance with the DVD standard,your DVD player is equipped with a Copy Protection system, which can be
switched on and off by the DVD disc itself,in order to make any recording of the relevant DVD disc onto a
videotape of very poor picture quality, or even impossible.“This product incorporates copyright protection technology
that is protected by U.S. patents and other intellectual property rights . Use of this copyright protection technology
must be authorized by Macrovision Corporation,and is intended for home and other limited uses only unless
otherwise authorized by Macrovision.Rever se engineering or disassembly is prohibited.”
Note on DivX files
Before playing DivX or mpeg4 files, please be sure of their origin and that you have legally purchased or rented the
contents. Pirate copying is illegal and may result in sanctions.Private copies of your own material for your own use
may be legal in some countries. Make sure you are aware of any applicable laws.
Technical data
Power requirements:AC 110V, 60 Hz -
Power consumption: 15W -
Operating temperature: 5˚C to 35˚C (41˚F to 95˚F) -
Operating humidity: 5 % to 90 % (no condensation).
In case of malfunction due to electrostatic discharge, reset the apparatus by
disconnecting from mains supply.