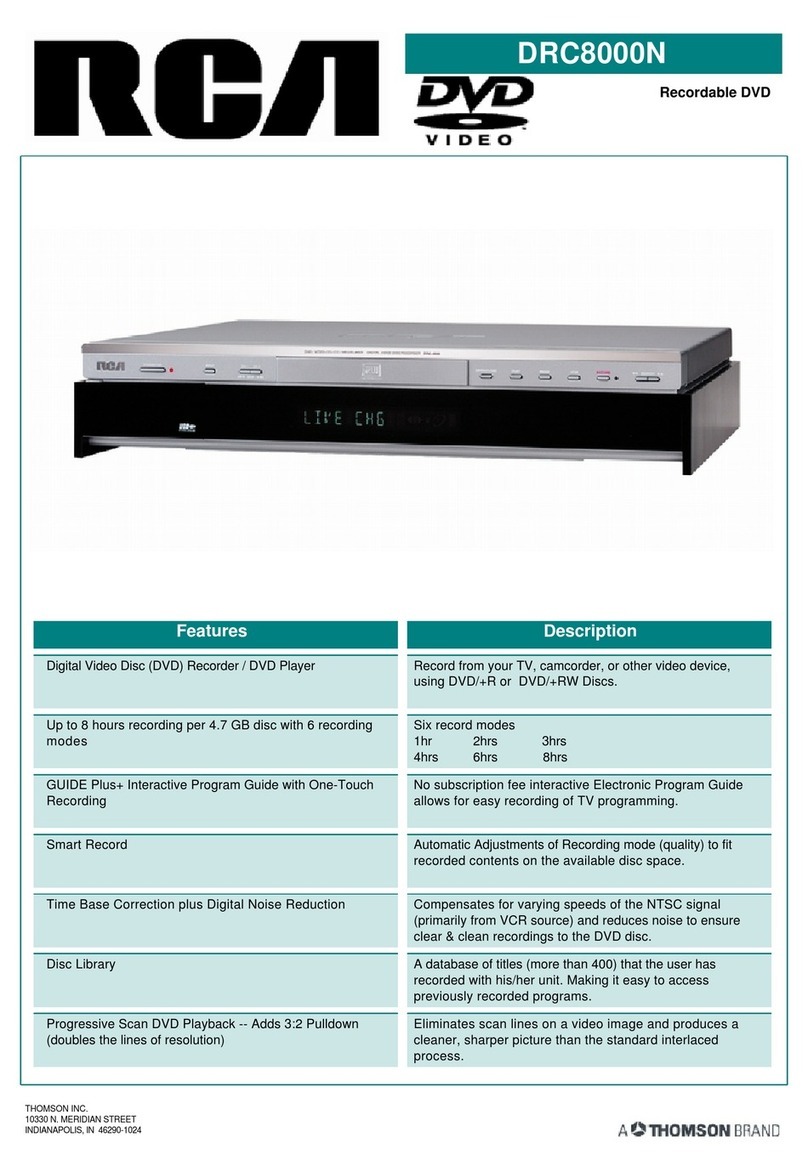
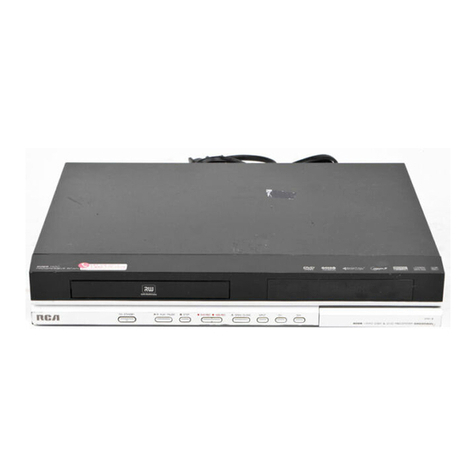
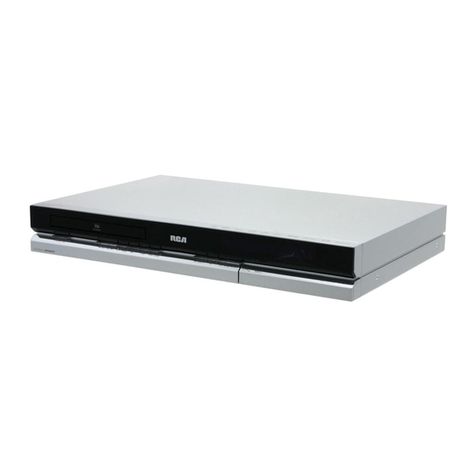
RCA GUIDEplus+ DRC8000N User manual

DVD Recorder
User's Guide
Changing Entertainment. Again.

Immpoirtant Imnfoirmation
DO NOT OEEN DThis symbol indicates that this product incorporates double
insulation between hazardous mains voltage and user
accessible par_s.
Thissymbolindicates"dangerous _ Thissymbolindicatesimportant
voltage" inside the product that instructions accompanyingthe
presentsa risk of electric shock or product.
personalinjung
FCC INFORMATION
This equipment has been tested and found to comply with the limits for a Class g digital device, pursuant to
Part 15 of the FCC rules.These limits are designed to provide reasonable protection against harmfa_
interference in a residential installation.This equipment generates, uses and can radiate radio E'equency
enemy and, if not installed and used in accordance with the instructions, may cause harmful interference to
radio communications. However,there is no guarantee that i_erfarence will not occur in a particular
instagation, lf this equipment does cause harmful interference to radio or television reception, which can be
determined by turning the equipment off and on,the user is encouraged to try to correct the interference by
one or more of the following measures.
Reorient or relocal;e the receiving antenna.
Increase the separation between the equipment and receiver:
Connect this equipment into an Outlet on a circuit d_rent from that to which the receiver is
connected.
Consult the dealer or an experienced radio/TV technician for help.
This class B digital apparatus meets all requirements of the Canadian feterference-wCausing Equipment
Regulations.
Referto the identification/ratinglabellocatedon the backpanelof yourproduct for its
proper operatingvoltage.
Product Registration
P_easefigout the product registration card and return it immediatelR Returning this card allows usto contact
you if needed.
Keepyour salesreceipt to obtain warrantyparts and service andfor proof of purchase.Attach it hereand
record the serial andmode_numbers in caseyou needthem.The numbers are iocated on the back of the
bjayen
Model No. DRC8OOO................................................................................ SeriaiNo.......................................
Deafer/Address/Phone: ................................................................................
WARNING
To reduce the riskoffire or shock hazard,do notexpose this
DVD Recorder to rain or moisture.
CAUTION
THIS PRODUCT UTILIZESALASER.USEOF CONTROLS OR
ADJUSTMENTSOR PERFORMANCEOF PROCEDURES
OTHERTHAN THOSE SPEOFIEDHEREIN MAY RESULTIN
HAZARDOUS RADIATION EXPOSURE.DO NOT OPEN
COVERSAND DO NOT REPAIRYOURSELEREFER
SERVIONGTO QUALIFIED PERSONNEL.
CAUTION
FCC Regulationsstate that unauthorized changesor
modifications to this equipment mayvoid the user'sauthority
to operate it.
Note:
This DVD Recorderis designedand manufactured to
respondto the RegionManagementInformation.If the
Regionnumber ofaDVD discdoesnot correspondto the
Regionnumber of this DVD Recorderthis DVD Recorder
cannot playthe disc.The Regionnumber for this DVD
Recorder isRegionNo I.
Note:
ThisdeviceisprotectedbyU.S.patentnumbers4,63_,603
and4,577,216and4,819,098andotherintegectualpropar_
rights.TheuseofMacrovision'scopyprotectiontechnologyin
thedevicemustbeauthorizedbyMacrovMon andisintended
forhome andotherlimitedpay-per_viewusesone/,unless
othei_viseauthorizedinwritingbyMacrovision.Reverse
engfeeeringordisassemblyisprohibited.
The apparatusshagnot be exposed to dripping or splashing
andthat no objectsfilledwith liquids, such asvases,shallbe
placed on the apparatus.
GUIDE Plus+pa_ents:6,331,877;6,239,794;6,154,203;
5,940,073;4,908,713;4,751,578;4,706,t2t
Ventilation:
You mustadequatelyventilate the product. Makesure there isadequatespacearound the DVD
Recorderto provideproperair flowfor ventilation.Seediagram.
VCR P_us+,C3,PiusCode,G-LINK,andGUIDEPlus+aretrademarksofGemstar-TVGuideInternational,fec.and/oritsrelatedaffiliates.
TheVCR Plus+andtheGUIDE Plus+systemsaremanufacturedunderlicensefromGemstar-TVGuideInternational,Inc.and/oritsrelatedaffiliates.
GEMSTAR IS NOT IN ANYWAY LIABLE FORTHEACCURACY OFTHE PROGRAM INFORMATION PROVIDED BYTHE
GUIDE PLUS+ SYSTEM. IN NO EVENT SHALL GEMSTAR BE LIABLE FORANYAMOUNT REPRESENTING LOSS OF
PROFITS, LOSS OF BUSINESS, OR INDIRECT, SPECIAL, OR CONSEQUENTIAL DAMAGES IN CONNECTIONWITHTHE
PROVISION OR USE OFANY INFORMATION, EQUIPMENT, OR SERVICES RELATING TOTHE GUIDE PLUS+ SYSTEM.
THOMSON AND GEMSTAR ARE UNAFFILIATED ENTITIES.THE GUIDE PLUS+ SYSTEM IS OPERATED BY GEMSTAR.
THOMSON SHALL NOT BE LIABLE FORANY LOSS OR DAMAGE INCLUDING, BUT NOT LIMITEDTO, DIRECT, INDIRECT,
SPECIAL OR CONSEQUENTIAL DAMAGES SUFFERED BYTHE USER OF THIS PRODUCT DUETO MALFUNCTIONING,
UNAVAILABILITY OR DISCONTINUANCE OFTHE GUIDE PLUS+ SYSTEM ORTHEACCURACY OFTHE PROGRAM
INFORMATION PROVIDED BYTHE GUIDE PLUS+ SYSTEM.

Table of Contents
Chapter I: Connections and Setup
Things to consider before you connect....................................................2
Chooseyour connection............................................................................3
Connection:DVD Recorder+TV +VCR (optional) ................................4
Connection:DVD Recorder+TV + Cable Box........................................6
Connection:DVD Recorder+TV + SatelliteReceiver............................8
AdvancedAudioConnectionInformation ..............................................l0
Connect the G-LINK cable...................................................................... It
Install batteries in the remote control .................................................. 12
Turn on theTV and the DVD Recorder ................................................12
Complete Interactive Setup.................................................................... 12
How to find your TV'sVideo Input Channel .......................................... 15
Bach of the DVD Recorder...................................................................... 16
Front of the DVD Recorder .................................................................... 17
What to Expect ........................................................................................ 18
Next Steps ................................................................................................ 18
Chapter 2:The Remote Control ............ 19
Explanation of buttons ............................................................................20
Find out if the remote can be programmed to operate your TV ......21
Programming the remote to operate your TV ....................................2t
Programming the remote to operate your satellite receiver
or cable box .............................................................................................. 22
Using the remote to operate other components ................................22
Code list for programming the remote control ..................................23
Chapter 3: Using the Recorder's Features
WatchingTV ............................................................................................26
The Channel Banner................................................................................26
Recording .................................................................................................. 26
Expressrecording ......................................................................................26
Watching onechannel whileyou record another channel ..................26
Recordingfrom the GUIDE Plus+on-screenprogramminggeide......25
Setting upTimer Recordingsto record programsautomatically........27
ConflictingTheers ....................................................................................27
Playback....................................................................................................27
Disc Library .............................................................................................. 28
Editingthe Disc Library'sContents ........................................................28
Findinga title (movie, program,etc.) byusingthe Sort Feature ........28
Playback....................................................................................................29
About the GUIDE Plus+ On-Screen programming Guide..................30
Listings........................................................................................................3I
Sort ............................................................................................................3 I
News ..........................................................................................................32
Messages....................................................................................................32
Promotions andAdvertising....................................................................32
Schedule ....................................................................................................32
Setup ..........................................................................................................32
Chapter 4: Playing Discs .......................... 33
RegionalCoding........................................................................................ 34
How to Load and Play Discs....................................................................34
Using Different Menus ............................................................................ 35
SearchOptions ........................................................................................35
PlaybackOptions...................................................................................... 35
Using the On-Screen Info Display..........................................................36
Time Display..............................................................................................37
SelectingaTitle ........................................................................................37
Selectinga Chapter ..................................................................................37
SelectingSubtitles....................................................................................37
Repeat Feature..........................................................................................38
ChangingtheAudio Language................................................................38
Changingthe CameraAngle....................................................................39
Play Mode Feature(Audio CD only) ......................................................39
Introsean (AudioCD only)......................................................................40
PlayBack Control (FBC),Video CD only................................................40
Playingmp3 andlor JPEG files................................................................4 I
Viewing JPEG files....................................................................................42
Chapter 5:The Menu System .................. 43
Overview of the Menu System ..............................................................44
Watch TV ..................................................................................................44
GUIDE Plus+ ............................................................................................44
Disc ............................................................................................................44
Play Disc ....................................................................................................
DiscTitle Menu..........................................................................................
Player Menu ..............................................................................................
PlayEst ........................................................................................................
Disc Options..............................................................................................
Autoplay ....................................................................................................
ScreenFormat ..........................................................................................
Angle Icon..................................................................................................
Disc Library ..............................................................................................
Timers ......................................................................................................
Setup..........................................................................................................47
Parental Controls......................................................................................47
Lock/Unlock........................................................................................47
Bated Titles..........................................................................................48
Unrated Titles ....................................................................................48
SystemOptions ........................................................................................48
Digital Output ....................................................................................48
SRSITruserround................................................................................48
Black Level..........................................................................................48
DisplayDimmer ..................................................................................48
AudioBroadcast..................................................................................
RecordingOptions....................................................................................
RecordingQuality ..............................................................................
Smart Record......................................................................................
Disc Options ..............................................................................................
Languages ..................................................................................................
Display..................................................................................................
Audio....................................................................................................
Subtitles ..............................................................................................
Disc ......................................................................................................
Installation Menu ......................................................................................50
Interactive Setup................................................................................50
Channel Search ..................................................................................50
Clock Setup ........................................................................................50
Channel List........................................................................................50
GUIDE Flus+Setup............................................................................50
Chapter 6:Additional Information ........ 5 I
Troubleshooting........................................................................................52
Handling Cautions....................................................................................55
Maintenance of Cabinet ..........................................................................85
Explanation of Jacks and Cable ..............................................................86
Limited Warranty ....................................................................................57
Accessories................................................................................................59
Copyingcontent from a DVD÷R or DVD+RW discto aVCR
videocassette ............................................................................................60
Copyingcontent from aVCR videocassette to a DVD+R or
DVD+RW disc ..........................................................................................61
Things to consider before you connect
Protect components from overheating
Don't block ventilation holes on any of the components.Arrange the components so th_z air can circulate freely.
Don'tstackcomponents.
When you place components in a stand, make sure you allow adequate ventilation.
If you connect an audio receiver or amptiger, place it on the top shelf.
Position cables properly to avoid audio interference
Insert each cable firmly into the designated jack.
If you place components above the T_, route all cables down the side of the back of the TV instead of straight down the middle of the back of the T_
If your antenna uses 300_ohm twin lead cables, do not coil the cables.Also, keep the twin lead cables away from audio/video cables.
Connection Pictures
Audio/video cables are usually bundled together. For better visibility, the connection pictures in this book show each cable separately (audio left, audio
right, and video). Graphics contained within this publication are for representation ont_
Recording:Types of discs you can use
DVD+R and DVD+RW
Playback:Types of discs you can play
•DVO discs - contain picture and sound (DVD-R, DVD+ RW, DVD-R, DVD- RW, DVD ROM are compatible with this
player).
CDs (Audio CDs, CD-R, CD-RW) -Audio CDs contain musical or sound content only. rap3 discs are CDs that
cono'nmp3 sTh'sp odo t op ysCOsth coooio PEO0os ndMo'tise s'onCOs
_IoT_vTAL_w-" Video CD (VCD) and SuperVideo CD (S-VCD) discs - Like DVD video discs,VCDs contain picture and
sound content.The difference is the amount of information that can be stored on the disc.VCDs typically have lower
Some discs maynot he picture and sound quality than DVD discs. SuperVibeo CDs (S-VCDs) can be used to record up to 70 minutes of
compatible due to laser pickup digital sound and video, with MPEG-2 standard video and MPEG- I standard audio, S-VCD disc compatibility is
ar_l disc d_ign, dependent on which MPEG coding software, disc design software, disc writer software are used, and the discs
themselves.
Unpack the Box
Your DVD Recorder came with the following items:
J
DVD Recorder
2Way Splitter (part numberVH47)
You must connect the 2 Way Splitter in order to
watch one program while you record another one. Not
applicable with satellite or digital cable box.
Remote control and
batteries (part number
261387)
Power cord (part number 218104)
G-LINK cable (part number 246990)
S-Video cable (part number RF Coaxial cable (part
257982) number 221396) I set of audio video cables
(part number 233086)
2Graphics contained within this publication are for _epresenta_on only.

Ch_÷r __ ¢olnln÷¢_li@lnsand $÷_u_
Choose Your Connection
There are sever_ w_ys to connect your DVD Recorder. P{ease use the following chart to determine which Connection is best for you.Turn to the
appropriate page for specific instructions.
Components CablesNeeded Connection
DVD Recorder
DVD Recorder
DVD Recorder
TV
TV Cable Box
TV Satellite Receiver
• Coaxial
• Audiolvideo
• S-Video (optional)
• Coaxial
•Audio/video
•S-Video (optional)
•Coaxial
•Audio/video
•S-Video (optional)
TV
TV + cable
box
TV+ satellite
receiver
Goto
p.4
p.6
p.8
Connecting an optional audio receiver:
After you connect the DVD Recorder to your TV (choose
an option above), go to page 10 for general information
about connecting an audio/video receiver.
VCR Connection go to pages 60 & 61
If you want to copy content from a DVD to a videotape or vice
versa,go to pages60 and 61 for general information.
Graphics contained within this publication are for representation only. 3

DVD Recorder
_ABLE/ANTEIIHA
VIDEO L R
TV
S-VIDE0
®1
®1
The back of your TV might look
different than the one pictured here.
Details about the different kinds of cables used to connect your DVD Recorder are on page 56.
To watch one program while you
record another: Tune the TV to its Input I channel orVid I channel
Tune the DVD Recorder to the channel you want to record, and press
RECORE_
Use the buttons on the TV (or the TV's remote control _) to tune the TV to
the channel you want to watch.
To play a disc Tune theTV its Input I channel orVid I channel.
If you need help f_ndingyourTV'svariousVideoInput Channels,go to page 15.
*Theremote controlpacked w_:hyour DVD Recorderiscapable of beingprogrammed to operate man/brands and modelsofTVs andVCRs.Forinstructions,
go topage 19.If the remote operatesyour T_,pressTV _nd INPUT toaccessthe VideoInput Channel.
4Graphics contained within this publication are for _epresenta_ion only.

2 Way Splitter
(provided)
RP Coaxial cable
Audio video cables are
usually colo_coded red,
white, and yellow.
Connection: DVD Recorder + TV
This connection uses the 2-way splitter (provided) so you will be able to watch one
program while recording another program.Also, the connection directs you to send the
cable/antenna signal to the DVD Recorder so you can utilize the DVD Recorder's on-
screen programming guide.
I. Connect the signal (cabte or antenna)
Note:Dependingupon howyou currently hove yourTV connected,you'll haveto disconnectthe cable
from yourTV'sAntenna thpotjack (sometimeslabeledCABLE/ANTENNA)beforeyou connectit as
explainedbelow.
Cable service: If you have cable service via a cable that comes out of the wall,
connect the end of that cabte to the 2Way Splitter (provided) m connect the cable to
the end of the 2 Way Splitter that only has one connecto_
Note: If you have a cable box, go to page 6 for connection instructions.
Off-air antenna: If you use an off-air antenna to get TV programming, connect the
antenna's RF coaxial cable to the end of the 2Way Splitter that only has one
connecto_
2. Use the RF Coaxial cable that was packed with your DVD Recorder, and connect one
end to the 2Way Splitter -- connect the cabte to the end that has two connectors
(it doesn't matter which of the two connectors you use). Connect the other end to
the RFANTENNA/CABLE INPUT jack on the back of the DVD Recorde_
3. Connect another RF Coaxial cable (not provided) to the other connector that's
available on the 2Way Splitte_ Connect the other end of this RF Coaxial cable to the
TV's Antenna Input jack (sometimes labeled CABLE/ANTENNA).
Connect the DVD Recorder to the TV
4. You need to connect cabtes to the DVD Recorder's OUTPUT iacks to the TV's
INPUT jacks in order to see the content from the DVD Recordel_
4a. Connect the audio cables.
A set of audio/video cables was packed with your DVD Recorden Connect the
audio cables to the OUTPUTAUDIO L (left -white) and R (right - red) iacks on
the back of your DVD Recorder, and to the corresponding Audio Input jacks on
your TV (sometimes labeled AUDIO IN L and R).
4h. Connect the video cable.The cables you use for the video determine the quality
of the picture you'll see on your TV when you're playing DVDs. For more
information about cables and signal quality, go to page $6. Connect the video cable
(yellow) to the OUTPUT VIDEO iack on the back of your DVD Recorder, and to
theVideo Input jack on your TV (sometimes labeledVIDEO IN).
S-VIDEO (not shown) If your TV has an S-VIDEO jack.connect one end of the
S-Video cable (provided) to the S-VIDEO iack on the back of the TV and the other
end to the S-VIDEO OUT iack on the back of the DVD Recorder.
COMPONENT OUT -Y, Pb, Pr (not shown) If your TV has Component Input
Jacks (Y, Pb, Pr), you can achieve even greater picture quality by connecting the
DVD Recorder to the TV using these jacks (COMPONENT VIDEO OUTPUT, Y,
Pb,Pr on the DVD Recorder). For more explanation, go to page 56.
Note:If your TV _scapableof progresslvescan,connect the DVD Recorderto theTV using the
COMPONENTV/DEO OUTPUTjacks, and slidethe PROGSCAN switch to the ON position to see DVD
titles (movies)in progressivescan format. If you need more explanation,go to page55.
5. Attach theAC power cord to the unit.
6. Insert the other end of the AC power cord into an AC oudet (or power strip).
Go to page 12
Graphics contained within this publication are for representation only. 5

The back of your TV and/or Cable Box might
look different than the ones pictured here.
DVD Recorder
Cable Box
TV
CABLE/AhTEIIHA
VIDEO L R S-VIDEO
Notes about cable boxes;
If you have ques_ons about us_ng a cable box with the DVD Recorder, consu_ your cable company. R_ can only provide _neml inst_c_ons because cable serwce and
cable boxes differ in various areas.
You must view premium cable channels through the DVD Recorder if you use this connection because ordy reguler cable channels are being sent to the TV via the 2
Way Splltte_
If you have a d_gital cable box, you need to purchase a _paclal Lype of sphtter--the one packed with the DVD Recorder is only for regular, analog cable boxes.
Ifyou connect your components as described,you must access differentVideo {nput Channels on your TV to see programming, b"you don't know
how to access Video Input Channels on your T_, go to page I S for help.A general explanation, based on the connection shown above, follows:
To watch one program while you record another: Tune the TV to its Input I channel orVid I channel.
Tune the DVD Recorder to the cable box channel (usually channel 2,
3, or 4).
Tune the cable box to the channel you want to record.
Press the RECORD button on the DVD Recorder.
Use the buttons on the TV (or the TV's remote control ) to tune the TV
to the channe{ you wa_t to w_t_h.
To play a disc Tune theTV to its Input I channel orVid I channel.
If you need help finding your TV's various Video Input Channels, go to page 15.
*The rer_lote control packed with your DVD Recorder is capable of being programmed to operate many brands and models of TVs. For instructions, go to page t 9. If the remote
operates your TV, press TV and INPUT to access the Video Input Channel.
6Graphics contained within dlis publicatio_ are for representation only.

Clha elr ¢olnlnectli@in$ and Setupo.
Connection: DVD Recorder +TV + Cable Box
2 Way Splitter
(provided)
RF Coaxial c_le
Audio video cables are
usually cofoPcoded red,
white, and yellow. Red=
right audio;White -- left
audio;Yellow = video.
I. Connect the 2 Way Splitter (provlded) to spilt the cable signal
Note: Beforeyou connectthe DVD Recorder,you'll needto thsconnectsome of the cablesfirst in orderto re<onnect them.
la. Disconnect the RP Coaxial cable tBet originates from the cable signal coming into your house, and goes to the
cable box. Connect this RF Coaxial cable to the 2 Way Splitter that was packed with your DVD Recorder -- connect
the cable to the end of the 2Way Splitter that has only one connector.
Note: If you havea digltol cable box,you can't use the 2 waysplitter provided.Youneed to purchase a digital splltte_
Ib. Use the RF Coaxial cable that was packed with your DVD Recorder, and connect one end to the 2 Way Splitter
-- connect the cable to the end that has two connectors (it doesn't matter which of the two connectors you use).
Connect the other end of this cable to the Cable Signa_input iack (sometimes labeled CABLE iN) on the cable box.
I¢. Connect another RF Coaxial cable (not provided) to the cable bo×'s TV Output Jack (sometimes labeled CABLE
OUT); and connect the other end to the RFANTENNA/CABLE INPUT jack on the back of the DVD Recorder.
Id. Connect another RF Coaxial cable (not provided) to the other connector that's available on the 2Way Splitter.
Connect the other end of that cable to your TV's Antenna input jack (sometimes labeled CABLE/ANTENNA).
For more information about the other Input iacks on the back of the DVD Recorder, go to page 54.
2. Connect the DVD Recorder to theTV
You need to connect cables to the DVD Recorder's OUTPUT jacks to the TV's INPUT jacks in order to see the
content from the DVD Recorder (whether it's aTV program or a disc you're playing).
2a. Connect the audiocables.
A set of audio/video cables was p_cked with your DVD Recorder. Connect the audio cables to the OUTPUT
AUDIO L (left -white) and R (right -red) jacks on the back of your DVD Recorder, and to the corresponding
Audio Input jacks on your TV (sometimes labeled AUDIO IN L and R).
2h. Connect the video cable.The cables you use for the video determine the quality of the picture you'll seeon your
TV when you're pl_ying DVDs. For more information about cables and signal quality, go to page 56.
Connect the video cable (yellow) to the OUTPUT VIDEO jack on the back of your DVD Recorder, and to the
Video input jack on your TV (sometimes labeledVIDEO IN)
S-VIDEO (not shown) If your TV has an S-VIDEO jack, connect one end of the S-Video cable (provided) to the
S-VIDEO jack on the back of the TV and the other end to the S-VIDEO OUT jack on the back of the DVD
Recordel:
COMPONENT OUTY, Pb, Pr (not shown) If your TV has Component Input Jacks (Y,Pb, Pr),you can achieve
even greater picture quality by connecting the DVD Recorder to the TV using these iacks (COMPONENT VIDEO
OUTPUT, Y,Pb, Pr on the DVD Recorder). For more explanation, go to page 56.
Note: If yourTV is copableof progressivesoon,connectthe DVD Recorderto the TV usingthe COMPONENT VIDEOOUTPUTjacks, and
slide the PROGSCAN s_tch to the ON position to see DVD titles (mo_es) in progressivescanformat. If you needmore explenat_on,go to
page 56.
3. Attach the G-LINK cabte to the G-LINK iack. Connecting this cable is necessary in order for you to conduct timer
recordings and for the GUIDE Plus+ programming guide to list what TV shows are on.
4. Attach theAC power cord to the unit.
S. _nsert the the other end of the AC power cord into an AC outlet (or power strip).
GO tO page !!
Notes:Thlsconnectionenablesyou to watch one channelwhile you recordanother channelby splittingthe cablesignoLIf your cable box is
necessaryfor premium channels,you won't be able to accessthem when watchingTV directly_e_ w_:houtgoing throughthe DVD Recorder
by tuning theTV to itsVideoInput Channelb
Graphics contained within this publication are for representation on{y. 7

Satellite Receiver
O.e,o,de,
The back of your satellite
receiver might look different
than the one pictured here.
The back of your TV might look
different than the one pictured here.
Details about the different kinds of cables used to connect your DVD Recorder are on page 56.
To watch TV (satellite
programming) Tune the TV to its Input I channel orVid I channel
Tune the DVD Recorder to the INPUT I channel (pressthe INPUT
button on the remote).
Tune the satellite receiver to the channel you want to watch.
To watch TV (satellite
programming) with the DVD
Recorder turned off.
Tune the TV to its CABLE/ANTENNA INPUT channel (usually channel 2,
3, or 4).
Tune the satellite receiver to the channel you want to watch.
To play adisc: Tune the TV to Input I channel orVid I channel.
8Graphics contained within this publication _re for representation only.

Colnln÷¢ li@lns and
RF Coaxial cable
Connection: DVD Recorder +TV + Satellite Receiver
The following instructions enable you to record the programs from your satellite receiver. Because the iack conEguradon
and labels vary on different satellite receivers and televisions, the steps provided are general guidelines.Consult your
Satellite Receiver and/or Television User's Guides for additional information. If you have cable 1W service AND satellite T_,
you can connect the cable signal to the DVD Recorder's RFANTENNA/CABLE INPUTiack.
I. Satellite signal: Leave the cable in place that comes from the satellite dish and goes to the satellite receiver.
2. Connect the satellite receiver to the DVD Recorder
2_ Connect audio cables (red and white) to the satellite receiver's output iacks [sometimes labeledAudio Left
(white) and Audio Right (red)]. Connect the other ends of these cables to the corresponding INPUT AUDIO L
and AUDIO R iacks on the back of the DVD Recorde_
2b. Connect the video cable (yellow) to theVideo Output jack on the satellite receiver (sometimes labeledVIDEO)
to the INPUT VIDEO jack on the back of the DVD Recorde_
If your satellite receiver, has an S-VIDEO jack, connect an S-Video cable to thaz jack and to the S-VIDEO iN jack
on the DVD Recorder for increased picture quality (not shown in connection diagram).
Note: If your satellite receiverdoesn'thaveaVideoOutputjack, connectan RFcoaxial cableto the satellite receiver'sOUT TOTVjack, and
to the DVD RecordersRFANTENNA/CABLEINPUTjack.
Audio video cables are
usually coloPcoded red,
white, and yellow. Red=
right audio;White = left
audio;Yellow = video.
3. Connect the DVD Recorder to theTV
You need to connect cables to the DVD Recorder's OUTPUT jacksto the TV'S INPUT jacks in order to see the
content from the DVD Recorder (whether it's a satellite program or a disc you're playing).
3a. Connect the audio cables.
A set of audio/video cables was pncked with your DVD Recorder. Connect the audio cables to the OUTPUT
AUDIO L (left -white) and R (right -red) jacks on the back of your DVD Recorder, and to the corresponding
Audio Input jackson your TV (sometimes labeled AUDIO IN L and R).
gh. Connect the video cable.The cables you use for the video determine the quality of the picture you'll see on your
TV when you're plnythg DVDs. For more information about cables and signal quality, go to page 56.
Connect the video cable (yellow) to the OUTPUT VIDEO jack on the back of your DVD Recorder, and to the
Video input iack on your TV (sometimes labeledVIDEO IN)
S-VIDEO (not shown) If your TV has an S-VIDEO jack, connect one end of the S-Video cabte (provided) to
the S-VIDEO jack on the back of the TV and the other end to the S-VIDEO OUT iack on the back of
the DVD Recorder.
COMPONENT OUT (Y_Pb, Pr) If your TV hasComponent Input Jacks (Y, Pb, Pr), you can achieve even
greater picture quality by connecting the DVD Recorder to the TV using these jacks (COMPONENT VIDEO
OUTPUT, Y,Pb, Pr on the DVD Recorder). For more explanation, go to page 56.
Note: If yourTV iscapableofprogressivescan,connectthe DVD Recorderto theTV usingthe COMPONENTVIDEOOUTPUTjacks,
and slidethe PROGSCAN s_tch tothe ON poslt_n to see DVD titles (movies)in progressivescan format. If you needmore expla_
nation,go to page56.
4, ConnectthesatellitereceivertotheTV
Connect an RF coaxial cable to the OUT TO TV iack on the satellite receiver, and to the Cable/Antenna input jack on
the TV (sometimes labeted CABLE/ANTENNA)
g. Connect the G-LINK cable to the IRA SATiack.You must connect this cable properly in order to use Timer
Recordings with your s_tetlite receiver.
6. At_ach the AC p_wer cord t_ the unit. _nsert the the _ther end AC p_wer c_rd tht_ an AC _ut_et (_r _wer str_)_
If you want to connect aVCR to the satellite receiver and the T_, connect the RF Coaxial cable in step 4 to the VCR'S
Cable/Antenna Input jack. Connect another RF Coaxial cable to the VCR'S OUT TO TV iack, and to the TV's
CABLE/ANTENNA INPUTiack. For more thform_tion, consutt the manuals that came with these products.
GO to page II
Things You Know:
The GUIDE Plus+ System won't work if you use this connection because it doesn't interpret information from satellite
programming. It only downloads cable TV listings and/or off-air broadcast listings.
You can't use the 2Way Splitter that came with the DVD Recorder to split the satellite signal becauseit won't read
digital signals properly.Therefore, you can't record one program and watch a different program _zthe same time.
Graphics contained within this publication are for representation only. 9

eh er ¢@nnec @ns and
Consult the manual
that came with your
receiver to connect it
properly.
DVD Recorder
OUTPUT AUDIO L (lef_ DIGITAL AUDIO DIGITAL AUDIO
and R (nght) COAXIAL OPTICAL
Advanced Audio Connection Information
Both Dolby Digital® and DTS® are audio formats used to record 5.1-channel audio signaIs onto the digital track of film (while the fitm is being made).
Both of these formats provide up to six separate channels:left, right, center, left rear, right rear, and common subwoofe_ The disc wilt play 5.1-channel
sound only i{ you've connected a DTS or Dolby Digital receiver or decoder and if the disc is encoded in the Dolby Digital or DTS format.
Please Read This Before Using the DIGITAL AUDIO Jacks!
This unit's digital output jacks are designed for a connection to aDolby Digital or DTS receiver or decnde_ Older digital equipment may not be compatible w_th the Oothy Digital
bitstteem. Such a connection can create a h_gh level of noise that me}, be harmful to your eats, and could damage headphones or speakers./t _ important to choose the correct
D_tel output setting in the System Options menu, especio//y when you use tither of the DIGITAL AUDIO OUT jacks. For more ioformation, go to page 48.
Connecting your DVD Recorder to an audio/video receiver
You'll need to consult instructions that came with your audio video receiver in order to connect it properly. The information below
provides general guidelines for the DVD Recorber's Audio Output Jacks.
For a basic audio connection, connect the left and right audio cables to your audio/video receiver and to the OUTPUTAUDIO L (left -white) and R
(right -red) jacks on the back of your DVD Recorder.
g you have aDolby Digital or DTS receiver_ use one of the DIGITAL AUDIO OUT jacks to connect the receiver to the DVD Recorder.You must also
ndjust the Digital Output setting (go to page 48 for information).
Notes:
Tile DIGITALAUDIOOUTPUTjack has two options: OPTICALand COAXIAL Some DolbyDigital receivershaveone type of DigltalAudlo Input jack, and some haveboth.Under
mostconditions,nptical andcoaxial connectionswork equallywell -- the oldydifferenceis the type ofcable you connectto the jack.
If you want to use alessexpensivecable,connecta coax_l cable to the COAXIALjack. Randy,but sometimes,coaxialcables-- e@eciolly longones,pick up radio frequency
(RF)interference from householdappllances,nearbypower h_es,and/or broadcast towers.
If you would rather use the OPTICALjack, connectan nptical digital cable to the DVD Recorderand to the correspondingdigital optical inputjack on the recelve_
Removethe protectivecoverthat's in the DIGITALAUDIOOPTICALjack before co_ecting cables.
Maeufscturedunde licenseI,om Dolby Labo arouses'Dob x' andthe aouble D syrrbo am trademarks of Dolby Labor,tobies Confider,lia_u%_blished works @
1992 1997Dolby Laborato_es,Inc All lights i_served
DIS isa re8iste_edtladernark of Digital Homelheate_ Systems,_nc
I 0 Graphics contained within this puhlicafio_ are for representation only.

¢lhap el Celnlne lielns and
Connect the cables to the G-LINK and/or IR SAT iacks on the back of the Recorder
If you connected a cable box or satellite receiver to the recorder, you must connect the G-LINK cable (provided) in order for all of the DVD Recorder's
features to work ¢orrecd_
The G-LINK cable (provided) enables the DVD Recorder to control the cable box or satellite receiver so you can set up timer recordings.
For cable box owners, you have to connect the G-LINK cable so the GUIDE Plus+ system (the on-screen programming guide) can tist the correct
programs.
Note:The GUIDEPlus+Systemdoesn'tinterpretinformationfrom satelliteprogramming. It only downloadscableTV //stingsoad/oroff-air broadcastlistings.Therefore,there won't
be any program llstthgsin the DVD RecordersGUIDEPlus+programmingguideif you hovesote_te service.
G-LINK cable: connect
it to the G-LINK jack
if you have a cable box
connected to your
DVD Recorder, or
connect it to the IRA
SAT jack if you have
satellite receiver
connected to your
DVD Recorder
I a. If you connected a cable box, insert the G-LINK cable into the GdsINK iack on the back of the Digital
Media Recorden
I b. If you connected asatellite receiver, insert the G_LINK cable into the IRA SAT jack on the back of the
DVD Recorden
2. COnnect the _ther end _f the cabie (ca_ed a wand) in fr_nt _f the remote sens_r that's on front _f the cab_ebo× _r
satellite receiver (see picture at the bottom of this page).
Some cable boxes and satellite receivers have the remote sensor tabooed,but some don_t.
If you see the remote sensor label on your cable box or satellite receiver, go to step 7(sometimes it's labeled IRA or
remol_e or sensor).
_fyou don_t see a remote sensor label oN your cable box or satellite receiver, go to step 3.
3. Turn off the cable box or satellite receiven
°°°°o o °!oo 7
4, Hold the satellite receiver remote control or cable box remote control so that it is touching the front of the satellite
receiver or cable box.
S, Slowly move the remote control in front of the satellite receiver or cable box while you press the power button on
and off.You must press and release the power button each time you move the remote (holding down the button
won't work).
6. When the satellite receiver (or cable box) turns on, you've located the sensor.
_at_//,tereceiver OR _uhle hox
-" \1\
Connectto IR_
Connect to G-LINKjack on
back of DVD Recorder
7. Placethe wand in front of the remote sensor, approximately one inch away from the remote senson
Graphics contained within this publication are for representation on{y. I I

Connections and Se u E
Install Batteries in the Remote
I. Remove the battery compartment cover on the back of the remote.
2. Insert new batteries. M_tch the polarities (+ and -) on the batteries with the diagram on the remote.
3. Put the battery compartment cover back on the remote.
Important Battery Information
• ffyou're notgoing to usethe remote for a month or more,be sure to removethe batteriesbecausethey can leak and causedamage.
•Disposeofbatterles in the proper manner,accordingto federal,state, and local regulations.
• Any battery may leak electrolyteif mixedwith adifferent batterg _ype,Jflnserted incorrectly,ffa# batteriesare not replacedat the samet_me,ifdlspased ofln fro, or if an
attempt is madeto chargea battery not intended to be recharged.
•Discardleakybatterles _mmediately.Leakingbatterles can causeskin burns or other personal injury.
Point the Remote in the Right Direction and Put it in DVD Mode
When you want the remote to operate the DVD Recorder, point the remote _ the DVD Recorder, not the TMTbe remote has to be pointed in the
correct direction and toward the correct: component in order for the remote control's signal to communicate with the sensor on the component. Make
sure there is a dear path between the remote control and the component you want to operate, so the signal isn't blocked.
Make sure the remote is in DVD mode --- press the DVD button.
Turn on theTV and DVD Recorder
I. Turn on the DVD Recorder_ress the DVD button on the remote.
2. Turn on the TV and tune it to the correct Video Input Channel_if you have an RCA, GE, or Proscan TV,,press the TV button on the remote and then
press the INPUT button on the remote (theTV turns on and tunes to the correct Video Input Channel).
If you have another brand of T_, turn on theTV and tune the TV to the correctVideo Input Channel (if you don't know how to access theVideo Input
Channel on your TV.go to page 15 for help).
Note:Youcan program your remote to operatemost brands of remote controllableTVs.Instructionsare on page 2I.
Le_ arrow
buit0n
buit0n
._drrow
bulion
R_i _rrow
b_t_0n
Use the _'1"o_ but_ns on the remote to
move through on-screen n'lenu$ and
highlight different options. Press the OK
button to select a menu item that is
highlighted.
Complete the Interactive Setup
The next few pages step you through the series of screens that will appear the first time
you turn on your DVD Recorder,
Use the remote control to follow the on-screen instructions.The arrow buttons move the
on-screen highlight in the corresponding directions on the screen (up, down, left, right).
Press the OK button to select a highlighted item.
Notes:
Youcan accessthe setup screensfrom the main menu. If you move,get a different program provider for
TV shows,or changepour connections,you'# needto complete the Interactive Setupagain.
If you don't see the Language selection screen (below) the frst time you turn on the DVD Recorder,
make sure you've tuned your TV to the Video Input Channel that corresponds to the way you've
connected the TV to the DVD Recorde_ If you need help, go to page t6.
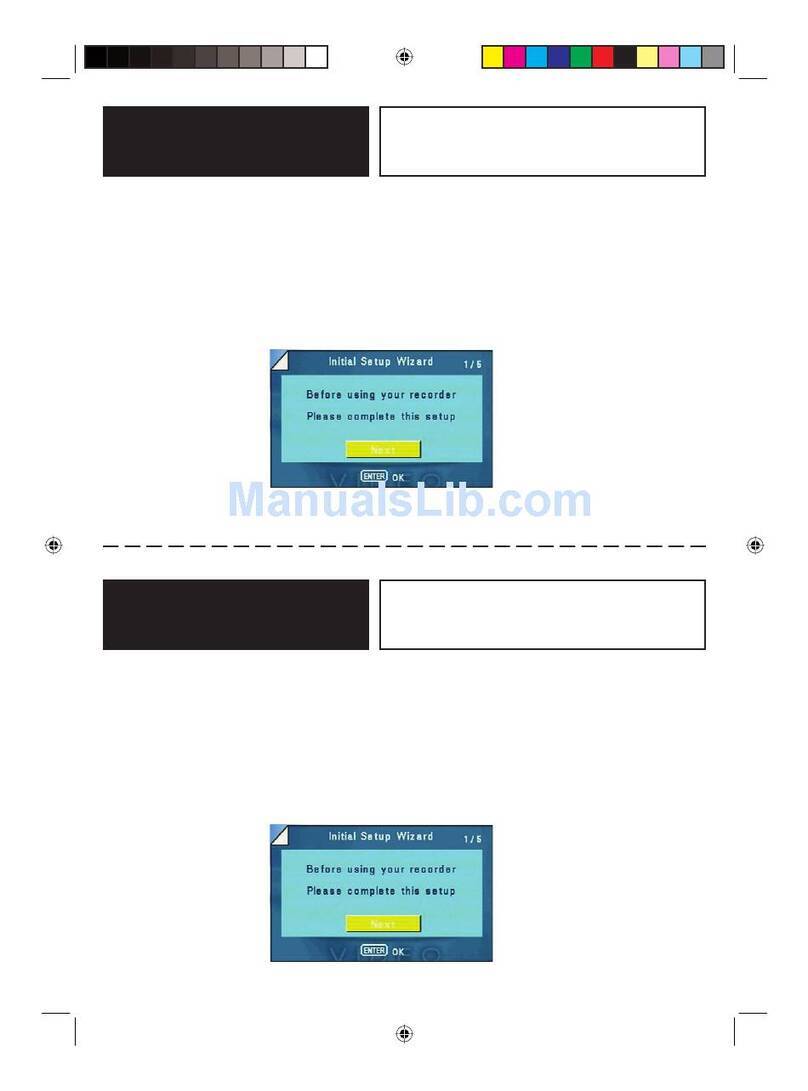
ilish I) Select on-screen menu language
Make sure the remote is in DVD mode (press the DVD button). If you want the on-
screen menus to appear in English, press the OK button on the remote control. If
you prefer another language,press the arrow down button until that language is
highlighted. Press OK to select the language.
Note: ff you don't see the Language selection screen the first time you turn on the DVD Recorder, make
sure you've tuned y0ur TV to tba VJdeo Input Channel that corresponds to the way you've connected the
TV to the DVD Recorde_ If you need help, go to page 15.
12 Graphics contained within this publication _re for representation only.

Chap ÷l ¢olnln÷¢ li@lns $÷ up
Antenna-Cable 2) Connection List
Completing this information lets tile DVD Recorder know what program signals are
being sent to it. Choose the component that is connected to each of the jacks on tile
DVD Recorder.
2a_ Antenna-Cable (RFANTENNA/CABLE INPUT jack connection): Press the
right arrow button to choose what you connected to the RFANTENNA/CABLE
INPUT iack on the back of your DVD Recordel:The choices follow:
Antenna-Cable (cable without a cable box)
Antenna Only (no cable service, iust off-air antenna)
Cable Receiver (cable service with a cable box)
Satellite Receiver (satellite programming)
Nothing (select this setting if you didn't connect anything to the RF
ANTENNA/CABLE INPUT jack on the back of the DVD Recorder).
Follow this procedure for all of the other INPUT jacks on the DVD Recordel:
2b. INPUT I (the INPUTjack,VIDEO or S-VIDEO, on the back of the DVD
Recorder)
2c, INPUT 2-Front (the jacks on the front of the DVD Recorder -- you have to
open the door on left side of the unit to see them).
2d. When you're finished, press the down arrow button on the remote to
highlight Done and press the OK button.
3) GUIDE Plus+ setup
Your DVD Recorder is equipped with the GUIDE Plus+ system, ano-fee, interactive, on-screen program guide that _ists cable and off-air broadcasts in
your area. In order to see program listings, you need to complete the following steps.
Note:The setup screensmay tell you to locateaQulck Setupguide.Pleasedisregard,as the instructlonsare contained in this User's Guide.
3a, First, identify your TVIS location, Use the arrow buttons to select your country and
pressOK. Use the number buttons on the remote to enter your zip code or postal
code, and press OK.
3b. The next series of screens asks you about your cable setup. Follow the on-screen
instructions.
If you don't have a cable box connected to your TV or DVD Recorder, skip to
step 3d.
3¢. If you connected a cable box to the DVD Recorder, the G-Link cable must be
connected to the back of your DVD Recorder and the other end of the cable (cal_ed
a wand) must be placed in front of the remote sensor on the cable box in order for
all of the features of the system to work. (Go to page I I for instructions.)
Turn on the cable box.
Identify the channel you tune your TV to when using the cable box, and the brand of
cable box. if your brand isn't listed, choose Not Listed.
After you've followed the on-screen instructions to enter the correct cable box
information,the GUIDE Plus+ System performs a test to make sure it has received the
appropriate information.
After the DVD Recorder completes its test, it gives you feedback. If the test failed, choose
another brand or set it manually.
3d, Confirming Your Settings
Once you've gnished the GUIDE Plus+ Setup, a screen appears listing the pertinent
information you've given. Check to make sure all settings are complete and correct.
Note: If the cablebox test failed,you shouldsee INCOMPLETEnext to the Cable Boxcategory.
If all of the settings are accurate, highlight Yes,end setup, and press OK.
if any settings are incomplete or incorrect, highlight No, repeat setup process, and press
OK. Follow the instructions on the screen to complete the setup.
Graphics contained within this publication are for representation on{y. _

4) Channel Search
The DVD Recorder automatically scans the signal coming through the cable
connected to the RFANTENNA/CABLE INPUT or the INPUT jacks, and prepares
the channel _ist.The channel list determines what channels appear when you press
the channel up and down buttons.
A progress indicator appears on theTV screen.When the Channel Search reaches
100%,press OK (the Channel List appears)
5) Channel List
The Channel List contains the channels you tune to when you press the CH+ and
CH- (channel up and channel down) buttons on the remote control From the
Channel List screen, you can delete channels you rarely watch.You'll still be able to
tune to the "deleted" channels directly by using the number buttons on the remote
control, but the DVD Recorder won't tune to a channel you delete when you press
the CH+/CH_ buttons on the remote control.
Press the down arrow button to scroll through the cbenne_s.A cbeckmark in the box
next to the channel means it has been stored in the channel list. Follow the on-screen
instructions to de_ete a channel in the list, or add one that isn't in the list.You can
also label channels by pressing the INFO button.
To skip editing the channel list, press the right arrow button.
If you didn't connect a satellite receiver, go to step 7
If you connected a satellite receiver, go to step 6
6) Satellite Receiver
If you connected a satellite receiver to the DVD Recorder, the G-LINK cable must be
connected to the back of your DVD Recorder (IRA SAT jack) and the other end of
the cable must be placed in front of the remote sensor on the satellite receiver in
order for the DVD Recorder to contro_ the satellite receiver for Timer Recordings.
(Go to page I I for instructions.)
Turn on the satellite receiver and follow the on-screen instructions to select your
sateflite receiver brand, ff your brand isn't listed, highlight Not Listed.
After you comptete the on-screen satellite receiver setup, the DVD Recorder wilt
perform a box test -- follow the on-screen instructions.
7) Time and Date
You muse set up the dock accurately in order for Timer Recordings to work.
Use the number buttons on the remote to enter Year, Date, and Time.To change the
AM/PM setting when you're entering the Time, press the right arrow button.
Note:If thls screendoesn't appear,you can setthe time later from the main menu-- w_:hthe remote
in DVD mode, pressMENU, select Setup,select Installation, select Clock Setupand follow the om
screen _llstructions.
hTV Watch TV
When the set-up procedure is complete, the main menu appears with the WQtch
TV menu highlighted.To watch TV, iust press the OK button on the remote.
14 Graphics contained within this publica_on are for representation only.

Ch ¢elr C@lmlme¢¢liOlmSamd
How to find )'our TV's Video Input Channel
In order to see wh_'s playing on your DVD Recorder, you need to tune the TV to the Video Input Channel that corresponds to the Input Jacks on your
TV that you used to connect the DVD Recorder to the T_The Video Input Cbenne_(s) varies for different brands and different models ofTVs.
RCA, GE, and Proscan TVs
If your brand of TV is RCA, GE, or Proscan,tile remote control packed with your DVD Recorder wilt most _ibely access the TV's Video Input Channel--
with tile DVD Recorder turned on, press tbeTV button, and then press INPUT until you see tile DVD Recorder's menu on your TV screen.
Other Brands of TVs
Sfilceaccessto aTV's Video feput Channel varies from one manufacturer to the next, it's dimcult to provide specific instructions for your particular brand.
However, a list of suggestions is provided below.
Consult the Instruction Manual that came with your T_
If you can't find the information in the manual, or can't find the manual, review the following list.
• There might be a button on theTV's remote control tha_ accesses theViffeo Input Channe_ (see table below for examples).
• You might select tbeVideo Input Channe_ from theTV's menu system.
• You might tune to it by pressing a specific channel number (see table below)
•Press the Channel up and/or down buttons on the TV's remote control (sometimes theViffeo Input Channel is stored in your TV's
channel list).
V deo mput ¢lhamme Var at oms
Button/Switch
on theTV
VIDEO
SIGNAL
VID I
VID 2
Button on the
TV remote
VID I S-VID
LINE INPUT
VID SOURCE
VIDEO AUX
Channel
Number
00 93
90 VID I
91 VID2
92 INPUT
Stop,
This chapter is dedicated to connecting your DVD Recorder. Choose what you want to do next, and go to the appropriate chapter for instructions.
Chapter 2:The Remote Control (page 19)
A description of each button is in Chapter 2.Additionally, the universa_ remote control can be programmed to operate aTV and satellite receiver or cable
box. Go to page 21 for instructions.
Chapter 3: Using the DVD Recorder's Features (page 25)
This chapter tells you how to record and playback programs; how to use the Disc Library, and the _dvantages of the GUIDE Plus+ System program guide.
Chapter 4: Playing Discs (page 33)
If you're ready to pop in a DVD (or a CD), dlis chapter explains how different discs function in the DVD Recorder and describes the features you can use
widl different types of discs.
Chapter 5:The DVD Recorder's Menu System (page 43)
Since this product is multi-functional, there are many on-screen menus to control settings and access features. Chapter 5 describes the menus and why
you would want to use diem.
Chapter 6:Additlonal Information (page 51)
If you're having trouble, go to Chapter 6.it includes troubleshooting information, the product's warranty, accessories you might want to purchase, and an
explanation of the correlation between different types of cables and picture/sound quality.
Graphics contained within this publication are for representation only. _5

®
Back of the DVD Recorder
The back of your recorder might look a little overwhelming at first.This section explains what goes where and wh)_There are two sets of jacks on the
back of your DVD Recorder m INPUT jacks and OUTPUT iacks.
Each jack is explained individually below, but the basic idea is about sending and receiving information to be played on or through your DVD
Recorder and displaying that information on your TV screen.We calJ it Signal Plow.
INPUT The cables connected to INPUT iacks bring the signal that carries the content iNTO the DVD Recorder, such as the cable signal
(programming) from the cable company or satellite programming from a s=teUite receiver.
OUTPUT The cables connected to the OUTPUT jacks are sending the signal from the DVD Recorder to the TV so you can see it on the
screen.The correct cables must be connected to the DVD Recorder's Ou_ut jacks and the corresponding Input Jacks on the TV so you can see
the program on the TV
Explanation of Jacks (from left to right)
RF ANTENNA/CABLE INPUT: Connect an RF Coaxial cable from an off-air antenna, cable box, or cab{e oudet to this iack.The cable is send-
ing the programming from the source to the DVD Recorde_ Our connections show the cable coming from an 2Way Splitter (which enables you
to watch one program on TV while you record another).
INPUT: These iacks receive audio and video from a compatible component, such as a sateffite receiver. INPUT 2 jacks are on the front of the
DVD Recorder.
VIDEO: Color coded yellow,the video cab{eyou usewith this iack provides better quality than an RFCoaxial cable but isn'tas good as
S-Video.Connect corresponding video cableto acompatible component suchasa satellite receiver.
AUDIO L (left): Color coded white, connect corresponding audio cable to a compatib{e component such as a satellite receiver.
AUDIO R (right): Color coded red, connect corresponding audio cable to a compatible component such as a satellite receivea
S-VIDEO IN: if your satellite receiver has S-VIDEO, connect the S-Video cable to this iack because it provides better picture quality than
standard video.
OUTPUT: These jackssend the content (audio andvideo) from your DVD Recorder O_T to theTV so you can seeit on theTV screenand
hear it through theTV's speakers.There are three video options:VIDEO, S-VIDEO,COMPONENTVIDEO OUTPUT (Y,Pb,Pr).Choose theVideo
Connectfon basedon yourTV's Input Jacks.For more information about jacks and cables,go to page56.Makesure you connect theAUDIO
OUTPUT jacksso you can hear the sound.
VIDEO: Color coded yellow,the video cab{eyou usewith this iack provides better quality than an RFCoaxial cable but isn'tas good as
S-Video.
AUDIO L (left): Color coded white, connect corresponding audio cable to TV's Audio Left Input Jack.
AUDIO R (right): Color coded red, connect corresponding audio cab{e to TV's Audio Right Input Jack.
S-VIDEO OUT: If your TV has S-VIDEO, connect the S-Video cable to this iack because it provides better picture quality than standard composite
video. (the yeffow jack).
DIGITALAUDIO (OPTICAL and COAXIAL): Use one of these jacks to connect your DVD Recorder to aDo,by Digital or DTS receiver or
decoder. Some receivers have either the COAXIAL or OPTICAL type of Digital Audio Input jack, and some have both. Under most conditions,optical
and coaxial connections work equally well -- the only difference is the type of cable you connect to the jack.
Rare_y,but sometimes, coaxial digital cables -- especially long ones, pick up radio frequency (RF) interference from household appliances,nearby power
lines, and/or broadcast towers. _fyou want to use a less expensive cable, connect acoaxial cable to the COAXtAL jack if your receiver has aCoaxial
input jack.
16 Graphics contained within this publica_on are for _epresentation only.

OPTICAL -connect an optical cable (SPDIF) to the OPTICAL iack on the DVD Recorder and Digita_ Audio Optical Input
jack on your receiver.
COAXIAL - connect a digital co_xia_ cable to this iack and to the Digital Audio Co_xia_ Input jack on your receiver.The
cable is not a black coaxial cable, but an RCA-type cable.
G-LINK: If you have a cable box connected, connect the G-Link Cable (provided) to this jack in order for the DVD
Recorder to control the cable box for timer recordings and program listings. For instructions, go to page I I.
IRA SAT: If you have a satellite receiver connected, connect the G-Link Cable (provided) to this iack in order for the DVD
Recorder to control the satellite receiver for timer recordings. For instructions, go to page I I.
PROG. SCAN switch - If you've connected your DVD Recorder to a TV that uses progressive scanning to display the image via the Y.Pb. Pr iacks, turn
the switch to the "on" position for progressive scan ptayback of DVD discs.Typically, only some High Definition Televisions and high-end multimedia
monitors use progressive scanning. Leave the switch in the OFF position for S-VIDEO or regular VIDEO (yellow) connections.
Note:If you turn the PROGSCAN switch on,andyourTV isn't capableof progressivescanningyou won't seea dear picture on the TVscreen.Additionally,when playingDVDs
you won't see any picture_ press STOP(the maln menu appears) and turn the PROGSCAN sw_h to the OFFposition.Tryplayingthe _sc again.
COMPONENTVlI:)EO OUTPUT (Y_ Pb, Pr): Some high-end TVs and monitors have ComponentVideo input jacks.The cables tha_ send the video
signal through these Output Jacks provide the highest resolution because the video signal is divided into 3 separate parts.As with VIDEO and S-VIDEO,
COMPONENT VIDEO (Y, Pb, Pr) on{y carries the picture sigaa{ so you need to connect the audio cables so you'll hear the sound. If your TV has
COMPONENT INPUT iacks, use three video grade cables to connect the DVD Recorder to these jacks on the TV to get the best picture quality.
Oper_ the door to access life _unt audio v_deo
ingat)acks (iNPUT l) and tie USB port
Front of the DVD Recorder
Underneath the door:
INPUT 2:AudloP/ideo jacks -These input Jacks are provided for convenience when you are connecting a temporary component, such
as a camcorder.
S-VIDEO- If a component you're connecting, such as a camcorder, has an S-Video Output jack connect it to this jack for picture quality
that is better than regular video (yellow). Remember.you still have to connect audio cables to hear sound.
USB Input- Connect a compatible Card Reader so you can view and!or copy music or pictures. Go to page 59 to find out which Card
Readers are compatible with this product.
STANDBY/ON -Turns the DVD Recorder on and off.
INPUT - Accesses different Video Input Channels (this is the"charmer' to which you tune the DVD Recorder so you can see the signal coming
from a component that is connected to the different Input Jacks on the DVD Recorder). For example, if your camcorder is connected to the Audio
andVideo input jacks on the front of the DVD Recorder (behind the door), you would press the INPUT button until INPUT 2-Front appears.
OPEN/CLOSE -Opens and closes the disc tray.
PLAY- Press to begin playback.
PAUSE - Pauses playback and/or recording.
STOP - Stops playback and/or recording.
RECORD -Records content to a DVD disc (DVD+R or DVD+RW discs only).
CH_ (channel down) - Goes to the previous channel in the channel list when you're watching TV
SKIP -When playing a disc, goes to the beginning of the preceding tide, chapter, or track on a disc.
CH+ (channel up) - Goes to the next channel in the channel list when you're watching TxZ
SKIP _1 -When playing a disc, goes to the beginning of the next tide, chapter, or track on a disc (in effect,"skippieg" the dale, chapter, or track).
I_ SEARCH _1 - Reverse and fast forward buttons (search backwards or search forwards).
Graphics contained within this publication are for representation only. _ 7

Chap ÷ ¢@lnlne¢ li@lnsand S÷ upo
What to Expect
Turn on the DVD Recorder to Watch TV
In order to use the features of the DVD Recorder (i.e., the on-screen GUIDE Plus+ System programming guide), you'll have to get used to turning on
your DVD Recorder to watch TM
You also need to tune the TV to the Video Input Channel -- instead of changing channels with the TV's channel up and channel down buttons, you change
channels via the DVD gecorder's channel up and down buttons (or number buttons) and the TV stays on the Video Input Channel that corresponds to
the Input Jacks on the TV you used to connect the TV to the DVD Recorde_ If you need help finding the TV's Video Input Channel, go to page 16.
Changing Channels
You might notice a slight delay when you're changing channels because the signal goes to the DVD Recorder and isthen sent out to the TM Also, if you
have a satellite receiver connected, use the arrow up/down buttons on the remote to change channels instead of using the CH+/CH- buttons.
The Main MenuAppears
The main menu appears whenever you turn on die DVD Recorder.To w_tchT_, press die
OK button when the Watch TV menu is highlighted.
When you change channels, the channel banner appears to give you programming
information tbet is available (for more information, go to page 26)
The main menu appears when you turn on the DVD
Recorder.To watch TV, press OK when the Watch TV
menu is highlighted.
To see the GUIDE Plus+ System, press the GUIDE
button while watching TV or select the GUIDE Plus+
menu.
In order to watch one channel while you record
another, you must connect the 2 Way Splitter
correctly and change tbeTV to the channel you want
to watch while the DVD Recorder stays on the channel
you want to record. Operation with cable boxes varies.
Not applicable with satellite receivers.
Recording one channel and watching another channel at the same time
A 2Way Splitter is packed with this product. Connected properly, this splitter enables you
to watch one program while you record another.The connections provided show this
2Way Splitter because you must use it if you want to record a program onto a DVD and
watch another program that is being broadcast onTV at the same time.
When you're recording one program and watching a different program, you can't change
channels via the DVD Recorde_You must change the channel on theTV (using theTV's
remote control; the channel buttons on the TV; or using the remote packed with the DVD
Recorder* provided you program the remote to operate the TV and put the remote in TM
mode by pressing the TV button).
Notes:
If you havea cehlefiox,you might not be able to recordpremium program stationsto the DVD
Recorderwhen usingthe g way splitte_Consultyour cable company and/orcable box manual for bel_
If you have a dig_al cable box, you must purchase a specJat digital splitter beceuse the one provided
for regular, anetag cafile boxes only.Also, the 2-wny spl_er provided _n't compatible _th digital
sate#ire receivers.
To see program listings, press the GUIDE button on
the remote control.
The first time you access the GUIDE Plus+ system,
the programs might not be listed yet.The program
information has to be downloaded and is usually sent
at night.
If there is more than one cable system operating in
your zip code, you will have to select the correct
channel line-up for your cable company. FoUow the on-
screen instructions.
The GUIDE Plus+ Program Guide
The GUIDE Plus+ system isa no-fee, on-screen programming guide that lists TV schedules
for your area (cable programming and/or off-air broadcasts only, not sateltlse).To see the
GUIDE Plus+ System programming guide, press the GUIDE button on the remote control.
The GUIDE Plus+ System is not available until it completes its first download of program
information. Program information is usually sent 3t nigh.To ensure that your first
download of data is complete,_eave your DVD Recorder off overnight but it must remain
plugged into a working AC outlet. If you use a cable box, be sure to leave the cable box
on. Downloads also occur several times a d3y,but won't affect operation.
Note: the GUIDE Plus+ system doesn't list satellite programming.
_he Ur_ivelsalR_rro_eCon_ro packedw_h l,,e DVD R_cordel operatesn/ost RCA,GE apdPioscanQVsI: isaso
c@_b_eof be% plogl arrln/edto operate rrany off,el bands aridn/odels Go to page2 _ormole ir_ortr _ o_
_8 Graphics contained withi_ this publication are for representation only.
Table of contents
Other RCA DVD Recorder manuals

RCA
RCA DRC8335 - DVD Recorder & VCR Combo User manual

RCA
RCA DRC8335 - DVD Recorder & VCR Combo User manual

RCA
RCA DRC8000N - Progressive-Scan DVD... User manual

RCA
RCA DRC8320N User manual

RCA
RCA DRC8060N User manual

RCA
RCA DRC8052NB User manual

RCA
RCA DRC8005N - Progressive-Scan DVD... User manual

RCA
RCA DRC8030N User manual

RCA
RCA DRC8052 User manual

RCA
RCA DRC8060 User manual