RCA RT1511 User manual

IMPORTER:AVC Multimedia
© 2012 AVC Multimedia
http://www.RCAav.com
User Manual
Manual de usuario
It is important to read this instruction book prior to using your new product for the first time.
Es importante que lea este libro de instrucciones antes de comenzar a usar su nuevo producto.
RT1511
5.1 Home Theater System
Equipo Home Theater 5.1
EN
ES

EN EN
23
SAFETY PRECAUTIONS
The lightning flash
with an arrowhead
within a triangle alerts you to
uninsulated dangerous voltage
within the product’s enclosure
thatcouldcausean electricshock.
The symbol for Class II
(Double Insulation)
The exclamation point within a
triangle alerts you to the presence
of important operating, maintenance and
servicing instructions in this user’s manual.
Placement Information
• Donotusethisunitinplaceswhichareextremelyhot,cold,
dusty, or humid.
• Inacabinet,allowabout2.5cm(1inch)offreespacearound
the unit for adequate ventilation.
• Placetheunitonaatandevensurface.
• Donotrestricttheairowofthisunitbyplacingitsomewhere
withpoorairow,bycoveringitwithacloth,orbyplacingit
on bedding or carpeting.
Safety Information
• WhenconnectingordisconnectingtheACpowercord,grip
the plug and not the cord itself. Pulling the cord may damage
it and create a hazard.
• Whenyouarenotgoingtousetheunitforalongperiodof
time, disconnect the AC power cord.
WARNING:
TO REDUCE THE RISK OF ELECTRIC SHOCK, DO NOT
REMOVE COVER (OR BACK). NO USER-SERVICEABLE
PARTS INSIDE. REFER SERVICING TO QUALIFIED
PERSONNEL.
TOPREVENTFIREORSHOCKHAZARD,DO NOTEXPOSE
THIS UNIT TO RAIN OR MOISTURE. DO NOT PLACE
OBJECTSFILLEDWITHLIQUIDSONORNEARTHISUNIT.
THE MAINS PLUG IS USED AS DISCONNECT DEVICE
AND IT SHOULD REMAIN READILY OPERABLE DURING
INTENDED USE.IN ORDER TO DISCONNECT THE
APPARATUS FROM MAINS COMPLETELY, THE MAINS
PLUG SHOULD BE DISCONNECTED FROM THE MAINS
SOCKET OUTLET COMPLETELY.
CAUTION:
DANGER OF EXPLOSION IF BATTERY IS INCORRECTLY
REPLACED.REPLACEONLYWITHTHESAMEOREQUIVALENT
TYPE.
SHOULD ANY PROBLEMS OCCUR, DISCONNECT THE AC
POWER CORD AND REFER SERVICING TO A QUALIFIED
TECHNICIAN.
DO NOT PLACE ANYTHING DIRECTLY ONTOP OFTHE UNIT,
IT MAY CAUSE DAMAGE.
USEOF CONTROLSORADJUSTMENTSFOR PERFORMANCE
OF PROCEDURES OTHER THAN THOSE SPECIFIED MAY
RESULT IN HAZARDOUS RADIATION EXPOSURE
THE APPARATUS SHALL NOT BE EXPOSEDTO DRIPPING OR
SPLASHINGANDTHATNOOBJECTSFILLEDWITHLIQUIDS,
SUCH AS VASES, SHALL BE PLACED ON APPARATUS.
Condensation Information
• Whenleftinaheatedroomwhereitiswarmanddamp,water
dropletsorcondensationmayforminsidetheunit.Whenthere
is condensation inside the unit, the unit may not function
normally. Let the unit stand for 1-2 hours before turning the
power on,or gradually heat the room and let the unit dry before
use.
Rating Plate Location
The rating plate is located on the rear of unit.
This device complies with part 15 of the FCC Rules.
Operation is subject to the following two conditions:
(1)This device may not cause harmful interference, and
(2)this device must accept any interference received,
including interference that may cause undesired
operation.
NOTE: This equipment has been tested and found to
complywiththelimitsfora Class B digital device,pursuant
to part 15 of the FCC Rules.These limits are designed
to provide reasonable protection against harmful
interference in a residential installation.This equipment
generates, uses and can radiate radio frequency energy
and, if not installed and used in accordance with the
instructions, may cause harmful interference to radio
communications.
However,there is no guarantee that interference will not
occur in a particular installation. If this equipment does
causeharmfulinterferencetoradioortelevisionreception,
which can be determined by turning the equipment
off and on, the user is encouraged to try to correct the
interference by one or more of the following measures:
Reorient or relocate the receiving antenna.
Increase the separation between the equipment and
receiver.
Connecttheequipmentintoanoutletonacircuitdifferent
from that to which the receiver is connected.
Consultthedealeroranexperiencedradio/TVtechnician
for help.
FCC Information
This Class B digital apparatus complies with
Canadian ICES-003. WARNING: Changes or modifications to this
unit not expressly approved by the party responsible
for compliance could void the user's authority to
operate the equipment.
This product complies with DHHS rule 21 subchapter
J parts 1040-10 and 1040-11 at date of manufactured.

EN EN
23
not t into your outlet, consult an electrician for
replacement of the obsolete outlet.
10) Protect the power cord from being walked on
or pinched particularly at plugs, convenience
receptacles, and the point where they exit from
the apparatus.
11) Only use detachments/accessories specied by
the manufacturer.
12)
Use only with the cart, stand,
tripod,bracket,ortablespecied
bythemanufacturer,orsoldwith
the apparatus. When a cart is
used, use caution when moving
thecart/apparatuscombination
to avoid injury from tip-over.
13) Unplug this apparatus during lightning storms
or when unused for long periods of time.
14) Referallservicingtoqualiedservicepersonnel,
Servicing is required when the apparatus has
beendamagedinanyway,suchaspower-supply
cord or plug is damaged, liquid has been spilled
or objects have fallen into the apparatus, the
apparatushasbeenexposedtorainormoisture,
doesnotoperatenormally,orhasbeendropped.
IMPORTANT SAFETY INSTRUCTIONS
1) Read these instructions.
2) Keep these instructions.
3) Heed all warnings.
4) Follow all instructions.
5) Do not use this apparatus near water.
6) Clean only with dry cloth.
7) Do not block any ventilation openings. Install in
accordancewiththemanufacturer’sinstructions.
8) Do not install near any heat sources such
as radiators, heat registers, stoves, or other
apparatus (including ampliers) that produce
heat.
9)
Do notdefectthesafety purpose of the polarized
orgrounding-typeplug.Apolarizedplughastwo
bladeswithonewiderthantheother.Agrounding
type plug has two blades and a third grounding
prong. The wide blade or the third prong are
providedforyoursafety.Iftheprovidedplugdoes
Using the Remote Control
• PointtheremotecontrolattheREMOTESENSORlocated
on the unit.
• Whenusing thisunit invery brightlight,the infrared
REMOTE CONTROL SENSOR may not work properly.
• Therecommendedmaximumdistanceforusing the
remotecontrolisabout16feet(5meters).
BATTERY REPLACEMENT
Whenthebatterybecomesweak,theoperatingdistance
of the remote control will be greatly reduced and you will
need to replace the battery.
Note: If the remote control is not going to be used for a
long time, remove the battery.
TO CHANGE THE REMOTE CONTROL BATTERY
2. InsertoneCR2025(3V)sizebattery.
Remove the
PLASTIC sheet
before using
the remote
control.
WARNING:
GETTING STARTED
1. Open the battery door.
Remote Control (with battery)................................................................................................. x 1
Audio Cable ................................................................................................................................... x 1
Please check and identify the supplied accessories.
ACCESSORIES
Do not dispose of the
battery in a fire or it may
leave and/or explode.
Battery shall not be
exposed to excessive
heat such as sunshine,
fire or the like.
CAUTION:
Danger of explosion
if battery is incorrectly
replaced.
Replace only with the same
or equivalent type.
Please read and save for future reference
Some of the following information may not apply
to your particular product; however, as with any
electronic product, precautions should be observed
during handling and use.

EN EN
45
REMOTE CONTROL REFERENCE GUIDE
1. ON/STANDBY button
2. SOURCE button
Switches the sound input source
(between DVD IN,AUX IN or LINE IN)
press repeatedly to select different
sources.
3. RESET button
Adjusts all speakers to their
original factory default settings.
4. CHANNELS button
Switchesbetween5.1(SURROUND
SOUND) and 2.1 (STEREO with
SUBWOOFER)soundmodes.
5. MUTE button
Instantly turns off the sound.Press
again to restore the sound.
6. FRONT -/+ buttons
Decreases / increases the level of
FRONT L/R speakers.
7. CENTER -/+ buttons
Decreases / increases the level of
CENTER speaker.
8. REAR -/+ buttons
Decreases / increases the level of
REAR L/R speakers.
9. SUBWOOFER -/+ buttons
Decreases / increases the level of
SUBWOOFER.
10. MASTER VOLUME -/+ buttons
Adjusts the volume and the level
of all speakers.
1
2
3
4
5
6
7
8
9
10
UNIT REFERENCE GUIDE
1 2 3 4 5 6
7
FRONT REAR
8
9
10
11
12
13
14
15
7. SUBWOOFER
8. DVD IN jack
Connects to the Audio Out of Blu-ray DVD Players,
or other devices with RCA stereo audio outputs.
9. AUX IN jack
Connects to the Audio Out ofTVs or other devices
with RCA stereo audio outputs.
10. FRONT Left Speaker terminal
11. FRONT Right Speaker terminal
12. CENTER Speaker terminal
13. SURROUND Left Speaker terminal
14. SURROUND Right Speaker terminal
15. POWER CORD
1. ON/STANDBY button
2. STANDBY indicator
Green Light : the unit is in turned ON.
Amber Light : the unit is in STANDBY.
3. Remote Control Sensor
4. SOURCE button
Switches the sound input source (between DVD
IN, AUX IN or LINE IN). Press repeatedly to select
different sources.
5. VOLUME +/- buttons
Adjusts the volume and the level of all speakers.
6. LINE IN jack
Connects to the Audio Out of portable audio
players or other audio devices

EN EN
45
IMPORTANT :
Switch off the power before connecting equipment.
The speakers cords have been color-coded to simplify connection.Just plug the speaker wire into the corresponding
jacks on the rear of the unit, matching the color tube on the end of the speaker wire to the color-coded connector.
2. CONNECTING THE SPEAKERS & SUBWOOFER
CONNECTIONS
Note :
• Beforeyouplugintheunit,makesurethattherated
voltage of your unit matches your local voltage.
• Keepyourhandsdry when youareconnecting the
power cord to the wall outlet to avoid electric shock.
•
Whenyouarenotgoingtousetheunitforalongperiod
of time, disconnect the power cord.
1. POWER CONNECTION
CAUTION :
• Topreventdamagetotheunit,besuretoturnitoffbefore
making any connection.
• Connectingspeakersotherthanthespeakerssuppliedwith
the unit may damage it.
SPEAKERS 4
F L
F R
C T
S L
S R
F L
F R
C T
S L
S R
HAUT-PARLEUR 4
Black & Red
Black & Green
Black & Blue
Black & Grey
Black & White
SURROUND (LEFT)
SURROUND (RIGHT)
CENTER
FRONT (RIGHT)
FRONT (LEFT)
• Whentheplayeris in the standby mode, it isstill
consuming some power. If you wish to disconnect the
unit completely from the power,unplug the power cord
from the AC outlet.
• TOPREVENTELECTRICSHOCK,MATCHWIDEBLADE
OFPLUGTOWIDESLOT,FULLYINSERT.
3. SPEAKERS POSITIONING
LISTENING POSITION
FRONT
(LEFT)
SURROUND
(LEFT)
FRONT
(RIGHT)
SURROUND
(RIGHT)
CENTER
SUBWOOFER

EN EN
67
CONNECTIONS
4. CONNECTING TO TV
• ConnecttheaudiocabletothewhitejackofAUXIN
(L) and red jack of AUX IN (R) on the rear of unit, and
then connect to the corresponding AUDIO OUT jacks
on your TV.
• TurnonyourTV.ThiswillallowyourTV’ssoundtoplay
through the unit.
• PresstheSOURCE button to select AUX IN mode.
L
R
DVD
IN
AUX
IN
Audio Cable
(supplied)
To AUDIO OUT
(white)
(red) (red)
(white)
NOTE: In order to have TV sound come through this Home Theater System, your TV
must have AUDIO OUT jacks.These jacks will typically be located on the rear or side of
the TV (not in the front). Most, but not all TV’s have these Audio Out jacks.
NOTE: If you use a Cable or Satellite Box to view TV content, you should be able to use
the Audio Out connection on the Cable or Satellite Box to listen to TV audio through
your Home Theater. Simply connect to the Home Theater’s AUX IN.
5. CONNECTINGTO BLU-RAY/DVD PLAYER / SATELLITE/CABLE / GAME CONSOLE
/ VIDEO CAMERA
• ConnecttheaudiocabletothewhitejackofDVDIN(L)andredjackofDVDIN(R)ontherearofunit,
and then connect to the corresponding AUDIO OUT jacks on your Blu-ray/DVD player /Satellite /
Cable/ Game Console / Video Camera.
• Turn on Blu-ray/DVDplayer,Satellite/Cable,GameConsoleorVideoCamera.Thiswillallowyour
Blu-ray/ DVD Player / Satellite / Cable / Game Console / Video Camera’s sound to play through the
unit.
• PresstheSOURCE button to select DVD IN mode.
GAME
L
R
DVD
IN
AUX
IN
(white)
(red)
To AUDIO OUT
To VIDEO IN
To VIDEO OUT
1 set of Audio
cables included
(red)
(yellow)
(yellow)
(white)
You should now hear your TV’s audio over your Home
Theater’s speakers. If you don’t:
1. Please check the volume settings on both your
Home Theater and your TV.
2. For some TV’s (this is quite rare) you may need to
ensure your TV’s Audio Output is enabled
(see TV’s setup menu).

EN EN
67
6. CONNECTING TO OTHER EQUIPMENT
• Connecta3.5mm-to-3.5mmaudiocable(notincluded)totheLINEINjackonthefrontofunitandtheAUDIO
OUT/HEADPHONE jack of your portable device.
• Turnonyourotherequipment.Thiswillallowyourequipment’ssoundtoplaythroughtheunit.
• PresstheSOURCE button to select LINE IN mode.
SOUND ADJUSTMENT
TROUBLE SHOOTING GUIDE
No power.
• CheckthattheACpowercordisconnected.
No sound.
• PresstheVOLUME + button to increase volume.
• EnsuretheMUTE button is not pressed on
the remote control.
• EnsuretheSOURCEselectioniscorrect.
Nosound fromonechannelorunbalanced
left and right volume.
Try pressing the RESET button on remote control. If
this doesn’t help, try pressing the CHANNEL button
onremotecontrol(thiswillswitchsystembetween5.1
SURROUND and STEREO modes).
•Checkthespeaker connectionsoftheinoperative
channel.
•Checkthespeaker cordconnection andspeaker
location.
• Adjustindividualspeakervolumes.
TO ADJUST THE MASTER VOLUME
TO ADJUST THE VOLUME OF AN INDIVIDUAL
SPEAKER
TO RESET
TO CHANGE THE SPEAKER CHANNEL
• Directlypressthe+ or - button on the remote control
to increase or decrease the level of the corresponding
speaker(s).
• Pointtheremotecontrolat the REMOTESENSOR
located on the unit.
• PresstheVOLUME +/- buttons on the unit or the
VOLUME MASTER +/- button on the remote control
to adjust the level of all speakers.
• PointtheremotecontrolattheREMOTESENSOR
located on the unit.
• PresstheRESET button on the remote control to
return to factory default speaker settings.
• PresstheCHANNELS button on the remote control
to select the listening mode.This will switch between
5.1(SURROUNDMODE) and 2.1 (STEREOwith
SUBWOOFER).Werecommendyouleavesystemin
5.1mode.TheCenterandRearSurroundspeakers
will not be active if system is in STEREO mode.
Note:
• Surroundspeakersandcenterspeakervolume
adjustments can only be made from the remote
controlin 5.1 channelspeakermode,notin2.1
channel speaker mode.
• PresstheMUTEbuttontoinstantlyturn off the
sound . Press it again to restore the sound.
Reversed left and right sound.
• Checkthespeakerconnectionforproperphasing.
The center speaker or the surround
speakers give no sound.
• Checkthespeakerconnectionsarecorrect.
• Thecurrentmodedoesnotsupportsurroundsound.
The remote control does not function.
• Removeanyobstaclesbetweentheremotecontrol
and the unit.
• Usetheremotecontrolneartheunit.
• Pointtheremotecontrolattheremotesensoronthe
unit.
•Replacethebatteryintheremotecontrolwithnew
one.
• Ifthereisaclearplasticstripstickingoutfromthe
rear of the remote control, pull it out.
Need more help?
Please visit online help at www.RCAav.com
Specifications
Power requirement : AC ~120V 60Hz
Specifications and external appearance are subject to change without notice.
Audio Cable
(not supplied)
To AUDIO OUT or
HEADPHONE jack
Portable Audio

EN
8811-151191W011
Printed in China
AVC MULTIMEDIA (“AVC”) makes the following limited warranty. This limited warranty extends to the original consumer
purchaser and is limited to non-commercial use of the product.
One Year Parts & Labor Warranty
AVC products purchased in the United States are warranted to be free from defects in materials or workmanship for a period
of one year from the date of their original retail purchase. If the unit fails to conform to this warranty, we will service the product
using new or refurbished parts and products, at AVC’s sole discretion.
During a period of one year from the eective warranty date, AVC will provide, when needed, service labor to repair a
manufacturing defect at its designated Service Center. To obtain warranty service in the United States, you must rst call our
Customer Support Center at 1-877-252-6873, during the hours listed in the box below. The determination
of service will be made by AVC Customer Support. PLEASE DO NOT RETURN YOUR UNIT TO AVC WITHOUT PRIOR
AUTHORIZATION. New or remanufactured replacements for defective parts or products will be used for repairs by AVC at
its designated Service Center for one year from the eective warranty date. Such replacement parts or products are warranted
for an additional one year from the date of repair or replacement. The Customer will be required to ship the unit to the Service
Center indicated at the time Customer Support is contacted to make the necessary repairs. The customer is responsible for all
transportation charges to the service facility.
Packaging and Shipping Instruction
When you send the product to the AVC service facility you must use the original carton box and packing material or an equivalent
as designated by AVC.
LIMITED WARRANTY
Your Responsibility
(1) You must retain the original sale receipt to provide proof of purchase.
(2) These warranties are eective only if the product is purchased and operated in the U.S.A. or Canada.
(3) Warranties extend only to defects in material or workmanship, and do not extend to any product or parts which have been lost
or discarded, or damage to product or parts caused by misuse, accident, improper operation or maintenance, or use in violation
of instructions provided with the product, or to product which has been altered or modied without authorization of AVC,or to
products or parts thereof which have had the serial number removed or changed.
Out of Warranty
In the event your product requires repair after the limited warranty period has expired, please contact our Customer Support
Center at 1-877-252-6873 or www.RCAav.com
Hours: Monday–Thursday: 9am–7pm, Friday: 9am–5pm, Saturday: 9am–NOON Eastern time.
Important: You are responsible for any transportation, shipping or insurance relative to the return of product to our
Product Returns Center.
All warranties implied by state law, including the implied warranties of merchantability and fitness for a particular
purpose, are expressly limited to the duration of the limited warranties set forth above. With the exception of
any warranties implied by state law as hereby limited, the foregoing warranty is exclusive and in lieu of all other
warranties, guarantees, agreements and similar obligations of manufacturer or seller with respect to the repair or
replacement of any parts. In no event shall AVC be liable for consequential or incidental damages.
Model no........................................................................ Product name ..................................................................
Type of set ................................................................................................................................................................
Serial no.......................................................................... Invoice no ........................................................................
Date purchased .............................................................. Dealer name ....................................................................
LIMITED WARRANTY
Specications and external appearance are subject to change without notice.
No person, agent, distributor, dealer or company is authorized to change, modify or extend the terms of these warranties in any
manner whatsoever. The time within action must be commenced to enforce any obligation of AVC arising under the warranty or
under any statute, or law of the United States or any state thereof, is hereby limited to one year from the date of purchase. This
limitation does not apply to implied warranties arising under state law.
This warranty gives you specic legal rights and you may also have other rights, which may vary, from state to state. Some states
do not allow limitation on how long an implied warranty lasts, when an action may be brought, or the exclusion or limitation of
incidental or consequential damages, so the above provisions may not apply to you.
For more information on other products and services, please visit our web site at
www.RCAav.com
Important: Also keep your“Bill of Sale”as proof of purchase.
FOR SERVICE AND REPAIR, PLEASE VISIT www.RCAav.com

ES
1
ADVERTENCIA:
PARA REDUCIR EL RIESGO DE SUFRIR DESCARGAS ELÉCTRICAS, NO
RETIRE LA CUBIERTA (NI LA PARTE POSTERIOR). NO HAY PIEZAS DE
REPUESTO DENTRO DEL APARATO. DERIVE CUALQUIER REPARACIÓN
A PERSONAL CALIFICADO.
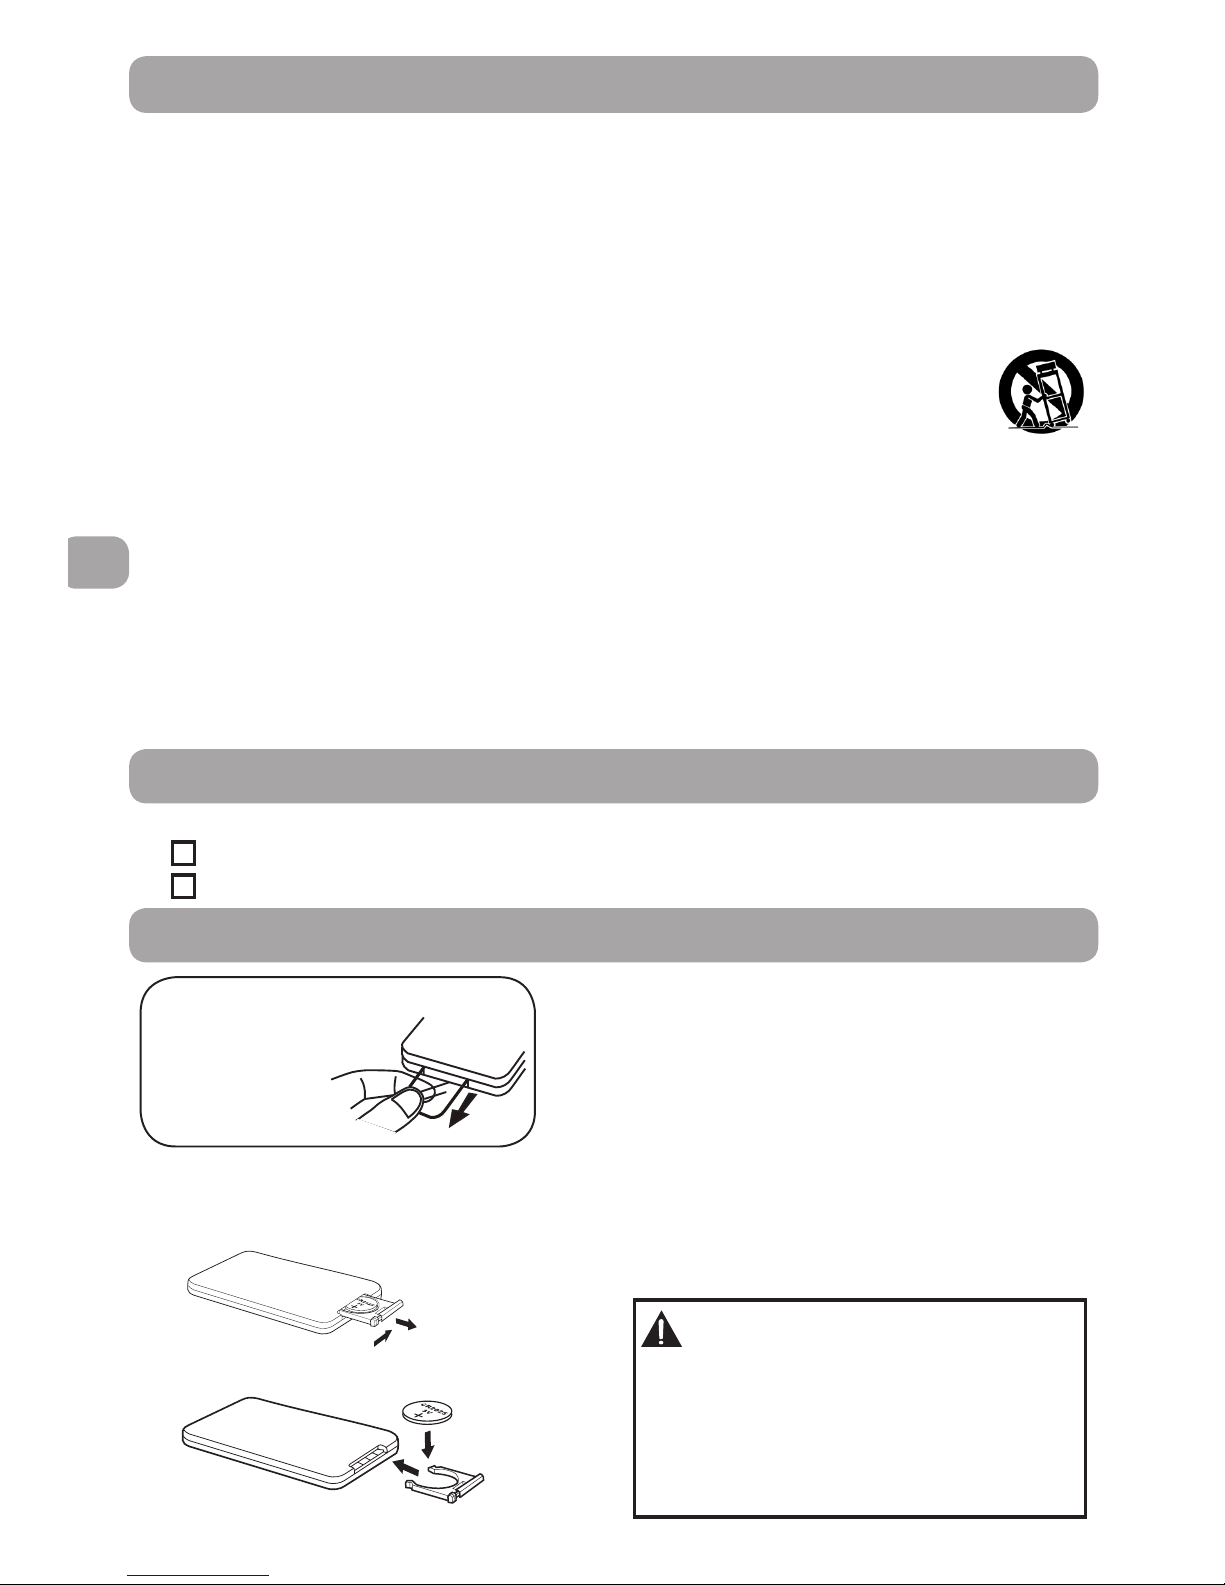
PELIGRO DE EXPLOSION SI LA PILA SE CAMBIA DE MANERA INCORRECTA.
AL CAMBIAR LA PILA, UTILICE SOLO EL MISMOTIPO DE PILA, O UN TIPO
DE PILA EQUIVALENTE.
EL TOMACORRIENTE SE USA COMO DISPOSITIVO DE DESCONEXIÓN
Y DEBE ESTAR SIEMPRE DISPONIBLE PARA SU FUNCIONAMIENTO
DURANTE SU USO. PARA DESCONECTAR COMPLETAMENTE EL
TOMACORRIENTE DE LA RED ELÉCTRICA, EL TOMACORRIENTE DEBE
ESTAR DESCONECTADO TOTALMENTE DEL ENCHUFE DE LA PARED
CONECTADO A LA RED ELÉCTRICA.
PRECAUCIONES DE SEGURIDAD
INFORMACIÓN REFERENTE A LA UBICACIÓN
• Noutiliceestaunidadenlugaresconexcesodecalor,frío,
polvo o humedad.
• Enungabinete,dejealrededorde2,5cm(1pulgada)
de espacio libre alrededor de la unidad para que ésta se
pueda ventilar adecuadamente.
• Coloquelaunidadenunasupercieplanaypareja.
• Norestrinjaelujodeairedelaunidadponiéndolaenun
lugar con poca ventilación. No la cubra con un paño, ni la
ponga sobre la ropa de cama o sobre la alfombra.
INFORMACIÓN REFERENTE A LA SEGURIDAD
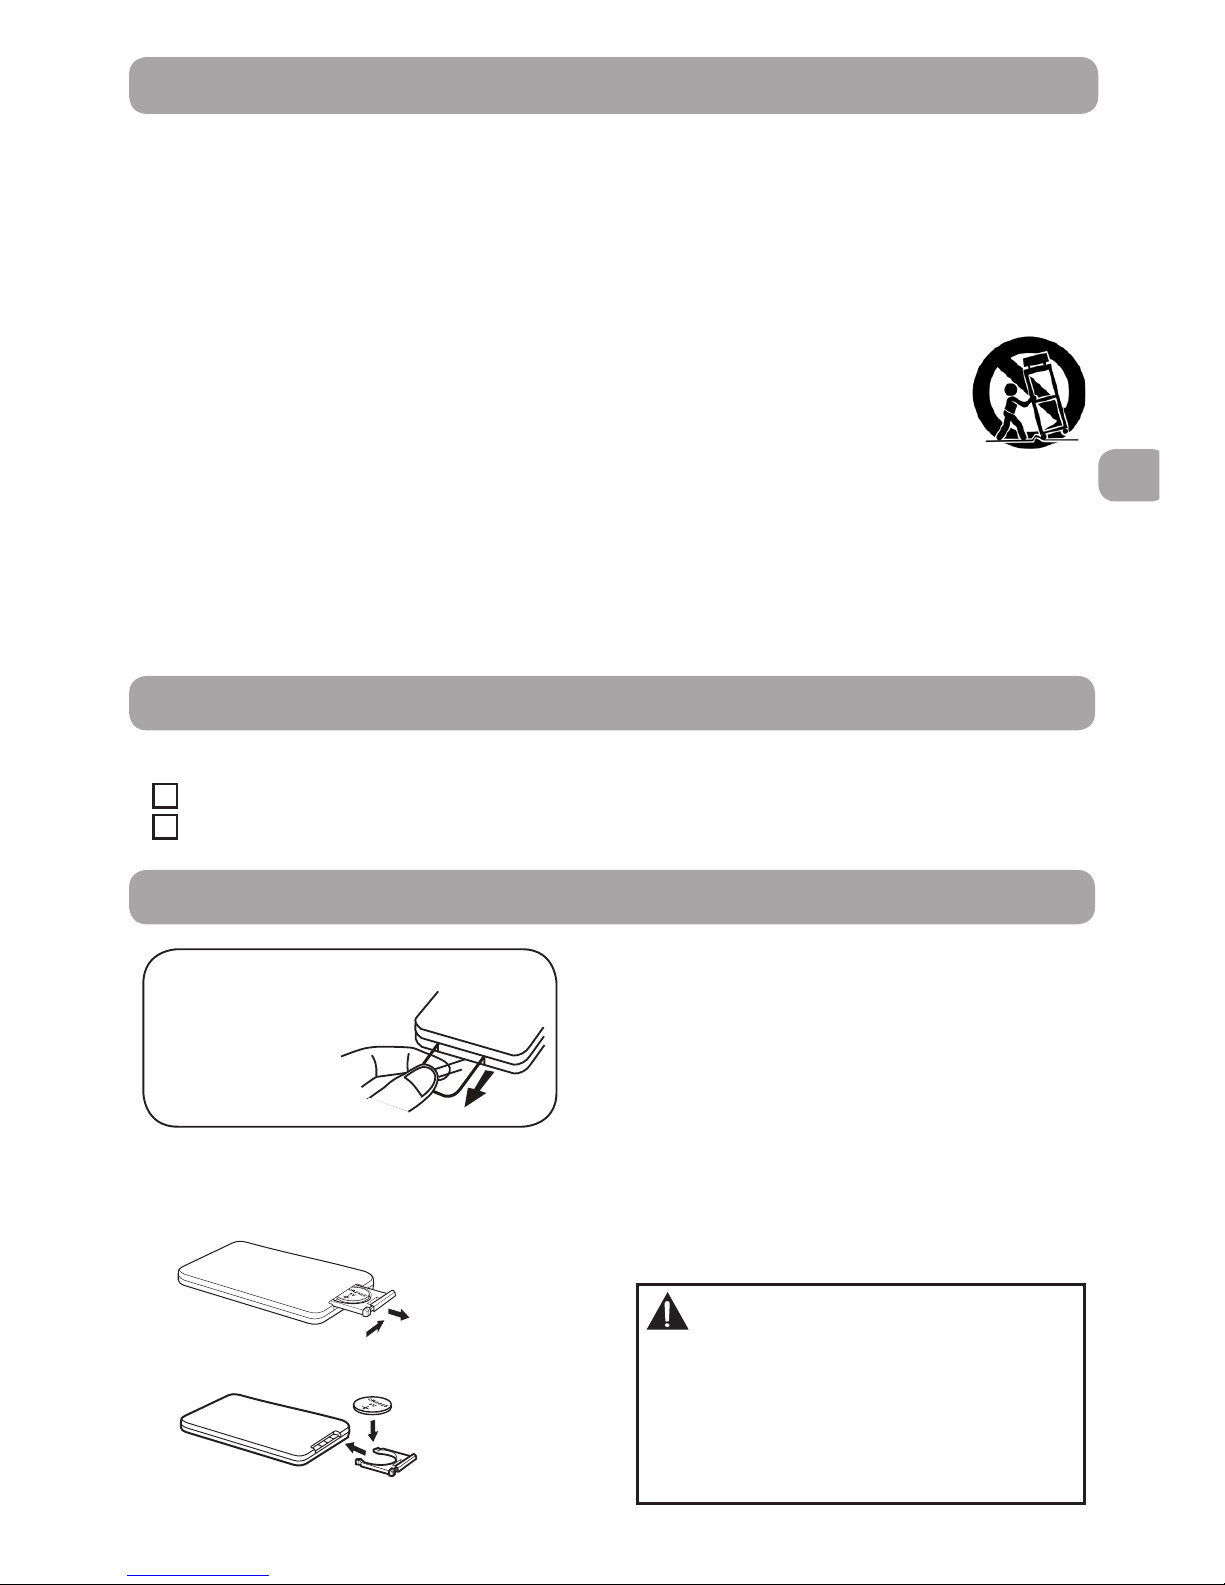
• Tirar del cable puede dañarlo y crear riesgo.
• Cuandolaunidadnosevaausarporunperíodolargode
tiempo, desconecte el adaptador de CA.
INFORMACIÓN REFERENTE A LA
CONDENSACIÓN
• Aldejaresteequipoenunahabitacióntemperada,con
calor y humedad, es posible que al interior del aparato
se formen gotitas de agua o condensación. Al haber
condensación dentro de la unidad, ésta no funcionará
normalmente. Deje reposar la unidad por 1 ó 2 horas
antes de encenderla, o tempere poco a poco la habitación
y seque la unidad antes de usarla.
UBICACIÓN DE LA PLACA DE CLASIFICACIÓN
La placa de clasicación está ubicada en la parte
posterior de la unidad.
Elsímbolodeunrayodentrodeuntriánguloequilátero
está pensado para alertar al usuario de la presencia de
“voltaje peligroso” no aislado dentro de la carcasa del
producto, el cual puede ser de una magnitud suciente para
provocar una descarga eléctrica.
El signo de admiración dentro de un triángulo equilátero
está pensado para alertar al usuario de la presencia de
instrucciones importantes de manejo y mantenimiento
(reparación) en este manual de usuario.
ÉsteeselsímboloparaclaseII(DobleAislación)
ADVERTENCIA:
SI OCURRE ALGÚN PROBLEMA,
DESCONECTE EL ADAPTADOR DE CA Y
LLAME A UN TÉCNICO CALIFICADO PARA EL
MANTENIMIENTO.
DECLARACIONES DE LA FCC
Este dispositivo cumple con la Parte 15 de las Reglas FCC.
La operación está sujeta a las siguientes dos condiciones:
(1) este dispositivo puede no causar interferencia dañina,
y (2) este dispositivo debe aceptar cualquier interferencia
recibida, incluyendo interferencia que puede ser causada
por operación no deseada.
NOTA: Esta unidad ha sido revisada y funciona en
conformidad a los límites establecidos para los aparatos
digitales clase B, según se establece en la Parte 15 del
reglamentodelaFCC.Dichoslímitesestándiseñadospara
proporcionar una protección razonable contra interferencia
dañina en una instalación residencial. Esta unidad genera,
usa y puede irradiar energía de frecuencias de radio y,
de no ser instalada y empleada según se indica en las
instrucciones, puede ocasionar interferencia dañina en las
comunicaciones radiales. Sin embargo, no se garantiza que
en una instalación particular no se produzca interferencia.
Si este equipo causara interferencia dañina en la recepción
de su radio o de su televisor (lo que puede determinarse al
encender y apagar la unidad), le sugerimos al usuario que
intente reparar dicha interferencia siguiendo una o más de
las siguientes recomendaciones:
- Oriente la antena de recepción en otra dirección o póngala
en otro lugar.
- Aumente la distancia entre la unidad y el receptor.
- Conecte la unidad a un enchufe de pared que esté en un
circuito diferente a donde haya conectado el receptor.
- Pida ayuda a un vendedor o a un técnico de radios y
televisores con experiencia, si tiene más consultas.
CUIDADO :
PARA PREVENIR RIESGO DE INCENDIO O DESCARGA ELÉCTRICA. NO
EXPONER ESTE APARATO A LLUVIA O HUMEDAD. NO COLOCAR OBJETOS
QUE CONTENGAN LÍQUIDOS ENCIMA O CERCA DE ESTA UNIDAD.
EN CASO DE OCURRIR ALGÚN PROBLEMA, DESCONECTE EL
ADAPTADOR DE CORRIENTE CA O EL ADAPTADOR DE CORRIENTE DEL
AUTOMÓVIL CA, Y REFIERA EL SERVICIO A UN TÉCNICO CALIFICADO.
NO PONGA NINGÚN OBJETO DIRECTAMENTE SOBRE LA UNIDAD, YA
QUE PUEDE DAÑARLA.
AL USAR LOS CONTROLES, HACER AJUSTES O LLEVAR A CABO
PROCEDIMIENTOS DISTINTOS A LOS QUE SE ESPECIFICAN EN EL
MANUAL, PUEDE QUEDAR EXPUESTO A RADIACION PELIGROSA.
NO DEBE EXPONER ESTE APARATO A GOTAS NI SALPICADURAS DE AGUA
NI DEBE PONER SOBRE ÉSTE OBJETOS QUE CONTENGAN LÍQUIDO,
COMO FLOREROS.
Este aparato digital Clase B cumple con la
norma Canadiense ICES-003.
A la fecha de fabricación, este producto cumple
con la regla 21, subcapítulo J para las piezas 1040-
10 y 1040-11 del DHHS .
PRECAUCION
RIESGO DE CHOQUE ELÉCTRICO
NO ABRIR

ES ES
23
reemplazar la toma de corriente obsoleta.
10. Proteja el cable de alimentación de ser pisado o
perforadoespecícamenteeneláreadelenchufe,
la toma de corriente y el punto en donde salen
del aparato.
11. Sólo use los anexos/accesorios especificados por
el fabricante.
12.Usesóloconelcarro,soporte,trípode,omesa
especicados por el fabricante, o vendidos con el
aparato. Cuando use el carro, mueva
la combinación de carro/aparato de
manera cautelosa para evitar daños
a causa de que se vuelque.
13. Desconecte este aparato durante tormentas
eléctricas o cuando no se vaya a usar durante
períodosprolongados.
14. Refiera todas las reparaciones a personal técnico
calificado. La reparación es necesaria cuando
el aparato se dañe de cualquier manera, como
por ejemplo en caso de que se dañe el cable de
alimentación o el enchufe, si se ha derramado
líquidoosihancaídoobjetosdentrodelaparato,
si el aparato ha quedado expuesto a la lluvia o a
la humedad, si no funciona normalmente o si se
ha dejado caer.
INSTRUCCIONES DE SEGURIDAD IMPORTANTES
1. Lea estas instrucciones.
2. Conserve estas instrucciones.
3. Preste atención a todas las advertencias.
4. Siga todas las instrucciones.
5. No use este aparato cerca del agua.
6. Limpie solo con un paño seco.
7. No bloquee ninguna de las aberturas de
ventilación. Instale de acuerdo a las instrucciones
del fabricante.
8. No instale cerca ninguna fuentes de calor tales
como radiadores, registros de calor, estufas u
otros aparatos (incluyendo amplificadores) que
producen calor.
9. No invalide la nalidad de seguridad del enchufe
polarizado o con descarga a tierra. Un enchufe
polarizado tiene dos cuchillas y una tercera clavija
de conexión a tierra. La cuchilla más ancha o
la tercera clavija se proveen para su seguridad.
Cuando el enchufe provisto no encaje en su
toma de corriente, consulte a un electricista para
USO DEL CONTROL REMOTO
• Dirijaelcontrolremotohaciaelsensorremotoubicado
en la unidad.
• Alestarantelapresenciadeunafuentedeluzambiental
potente, es posible que el funcionamiento del sensor
remoto infrarrojo se vea distorsionado y provoque
operaciones poco dedignas.
• Ladistanciaqueserecomiendaparahacerfuncionarel
control remoto es de alrededor de 16 pies (5 metros).
REEMPLAZO DE LA BATERÍA
Cuandolabateríapierdaenergía,ladistanciaoperativadel
control remoto será reducida grandemente y usted necesitará
reemplazarlabatería.
Nota:
Cuando no vaya a usar el control remoto por un periodo
prolongado, retire la pila.
PARA INSTALAR LAS PILAS
1. Abra la tapa del compartimento para la pila.
2. Introduzca una pila tamaño CR2025 (3V).
ADVERTENCIA:
No arroje las pilas al fuego,
ya que pueden explotar o se
puedederramarelliquidoque
hay en su interior.
No debe exponer la batería
a fuentes de calor excesivo,
como es la luz del sol, el fuego
u otros factores similares.
Antes de USAR el
control remoto,
retire la lámina
de PLÀSTICO.
CUIDADO:
Peligro de explosión si la
batería es reemplazada
incorrectamente.
Reemplácela solamente con
el mismo tipo o equivalente.
PRÉPARATIFS
ACCESORIOS
Por favor localice los accesorios incluidos.
Controlremoto(conbatería)...............................................................................x 1
Cable de audio......................................................................................................... x 1
Favor de leer y conservar para referencia futura
Alguna parte de la siguiente información puede no
aplicar a su producto en particular; sin embargo, al
igual que con cualquier producto electrónico, se deben
observar precauciones durante el manejo y el uso del
mismo.

ES ES
23
CONTROL REMOTO GUÍA DE REFERENCIA
UNIDAD GUIDE DE RÉFÉRENCE
Parte frontal Parte posterior
1. Botón ON/STANDBY
2. Botón SOURCE
Cambie de fuente de entrada de
sonido (elija entre DVD IN, AUX IN
IN o LINE IN); oprima una y otra
vez para seleccionar diferentes
fuentes.
3. Botón RESET
Ajusta todos los parlantes a
la programación original por
defecto.
4. Botón CHANNELS
Alterne entre las modalidades
de sonido 5.1 (SONIDO
ENVOLVENTE) y 2.1
(ESTÉREO con PARLANTE
DE FRECUENCIAS GRAVES).
5. Botón MUTE
Desactiva instantáneamente el
sonido. Oprima nuevamente para
restaurar el sonido.
6. Botones FRONT -/+
Baja/sube el nivel de los
parlantes FRONTALES
IZQUIERDO/DERECHO.
7. Botones CENTER -/+
Baja/sube el nivel del
parlante CENTRAL.
8. Botones REAR -/+
Baja/sube el nivel de los
parlantes POSTERIORES
IZQUIERDO/DERECHO.
9. Botones SUBWOOFER -/+
Baja/sube el nivel
del PARLANTE DE
FRECUENCIAS GRAVES.
10.Botones MASTER
VOLUME -/+
Ajusta el volumen y los
niveles de todos los
parlantes.
1
2
3
4
5
6
7
8
9
10
1 2 3 4 5 6
7
8
9
10
11
12
13
14
15
8. Enchufe DVD IN
Se conecta al enchufe de salida de audio de
los reproductores de DVD para Blu Ray, o a
otros aparatos con enchufes RCA para salida
de audio en modalidad estéreo
9. Enchufe AUX IN
Se conecta al enchufe de salida de audio
de los televisores o a otros aparatos con
enchufes RCA para salida de audio en
modalidad estéreo.
10. Terminal del parlante FRONTAL izquierdo
11. Terminal del parlante FRONTAL derecho
12. Terminal del parlante CENTRAL
13.
Terminal del PARLANTE DE FRECUENCIAS
GRAVES izquierdo
14.Terminal del PARLANTE DE FRECUENCIAS
GRAVES derecho
15. CABLE DE ALIMENTACIÓN
1. Botón ON/STANDBY
2. Indicador STANDBY
Luz verde: la unidad se enciende.
Luz ámbar: la unidad está en la modalidad de
suspensión STANDBY.
3. Sensor del control remoto
4. Botón SOURCE
Cambia la fuente de entrada de sonido (elija
entre DVD IN, AUX IN o LINE IN).Oprima una
y otra vez para seleccionar distintas fuentes.
5. Botones VOLUME +/-
Ajusta el volumen y el nivel de todos los
parlantes.
6. Enchufe LINE IN
Conecte al enchufe para salida de audio
(Audio Out) de los reproductores de audio
portátiles o de otros aparatos de audio.
7. PARLANTE DE FRECUENCIAS GRAVES

ES ES
45
de corriente, éste sigue consumiendo un poco de
corriente. Si usted desea desconectar completamente
la unidad de la red eléctrica, desenchufe el cable de
alimentación del enchufe de CA de la pared.
• PARA EVITAR RECIBIR DESCARGAS ELÉCTRICAS,
INSERTE COMPLETAMENTE LA PATA ANCHA DEL
ENCHUFEENLARANURAANCHACORRESPONDIENTE
DEL ENCHUFE DE LA PARED.
Nota :
• Antesdeenchufarlaunidad,asegúresedequeelvoltaje
promedio de la unidad sea el mismo que el voltaje local.
• Mantengasusmanossecasalconectarelcablede
alimentación al enchufe de la pared, para evitar que le
dé la corriente.
• Cuandonovayaausarlaunidadporun período
prolongado, desenchufe el cable de alimentación.
• Mientras el reproductor está en la modalidad de
suspensión, éste sigue consumiendo un poco
1. CONEXIÓN A LA CORRIENTE
CONEXIONES
IMPORTANTE:
Apague la unidad antes de conectar los aparatos.
Los cables de los parlantes se han codicado con colores para simplicar la conexión. Tan sólo enchufe el cable del
parlante en los enchufes correspondientes ubicados por detrás de la unidad, haciendo corresponder el tubo de color
del extremo del cable del parlante al conector del mismo color.
2. CONEXIÓN DE LOS PARLANTES Y DEL PARLANTE DE FRECUENCIAS GRAVES
CUIDADO:
•Paraevitarquelaunidadsedañe,asegúresedeapagarlaantesde
llevar a cabo cualquier conexión.
•Siconectaotrosparlantequenoseanlosqueseincluyenconeste
equipo,elequiposepodríadañar.
SPEAKERS 4
F L
F R
C T
S L
S R
F L
F R
C T
S L
S R
HAUT-PARLEUR 4
negro y rojo
negro y verde
negro y azul
negro y gris
negro y blanco
parlante de frecuencias
graves (izquierdo)
parlante de frecuencias
graves (derecho)
CENTRAL
parlante FRONTAL (derecho)
parlante FRONTAL (izquierdo)

ES ES
45
3. POSICIÓN DE LOS PARLANTES
parlante
FRONTAL
(izquierdo)
parlante
FRONTAL
(derecho)
parlante de
frecuencias
graves
(izquierdo)
parlante de
frecuencias
graves
(derecho)
parlante
CENTRAL
POSICIÓN PARA ESCUCHAR
parlante de
frecuencias
graves
CONEXIONES
4. CONEXIÓN AL TELEVISOR
•
Conecte el cable de audio al enchufe blanco AUX IN
(izquierdo) y al enchufe rojo AUX IN (derecho) ubicados
en la parte posterior de la unidad, y luego conecte a los
enchufes AUDIO OUT correspondientes del televisor.
• Enciendaeltelevisor.Estopermitiráqueelsonidode
su televisor se oiga por medio de la unidad.
• OprimaelbotónSOURCE para seleccionar la
modalidad AUX IN. Usted debiera escuchar ahora
L
R
DVD
IN
AUX
IN
al enchufe AUDIO OUT
cable de audio
(incluido)
(blanco)
(rojo)
(blanco)
(rojo)
NOTA : para que el sonido del televisor se oiga a través del equipo Home Theater, su televisor debe contar con
enchufes AUDIO OUT. Estos enchufes normalmente se encontrarán en la parte posterior de la unidad o por el
costadodeltelevisor(ynoenelfrente).Lamayoríadelostelevisores,peronotodos,cuentanconestosenchufes
de salida de audio.
NOTA: si usa una caja para cable o recepción satelital para ver contenido de televisión, usted debiera poder usar la
conexión Audio Out de la caja para cable o recepción satelital para escuchar el sonido del televisor a través de su
equipo Home Theater. Simplemente conecte el enchufe AUX IN del equipo Home Theater.
el sonido de su televisor a través de los parlantes del
equipo Home Theater. De lo contrario:
1. Revise la programación de volumen del equipo
Home Theater y de su televisor.
2. En el caso de algunos televisores (en casos muy
raros) puede que deba revisar que la salida de audio
de su televisor esté activada (reérase al menú de
conguración del televisor).

ES ES
67
5. CONEXIÓN A UN REPRODUCTOR DE BLU-RAY Y DVD / RECEPTORES DE TELEVISIÓN
SATELITAL O DE TELEVISIÓN POR CABLE /CONSOLA DE JUEGOS/CÁMARA DE VIDEO.
• ConecteelcabledeaudioalenchufeblancoDVDIN(izquierdo)yalenchuferojoDVDIN(derecho)ubicadosenla
parte posterior de la unidad, y luego conecte a los enchufes AUDIO OUT correspondientes de su REPRODUCTOR
DE Blu-ray y DVD / Receptores de televisión satelital o de televisión por cable / Consola de juegos / Cámara de
video.
• EnciendaelREPRODUCTORDEBlu-rayyDVD,laReceptoresdetelevisiónsatelitalodetelevisiónporcable,la
consola de juegos o la cámara de video. Esto permitirá que el sonido de su REPRODUCTOR DE Blu-ray y DVD /
Receptores de televisión satelital o de televisión por cable /consola de juegos/cámara de video se oiga a través
de la unidad.
• OprimaelbotónSOURCEparaseleccionarlamodalidadDVDIN.
6. CONEXIÓN A OTRO EQUIPO
• Conecteuncabledeaudiode3.5mma3.5mm(novieneincluido)delenchufeLINEINubicadoenlaparte
frontal de la unidad al enchufe AUDIO OUT/HEADPHONE de su dispositivo portátil.
• Enciendaelotroequipo.Estopermitiráqueelsonidodesuequiposeoigaatravésdelaunidad.
• OprimaelbotónSOURCEparaseleccionarlamodalidadLINEIN.
cable de audio
(no viene incluido)
al enchufe AUDIO
OUT o al enchufe
para audífonos
L
R
DVD
IN
AUX
IN
(amarillo)
(amarillo)
al enchufe AUDIO OUT
(blanco)
(rojo)
(blanco)
(rojo)
al enchufe
VIDEO IN
sólo se incluye 1
set de cables para
audio
al enchufe
VIDEO OUT
CONEXIONES
GAME
receptores de televisión
satelital o de televisión
por cable
reproductores de
Blu-ray o DVD
computadora
de audio portátil

ES ES
67
AJUSTE DEL SONIDO
PARA AJUSTAR EL VOLUMEN PRINCIPAL
PARA AJUSTAR EL VOLUMEN DE UN SOLO
PARLANTE
PARA VOLVER A LA PROGRAMACIÓN POR
DEFECTO
PARA CAMBIAR EL CANAL DEL PARLANTE
• OprimalosbotonesVOLUME +/- de la unidad o el
botón VOLUME MASTER +/- del control remoto para
ajustar el nivel de todos los parlantes.
• DirijaelcontrolremotoalSENSORREMOTOubicado
en la unidad.
• Oprimadirectamenteelbotón+o –del control
remoto para subir o bajar el nivel del parlante
correspondiente.
• DirijaelcontrolremotoalSENSORREMOTOubicado
en la unidad.
• OprimaelbotónRESET del control remoto para
volver a poner los parlantes bajo la programación
por defecto.
• OprimaelbotónCHANNELSdelcontrolremotopara
seleccionar la modalidad de escucha. Ésta alternará
entre la modalidad 5.1 (SONIDO ENVOLVENTE)
y la modalidad 2.1 (ESTÉREO con PARLANTE DE
FRECUENCIAS GRAVES). Le recomendamos dejar
el equipo en la modalidad 5.1. Los parlantes
posteriores de sonido envolvente no se activarán
si el equipo está bajo la modalidad ESTÉREO.
Nota:
• Elajustedelvolumendelosparlantesdesonido
envolvente y del parlante central sólo se puede
efectuar desde el control remoto en la modalidad
de parlante con 5.1 canales, no en la modalidad de
parlante con 2.1 canales.
• Oprima el botón MUTE para apagar
instantáneamenteelsonido.Oprímalodenuevo
para restaurar el sonido.
•
Revise que el cable de alimentación de CA esté
conectado.
• OprimaelbotónVOLUME+parasubirelvolumen.
•
Asegúrese de no haber oprimido el botón MUTE del control
remoto.
• Asegúresedehaberseleccionadolafuentecorrecta.
Pruebe y oprima el botón RESET del control remoto. Si esto no
funciona, intente oprimir el botón CHANNEL del control remoto (el
cual alternará poniendo el equipo en la modalidad 5.1 SURROUND
o en la modalidad STEREO).
• Revise las conexiones del parlante del canal que no esté
funcionando.
•
Revise la conexión del cable del parlante y la ubicación del
parlante.
•
Ajuste el volumen de un parlante en particular.
No hay corriente.
No se oye el sonido por un canal, o bien,
el volumen izquierdo y derecho no está
balanceado.
No hay sonido.
• Revise laconexióndelparlanteparaunafase
apropiada.
• Retirecualquierobstáculoquehayaentreelcontrolremotoyla
unidad.
• Useelcontrolremotocercadelaunidad.
• Dirijaelcontrolremotoalsensorremotodelaunidad.
• Cambielabateríadelcontrolremotoypongaunabatería
nueva.
• Sihubieraunaláminadeplásticotransparenteasomando
pordetrásdelcontrolremoto,quítela.
• Revisequelasconexionesdelparlanteesténbien
hechas.
• Lamodalidadseleccionadanocuentaconrespaldo
para sonido envolvente.
El parlante central o los parlantes de de
sonido envolvente no se oyen.
Sonido izquierdo y derecho al revés.
El control remoto no funciona.
GUÍA PARA RESOLVER PROBLEMAS
¿Necesita más ayuda?
Por favor, visite la página de ayuda en Internet
http://www.RCAav.com
ESPECIFICACIONES ELÉCTRICAS
Requisito de corriente: CA ~ 120V 60Hz
Especicaciones y apariencia externa sujetos a cambio sin noticación.

8
ES
Su Responsabilidad
(1) Usted debe conservar el recibo de venta original para suministrar prueba de compra.
(2) EstasgarantíassonefectivassolamentesielproductoescompradoyoperadoenlosEE.UU.oCanadá.
(3)Lasgarantíasseextiendensolamenteparadefectosenelmaterialomanodeobra,ynocubrenproductoopartealguno
que pudiera haberse perdido o desechado, o daño a producto o partes causado por el mal uso, accidente, operación o
mantenimiento inapropiados, o por el uso en violación de las instrucciones suministradas con el producto, o producto
que haya sido alterado o modicado sin la autorización de AVC, o productos o partes del mismo a los que se les haya
removido o cambiado el número de serie.
Enelcasodequesuproductorequierareparacióndespuésdelaexpiracióndelperíododegarantíalimitada,porfavorcontacte
a nuestro Centro de Soporte al Cliente al 1teléfono
1-877-252-6873
ó www.RCAav.com
Horas: Lunes–Jueves: 9 a.m. – 7 p.m., Viernes: 9 a.m. – 5 p.m., Sábado: 9 a.m. – MEDIODIA Tiempo del Este.
Importante:ustedesresponsableporcualquiertransporte,envíooseguroconrelaciónaladevolucióndelproductoanuestro
Centro de Devoluciones de Producto.
GARANTÍA LIMITADA
Fuera de Garantía
AVC MULTIMEDIA (“AVC”)proporcionalasiguientegarantíalimitada.Estagarantíalimitadaseextiendealcomprador
consumidor original y está limitada al uso no comercial del producto.
Garantía de Un Año en Partes y Mano de Obra
Los productos AVC comprados en los Estados Unidos están garantizados y están libres de defectos en materiales o mano
de obra por un periodo de un año desde la fecha de su compra al detalle original. Si la unidad falla durante el cumplimiento
deestagarantía,nosotrosledaremosservicioalproductousandopartesyproductosnuevosoreconstruidos,alasola
discreción de AVC.
Duranteunperíododeunañodesdelafechaenvigordelagarantía,AVC proveerá, cuando sea necesario, mano de obra de
serviciopararepararundefectodemanufacturaensuCentrodeServiciodesignado.Paraobtenerserviciodegarantíaenlos
Estados Unidos, usted primero debe llamar a nuestro Centro de Soporte al Cliente al teléfono 1-877-252-6873, durante
las horas indicadas en la casilla siguiente. La determinación de servicio será efectuada por Servicio al Cliente AVC. POR
FAVOR NO REGRESE SU UNIDAD A AVC SIN AUTORIZACIÓN PREVIA. Se usarán reemplazos nuevos o de remanufactura
para partes o productos defectuosos para reparaciones por AVC en su Centro de Servicio designado por un año desde la
fechadegarantíaenvigor.Talespartesoproductosdereemplazoestángarantizadosporunañoadicionaldesdelafechade
reparaciónoreemplazo.SepediráalClientequeenvíelaunidadalCentrodeServicioindicadoalmomentoenqueSoporte
al Cliente sea contactado para hacer las reparaciones necesarias. El cliente es responsable por todos los gastos de transporte
hasta la instalación de servicio.
Instrucción de Empaque y Envío
CuandoustedenvíeelproductoalainstalacióndeservicioAVC debe usar la caja y el material de empaque originales o un
equivalente según sea indicado por AVC.GARANTIA LIMITADA
Todaslasgarantíasimplícitasporleyestatal,incluyendolasgarantíasimplícitasdecomercializaciónyadecuaciónparaun
propósitoparticular,sonlimitadasexpresamentealaduracióndelasgarantíaslimitadasestablecidasanteriormente.Conla
excepcióndecualquiergarantíaimplícitaporleyestatalconformeselimitadoenelpresentedocumento,lagarantíaantecedente
esexclusivayenlugardetodaslasotrasgarantías,acuerdosyobligacionessimilaresdefabricanteovendedorconrespectoala
reparación o reemplazo de cualquier parte. En ningún caso AVC será responsable por daños consecuenciales o incidentales.
Ningunapersona,agente,distribuidorocompañíaestáautorizadoacambiar,modicaroampliarlostérminosdeestasgarantías
en manera alguna. El tiempo en que la reclamación debe ser iniciada para hacer exigible alguna obligación de AVC derivada bajo
lagarantíaobajoalgúnestatuto,oleydelosEE.UU.ocualquierestadointegrantedeestos,esporestemediolimitadoaunaño
desdelafechadecompra.Estalimitaciónnoaplicaagarantíasimplícitasderivadasbajolaleyestatal.
Estagarantíaledaderechoslegalesespecícosyustedpuedetambiéntenerotrosderechos,loscualespuedenvariar,deestado
aestado.Algunosestadosnopermitenlimitaciónencuantoaltiempodeduracióndeunagarantíaimplícita,cuandosepresenta
una reclamación, o la exclusión o limitación de daños incidentales o consecuenciales, por lo tanto las anteriores provisiones
pueden no aplicar a usted.
Para más información sobre otros productos y servicios, por favor visite nuestro sitio web en
www.RCAav.com
Importante: también conserve su“Nota de Venta” como prueba de compra.
Modelo no. ................................................ Nombre de Producto ..........................................................
Tipo de equipo .......................................................................................................................................
No. de serie .............................................. No de factura .....................................................................
Fecha de compra ..................................... Nombre del Distribuidor ....................................................
Impreso en China 811-151191W011
PARA SERVICIO Y REPARACION, POR FAVOR VISITE www.RCAav.com
Especicaciones y apariencia externa sujetos a cambio sin noticación.
Table of contents
Languages:
Other RCA Home Theater System manuals

RCA
RCA RTD130 User manual

RCA
RCA RTD317W User manual

RCA
RCA RTD315 User manual

RCA
RCA RTS202 User manual

RCA
RCA RTD215 - Home Theatre System User manual

RCA
RCA HT35752BD User manual

RCA
RCA RCA User manual

RCA
RCA Complete 7-Piece100-Watt Home Theater Audio... User manual

RCA
RCA RT2910 User manual

RCA
RCA RTS202 User manual