(_)PC (Previous Channel) Button
•Pressing the PC button causes the
TV to change back to the last
tuned channel. This is useful
should you want to monitor two
channels.
• To operate, select the first channel
you wish to watch. Then select
the other channel by pressing two
number buttons (for example,
press 0 then 6 for channel 6).
• The TV will now change back
and forth between the two
channels each time you press the
PC button.
CS (Commercial Skip) Button
•Use this button when you want to
scan other channels during a
program break.
• When a break occurs, press CS
once before changing channels.
The TV will count down 30
seconds on the screen and then
automatically switch channels
back to the original channel.
• Press CS twice if you want the
TV to count down 60 seconds.
Each additional press will add
another 30 seconds to the count-
down time (up to four minutes).
• To cancel, press CLEAR. The
countdown clock will disappear
from the screen, and the TV will
stay tuned to the present channel.
• The counter will only display for
2 seconds if CAPTIONING is
turned on.
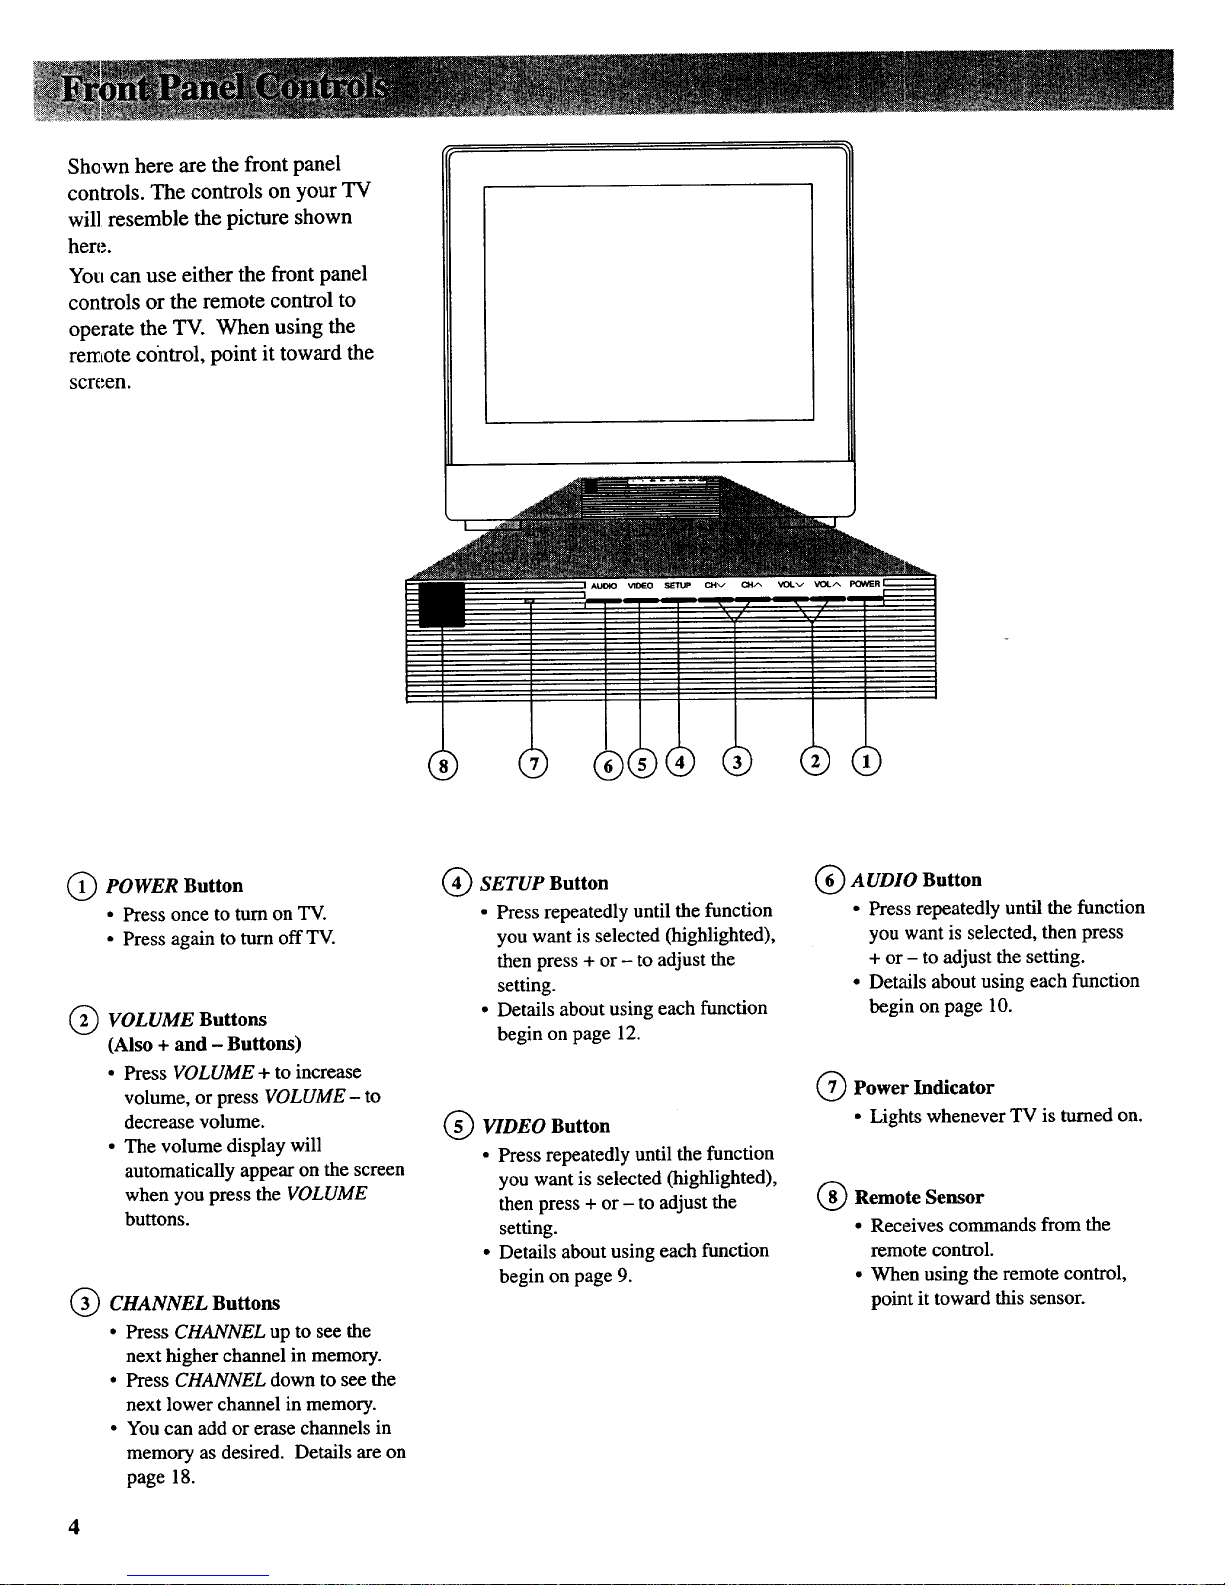
CHANNEL Buttons
• Press CHANNEL up to select the
next higher channel in channel
memory.
• Press CHANNEL down to select
the next lower channel in channel
memory.
• You can add or erase channels in
memory as desired. Details are
on page 18.
VOLUME Buttons
• Press VOLUME up to increase
volume.
• Press VOLUME down to
decrease volume.
• The volume display will
automatically appear on the
screen when you press the
VOLUME buttons.
MUTE Button
• Press MUTE to quickly reduce
sound to minimum level without
affecting the picture. This is
especially useful during
telephone calls or other
interruptions.
• When the sound is muted, the
word MUTE will be displayed on
the screen, except when
CAPTIONING is turned on.
• To restore sound, press MUTE
again or press VOLUME up.
SETUP Button
• Press repeatedly until the
function you want is selected,
then press + or - to adjust the
setting.
• Details about using each function
begin on page 12.
I(I(I_A UDIO Button
• Press repeatedly until the
function you want is selected,
then press + or - to adjust the
setting.
• Details about using each function
begin on page 10.
VIDEO Button "
• Press repeatedly until the
function you want is selected,
then press + or - to adjust the
setting. Press + or - again to
adjust the picture settings.
• Details about using each function
are on page 9.
(_)+ and Buttons
•Use these buttons after you have
pressed one of the three menu
buttons (VIDEO, AUDIO, or
SETUP).
_Number Buttons (0-9)
• These buttons let you directly
access any channel number, even
if the channel is not in the
channel memory.
• To select a channel, press two
number buttons (first one, then
the other). For example, press 0
then 6 for channel 6. Press 1
then 3 for channel 13.
• To select a 3-digit number (like
125), press and hold number
button 1until 1-- appears on the
screen. Then press the other two
numbers.
Note: YourTV will tuneup to
chmme1125. Check with your cable
company to determine which
chmmelsare available in your area.
I(I(I@RES/MEM (Reset/Memory)
Butt_m
•When the remote is in the "TV
Mode" (as explained in the
Important Note on page 10), this
button is the RES (Reset) button.
Pressing it will return the video
functions (color, tint, contrast,
brightness, and sharpness) to
their original factory settings.
•When the remote is in the
"VCR Mode", the RES/MEM
button becomes the MEM
(Memory) button. Pressing it
turns on a compatible VCR's
counter memory function.
(_) CLEAR Button
•Pressing CLEAR clears the
screen of all on-screen display
messages (except MUTE).