4
First Things First
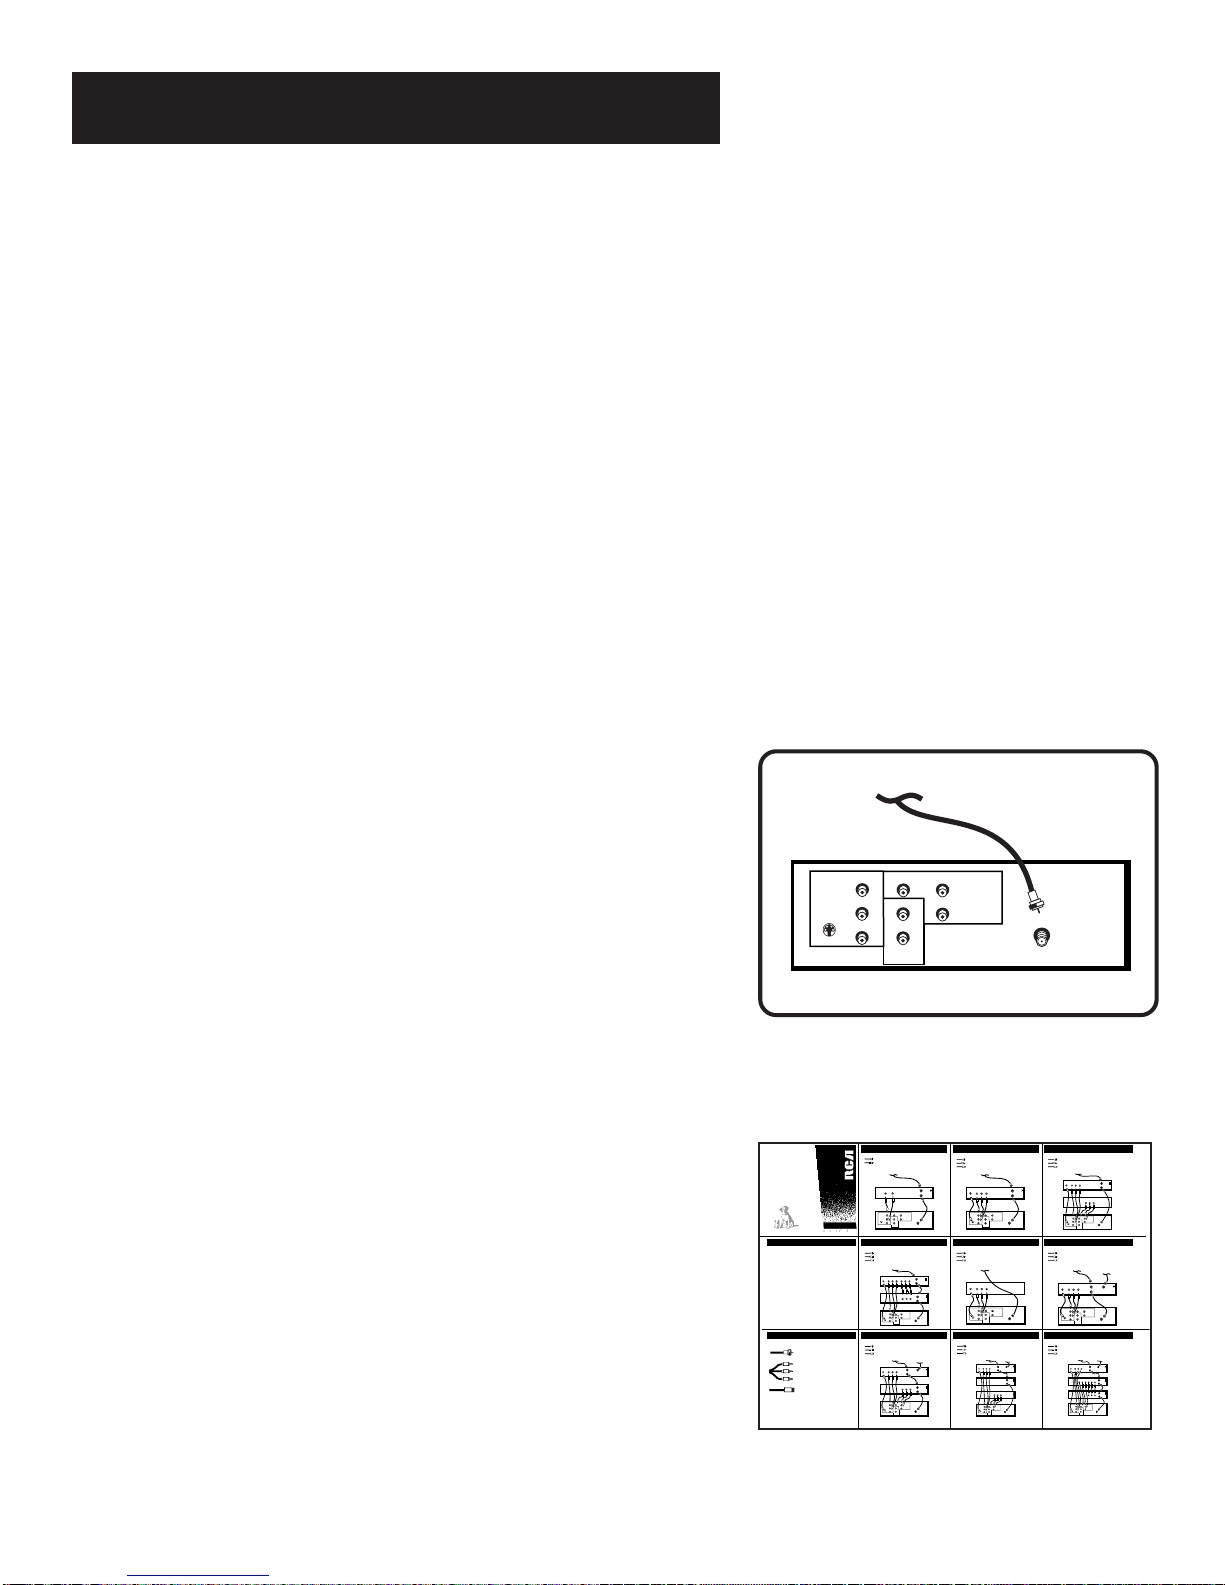
The front side of this foldout, which should be used in conjunction
with the First Things First section of the User Manual, diagrams 10
recommended connections for hooking up the TV to a cable box or
antenna, one or two VCRs, a DVD player,and a satellite receiver. If
your components don’t match those shown on the foldout, or if you
prefer a different connection, see your dealer or specific component
user manuals.
The reverse side of this foldout contains a first-time setup guide, as
well as brief descriptions of the remote control buttons and
instructions on using the on-screen menu system.
VCR 1
TV
AUDIO
VIDEO
OUT
INFROM ANT
OUTTO TV
CH3
CH4
VIDEO1
INPUT
VIDEO
R
L/MONO ANT
S-VIDEO AUDIO
OUTPUT
R
L/MONO
VIDEO2
INPUT
VIDEO R
L/MONO
CABLE, CABLE BOX, OR ANTENNA
Tocom 15182090
C
ABLES
AND
C
ONNECTIONS
A. TV
AND
MONO VCR B. TV
AND
VCR
VCR 1
TV
S-VIDEO L
R
VIDEO
OUT
INFROM ANT
OUTTO TV
CH3
CH4
VIDEO1
INPUT
VIDEO
R
L/MONO ANT
S-VIDEO AUDIO
OUTPUT
R
L/MONO
VIDEO2
INPUT
VIDEO R
L/MONO
CABLE, CABLE BOX, OR ANTENNA
C. TV, VCR
AND
DVD P
LAYER
VCR 1
DVD PLAYER
TV
S-VIDEO L
R
VIDEO
OUT CH3
CH4
OUT
VIDEO L
R
INFROM ANT
OUTTO TV
VIDEO1
INPUT
VIDEO
R
L/MONO ANT
S-VIDEO AUDIO
OUTPUT
R
L/MONO
VIDEO2
INPUT
VIDEO R
L/MONO
CABLE, CABLE BOX, OR ANTENNA
TV
VCR 1
VCR 2
S-VIDEO
INFROM ANT
OUTTO TV
OUT
VIDEO L
R
CH3
CH4
INFROM ANT
OUTTO TV
IN
VIDEO L
R
CH3
CH4
OUT
VIDEO L
R
VIDEO1
INPUT
VIDEO
R
L/MONO ANT
S-VIDEO AUDIO
OUTPUT
R
L/MONO
VIDEO2
INPUT
VIDEO R
L/MONO
CABLE, CABLE BOX, OR ANTENNA
DVD PLAYER
TV
S-VIDEO L
R
VIDEO
OUT
VIDEO1
INPUT
VIDEO
R
L/MONO ANT
S-VIDEO AUDIO
OUTPUT
R
L/MONO
VIDEO2
INPUT
VIDEO R
L/MONO
CABLE, CABLE BOX, OR ANTENNA
F. TV
AND
S
ATELLITE
R
ECEIVER
SATELLITERECEIVER
TV
S-VIDEO L
R
VIDEO
OUT
INFROM ANT
OUTTO TV SATELLITE
IN
CH3
CH4
VIDEO1
INPUT
VIDEO
R
L/MONO ANT
S-VIDEO AUDIO
OUTPUT
R
L/MONO
VIDEO2
INPUT
VIDEO R
L/MONO
SATELLITESIGNAL
CABLE, CABLE BOX, OR ANTENNA
G. TV, VCR
AND
S
ATELLITE
R
ECEIVER
SATELLITERECEIVER
VCR 1
TV
S-VIDEO L
R
VIDEO
OUT
INFROM ANT
OUTTO TV SATELLITE
IN
CH3
CH4
INFROM ANT
OUTTO TV
OUT
VIDEO L
R
CH3
CH4
VIDEO1
INPUT
VIDEO
R
L/MONO ANT
S-VIDEO AUDIO
OUTPUT
R
L/MONO
VIDEO2
INPUT
VIDEO R
L/MONO
SATELLITESIGNAL
CABLE, CABLE BOX, OR ANTENNA
H. TV, VCR, S
ATELLITE
R
ECEIVER
& DVD P
LAYER
VCR1
DVDPLAYER
SATELLITERECEIVER
TV
CH3
CH4
OUT
VIDEO L
R
INFROM ANT
OUTTO TV
S-VIDEO L
R
VIDEO
OUT
INFROM ANT
OUTTO TV SATELLITE
IN
CH3
CH4
VIDEO1
INPUT
VIDEO
R
L/MONO ANT
S-VIDEO AUDIO
OUTPUT
R
L/MONO
VIDEO2
INPUT
VIDEO R
L/MONO
CABLE,CABLE BOX, OR ANTENNA SATELLITE SIGNAL
I. TV, 2 VCR
S
AND
S
ATELLITE
R
ECEIVER
VCR1
VCR2
SATELLITERECEIVER
TV
CH3
CH4
OUT
VIDEO L
R
INFROM ANT
OUTTO TV
S-VIDEO L
R
VIDEO
OUT
INFROM ANT
OUTTO TV SATELLITE
IN
CH3
CH4
IN
VIDEO L
R
OUT
VIDEO L
R
CH3
CH4
INFROM ANT
OUTTO TV
VIDEO1
INPUT
VIDEO
R
L/MONO ANT
S-VIDEO AUDIO
OUTPUT
R
L/MONO
VIDEO2
INPUT
VIDEO R
L/MONO
CABLE,CABLE BOX, OR ANTENNASATELLITE SIGNAL
To use this connection, you musthave:
2 coaxial cable
2 audio/video cables
To use this connection, you musthave:
2 coaxial cable
3 audio/video cables
1 S-Video cable (optional)
To use this connection, you musthave:
2 coaxial cable
6 audio/video cables
1 S-Video cable (optional)
To use this connection, you musthave:
3 coaxial cable
6 audio/video cables
1 S-Video cable (optional)
To use this connection, you musthave:
1 coaxial cable
3 audio/video cables
1 S-Video cable (optional)
To use this connection, you musthave:
3 coaxial cable
3 audio/video cables
1 S-Video cable (optional)
These diagrams use three types of cables and connectors:
Coaxial Cable is the standard cable that comes
in from your antenna or cable box. Coaxial
cables use “F” connectors.
Audio/Video Cables, also called RCA-type
cables, usually come in groups of three cables,
each one with a connector that is color-coded
according to its use: yellow for video; red for
right audio, and white for left (or mono)
audio.
S-Video is an optional video cable that
provides the very best picture. If your VCR
does not have S-Video capability,connect the
coaxial and audio/video cables only.
See Appendix A in the User Manual for detailed information on
using each of these connections.
Video (yellow)
Right Audio (red)
Left Audio (white)
To use this connection, you musthave:
4 coaxial cable
6 audio/video cables
1 S-Video cable (optional)
To use this connection, you musthave:
4 coaxial cable
6 audio/video cables
1 S-Video cable (optional)
To use this connection, you musthave:
5 coaxial cable
9 audio/video cables
1 S-Video cable (optional)
COLOR TV
Connections
U
SING
THE
C
ONNECTIONS
F
OLDOUT
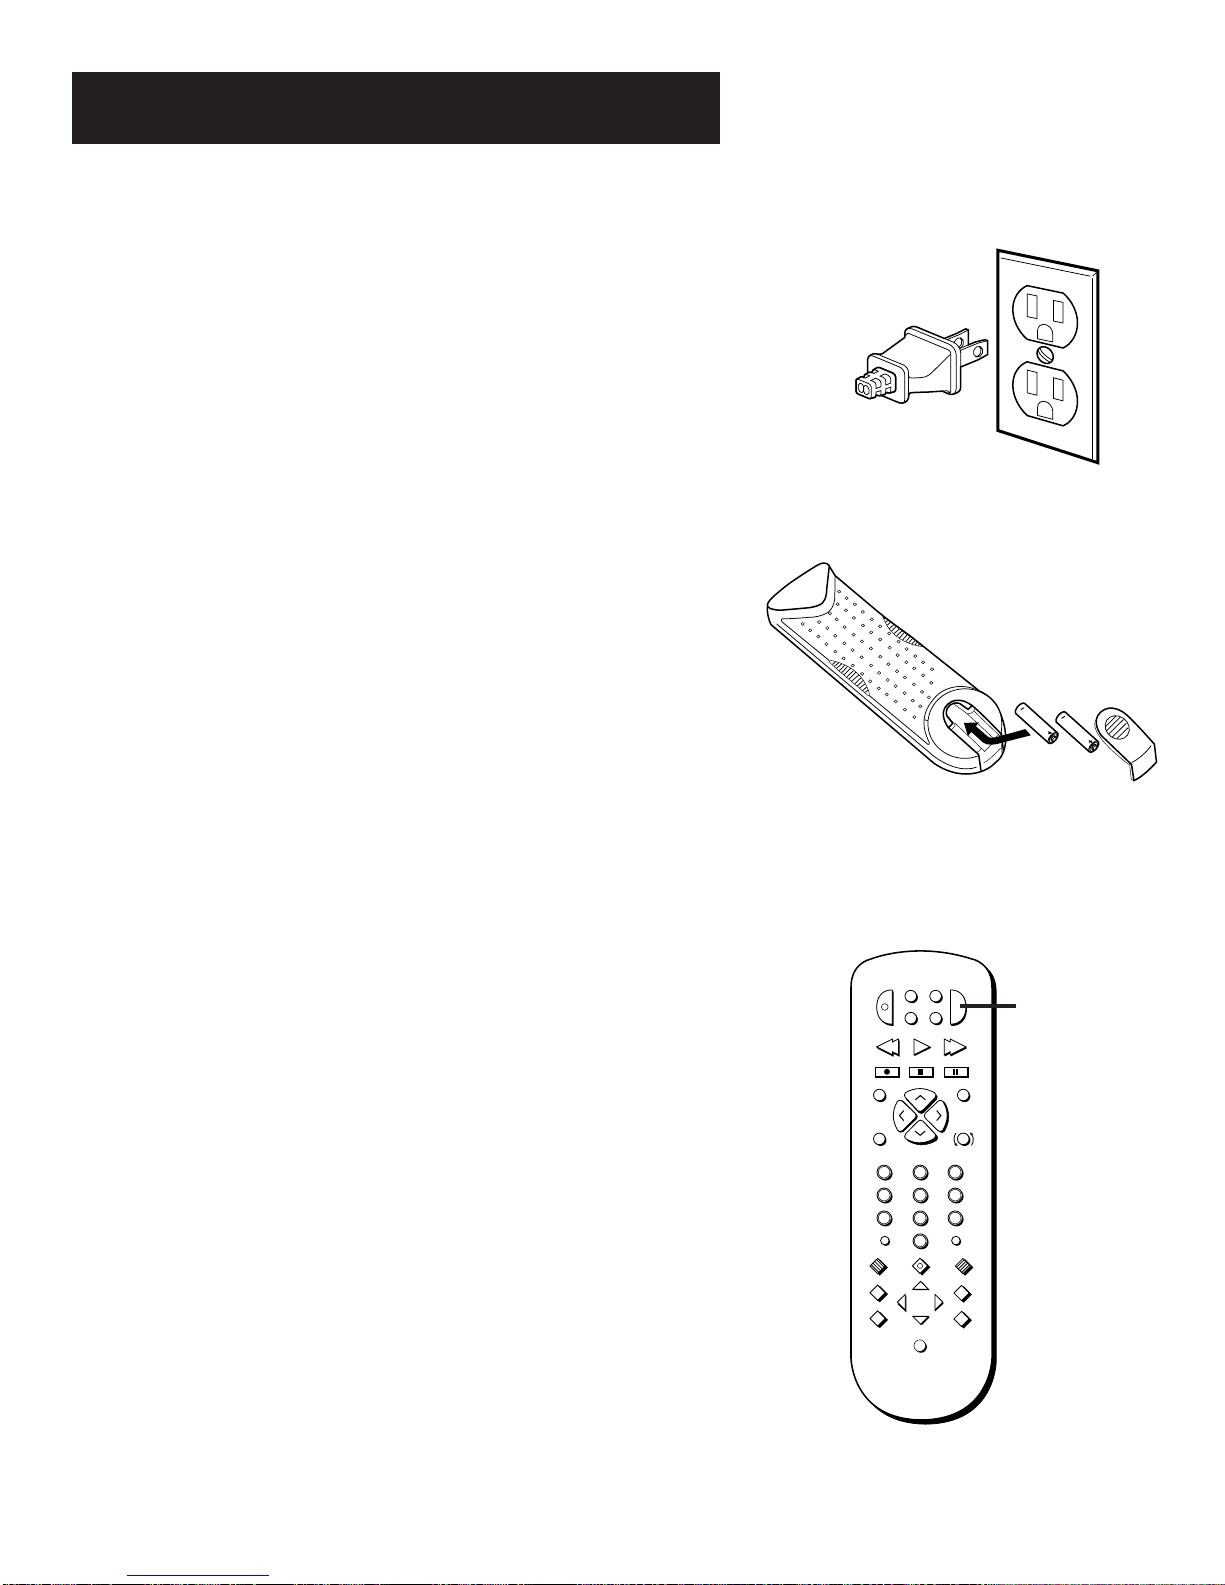
Step 1
Unpack the TV. Make sure to locate the remote control and
Connections Foldout.
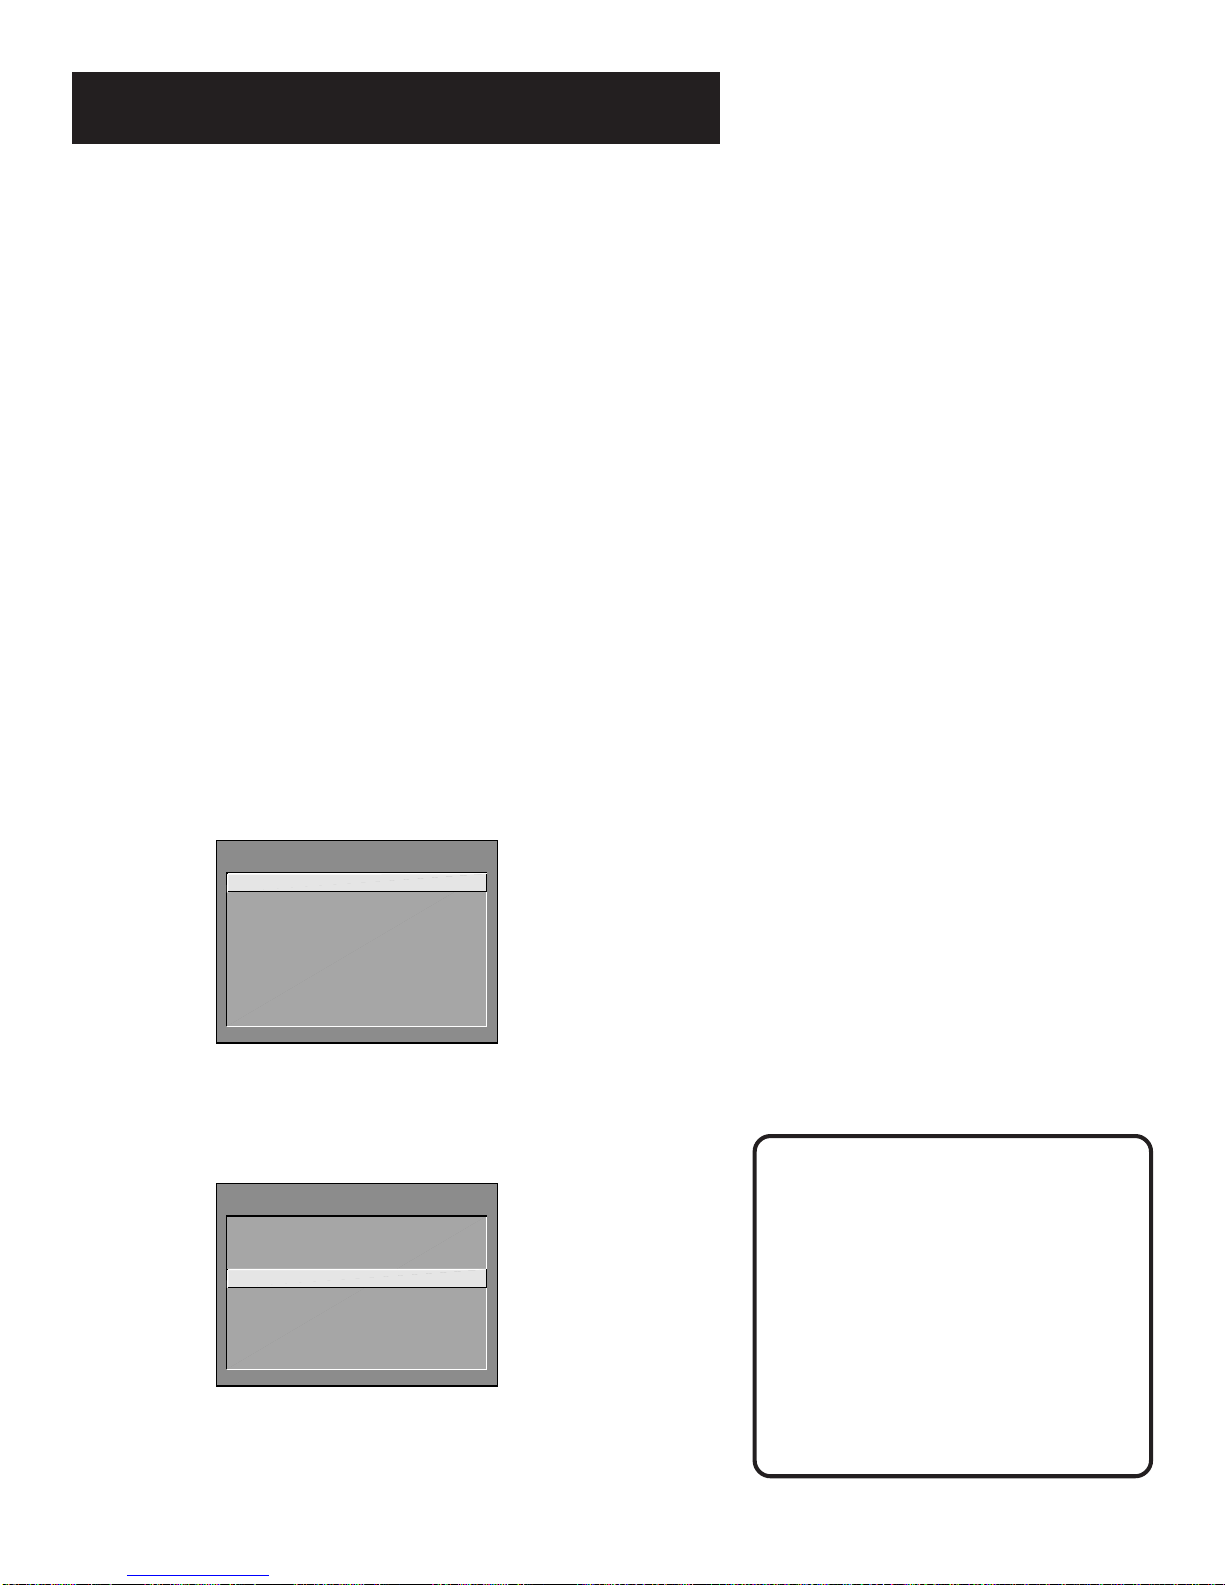
Step 2: Connecting your TV
If you’re only going to connect the TV to your home antenna or
cable system, use the “TV Only” connection shown below. If
you’re going to connect the TV to a VCR, satellite receiver, DVD
player or other component, look at the Connections Foldout. The
Connections Foldout details ten diagrams that are recommended
for hooking up the TV to a cable box or antenna, one or two
VCRs, a DVD player, and a satellite receiver.
TV Only
This is a basic connection from an antenna or cable system to
your TV. Connect the cable as shown. If you have a VCR or other
components to connect to the TV, skip to the next section.
TV with other Components
Use the Connections Foldout to connect your TV to a VCR,
laserdisc player, and/or satellite receiver. After connecting your
TV and other components, proceed to the next step. See
Appendix A for detailed information about using each of these
connections.
If your components don’t match those shown on the foldout, or
if you prefer a different connection, see your dealer or specific
component user manuals.
TV
INPUT 1VIDEO
R
L/MONO ANT
S-VIDEO AUDIO
OUTPUT
R
L
INPUT 2
VIDEO R
L/MONO
CABLE, CABLE BOX, OR ANTENNA