RCA P52935 User manual

_Cr¸O,k_I

WARNING .... ' _' ': °.
To reduce the risk of fire or,
shock hazard,,do not expose
thisTV to rain or moisture..' -*_;_
Toreduce the risk of electric shock, do not remove
cover (or back). No user serviceable partsinside.
ISH0CKDO NOT OPENIRefer.se'rvicingto qualified service personnel. - '
=:l:his;_nibol indicates
"dangerous voltage" inside AThis Symbol indicates
,inli_rtant instructiOns
- .the product that presents a _lLalo_panyill_ithe_o_t.
risk of electric shock or " _'- _J */_" C
personalinjury.
Caution: To reduce th_k _)f elea___i ._
blade of plug to wide_, f_," sert.t .__ _
• _ _lb.# _ _. _ "\
Attention: Pour•dviterlle_h_cs _l_rij_bs ,[l_rfodul_a _
lame la plus large de lafiche dens lab_'orne_s' _" % ,_._-
correspondent e de la prise eaMIl_U41_rj_ a_f_lQ
Refer to the identification/rating label Iocate_t_t_a_pa_f_
product for its proper operating voltage.
FCCRegulations state that unauthorized. ChaMglif o_n_ c_ica t_,t Cl_ljis
•equipment may void theuser's authority to operate it.
,
,,,,,,ooo ,_o°
peri'ods, tltey may be permanently
image_ include network Iogos, phone numbers, and video gaE_is.
This damage is not covered by your wa_i_lkv, f_lte_d vit_iq_
of Channels displayii_ these images shol__vo_. __
Cable lrv Installer:. This reminder isprovided to call your attention to
Article 820-40 Of the National Electrical Code (Section 54 of the Canadian
Electrical Code, Partl) which provides guidelines for proper grounding
and, in particular, specifies that the cable ground shall be connectecito the
grounding system of the building asclose to the point of cable entry as
practical.
f ";i _ _ "_ " "i'" "" " "" '- , .' " _'_
The GUIDE Plus+ Gold system is manufactured, under license from Index. !
lSystemslnc. *::,....-;_ • " . - . .,' i._ " '

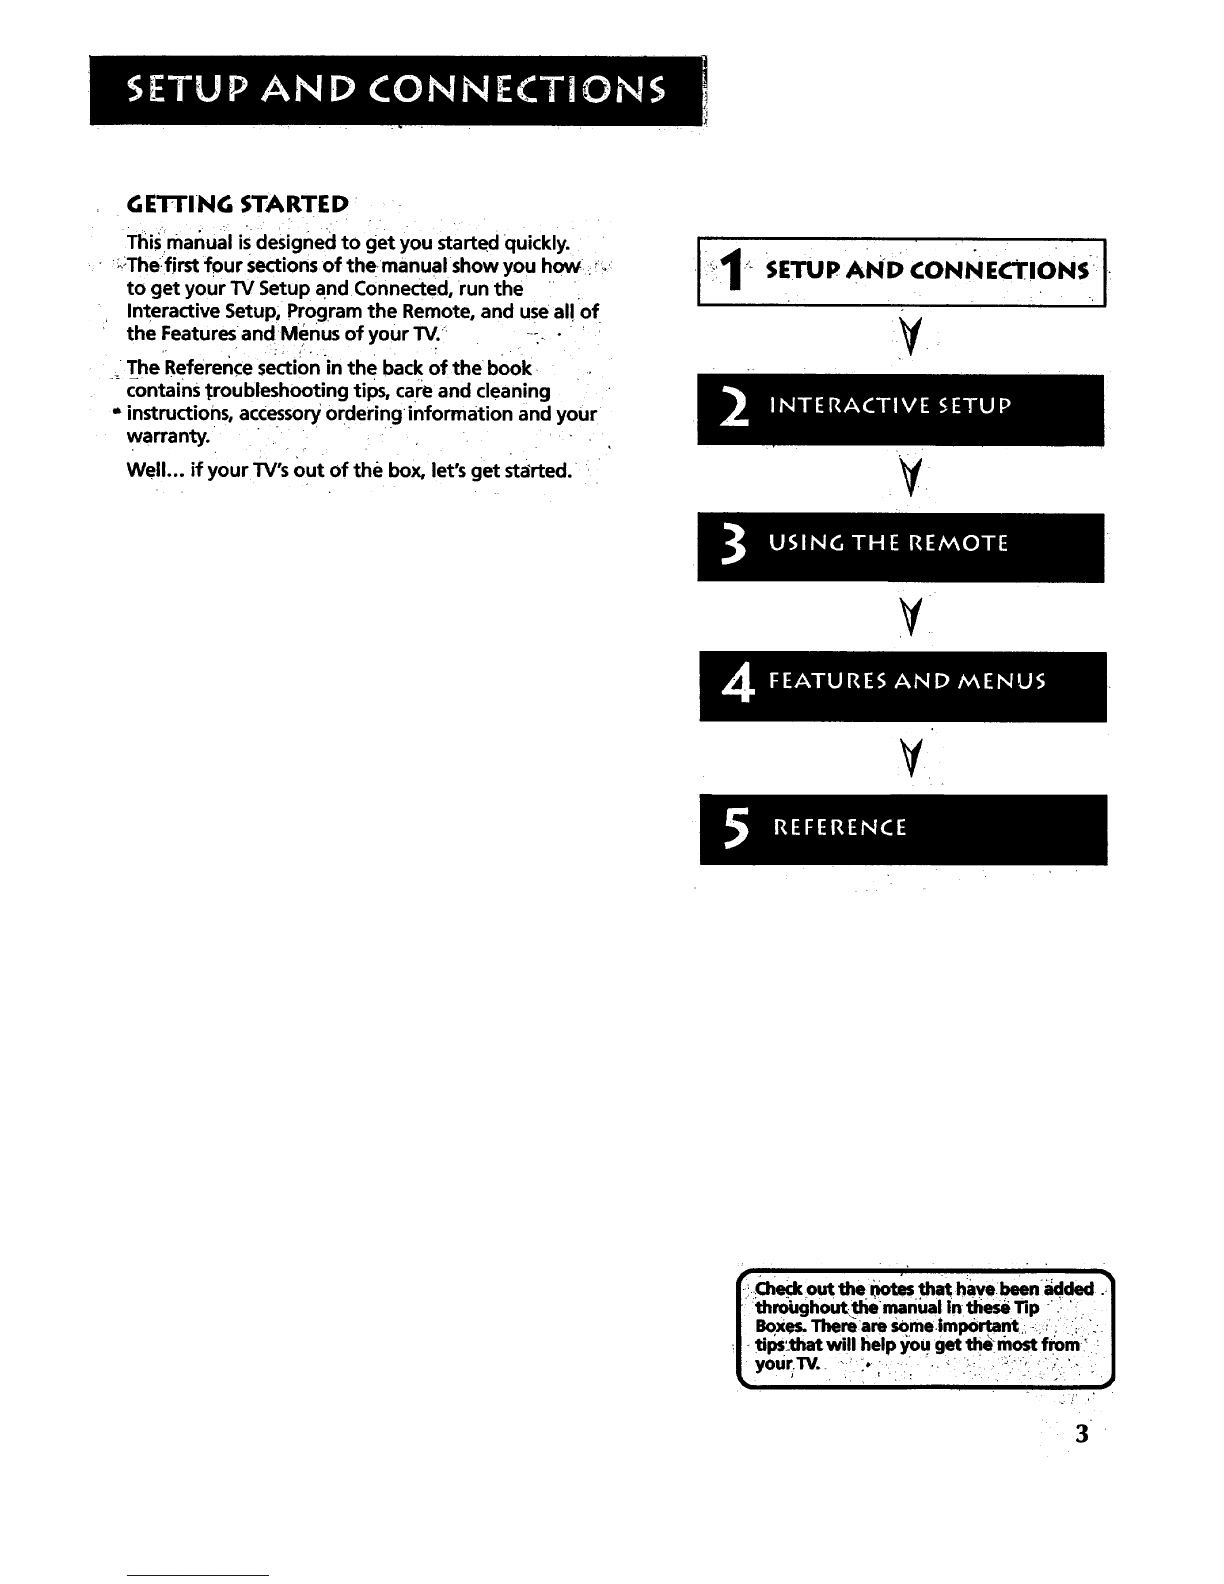
SETUP AND CONNECTIONS r................... ................................. ...'.3
Step 1: Unpack the TV ..................... .............. :.................................. 4
Step 2:;Connecting your TV .................. _............... =............... ............ 4
"iV Only ................ _................. ...................................................... 4
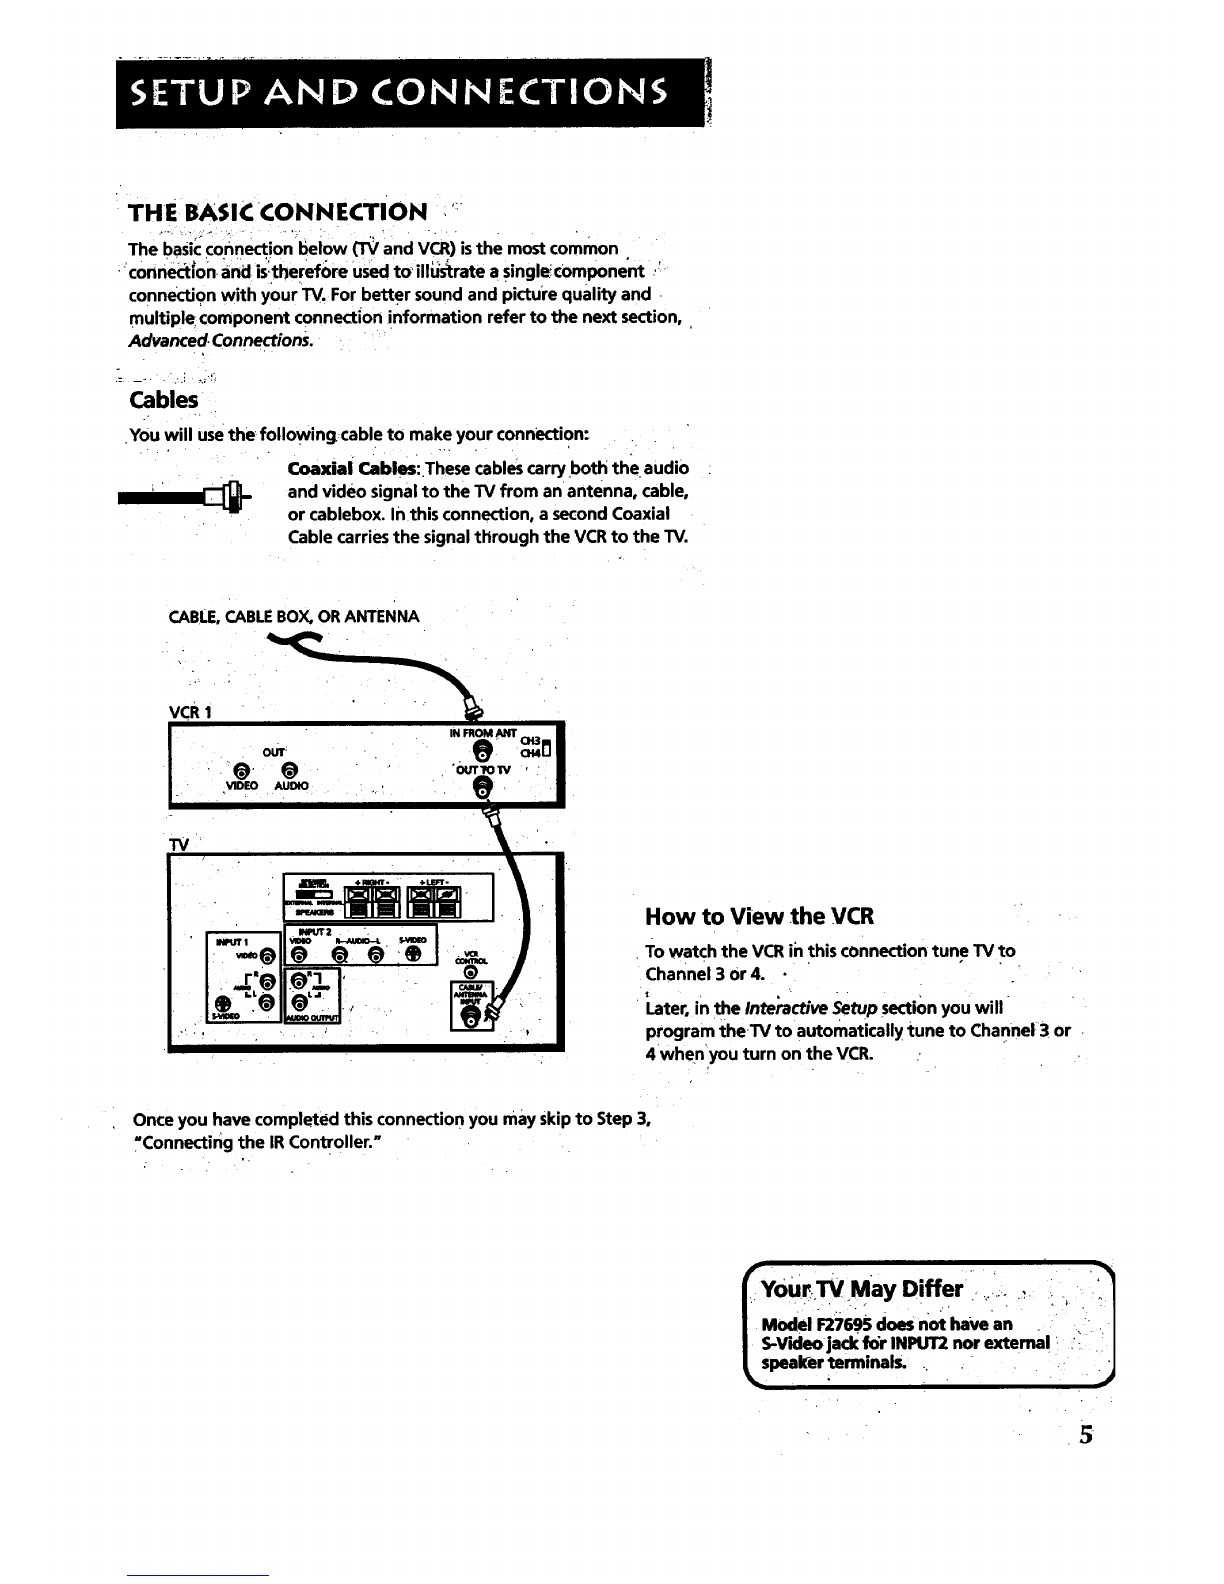
The BasicConnection ............ .................. .............. ,......... ........... 5
Advanced Connections.... ......................... _...... ......... ............. i,.6
-:Step 3:Connecting the IR Controller .9
•Attaching the IR Controllers ......... .......... _............................. .... 9
Step 4_ Plug in the TV.. ...................... ....... .................................... .. 10
Step S: Place batteries in remote '10
Step 6: Turn on the TV ................................................................... 10
On-Screen ProgramGuide. .................... ................. .................. 10
Step 7: Program the TV .................................................................. 10
INTERACTIVE SETUP .... ....... ........ :........................................ ........ 11
Using Point and Select .............. ............... ,.................................... :12
Entering Setup ........... ........................... ......................................... 112
Select a Language "_13
Auto Channel Search .................................. ................................... 13
GUIDE Plus+ System . 14
Set the Time ,.., ....................... ............ ......:..........:........................... 14
Set the VCR1 Channel (auto tuning) ....................... :..................... 15
Setthe VCR2 Channel (auto tuning) ............................ ................. 15
Set the DVD channel (auto tuning) .............................................. 16
Set tl_e SAT/CABLE Channel (auto tuning) ....................... ............. 17
Label the Channels ...i................. ............. ............ ............... ............ 18
What Now? ......... ................... ............ :....................................... .... 18
Program the Remote ............................................................. .. 18
USl big TH E REMOTE ....... ,......................................... .................... 19
Remote Buttons ............ .................................................................. 20
Using the WHO-INPUT button ................................................ 21
Programming the Remote .........,............................... ..................... 22
Testing the remote. ........... .......................................... ;.......... ..22
:Programming the remote ................................ .......... _............. 22
'Usingthe remote to control a device ,....... _.......'.............. ....... 23
".i::t:, _ ,.. • . , _,; ..;
,_Modes of operation ..:......:.. _......]./.L;................ .....'._.....,....:.. 23
Front Panel L.....,..._ ..........................._.].,:.-!]..;..........i..... ............... 23
•1

FEATURESAND MENUS'.....:....;...L_............:.............................2S
Menus and Control Panels ._................................... ._....... i.............. 26
.Menus.._ ............ ............ :.,.,.. ........,..........:....,.......... _............. ,..26
Control Panels ............................................ .............................. 27
Audio Menu..°..,......_.._............. i.... ....................... _.................. ......... 28
Using the.remote to Select an audio'processor ............................ 29
_-Picl;ureQuality Menu. ...................... ........... ..i.......... ........... ..,........ 30
Screen Menu ................. ;...... ...... ............... ................................... ,.. 31
Using Closed Captioning 32
Channel Menu 33
Time Menu .................................................................... .................. 34
Parental Controls Menu'....i .................. .......................................... 35
GUIDE Plus+ Menu ......................................................................... 36
Setup Menu ' 36
PIP (Picture-in-Picture) Operation ...... ............... _........................... :37
Channel Marker ................ i...,.; ....................................................... 38
TROUBLESHOOTING .................................................................... 39
CARE AND CLEANING ................ _................................................ 40
R_J_DIRECT Vl EW 5"-36" TELEVI sION LIMITED WARRANTY 41
RCA PROJECTION "II'VLIMITED WARRANTY ...... _.................... 42
ACCESSO RI ES ........................ ............................................. ........... :43
INDEX. ............... ........................................... ............................... ...45
2

G ETTING STARTE D
This manual is designed to get you started quickly.
:,:Thefirst four Sections of the manual•show you how:: ,,,
to get your TV Setup and Connected, run the
Interactive Setup, Program the Remote, and use al! of
the Features andMenus of your TV." -4- "
The Reference section in the back of the book
contains troubleshooting tips, care and cleaning
-instructions, accessory ordering information and your
warranty.
Well... if your TV's out of the box, let's get started.
No<.N=o. i
': SETUPA O E I S:
V
, • i
_..Checkout the _th= havebeen_ded -1
/th_ghouttt_m=nua! intheseTip i :!' i- /
/ Boxe_11_ere=msome.|mportant:,-:;i. L ::-/
t tips:that wi!l help you get themost from,://
yourTV. "......._ .... " '. _:, .... ':_:_"" " ::,"."
,: !_ ,
3

STEP 1: UNPACK THE TV
.Make sure to locate the remote control and your GUIDE Plus+ Bo?klet,
STEP 2: CONNECTING YOUR TV
-: There arethree types of connectionsoutlinedin this section:
i• .. •
TV Only: . If you're only going tO connect the
TV to your home antenna or cable •
system.
The Basic Connection: If you're going to connect the TV to a
VCR or satellite receiver.
Advanced Connections: If you're going to make multiple
Connections,hooking up the TVto
one or two VCRs,DVD player,and a
satellite receiver.
Cable information and illustrations are given for each type of connection.
Once you, have completed your desired connectionYou may skip forward
to Step 3.
TV ONLY
This isa basic Connection from an antenna or Cable system,to your TV:
Connect the cable into the Cable/Antenna jack as shown.
Cables •
You will use the following cable to make your connection:
Coaxial Cable: These cables (:arry audio and v!deo
signal to the TV from an antenna, cable, or "
.. • . , '.
_... : cab!ebox. ,I
CABLE,CABLEBOX/OR ANTENNA "
!mportant Stand Information
Direct View TVs: 13,. - 36_ diagonal
CAUTION: Choose the location for your TV
carefully. Take precautions that the stand
or other fumiture the TV is placed on is
properly located (see Important
Safeguards sheet) and of adequate size
and strength to prevent the TV._rom
accidentally being Upped over, pushed off.
orpulled off. This could cause damageto
the,TV and/or personal injury.
(
f_Before You Connect _q
Protect against power surges:
• Connect all components before
plugging any power cords into the wall
outlet.
• TUrn off the TV and/or component
before connecting or disconnecting any
cables.
•Make sure all antennas and cables are
properly rgrounded. Refer to your
Safety Tips sheet packed with your TV.
%
•May Differ _,
S-Video jack forINPUT2 nor e._ernal i'! : "

THE BASIC CONNECTION "
.... ..... ., .,
The basic connection below (TV and VCR) is the most common
connection and is:therefl>re used toillUstrate a single, component '
connection with your TV. For better sound and picture quality and
multiple component connection information refer to the next section,
Advanced. Connections.
Cables
You will usethe following cable to make your connection"
Coaxial Cables: These cables carry both the audio
and video signal to the TV from an antenna, cable,
or cablebox. In this connection, asecond Coaxial
Cable carries the signal through the VCR to the TV.
CABLE,CABLEBOX,OR ANTENNA
VCR 1
OUT
_@. @
VIDEO AUDIO
How to View the VCR
To watch the VCR in this connection tune TV to
Channel 3 or 4.
I.ater, in the Inte'ractive Setup section you will
program theTV to automatically tune to Channel 3 or
4 when you turn on the VCR.
Once you have completed this connection you may Skipto Step 3,
"Connecting the IR Controller. =
I
/Model F'Zi69Sdoes not havean :.iI
/S-V'.Jeojack for INPUT2 nor extema! .:: I
Lspealc'er terminals .... ..- j
.

:ADVANCED CONN ECTIONS
••j
Advanced ConneCtions give you better sound and video by separating
the audio and Videos[gnals and enable youto connect multiple -i ,
components.
This section describes the types of inputs available on the back of your
TV and suggests ways you can usethem for optimum performance.
1
•, ,. ., ,
Once_you *have made your connections
you will need to program the TV to tune
to the correct Video INPUT channel in ;
order to see and hear audio and Video
from the component You will prbgram
this later in thelnteractive Setup.
Backof the TV
The diagram belowdescribeseach Of the backpaneljacks.When
connectingAN cables,be suretoconnect correspondingOUTPUTSand
INPUTS(Video to Video, Right Audio to RightAudio,etc.).
Input I
Connect any of the following components:
. VCR • Internet Access Device
• Laserdisc Player -• DVD Player
•Satellite Receiver
To view the componentconnected to Input 1:.
Use the WHO•INPUTbutton on the remote,
S-Video
Input 2
Connect any of the following components:
•VCR •Internet Access Device
•Laserdisc Player •DVD Player
•Satellite Receiver
To view the,component connected to Input 2:
Use the WHOelNPUT button on the remQte.
This optional i
connection can
be used for
better video
•quality picture.
IAudio Outputs .
Connect to an audio receiver or-
I-amp!ifier for variable controlled
or fixed level stereooutput._.'
CablelAntenna
Takes the signal input from a cable,
cable.box, or an •off-air antenna. Can also
.be used for basic component connections. 1
• 1
Speaker Terminals*,
Use to connect external
speakers for surround sound;
Make sure the Speaker
Selection is•set to EXTERNAL.
S-Video* " i1
o , . . . •
This optional connection, can '
be used for better video'
quality picture.
VCR Control
Connect Guide Plus+
controller for one-button
recording and channel
tuning from the Guide.'
•* *Model F27695does not have these features.
6

Sample Connections
The following are sample connection scenarios which you may encounter
when connecting components to your TV. Note: those Components which
offer an S-Video connection, such as DVD, VCR or Satellite Receivers; _
• must match their S-Vide*0 c0nhection With their audio INPUT connecti0n _._ '"
Cables
You Will use th= ,v,,u.,,,_ _.,= ,u ,,,a_ yuu_ Lu.._uu..
1/1111_i _* Coaxial Cables: Carries the signal from the
antenna or cable directly tothe television or
through a cablebox, as needed.by your cable
system.
Audio/Video Cables: Carries sound ancl video
from the component to the TV.
S-Video Cable: Carries video from an S-Video
capable component which provides best
picture quality.
TV and Stereo VCR
•CABLE,CABLE BOX, OR ANTENNA
•Cautions:
Position cables to Avoid Audio Hum
or interference .,
'. insert all cables firmly into jacks.
• Place the audio/vldeo cables tQthe
_ides of the TV's back panel instead of
straight down the middle.
', Try not to coil any twin-lead cables and
keep them away from the audio/video
, cabies, i. ; /_,
•_tect your components from
Overheating
• Do not block ventilation holes in any of
•the components. Arrange the
components so that air can circulate
freely.
• Do not stack components.
•Allow _dequate ventilation when
placing your componenl_, in a stand.
• Place an amplifier on the top shelf of
the stand so heated air rising from it
will not flow around other
components.
TV
How to View Your VCR
To watch the VCR in tl_is connection, press TVto put the
remote Control'into TV mode, then press WHO•INPUT to
scroll through thelvideo input channels until you.tune to
VID1 input.
!n the Interactive Setup section you can program theTV to
automatically tune to the VIDI input channel when you '
turn on the VCR.
Compared to the Basic Connection, using audio, video and
S-Video (if available)cables will enhance the sound and picture qualitY•
from a comporient.
MostAudio/Video cables are combined "
into one cablewith three
heads on each end. v_o
We
r_bles in these
7

TV, VCR and Satellite ReceiVer
CABLE,CABLE BOX, OR ANTENNA'
SATELLITE'RECEIVER " : • "
VCR
TV, VCR, Satellite Receiver• and DVD
CABLE;CABLE BOX, oR ANTENNA SATELLITESIGNAL-
SATELLITE RECEIVER
VCR
iHo.w to view Your Components _
To watch the Satellite Receiver in thisconnection, press
TV to •put the remote control into TV mode, then press
WHO-INPUT to scrol! through the video input channers.
until you tune to VID1 (or SVID 1)input. "'
TO watch'the VCR in thisconnection, press TV to put the"
remote control into TV mode, then pressWHOoINPUT to
scro!lthr0ugh the video input channel s until you tune
to VID2 (or SVID 2) input.
Inthe Interactive Setup you can program the TV, to'
automatically tuneto correct input channel when you:
turn on your c0mponent. .." '
How to ViewYour Component_
To Watch the Satellite ReceiVer in this connection, press
TV tO put the re_ote control into TV mode, then press
WHOelNPUT to scroll through the video input channels.•
until you tune !:o VID1 (or SVlD 1)input.
To watch the VCR in this connection tune to Channel 3
or 4.
. , . . .
To watch the DVD player in this connection, press TV to
put the remote control into TV mode, then press
WHOoINPUT to scroll through the Video input channels
:until:youtuneto VID2 (or SVID 2) input.
ilnthe tnteracl_ ._.tup Y0U.can program the TV to'
•auto_t!cally tune to thecoF_ i_Put.channe! when,
you turn on your compotnent.. " " " • ':

STEP 3: CONNECTING THE IR •
CONTROLLER ..
The IR(Infrared) Controller enablesGUIDE Plus+ Gold" to control your
VCR and cable box (if necessary) so that you Gantune to television
channels and even start recording a program from the program guide.
After you have affixed the ends of.the _ontroller to thenecessary devices
(VCR, or Cable box),you will use the on-screen interactive setup routine
for GUIDE Plus+to test the connected devices.
A3-FACHING THE I R CONTROLLERS
Some components label the infrared remote sensor,and Others do not. If
your component is labeled, affix the IR controller directly over the
sensor._For components that do not label the remote sensor, you need to
use to use the ¢omponeiit's remote control to locate the sensor.
1. Hold the component's remote control (not the remote that came
with your TV) so that it istouching the front of the component.
2. Slowly move the remote over the front of the component while
pressing the remote power button on and off. (Be sure tO press and
release the power button each time you move the remote. Holding
the button may not work.)
The IRController is usedto send commands
to your VCRand/or cable box.
I ' "
3. Whenthe component turns off or on, you've located the sensor.
6
4. Affix the controller's node directly to the remote sensor.
:ii......i.....-------i
Colmlltld tO the TV .
You may want to use a piece of dear
plastic tape to temporarily affix the
controller's node until you have completed
the interactive setup. That way you easily
move it if you have not placed it exactly
over the sensor.
*GUIDEPiu_ is'atradem'_rk'of IndexSystems'Inc.TheGUIDE Plus+Golclsystemismanufactured under licemefrom IndexSyFtemsInc. '
9

-, STEP 4:_PLUG I NTH E.I_.
Plug the end intOthe wall Outlet, matchingthe wide blade of ihe plug
-with the wide slot inthe outlet.-Be sure to insert the plug completely.
STEP 5: PLACE BATTERIES IN REMOTE.
• Remove the battery compartment cover from the back of the
remote.
•Insert fresh batteries. Make sure that the polarities (+ and -) are
aligned correctly.
•Replace the cover.
STEP 6: TURN ON THE TV, •
PressTV on the remote, or press POWER on the TV itself.
Pressing the TV button not only turns on the TV, but puts the remote
into TV mode, so that the buttons on the remote will control TV
functions.
ON-SCREEN PROGRAMGUIDE
The TV is designed to bring upthe GUIDE Plus+ on-screen program
guide when you use theTV button on the remote to turn on the TV
(after you have set up the GUIDE Plus+system). For more information,
see the GUIDE Plus+ Features & Setup booklet.
To get out of the Guide:
°Press.OK exit the Guide and tune to the highlighted channel.
•Press GUIDE to exit the Guide and tune t'o the channel displayed in
the View window.
•PressCLEAR to exit the guide and go to the last channel you were
watching.
STEP 7: PROGRAM THE TV
Proceed to the next section, Interactive Setup. The interactive setup
routine walks you through the steps needed to fully configure the TV.
The first steps ask you to select your preferPed language for the menu
system and tO begin the auto channel search, v_hich puts available cable
TV or antenna signals into the TV's memory.
i
rProjection TV Only,
if the pictUre appears to have a double or
triple image or if you notice rings or halos
around objects, you may have to adjust the
color convergence.. Details can be found i
undertheScreen menu heading inthe
Features and Menus s_tion of this manual.
i ' I_" " " " "''"I "
10

••Set the VC-R2channel
•Setthe DVD channel
•Set the SAT/CABLEchannel
'THERE'SAN ON-SCREEN SETUP ROUTINE
The interactive setup routine takes you through the steps.
needed to configure the TV:
Select a menu language
Search for available channels
Set up the GUIDE Plus+ system
Set the time
f
Set the VCR1 channel
•Make the channel list and labels
"2INTERACTIVE SETUP
, _, , . Vo
,I
Y
•..
11.

USING POINT AND SELECT
You only need to know one rule when using the remote to accesson- •
screen menus and control panels: pointand select.The point and select
method has two steps.
1. Point to a menu item using the MOVF_arrows on the remote.
To point up or down, press.the up or d_m arrows. To .point left or
right, press the left o.rright arrows.
r..
Select a menuitem by pressing MENU or OK.
I
•Selecting an item tells theTV's menu system to go ahead and make
thechange or go to a place you have indicated.
ENTERING SETUP
The first screen of the Interactive Setup appears automatically when
you turn on your TV for the first time or after a power outage.
1. PressMENU to begin setup or CLEAR to exit.,
o O
MENU
Point and Select
buttons
You can also accessthe Interactive setup through the Main menu:
1. PressMENU to bring up the Main menu.
2; Point to Setup and press MENU or OK. The first Setup screen comes
up; asking you to confirm thatyou Want to begin.
. , . , . o..
YOUcan als0 select a menu item by
entering theitem number with the
number buttons on the remote,
PressCLEAR at anytime to remove all ,
displays from the screen and return to TV
viewing. " •
Many VCR user manuals refer to a
PROGRAM button. The MENU button on
this remote works as a PROGRAM button
in VCR mode, Other manuals may refer to
"a SELECT SUtton, The oK'b_ton on this
remote Works as a SELECTbutton. .... ,
tm "'_ I"....

3. _'Point to Beginsetup now and pressIMENU or OK.
SELECT A I.LANGUAGE
Thefirst part of the setup routine asksyou to select your preferred "
language for the menu _yStem,
". '. . • .
1.:.: Point to your preferred •language for the menu system.
2. PressMENU or OK to select that languag e.
I
AUTO CHANNEL SEARCH
The next part of the setup routine asksyou •ifyou want the TVto search
automatically for;all channels available through your antenna Or cable
TV system. This issometimes called "autoprogramming., '
• • _ , . . •
1: Pr_s MENU or OK to :telltheTV to bL_Jinsearching for Channels.
'. Th.edisplaygives You aPmgreSs.report and tells you when ithas
,ifinished_-i_ :_"ii :..,..-",'.:...'
'2:_::.,Press MENU or OK to continue.--
13

•_ GUIDE PLUS+ cY¢'rl:_____.... •.....:. :,,;._.,.. ,.:_:. _::.:,,_...:.: .
-- - -- lets * GUIDE iForMoreGUlDE PluS+ __ :, -
•iThenext step you setup the Plus+systemto disPlayyour ,_ i..f^._.÷;._. _' _ _
localprogram listings,and controlyourcable box and VCR. I "' v"'=uV ''' _ , '
"" :g " " _ "" : " " " " r'' '': " _ '" ...... : "::_:, : - Specific information about theGUlDl ': -'
Youcaneither pressMENU or OKto bring up the GUIDEPlus+initial :I PluS+S"stem iscontainedin a .... rate
menu or point to SkipthisStepto move.to:the next step in the " : | boolde_that accompaniedthis_uct. "
Interactive Setup. ".. . ..... L:_ .. :.:U. ', : _,i:i_ ,.,- .
Seethe GUIDEPlus+Features&Setup Bookletfor detailed setup
instructions.
sETTEE TIME
The next step inthe InteractiveSetup letsyou set the time of day.If your
.GUIDEPlus+systemhasnot completed itsfirst download you need to set
thetime, .Oncethe Guidesystemhascompleted itsfirst doWnload, it sets
the time for you automatically. ,•
•1., PressMENUor OKto bring up the Set71mec0ntrol panel.
k
•ii: 2; 'Usethe left and right arrowsto pointto the hour and minutes . .
i _.:";:_!i_!!_::Spaces::U_ the: up aqd downarrowstO st#oilthrough-the numbers.:
i-,,i ::.:'ii::i_a_dChan_ie'fromAM to PM, '_." ',: -: ' " -' ':; "_:
/r:3"" "PressMENU or OKto continue.
,.

SETTHE VCR1 CHANNEL(AUTO TUNING]
• • o ,
The next step lets you Set the VCR1 channel. When you set the VCR1
channel, you're telling the TV whl_channeltotuneto when you press:
the VCR1 button on the remote, This isAuto Tuning.
i
Indicate which inputyou used to connect the VCR. If you don't have a
VCR1 comporlent connected to the TV, Skip this step or select No.t
connected from the VCR1 Channelchoice list. (For rnore, see Auto
-_Tuning in the Features and Menus section..)
PressMENu orOK to bring up the VCR1 choicelist.
,
.
Point to the choice that matches the way you have your VCR
connected to the TV.
Press MENU or OK to continue.
SET THEVCR2 CHANNEL (AUTOTUNING)
The next step lets you set the _/CR2 channel. Whenyou set the VCR2
channel, you're telling the TV what channel to tune to when you press
the VCR2 button on the remote.
•Indicate which input you used to Connect a second VCR. If you don:t
have a second VCR component connected to the TV, skip this step or
select NotConnected from the VCR2 channel choice list (For more, _;ee
Aul:o Tuning in the Features and Menus section.)
. . - . , . , ",
15

1_' Pr_ MFNI! _r OK tn hrinn .n the VCl_2 choice list.
2.
3_
Point to the choicethat matches the wayyou have your second VCR
connected to the TV.
"PressMENU or'OK to continue.
SET THE DVD CHANNEL (AUTOTUNING)
o
The next step letsyou setth e DVD channel. When you set the DVD
channel, you're telling the TV•what channel to tune to when you press
the DVD button on the remote.
Indicate which in put you used to connect a'DVD PlaYer. If you don't have
a DVD player connected to the TV, skip this step or •selectNot Connected
from the DVD Channel choice list. (For more, see Auto Tuning in the
Features end Menus section.) ....
.... :._ , ... '_.. o•,. • . ,_, : . . , . .
_1, PressMENU 0rOK tobring Up the: DVD choice list.
16•

2. 'Point to thechoice that matches the way you have your DV Dplayer
'connected to the'IV.
3. PressMENU or OK to continue.
SET THE SAT/CABLE CHANNEL (AUTO
TUNING)
The next step lets you set the SATICABLEchannel. When you set the SAT/
CABLEchannel, you'retelling the TV what channel to tune to when you
pressthe SAT.CABLE button on the remote;
Indicate whic h input you used to connect a satellite receiver or a cable
box_If you don,t have a satellite receiver or cable box connected to the
TV;skip this step or select Not Connected from the SAT/CABLEChannel
choice list. (For more, seeLAuto Tuning in the Features and Menus section.)
1_. PressMENU or OK to bring tip the SAT/CABLEchoice list.
2:/: Point to the choice,that matches the Way you haveyour satellite ..
:_,"receiverormbleboxconne_-tedtotl_eTV.+ ............. . . .
• +
3_ +.Press.MENUOP OK to continue.
o+
+.'
._ ...._ •,%,•
17

LABEETHE CHANNELS
This laststep in the'Interactive Setup lets you create your channel list and
label your channels, (For more: see List and Labels in the Features and
Menus section.)
Use the,CH ^-(channel up) or CH v
(channel down) buttons to change , ,
channels in the Chan# field. This works
even if you,re not in the Chan# field. Or,
enter the channel number directly using
the number buttons on the universal
remote.To enter a number greater than
99, press and hold "1, to enter the. _
hundreds digit; then press the two
remaining numbers. .......
The list and labels feature can also be: "
accessed from the Channel menu. Because
this procedure can be timeconsuming,
feel free to skip this step and come back
to it later.
1. PressMENU or OK to bring up the List and Labe|s control panel.
2,
,
4,
., _..
Use the left and right arrows topoint to the three different areas of
the Control panel (called "fields").
Use the up and down arrows to scroll through the numbers and
letters and select Yes or No in the Normal List field. You may wish to
refer to the call letters listed in your newspaper's TV section for ideas
on labelling the channels.
Repeat this process for each of your channels. Then press MENU or
OK to continue. The TV can store up to 27 labels in memory.
WHAT NOW?
Now that you've finished the interactive setup, you can sit back, relax,
and enjoy the TV. Or...
PROGRAM THE REMOTE
., - ,
Since,you've gone this far, you can take a few minutes to program the
remoteto control your VCR, DVD player, Satellite rec.e!ver,or..other
components.;To findout how to program the remote, go to the next
;_ioi_ _..-,'.- -...::-.. . . .- : .
181
This manual suits for next models
7
Table of contents
Other RCA TV manuals

RCA
RCA L23W10 User manual

RCA
RCA F27669TX71AA14 User manual

RCA
RCA F35674 User manual

RCA
RCA F35675 User manual

RCA
RCA 27F520T - 27" TruFlat Picture Tube TV Quick start guide

RCA
RCA RLD3273A-B User manual

RCA
RCA F32690 User manual

RCA
RCA J13801CL User manual

RCA
RCA LED1526A2 User manual

RCA
RCA P52810 User manual