RCA CTC179 User manual

• @A
Rt'S
NUAL

m
10 REDUCE IrHE RISK OF ELEC1RIC SHOCK, DO
NOT REMOVE COVER (OR BACK)• NOUSER
SERVICEABLEPARTSINSIDE• REFERSERVICING
TO QUALIFIED SERVICEPERSONNEL•
This symbol indicates
"dangerous voltage" inside
the product that presents a
risk of electric shock or
personal injury.
This symbol indicates
important instructions
accompanying the
pro.duct'.
Caution: To reduce the risk of electric shock,
match wide. bladi_ of plug to wide slot, fully
insert.
•Attention: Pour 6viter les chocs ._lectriques,
• . ." .. - .
_'intro-duire la lame la plus large de/a fiche dans la
borne correspondante de la prise et pousser ]usq_
au fond, ="-
lot defeat the safety feature of the plug. The wide blade
the wall socket only one way. If you need an
cord, •make sure it matches theplug of the TV.
. ...
)erate TVonly on 120 volts, 60 HzAC power (normal house
=:;.power).
Eorlsafety reasons, make sure any equipment or accessories
.icohnected to this product bears the UL listing mark or the
_CSA.or Certification mark. If in doubt, contact qualified
_i_service personnel.
_FCC Regulations state that unauthorized changes or
s to this equipment may>void the user's authority
operate it.
]er is provided to call yourattention to Article 820-40
onal Electrical Code(Section 54 of the Canadian
1) which provides guidelines for proper
gand, in particular, specifiesthat the cable ground
:'oConnected to the grounding system of the building as
e point of cable entry as practical•
I
.i
_.._.,. _.:-......_. , . .
.... :,.°...,_ _'.; . _ "-.: --.....
• . .... .-"":L
NOTE _OCABLE TV
INSTALLER

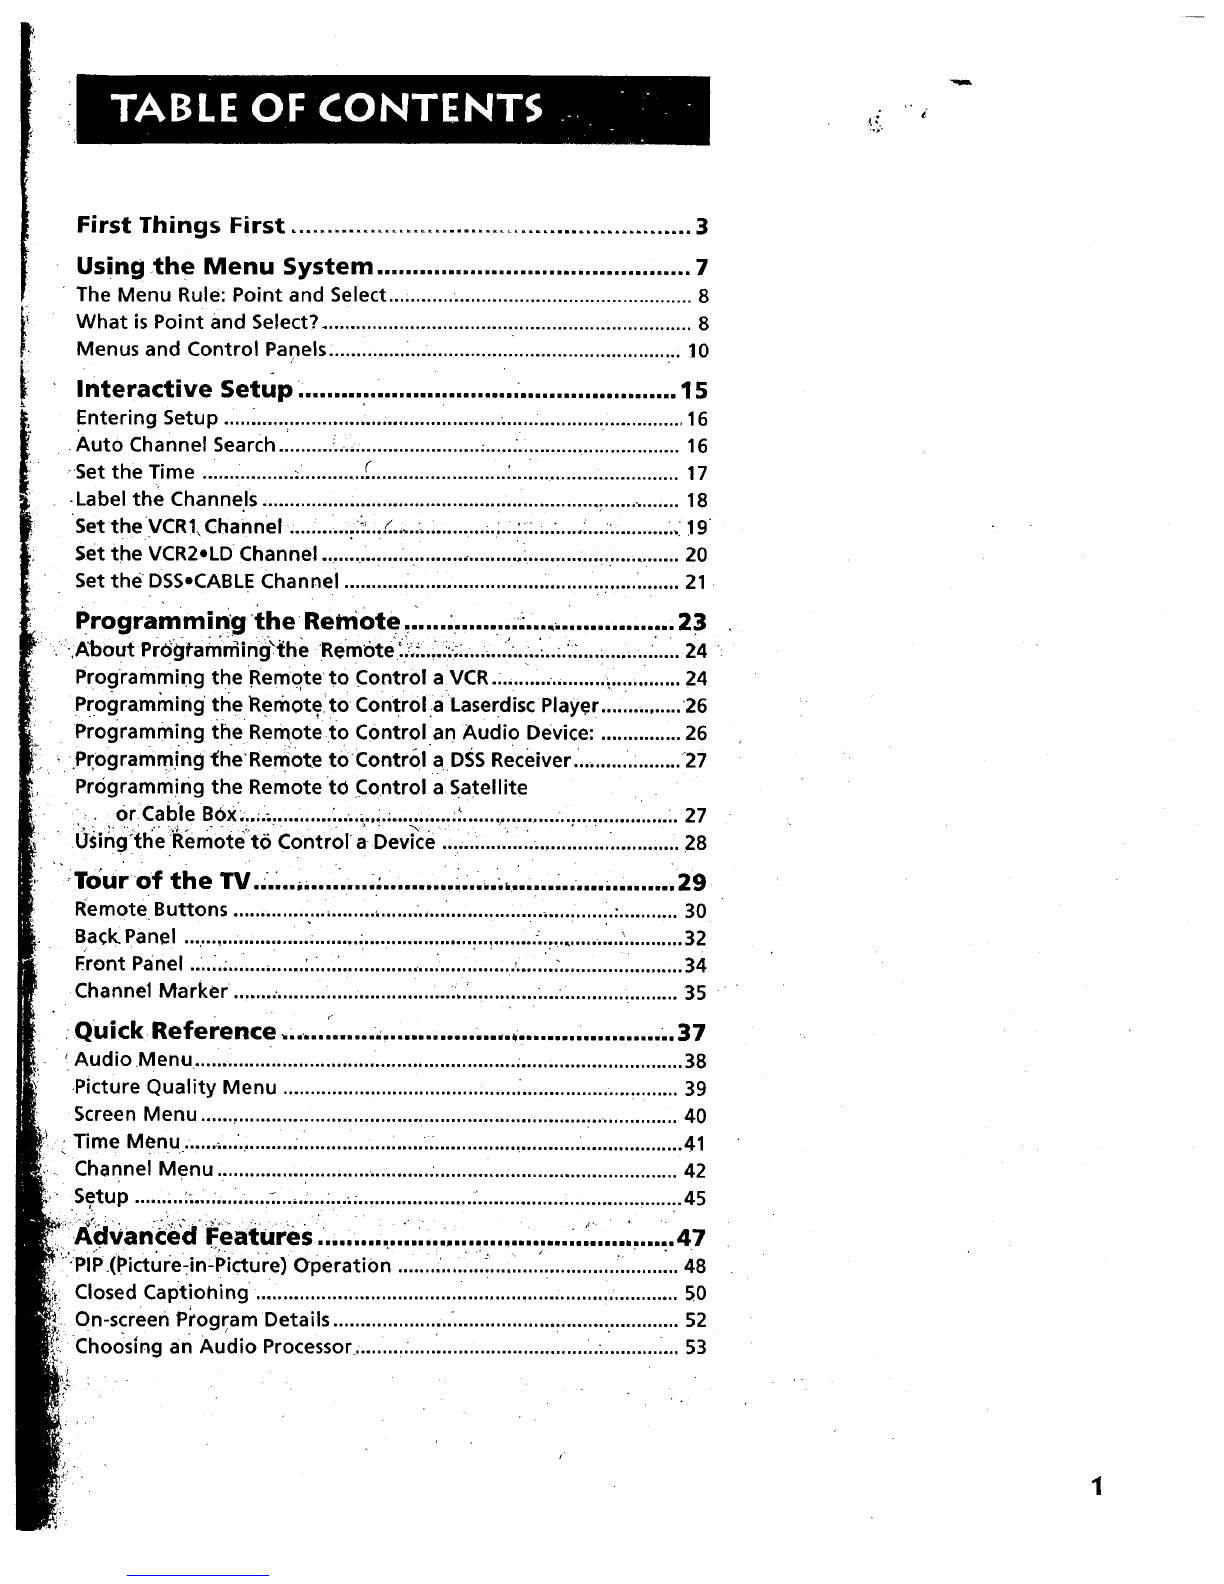
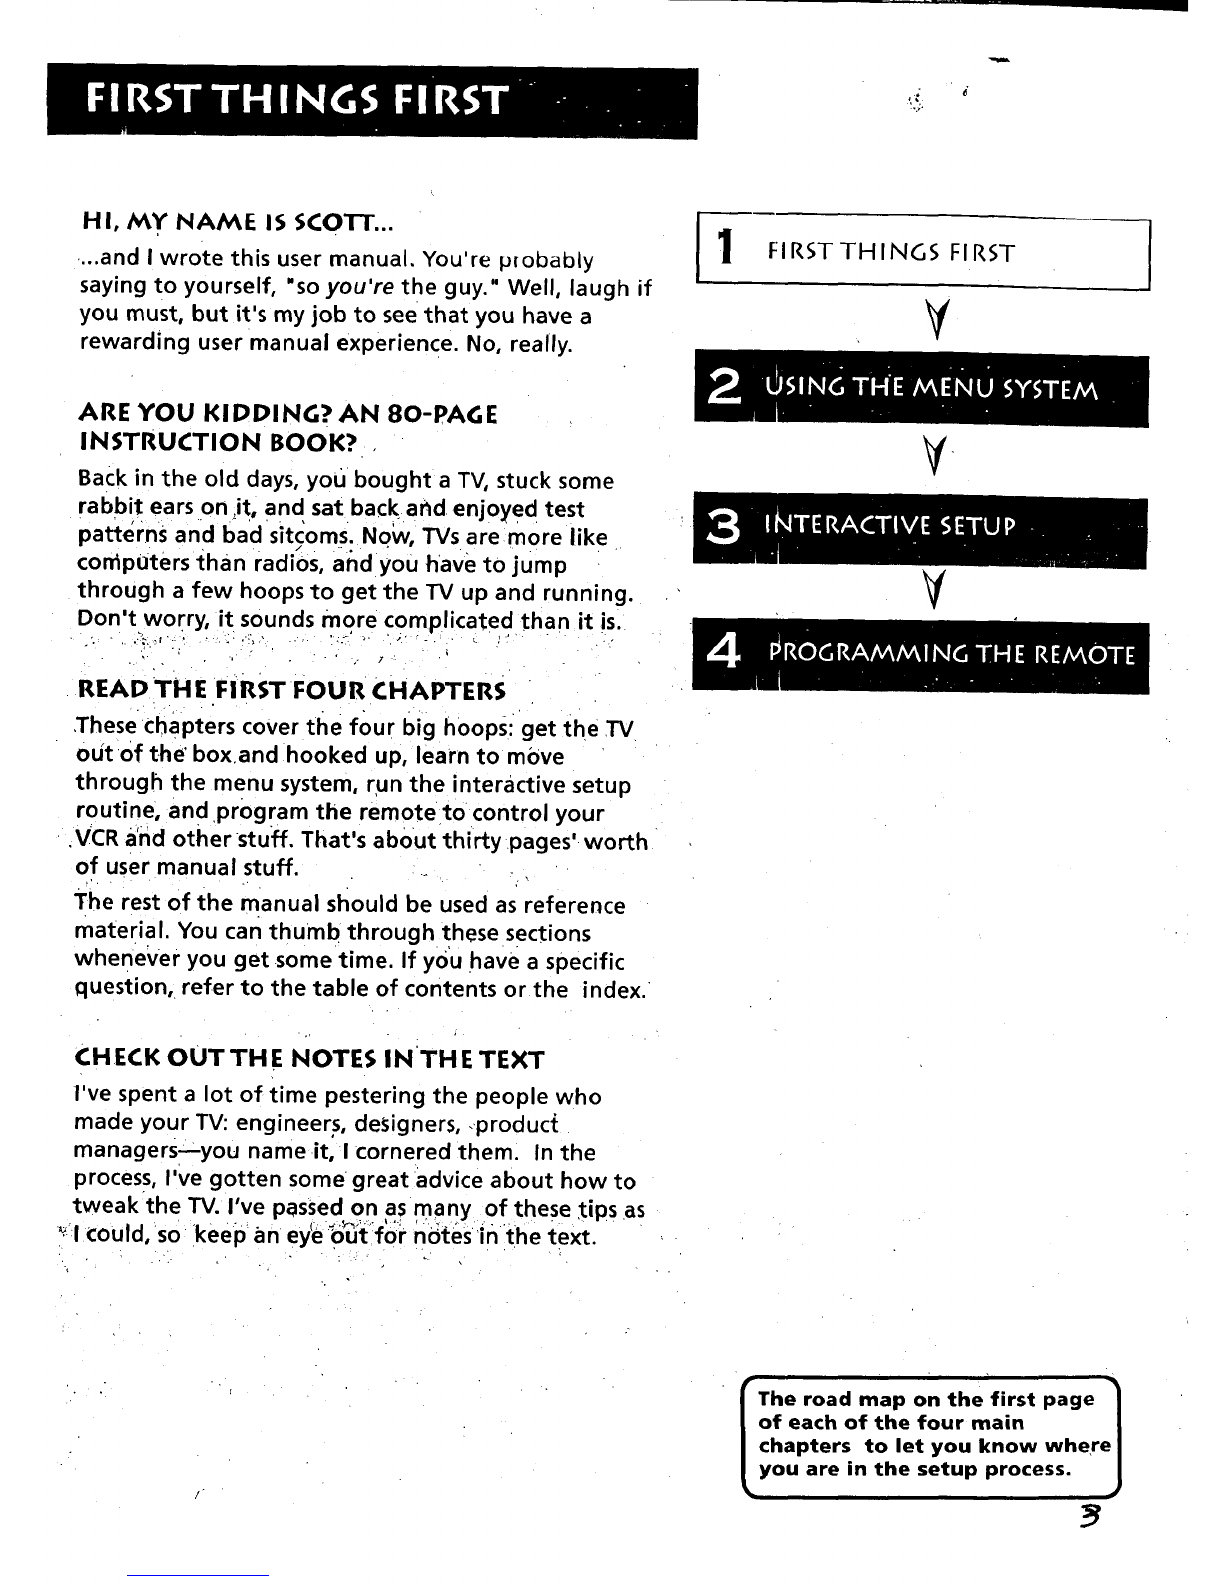
First Things First ........................................................ 3
Using the Menu System ............................................ 7
The Menu Rule: Point and Select ............ :........................................... 8
What is Point and Select? .................................................................... 8
Menus and Control Panels 10
Interactive Setup ..................................................... 15
Entering setup ..................................................................................... 16
Auto Channel Search .......... _........................... ,.....:.............................. 16
Set the Time ................. ............. ._......................... :............................... 17
-Label the Channels ..................................................................... ........ 18
Set the VCR1.Channel ............._...:.................... :.....:.........:......., 19
Set the VCR2oLD Channel ..................................... ............................. 20
Set the DSSoCABLEChannel 21
Programming the Remote" .... ......... . .... ................. 23
About Progtammnng the Remote .,, ...........;,...:......., ...................... 24
Programming the Remote to Control aVCR ................................... 24
Programming the Remote to Control aLaserdisc Player ............... 26
Programming the Remote to Control an Audio Device: ............... 26
programm!ng l_heRemote tOControl a DSSReceiver... ................. 27
Programming the Remote tO Control a Satellite
0r Cabie BOx:...., ................ ;........ =:....... :........................................ 27
Lising:tl_e :Ram0te_t6 Control aDevice :.....:...ii..._.. ......:...:..: ............ 28
Tour of the W.... ....... .....;.... .............. _...................... 29
Remote Buttons .................................. •.................................... :........... 30
Back Panel ................................ ................................. ............... :........... 32
Front Panel ...._.................. _...:................. ...................... ........................ 34
Channel Marker ........•............... ......... 35
Quick Reference ,.. .......... ........................................ .. 37
Audio Menu .......................................................................................... 38
Picture Quality Menu 39
Screen Menu ........................................................................................ 40
Time Menu ........... .............................................................. ................... 41
Channel Menu ..................................................................................... 42
,Setup, ......"':" ............. "_......................................................... i................. 45
_:_,, _:_:,. ::_,: ;._:,'.,.... ....... . . ,. .....
' Advanced Features...., .......... ,.................................. 47
_'>'PIP.(Picture_in=:i_icture_.__. Operation ;"48
Closed Captioning .............................................................................. 50
On-screen Program Details °52
Choosing an Audio Processor.............................................. ............... 53

Appendix A: TV Connections ................................. 55
Things to Do Before Connecting Components ............................... 55
TV and MONO VCR (Connection A) .................................................. 56
TV and STEREO VCR (Connection B)................................................. 57
TV, VCR and Laserdisc Player (Connection C) .................................. 58
TV and (2) VCRs (Connection D) ....................................................... 59
TV and Laserdisc Player(Connection E) ............................................ 61
TV and DSS Receiver (Connection F) ................................................ 62.
TV, VCR, and DSS Receiver (Connection GI ...................................... 63
TV, VCR, DSSReceiver, and Laserdisc Player (Connection H) .......:. 64
TV, (2) VCRs, and DSSReceiver (Connection I) ................................ 66
:_i)_end|x B-°€onnectlng Other Components ...... 68
Conne_ing' External Speakers .......................................................... 68
Connecting Audio Cornponents. ....................................................... 69
.Cohnecting aCamcorder ............ 70
. "_ :'_._":":'_-"__"_ ', ."._ _._" '"".' "": ""'I °: _'_'_" _>" "'. "•
p en ix : Trou lesh tmg Tips...;:. .......... ...,..72
Appendix D:_ Limited Warranty ............. _...... ,........ 74
Appendix E: Care and Cleaning .......................... ;.75
Accessories ........................................... • ............. ......76
index 79
ilh•liinii•lliillillilillilllli•ll•l •..•,,,•,lgillellqnl nil• llilinnilli
_, ,¢_:\ .
:1DSS iSa trademark of Hughes Communications,
a unit of GM Hughes Electronics
2

HI, MY NAME IS SCOTT...
,...and I wrote this user manual, You're plobably
saying to yourself, "so you're the guy." Well, laugh if
you must, but it's my job to see that you have a
rewarding user manual experience. No, really.
1FIRSTTHINGS FIRST 1
ARE YOU KIDDING? AN 80-PAGE
INSTRUCTION BOOK?
Back in the old days, you bought a TV, stuck some
rabbit ears on _it, and sat back and enjoyed test
patterns and bad sitcoms. NoW, TVs are more like
computers than radios, at_d you have to jump
through a few hoops to get the TV up and running.
Don't worry, it sounds more complicated than it is.
-. "_-,t .... --.i_ .... :' _" " ;" "-. . _" ! "
READ THE FIRST FOUR CHAPTERS
,Thesechapters cover ti_e four big hoops: get the TV
out of the' boxand hooked up, learn to move
through the menu system, run the interactive setup
routine, and ,program the remote to control your
•VCR a'nd other stuff, That's about thirty .pages' worth
of user manual stuff.
The rest of the manual should be used as reference
material. You can thumb through these sections
whenever you get some time. If y0'u have a specific
question, refer to the table of contents or the index.
.
V
CHECK OUTTHE NOTES IN THE TEXT
I've spent a lot of time pestering the people who
made your TV: engineers, designers, ,product
managers--you name it,! cornered them. In the
process, I've gotten some great advice about how to
tweak the TV. I've passed on as many of these ,tips as
k ..... " _""."_"_.... _ "_:_ ".... i "_::1could, so eep an eye Out for notes mthe text.
The road map on the first page 1
of each of the four main |
chapters to let you know where I
you are in the setup process. J

=.
• ._ _.-...... .-k,..'_.....
,,.- , ,. ].., ,"
,.. , x [
STEP 1
Unpack the TV and accessories. The accessories packed with
TV include the Universal Remote, the four AAA batteries, an
antenna adapter, and an AV jack for plugging your camcorder
or other aUdio/video component into the front of the TV.
Make sure to locate the Connections Foldout.
Important Information: Optional Stand
Amatching stand has been designed to be used with this
television. The recommended stand, model RB3509, is
provided with hardware to secure the TV to the stand so that
it cannot be pulled off easily or tipped over. This stand is
available from your local RCA dealer, and is not available by
mail order. To locate your nearest dealer, call this toll-free
number: 1-800-336-1900.
Caution If you choose not to use the recommended
stand for your television, take precautions that the stand
or other furniture on which the TV is placed is properly
located and of adequate strength to prevent the TV from
being tipped over accidently or pulled off the stand.
Tipping over the TV or pulling it off the stand could cause
both personal injury and damage to the set.
o
STEP 2: CONNECTI NG YOUR TV
If you're only going to connect the TV to your home antenna
or cable box, use the "TV Only" connection shown below. If
you're going to connect the TV to a VCR, laser disc player or
other component, we recommend you use the Connections
Foldout. The Connections Foldout details ten diagrams that
are recommended for hooking up the TV to a cable box or
antenna, one or two VCRs, a laserdisc player, and a DSS
receiver.
"IV ONLY
This is a basic connection from an antenna or cable box to
your TV. Connect the cable as shown. If you have a VCR or
other components to connect to the TV, skip to the top of the
next page.
4
r I
OR_ANTENNA
vl
.RVIDEO M_TA
_DE02 9
I I I
II

. • . • _ '
"rv WITH OTHER C.ONkPONENT5
Use the Connections F01dout to connect your TV to aVCR,
laserdisc player, and/or DSS" receiver. After connecting your
TV and other components, proceed to the next step. See
Appendix A, p. 57, for detailed information about using each
of these connections.
If your components don't match those shown 0n the foldout,
or if you prefer a different connection, see your dealer or
specific component user manuals.
DSSis a trademark of Hughes Communications,
a unit of GM Hughes Electronics
/
B/ i
STEP 3
Plug in the TV.
Plug the end into the wall outlet, matching the wide blade_of _
the plug with the wide slot in the outlet. Be sure to insert the
plug completely.
STEP4
Put batteries in the remote.
• Slide the battery compartment cover off back of the
remote.
• _ Insert the foot AAA batteries as shown, matching the +
and - ends of each battery in the compartment.
• Replace the cover.
5

STEP 5
Turn on the IV.
•Press TV on the remote, or press POWER on the TV itself.
STEP 6
.Read the next section, Using the Menu System, which is a brief
:overview of the basic rules for getting around in the menus.
z- i
•Proceed to section three, Interactive Setup. The interactive setup
routine walks you through the steps needed to fully configure
the TV. The first step is the auto channel searcl_, which puts
available cable TV or antenna signals into the TV's rnemo.ry. You
must complete the auto channel search. -After this first Step,
you can skip any of the remaining steps and return to them
later. "
•e . ."
... ,.,
. .: ;. -
TV ButtOn
•.. "..
6
_ ,--" ;-
.... - .. ,,. ,.:: .-, ..'-, ...".'°-, . - :.._{_
i
.. - .] ,. •. •. •
I .Interactive Setup is designed to
be used with'the Connections
Foldout.
"I

ONE RULE TO REMEMBER
You control and customize the TV by making
changes to •various control panels in the.menu
system. The great thing is, you only need to know
one rule: point and select. J2 V
USING THE MENU SYSTEM
V
. . . .,.
¥
If you want alot of cool
features, you have to use some
kind of menuing system. Look at
it this way: you only need to
know one rule.
:7

THE MENU RULE: POINTF AND SELECT
You only need to know one rule to use the on-screen menus
and control panels: point and select.
WHAT IS POINTAND SELECT?.
The point and select method has two steps.
1. Point to a menu item using the MOVE arrows on the
remote.
1
For example, to select the channel menu from the
Menu:
1. Press MENU tobringup,the Main Menu.
To point up or down, press the up or down arrows. To
point left or right, pressthe left or rigl_t arrows.
Select a menu item by pressing MENUoPROG.
Selecting an item tells the TV's menusystem to go ahead
and make the change or goto a place you have indicated.
Main
.._.,_
.
8
Point to Channel by pressing the down arrow until _he
word Channel is highlighted in green. . _.'-

3. Press MENU to select Chanllel. Ihe t.hal_l_el rllur_u _omes
up.
4. Point to Exit and press MENU to return to the Main Menu.
5. Point to Exit and press MENU to leave the menu system
and return to TV viewing.
....If you ever _ant t0le_ie the menu system, press CLEAR.
Once you know how to point and select your way through
.the menus, you can apply this rulein the control panels,
which do the real work in the menu system.
!
!.,,
IOne way to exit out of the l
menus is to press zero (0) until J
you back out of the menu
system and return to TV
viewing.
9

MENUS AND CONTROL PANELS
There are two parts to the menu system: menus and control
panels. But before you can use acontrol panel, you first have
to move through at least one menu--the Main Menu.
MENUS
The first menu is called the Main Menu. To bring up the* Main
Menu:
]!: Press MENU on the remote or front panel:
-/
Menus take you to another menu Or a Control panel. There
are two ways to makea choice in a ,menu:
•Point and select with the MOVE arrows and MENU.
• Press a number button on the remote. For example, in the
Main Menu press 3 to go straight to the Screen menu.
Exiting a menu
There are three ways to exit a menu:
• Point to Exit and press MENU.
• Press 0 on.the remote.
Press CLEAR. The on-screen displays are cleared from the
screen and.you are returned to TV viewing,
_° • I:"
I
:. o_ .....
, - ._ , " .. •..
.......... ,,
;°, .L
10
-°:.
... _/ .
•" ,, " • "' "" " b'" "
o.
!.,'_/-_,.. ,,_.:,..:.,_...... . _,
,..'..' _-:_,_ :.._ .' .. .-,
"_ • _iz':' ..' _'._,:"_-_. ,':t--.,
-.:'.:" . .:_,,:,,..._.: ":.,.r_
.... i-_. ] ..i '..: _:',_--:_:.

CONTI?,O L PANELS
Control Panels do the work m the menu system: it's where
you choose a setting, enter a number, or adjust a level such as
tint or brightness. There are three kinds of control panels:
sliders, choice lists, and numeric entry.
_._ :.. ..
Sliders
Sliders are used to make adjustments to a particular control.
For example, to adjust the TV's tint:
1. Press MENU to brin_Up theMain Menu_
2. Point to Picture Quality and press MENU. The Picture
Quality menu comes up.
_. .. ,
'L
,r _.,
3: :::
Utoselect Picture Controls.
,..{
F
i
Pressthe down arrow to point to Tint.
._ _=_t_;. _.-,'.-.
You don't need to remember
the names of the control panel
types. Once you've learned how
each type works, you'll be able
to use any part of the menu
system.
tt

°
• . . :-.-:7
5. Pres_ the rlglqt or left d_jow to adjust the indicator line.
Notice that the picture changes as you adjust the tint,
Now that you know how the Tint slider works, you know how
all sliders work. ,°
Choice Lists
Choice lists are used to choose a particular setting from a list
of settings. The current setting in a choice list is always
highlighted in green.
For example, to indicate whether you're Currently using a
home antenna or a cableTV signals:
1. Press MENU to bring,up the Main Menu.
2. Point to Channel and press MENU, The. Channel menu
conies up.. . .... : ,..
.
i '-.
Point toSignal Type and pressMENU. The Signal Type
choice list comes up with the current setting highlighted
in green. For example: • .• ..
12
4. Point to the correct setting for _;our connection and press
MENU. As soon as you select a choice, the TV saves your
change, and you are returned to the.previous menu.
5. Point to Exit and press MENU to return to "the Main Menu.
6. Point to Exit and press MENU to return to TV viewing.
.i
-°
I •
You can enter numbers directlyl _'_
by using the number buttons.

Numeric Entry
A numeric entry control parcel is used to entel llumbei_ ol
letters.
For example, to set the current time:
I. , Press MENU to bring up the Main Menu.
2. Point to Time and press MENU.
3. .Poin'ttoSet Time and press MENU. The Set Time numeric
entry control panel comes up. Notice the pointer
underneaththe first dash.
4, ,Pressthe up arrow to enter a number in that column.
5. Press the right arrow to move to the next column, then
press the up or down arrow to enter a number.
6. Repeat Step 5 until you have entered the hour and
minute for the current time. Notice that when you reach
thelast column, pressing the-up or down arrow changes
whether the time reads AM or PM.
i|| | | •
Trivia: This type of control panel
is referred to as a "one-armed
bandit." I don't know why.
If the control panel is not set at
the current time, use the left
arrow to go back over the
columns and the up arrow to
make changes.

_-_t. _ ",'l ,_. ""
•... ..
14
• r
o. _ ..
a.....
"7
[-" i'". "'i '"" "- " ""
%, :.
" '.":. ::'_'_ _:-"!' °:7-;:.
. -
. . ., .
.. . ,... .. ".
',. : " :.. ":,... , ,
.-,-,, oi
4
.., • .;'; ,
. . _!_ ,_',_,_._-,_;.;-
." " "" ": _'_ ": (_:_7. "
. . • . "_ . _.. .- ,. -, ,_," _ -
.-- . .
: ... _." _ . /.__
.f - .
._, .. !!

THERE'S AN ON-SCREEN SETUP ROUTINE
Your TV has software that tells it what to do, just like
a computer. The interactive setup routine takes you
through the steps needed to configure the TV:
• Search for available channels
• Set the time
• Makechannel lists and labels
• Set the VCR1 channel
• Set theVCR2•LD channel
.• Set the DSS•CABLE channel 3
V
V
I NTE RAC.TIVE 5 ETU P
V]
Complete the first step, auto
channel search, to receive
antenna or cable TV signals.
After that, you can skip other
steps and return to them at your
convenience.
15

GEN]ERING SETUP
Setup is accessed through the Main Menu:
1. Press MENU to bring up the Main Menu.
2. Point to Setup and press MENU. The first Setup screen
comes up, asking you to confirm that you want to begin.
3. P.ress MENU to,begi n the Setup routine.
•." . .
AUTO CHANN EL SEARCH
The :fir_s:tpart'of the setup routineaskS you if you want the TV
to search automatically for all channels available through
your antenna or cable,TV system. -This is sometimes .called
autoprogramming.*
\. ..
•.:' .." o 1•_-" ...'. '_:' ,4" .;_.,s_._.'_' ,." .... :r-_. .,,
1. Press MENU to tel[the TV to begin searching for channels.
•The display gives you a progress report and tells you when
it. has finished.
2. Press MENU to continue. . -. •..
.', •. -, . ;
You must complete the Auto
Channel Search ;t o receive TV
signals andPut channels in
memory. - -
Auto Channel Search can also be
accessed through the Channel
menu.
|_

SET-I+H I: rIME
The second step lets you set th_ tinl_ ut day.
1. Press MENU to bring up the Set Time control panel.
,- ...
v
2. '.Us_:tl_e'left andrigh_ arrows to point to the hour and
-mlnutesspaces. Use the up and down arrows to scroll
•_chroug ,hthe numbersand change from AM to PM.
3. Press MENU to continue.
17

LABEL3 t4k cHANNELS. •
The third step lets you make your channel list, label your
channels, and choose whether each channel belongs in the
parent.approve d channel list• (For more, see Lists an.d Labelso
page 44.}
-.rows :topoint to the four different
se the left and rlght ar . (called ,f_elds")-
Ureas o_ the control panel, •scroll through the
_wn arr°WS..t,.°., ,,^ _ _h Normal
Use the u.p,an_,_:/"_°_d"select Yes or -u ..... e the
n'u_ers and lett_,_ _- - :may wish to refer to
and pgre_t" apprO;v_l fie_'.ds:'"_ou • for ideas
call |etterg'listediny'Our newp"aPer's TV sectiOn
on labellir_g the channelS_ '
_,. oroceSS"f_r_a:€_b,:°f your channels. Then preSS •:,,
•..:._*_..
.... -. •
Other manuals for CTC179
1
Table of contents
Other RCA TV manuals