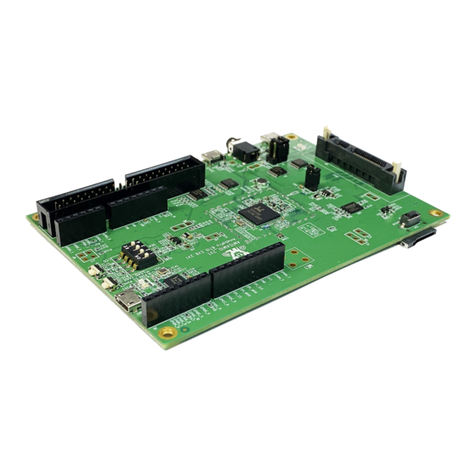
Realtek AmebaPro2 RTL8735B User manual

AmebaPro2 Getting Started Guide
Getting Started Guide All information provided in this document is subject to legal disclaimers. © REALTEK 2020. All rights reserved.
1
AmebaPro2 Amazon FreeRTOS-LTS
- Getting Started Guide
Realtek Semiconductor Corp.
No. 2, Innovation Road II, Hsinchu Science Park, Hsinchu 300, Taiwan
Tel.: +886-3-578-0211. Fax: +886-3-577-6047
www.realtek.com

AmebaPro2 Getting Started Guide
Getting Started Guide All information provided in this document is subject to legal disclaimers. © REALTEK 2020. All rights reserved.
2
COPYRIGHT
© 2019 Realtek Semiconductor Corp. All rights reserved. No part of this document may be reproduced, transmitted, transcribed, stored in a
retrieval system, or translated into any language in any form or by any means without the written permission of Realtek Semiconductor Corp.
DISCLAIMER
Please Read Carefully:
Realtek Semiconductor Corp., (Realtek) reserves the right to make corrections, enhancements, improvements and other changes to its
products and services. Buyers should obtain the latest relevant information before placing orders and should verify that such information is
current and complete.
Reproduction of significant portions in Realtek data sheets is permissible only if reproduction is without alteration and is accompanied by all
associated warranties, conditions, limitations, and notices. Realtek is not responsible or liable for such reproduced documentation. Information
of third parties may be subject to additional restrictions.
Buyers and others who are developing systems that incorporate Realtek products (collectively, “Customers”) understand and agree that
Customers remain responsible for using their independent analysis, evaluation and judgment in designing their applications and that
Customers have full and exclusive responsibility to assure the safety of Customers' applications and compliance of their applications (and of all
Realtek products used in or for Customers’ applications) with all applicable regulations, laws and other applicable requirements. Designer
represents that, with respect to their applications, Customer has all the necessary expertise to create and implement safeguards that (1)
anticipate dangerous consequences of failures, (2) monitor failures and their consequences, and (3) lessen the likelihood of failures that might
cause harm and take appropriate actions. Customer agrees that prior to using or distributing any applications that include Realtek products,
Customer will thoroughly test such applications and the functionality of such Realtek products as used in such applications.
Realtek’s provision of technical, application or other design advice, quality characterization, reliability data or other services or information,
including, but not limited to, reference designs and materials relating to evaluation kits, (collectively, “Resources”) are intended to assist
designers who are developing applications that incorporate Realtek products; by downloading, accessing or using Realtek’s Resources in any
way, Customer (individually or, if Customer is acting on behalf of a company, Customer’s company) agrees to use any particular Realtek
Resources solely for this purpose and subject to the terms of this Notice.
Realtek’s provision of Realtek Resources does not expand or otherwise alter Realtek’s applicable published warranties or warranty disclaimers
for Realtek’s products, and no additional obligations or liabilities arise from Realtek providing such Realtek Resources. Realtek reserves the
right to make corrections, enhancements, improvements and other changes to its Realtek Resources. Realtek has not conducted any testing
other than that specifically described in the published documentation for a particular Realtek Resource.
Customer is authorized to use, copy and modify any individual Realtek Resource only in connection with the development of applications that
include the Realtek product(s) identified in such Realtek Resource. No other license, express or implied, by estoppel or otherwise to any other
Realtek intellectual property right, and no license to any technology or intellectual property right of Realtek or any third party is granted herein,
including but not limited to any patent right, copyright, mask work right, or other intellectual property right relating to any combination,
machine, or process in which Realtek products or services are used. Information regarding or referencing third-party products or services does
not constitute a license to use such products or services, or a warranty or endorsement thereof. Use of Realtek Resources may require a license
from a third party under the patents or other intellectual property of the third party, or a license from Realtek under the patents or other
Realtek’s intellectual property.
Realtek’s Resources are provided “as is”and with all faults. Realtek disclaims all other warranties or representations, express or implied,
regarding resources or use thereof, including but not limited to accuracy or completeness, title, any epidemic failure warranty and any implied
warranties of merchantability, fitness for a particular purpose, and non-infringement of any third party intellectual property rights.
Realtek shall not be liable for and shall not defend or indemnify Customer against any claim, including but not limited to any infringement claim
that related to or is based on any combination of products even if described in Realtek Resources or otherwise. In no event shall Realtek be
liable for any actual, direct, special, collateral, indirect, punitive, incidental, consequential or exemplary damages in connection with or arising
out of Realtek’s Resources or use thereof, and regardless of whether Realtek has been advised of the possibility of such damages. Realtek is not
responsible for any failure to meet such industry standard requirements.
Where Realtek specifically promotes products as facilitating functional safety or as compliant with industry functional safety standards, such
products are intended to help enable customers to design and create their own applications that meet applicable functional safety standards
and requirements. Using products in an application does not by itself establish any safety features in the application. Customers must ensure
compliance with safety-related requirements and standards applicable to their applications. Designer may not use any Realtek products in life-
critical medical equipment unless authorized officers of the parties have executed a special contract specifically governing such use. Life-critical
medical equipment is medical equipment where failure of such equipment would cause serious bodily injury or death. Such equipment
includes, without limitation, all medical devices identified by the U.S.FDA as Class III devices and equivalent classifications outside the U.S.

AmebaPro2 Getting Started Guide
Getting Started Guide All information provided in this document is subject to legal disclaimers. © REALTEK 2020. All rights reserved.
3
Customers agree that it has the necessary expertise to select the product with the appropriate qualification designation for their applications
and that proper product selection is at Customers’own risk. Customers are solely responsible for compliance with all legal and regulatory
requirements in connection with such selection.
Customer will fully indemnify Realtek and its representatives against any damages, costs, losses, and/or liabilities arising out of Designer’s non-
compliance with the terms and provisions of this Notice.
TRADEMARKS
Realtek is a trademark of Realtek Semiconductor Corporation. Other names mentioned in this document are trademarks/registered trademarks
of their respective owners.
USING THIS DOCUMENT
Though every effort has been made to ensure that this document is current and accurate, more information may have become available
subsequent to the production of this guide.

AmebaPro2 Getting Started Guide
Getting Started Guide All information provided in this document is subject to legal disclaimers. © REALTEK 2020. All rights reserved.
5
1.2 PCB Layout Overview
The PCB layout of AmebaPro2 is shown in Fig 1-1.
Fig 1-1 Demo board −PCB layout (2D)
1.3 Log UART
The USB Type-C log UART is shown in Fig 1-2.
Fig 1-2 Demo board –log UART

AmebaPro2 Getting Started Guide
Getting Started Guide All information provided in this document is subject to legal disclaimers. © REALTEK 2020. All rights reserved.
6
2Configure AWS IoT Core
2.1 Set up your AWS account and Permissions
Refer to the instructions at Set up your AWS Account https://docs.aws.amazon.com/iot/latest/developerguide/setting-up.html. Follow the
steps outlined in these sections to create your account and a user and get started:
Sign up for an AWS account
Create a user and grant permissions
Open the AWS IoT console
Please pay special attention to the Notes in AWS webpage.
2.2 Create a New Device
To create a new device, navigate to Manage -> Things in the left-hand navigation menu. Then click “Create things”.

AmebaPro2 Getting Started Guide
Getting Started Guide All information provided in this document is subject to legal disclaimers. © REALTEK 2020. All rights reserved.
7
Then, name the new device. This example uses the name TestDevice.

AmebaPro2 Getting Started Guide
Getting Started Guide All information provided in this document is subject to legal disclaimers. © REALTEK 2020. All rights reserved.
8
Skip this part and “Create thing”, we will attach the policies to certificate later.

AmebaPro2 Getting Started Guide
Getting Started Guide All information provided in this document is subject to legal disclaimers. © REALTEK 2020. All rights reserved.
9
Download the certificate, public key, and private key for the device by clicking Download. Next, download the root CA for AWS IoT by clicking
to the Download link. Once all the certificate and keys have been downloaded, click Done
1
3
4
2

AmebaPro2 Getting Started Guide
Getting Started Guide All information provided in this document is subject to legal disclaimers. © REALTEK 2020. All rights reserved.
10
2.3 Create a policy
A policy defines a device’s access permissions to IoT Core. To create a policy, navigate to Secure -> Policies. Then click “Create policy”
Note: this policy grants unrestricted access for all iot operations, and is to be used only in a development environment. For non-dev
environments, all devices in your fleet must have credentials with privileges that authorize intended actions only, which include (but not
limited to) AWS IoT MQTT actions such as publishing messages or subscribing to topics with specific scope and context. The specific permission
policies can vary for your use cases. Identify the permission policies that best meet your business and security requirements.
For sample policies, refer to https://docs.aws.amazon.com/iot/latest/developerguide/example-iot-policies.html.
Also refer to https://docs.aws.amazon.com/iot/latest/developerguide/security-best-practices.html

AmebaPro2 Getting Started Guide
Getting Started Guide All information provided in this document is subject to legal disclaimers. © REALTEK 2020. All rights reserved.
11
2.4 Attach Policy
The last step to configuring the device is attaching a policy. To attach a policy to new device, navigate to Manage -> Things. Then click on the
device which was created.

AmebaPro2 Getting Started Guide
Getting Started Guide All information provided in this document is subject to legal disclaimers. © REALTEK 2020. All rights reserved.
12
Click Certificate, then choose the certificate create in previous step.

AmebaPro2 Getting Started Guide
Getting Started Guide All information provided in this document is subject to legal disclaimers. © REALTEK 2020. All rights reserved.
13

AmebaPro2 Getting Started Guide
Getting Started Guide All information provided in this document is subject to legal disclaimers. © REALTEK 2020. All rights reserved.
14
3Configure AmebaPro2 Amazon FreeRTOS
3.1 Download FreeRTOS-LTS Library Source Code from Github
Open source link: https://github.com/ambiot/amazon-freertos/tree/amebaPro2-9.x-202107.00-LTS
branch: amebaPro2-9.x-202107.00-LTS
Go to “AmebaPro2_SDK/project/realtek_amebapro2_v0_example/src”:
$ cd project/realtek_amebapro2_v0_example/src
$ git clone --recurse-submodules -b amebaPro2-9.x-202107.00-LTS https://github.com/ambiot/amazon-freertos.git aws_iot_freertos_lts
3.2 Get Broker Endpoint by AWS IoT Core
Broker Endpoint

AmebaPro2 Getting Started Guide
Getting Started Guide All information provided in this document is subject to legal disclaimers. © REALTEK 2020. All rights reserved.
15
3.3 Get Thing Name
3.4 Setup IoT Core Information with AmebaPro2 Amazon FreeRTOS
Setup BROKER_ENDPOINT, THING_NAME, WIFI_SSID, PASSWORD in
“project/realtek_amebapro2_v0_example/src/aws_iot_freertos_lts/demos/include/aws_clientcredential.h”
Thing Name

AmebaPro2 Getting Started Guide
Getting Started Guide All information provided in this document is subject to legal disclaimers. © REALTEK 2020. All rights reserved.
16
3.4.1 Setup Thing’s Private Key and Certificate
Fill keyCLIENT_CERTIFICATE_PEM and keyCLIENT_PRIVATE_KEY_PEM in
“project/realtek_amebapro2_v0_example/src/aws_iot_freertos_lts/demos/include/aws_clientcredential_keys.h” by xxxxxxxx-certifiacte.pem
and xxxxxxxx-private.pem.key.
It can be done by the script PEM-to-C-string.py provided by AWS.It can be downloaded from https://github.com/aws/amazon-
freertos/tree/main/tools/certificate_configuration.

AmebaPro2 Getting Started Guide
Getting Started Guide All information provided in this document is subject to legal disclaimers. © REALTEK 2020. All rights reserved.
17
Final aws_clientcredential_keys.h overview.
3.4.2 Enable FreeRTOS demo on AmebaPro2
For example, if you would like to run MQTT mutual authentication demo, please find aws_demo_config.h in
“project/realtek_amebapro2_v0_example/src/aws_iot_freertos_lts/vendors/realtek/boards/amebaPro2/aws_demos/config_files/”and
enable CONFIG_CORE_MQTT_MUTUAL_AUTH_DEMO_ENABLED
Now you can start to compile AmebaPro2 Amazon FreeRTOS project !

AmebaPro2 Getting Started Guide
Getting Started Guide All information provided in this document is subject to legal disclaimers. © REALTEK 2020. All rights reserved.
18
4Compile AmebaPro2 Amazon FreeRTOS
4.1 Compile Program with GCC Toolchain
Run following commands to build the image with option `-DEXAMPLE=amazon_freertos`
$ cd project/realtek_amebapro2_v0_example/GCC-RELEASE
$ mkdir build
$ cd build
$ cmake .. -G"Unix Makefiles" -DCMAKE_TOOLCHAIN_FILE=../toolchain.cmake -DEXAMPLE=amazon_freertos
$ cmake --build . --target flash -j4
After successfully build, there should be an image file flash_ntz.bin located in “build/” directory.

AmebaPro2 Getting Started Guide
Getting Started Guide All information provided in this document is subject to legal disclaimers. © REALTEK 2020. All rights reserved.
19
5Image Download Tool
Use image tool to download the image to AmebaPro2. The tool can be find in tools/Pro2_PG_tool_linux_v1.3.x.
5.1 Environment Setup
The hardware setup is shown in Fig 5-1.
Fig 5-1 Hardware setup
5.2 Enter the Download Mode
Press these two buttons in following figure simultaneously to enter download mode.
Fig 5-2 Enter download mode
5.3 Download Firmware Image
Copy the image flash_ntz.nn.bin to image tool folder tools/Pro2_PG_tool_linux_v1.3.x.
Then, Use Pro2_PG_tool_linux_v1.3.x command line tool to download image.
Nor flash
$ ./uartfwburn.linux -p /dev/ttyUSB? -f flash_ntz.nn.bin -b 2000000 -U
Nand flash
$ ./uartfwburn.linux -p /dev/ttyUSB? -f flash_ntz.nn.bin -b 2000000 -n pro2
After firmware image downloaded, press the reset button (beside the LED) to reboot the device and open terminal console to check the log.
Note: If using windows, replace uartfwburn.linux with uartfwburn.exe and replace /dev/ttyUSB? with COM?
Micro USB cable

AmebaPro2 Getting Started Guide
Getting Started Guide All information provided in this document is subject to legal disclaimers. © REALTEK 2020. All rights reserved.
20
6MQTT Demo
6.1 Run MQTT Demo
Default setting of SDK are enable MQTT demo. Once the AmebaPro2 EVB has rebooted, the application will automatically start run MQTT
demo and communicate to IoT Core.
…
…
Table of contents
Other Realtek Computer Hardware manuals