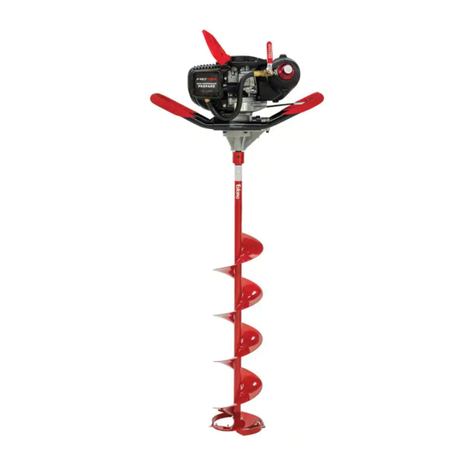
Redback E808C Installation and maintenance instructions

Original Instruction
1 / 13
40V LITHIUM-ION CORDLESS
ICE AUGER/SOIL AUGER /MIXER
Model No: E808C/806C/805C
Operator’s Manual and Part List
Before use please read & understand this manual, paying particular
attention to the safety instructions.
Retain these instructions for future reference

Original Instruction
2 / 13
CONTENTS
•Contents…………………………………………………..…….2
•Specifications…………………………………………………3-4
•Symbols……………………………………………………..…..5
•Major Parts of the Tool…………..……………………..……..6
•Safety instructions…………………………………….……..7-8
•Assembly and Operation……..………………………….…9-10
•Exploded View and Part List ….. …………………..……11-12

Original Instruction
3 / 13
PRODUCT SPECIFICATIONS
Product Name
Ice Auger
Model No
E808C
Rated Voltage
40V
No Load Speed
250rpm
Blade Diameter
200mm (7.9”)
Cutting Depth
800mm (31.5”)
Weight (w/o battery pack)
8.8kg (19.4lbs)
Guaranteed sound power level
89 dB(A)
Battery Pack
Lithium-Ion –EP20, EP40 or
EP60 (2.0, 4.0 or 6.0Ah).
Product Name
Soil Auger
Model No
E806C
Rated Voltage
40V
No Load Speed
250rpm
Blade Diameter
150mm (5.9”)
Cutting Depth
800mm (31.5)
Weight (w/o battery pack)
8.1kg (17.86lbs)
Guaranteed sound power level
89 dB(A)
Battery Pack
Lithium-Ion –EP20, EP40 or
EP60 (2.0, 4.0 or 6.0Ah).

Original Instruction
4 / 13
Product Name
Mixer
Model No
E805C
Rated Voltage
40V
No Load Speed
250rpm
Blade Diameter
120mm (4.7”)
Mixing capacity
30-50L
Weight (w/o battery pack)
6.9kg (15.2lbs)
Guaranteed sound power level
89 dB(A)
Battery Pack
Lithium-Ion –EP20, EP40 or
EP60 (2.0, 4.0 or 6.0Ah).
These instructions should be read in conjunction with the instruction manual for the
battery pack and charger.

Original Instruction
5 / 13
SYMBOLS
Warning, safety alert.
Read and follow all safety precautions in the owner’s
manual.
Protective goggles/visor, protective helmet &
hearing protection。
Wear no-slip, heavy-duty gloves
Do not expose to rain.
Thrown objects can ricochet and result in personal
injury or property damage.
Risk of injury by cutting of foot
Keep hands away from the blade。
keep the bystander away from the operating site
Wear spiked shoes when using ice auger on the ice

Original Instruction
6 / 13
MAJOR PARTS OF THE TOOL
1.Battery
2. Trigger switch
3. Safety switch
4. Handgrip
5. Forward / Reverse switch
6. Auger connecting bolt
7. Auger
8. Auger blades
9 Soil auger blade
10.Mixer head
7
6
6
6
7
6
6
6
9
10
4
1
6
7
8
2
5
3

Original Instruction
7 / 13
INTEND USE
The different auger types will be used in different circumstances, paid especial attention to the ice
auger should use on the ice that thickness is more than 20cm (7.9”).
The ice blades are very sharp. Use extreme caution when drilling a hole or replacing the blades. Put the
blade guard on after each use.
•Always keep hands, feet, hair, drawstrings, scarves, hats and loose clothing away from any moving
parts on the unit.
•Do not operate any power equipment under the influence of alcohol or drugs.
•Keep all screws, nuts, and bolts tight.
•The battery must be removed before any repairs are attempted.
•DO NOT use this product for other than its intended purpose.
•DO NOT continue to use this product in the event of mechanical failure.
•This product produces a considerable cutting force that is felt by the operator. Make sure your feet are
firmly planted and that the handles are held firmly while operating the auger.
•During operation, the unit could stop. If this happens, release the operating switch. Reposition your
feet and grip the handles tightly. Then squeeze the operating switch and lift the unit gently.
•When drilling ice holes, do not push down on the unit. If auger begins to drill slowly, blades may need
to be sharpened or replaced.
SAFETY INSTRUCTIONS
1) Work area safety
a) Keep work area clean and well lit. Cluttered or dark areas invite accidents.
b) Do not operate power tools in explosive atmospheres, such as in the presence of flammable liquids,
gases or dust. Power tools create sparks which may ignite the dust or fumes.
c) Keep children and bystanders away while operating a power tool. Distractions can cause you to lose
control.
d) Only allow adults to use the tool who have read this instruction manual, or have been trained in the
safe operation of this tool
e) The auger is fitted with a sharp blade. Protect yourself and the blade by using the blade guard when
the tool is not in use.
f) This tool produces considerable torque. Before starting the tool, ensure that you have a firm footing
and a tight hold on the handgrips.
h) Before drilling, look for any obstructions or dangers in the ice below.
2) Electrical safety
a) Power tool plugs must match the outlet. Never modify the plug in any way. Do not use any adapter
plugs with earthed (grounded) power tools. Unmodified plugs and matching outlets will reduce the risk of
electric shock.
b) Avoid body contact with earthed or grounded surfaces, such as pipes, radiators, ranges, and
refrigerators. There is an increased risk of electric shock if your body is earthed or grounded.
c) Do not expose power tools to rain or wet conditions. Water entering a power tool will increase the risk
of electric shock.
d) Do not abuse the cord. Never use the cord for carrying, pulling or unplugging the power tool. Keep

Original Instruction
8 / 13
cord away from heat, oil, sharp edges or moving parts. Damaged or entangled cords increase the risk of
electric shock.
e) When operating a power tool outdoors, use an extension cord suitable for outdoor use. The use of a
cord suitable for outdoor use reduces the risk of electric shock.
f) If operating a power tool in a damp location is unavoidable, use a residual current device (RCD)
protected supply. The use of an RCD reduces the risk of electric shock.
3) Personal safety
a) Stay alert, watch what you are doing and use common sense when operating a power tool. Do not use
a power tool while you are tired or under the influence of drugs, alcohol or medication. A moment of
inattention while operating power tools may result in serious personal injury.
b) Use personal protective equipment. Always wear eye protection. Protective equipment such as dust
mask, non-skid safety shoes, hard hat, or hearing protection used for appropriate conditions will reduce
personal injuries.
c) Prevent unintentional starting. Ensure the switch is in the off-position before connecting to a power
source and/or battery pack, picking up or carrying the tool. Carrying power tools with your finger on the
switch or power tools that have the switch on invites accidents.
d) Remove any adjusting key or wrench before turning the power tool on. A wrench or a key left attached
to a rotating part of the power tool may result in personal injury.
e) Do not overreach. Keep proper footing and balance at all times. This enables better control of the
power tool in unexpected situations.
f) Dress properly. Do not wear loose clothing Keep your hair, clothing, and gloves away from moving
parts. Loose clothes or long hair can be caught in moving parts.
g) If devices are provided for the connection of dust extraction and collection facilities, ensure these are
connected and properly used. The use of dust collection can reduce dust-related hazards.
4) Power tool use and care
a) Do not force the power tool. Use the correct power tool for your application. The correct power tool will
do the job better and safer at the rate for which it was designed.
b) Do not use the power tool if the switch does not turn it on and off. Any power tool that cannot be
controlled with the switch is dangerous and must be repaired.
c) Disconnect the battery pack from the power tool before making any adjustments, changing
accessories, or storing power tools. Such preventive safety measures reduce the risk of starting the
power tool accidentally.
d) Store idle power tools out of the reach of children and do not allow persons unfamiliar with the power
tool or these instructions to operate the power tool. Power tools are dangerous in the hands of untrained
users.
e) Maintain power tools. Check for misalignment or binding of moving parts, breakage of parts and any
other condition that may affect the power tool’s operation. Check that bolts and screws are tight before
each use. If damaged, have the power tool repaired before use. Many accidents are caused by poorly
maintained power tools.
f) Keep cutting tools sharp and clean. Properly maintained cutting tools with sharp cutting edges are less
likely to bind and are easier to control. The auger blade needs to be sharpened annually or anytime that
cutting performance is degraded.

Original Instruction
9 / 13
g) Use the power tool, accessories, and tool bits etc. in accordance with these instructions, taking into
account the working conditions and the work to be performed. The use of the power tool for operations
different from those intended could result in a hazardous situation.
h) Do not modify the tool, or use unauthorized attachments or accessories. Using the machine in a way
that was not intended to be used could cause an injury to the operator or bystanders or damage to the
tool.
5) Battery tool use and care
a) Recharge only with the charger specified by the manufacturer. A charger that is suitable for one type of
battery pack may create a risk of fire when used with another battery pack.
b) Use power tools only with specifically designated battery packs. The use of any other battery packs
may create a risk of injury and fire.
c) When the battery pack is not in use, keep it away from other metal objects, like paper clips, coins, keys,
nails, screws or other small metal objects, that can make a connection from one terminal to another.
Shorting the battery terminals together may cause burns or a fire.
d) Under abusive conditions, liquid may be ejected from the battery; avoid contact. If contact accidentally
occurs, flush with water. If liquid contacts eyes, additionally seek medical help. Liquid ejected from the
battery may cause irritation or burns.
Assembly and Operation
IMPORTANT CAUTIONS
Always remove the battery when the Ice Auger& SOIL AUGER is not in use, or before maintenance or to
free the blade when stuck.
The Ice Auger Ice Auger& SOIL AUGER has a sharp blade that can cause injury or damage to property.
Always use the blade protector when the tool is not in use.
This tool is for drilling into ice or earth Do not use it for any other purpose or with accessories not supplied
by REDBACK. Never attempt to modify the tool, or to bypass any of the safety features.
USE OF THE ICE AUGER& SOIL AUGER
1. Follow the instructions below to charge the battery before use. Three different batteries are available
which give different run-times
2. Fit the Auger to the machine. To do this put the auger onto the output shaft on the machine. Align the
bolt holes and use the bolt supplied to lock it into place. Always check that this bolt is tight before each
use.
3. Remove the blade guard and fit the battery to the machine.

Original Instruction
10 / 13
4. Choose your position to drill. Ensure that you have a firm footing and place the point of the auger in the
center of your drilling position.
5. Ensure that the forward/reverse switch is in the ‘forward’ position.
6. Press the safety switch and pull the trigger switch. There will be a short delay before the blade starts to
turn. Keep your hands and feet away from the blade and make sure that loose clothing, hair or anything
else does not become entangled with moving parts.
7. This machine produces a low-speed, high torque output. Make sure that you have a firm footing and
hold the handgrips firmly.
7. Allow the blade to cut at its own speed into the ice. Do not push down on the auger. If the auger starts
to cut the ice more slowly, it may be time to sharpen the blades. We recommend the blades to be
sharpened annually, or when cutting performance deteriorates.
8. If the auger becomes stuck, release the trigger switch. Move the forward/reverse lever into ‘reverse’
and attempt to power the auger out. If this does not work, remove the battery and manually unwind the
auger from the ice or earth
9. When you have finished drilling, remove the battery from the machine and keep both the battery and
the machine away from the ice, water or other moisture.
USE OF THE MIXER
1. Follow the instructions below to charge the battery before use. Three different batteries are available
which give different run-times
2. Fit the mixer head to the machine. To do this put the head onto the output shaft on the machine. Align
the bolt holes and use the bolt supplied to lock it into place. Always check that this bolt is tight before
each use.
3. Fit the battery to the machine. Choose your position to mix. Ensure that you have a firm footing and
place the point of the mixer.
4 Ensure that the forward/reverse switch is in the ‘forward’ position.
5. Press the safety switch and pull the trigger switch. There will be a short delay before the tool starts to
turn.
6. This machine produces a low-speed, high torque output. Make sure that you have a firm footing and
hold the handgrips firmly.
7. If the mixer becomes stuck, release the trigger switch. Move the forward/reverse lever into ‘reverse’
and attempt to power the mixer out. If this does not work, remove the battery and manually unwind the
head.
8 When you have finished mixing, remove the battery from the machine and keep both the battery and
the machine away from the ice, water or other moisture.

Original Instruction
11 / 13
BATTERY CHARGER
WARNING: This charger can be used with an input voltage of 120V and an AC frequency of 60Hz.
To avoid the risk of damage and injury, only use the charger to recharge Redback 40V battery packs.
Never try to recharge non-rechargeable batteries.
WARNING: If the charger is plugged in and no LED lights are illuminated, unplug and check with your
nearest authorized service center. Do not attempt to use the charger.
Status indicator lights
The LED light indicates the operating status and the state of charge of the battery.
- LED steady red –the charger is ready to charge, but no battery is connected
- LED flashes green. The battery is charging.
- LED steady green: The battery is fully charged and can be removed.
- LED flashes red: battery fault or overheat.
Charging the battery
- Plug the charger into an AC outlet 100-250V (normal household voltage).
- Insert the battery into the slots of the charger and slide into place until the battery locks into place
- The LED will flash green while the battery is charging
- Once the battery is fully charged, the LED indicator will show a steady green light.
- Remove the battery by pressing and holding the latch button and sliding out of the charger
Lithium-Ion batteries have no memory effect –a partial charge will not damage your battery
Storage of the charger and battery
For long-term storage, it is preferable that the battery is fully charged and stored in a dry place at a
temperature between 10 -25 °C (50 –68 °F)
- The charger should be stored in the same conditions as the battery, taking care that no foreign objects
such as metal chips enter through the ventilation slots of the charger or short out the connectors on the
battery
CAUTION: Only use the supplied charger and batteries with this tool
Battery
Charger
LED

Original Instruction
12 / 13
EXPLODED VIEW AND PARTS LIST
No.
Part No.
Description
QTY
No.
Part No.
Description
QTY
1
20920070
Front cover
1
15
20470060
Power switch
1
2
60170670
Self-tapping screw
23
16
30080030
Micro switch
1
3
20920060
Right housing
1
17
20530110
Lock button
1
4
30010240
Male tab
4
18
21060190
Left handle
1
5
20800060
Tab seat
1
19
71080110
Fixing pipe
1
6
20650040
Upper cover
1
20
21060150
Left handle
1
7
Battery pack
1
21
21060170
Right handle
1
8
30070090
Brushless motor
1
22
30070110
Reduction gearbox
1
9
60150090
Self-tapping screw
2
23
60050030
Bolt
3
10
30030060
Switch
1
24
20040070
Knob
1
11
60070100
Controller
1
25
21000040
Decorative cover
1
12
20920060
Left housing
1
26
60480080
hexagon bolt
4
13
21060210
Right Handle
1
27
71030430
Blade
1
14
60390160
Spring
2
This manual suits for next models
2
Table of contents