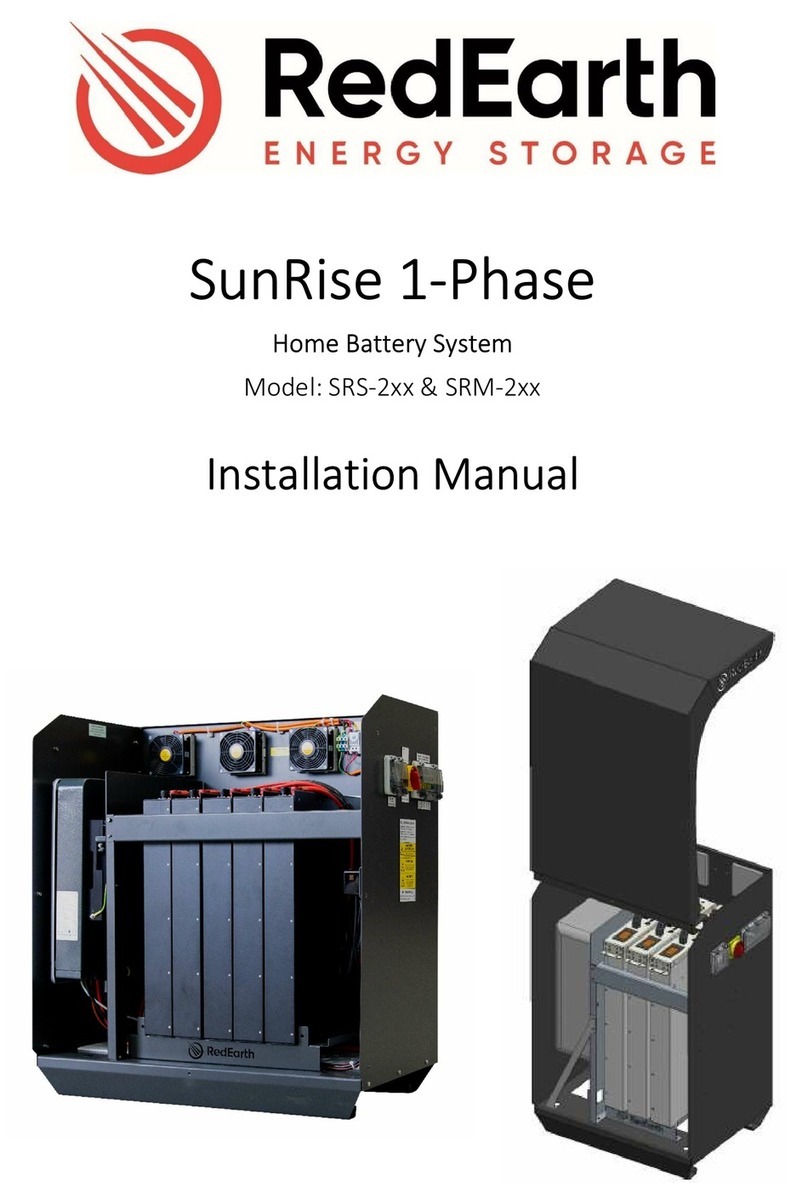
RedEarth BlackMax User manual

BlackMax – User Manual
RE_PROD_0006 Version 1 Page 1 of 19 Issue Date 28/07/2020
BlackMax
Shed Power – Off-grid
Alino TL with Lithium batteries
User Manual

BlackMax – User Manual
RE_PROD_0006 Version 1 Page 2 of 19 Issue Date 28/07/2020
WARNING: Working on the inside of the BlackMax system is restricted to qualified personnel.
In Australia this is typically qualified electricians with CEC accreditation for Solar and Battery.
WARNING: Lithium Battery Hazard
Many of the procedures covered in the Installation manual have inherent risks.
Whilst the BlackMax is designed to be electrically safe, including residual current
device and double insulated cables, the voltages connected or generated by the
equipment are hazardous and potentially fatal.
Shutdown and safety procedures
The BlackMax must only be commissioned by suitably qualified personnel.
It is the responsibility of the installer to ensure the operation and all the wiring is
carried out according to all safety standards that are applicable to the installation.
The wiring diagrams and installation instructions are given as a guide only and
compliance to appropriate standards is the responsibility of the installer.
Damaged battery
Do not use a damaged battery. Batteries should only be disposed of at an appropriate recycling centre.
Please contact RedEarth for advice.
Fire
In the event of fire evacuate the area and call
emergency services. A dry agent fire extinguisher
should be readily available and used. DO NOT use
water. Evacuate the area and call emergency
services. Toxic gas may be produced if the battery
catches fire.
Note: MSDS document is provided with the system
and also can be found at www.redearth.energy

BlackMax – User Manual
RE_PROD_0006 Version 1 Page 3 of 19 Issue Date 28/07/2020
RedEarth’s BlackMax battery system is a all in one, ready-to-run energy storage system for off-
grid applications. It consists of a Alino TL 5kVA hybrid inverter and up to two (2) self-managed
lithium batteries (8kWh total). It is fully assembled, factory tested and requires no programming.
It is ready to connect a PV Solar array and a generator (either auto or manual start)
The BlackMax system is designed to be installed either inside or outside, ideally on a flat surface
and in a shaded area against a wall.
RedEarth Energy Storage can also provide an opptional remote monitoring service to ensure
ongoing operation of the BlackMax battery system.
A typical complete installation of the BlackMax with solar panels, will require the electrical
connection of:
•The customers load – via
external GPO.
•The array of PV solar panels
– via MC4 conectors on the
side of the unit.
•Generator – via external
GPO.
In addition, the installer may need to
verify that the internet/monitoring is
operational; assuming remote
monitoring is requested. In this
case, RedEarth can provide a SIM-
card based monitoring solution if the customer does not have internet and the installation site has
mobile coverage.
Note: The BlackMax is not designed to act as a main switch board for the premises, as it does not
include space for additional main & customer circuit breakers or RCDs. The MEN link and Earth
connection need to be in place at the premises as required.
About BlackMax

BlackMax – User Manual
RE_PROD_0006 Version 1 Page 4 of 19 Issue Date 28/07/2020
`
Dimension & Clearance
BlackMax Weight: 154kg with 2x Lithium batteries (42kg per battery)
Dimensions with door and lid closed: 940 H x 700 W x 420 D [mm]
BlackMax Minimum Clearance
According to AS/NZS 5139
BlackMax Fully Open
1310 H x 705 W x 990 D [mm]

BlackMax – User Manual
RE_PROD_0006 Version 1 Page 5 of 19 Issue Date 28/07/2020
The BlackMax can be divided into four areas. The AC, the DC, the inverter, and the battery area.
With two access points available, use the lid for the batteries and the front door for the switches
and electronic equipment. Below is explained how to access and what to expect in each area.
The Top:
A clear weather proof cover on the lid allows viewing of
the display, if interaction is needed, the cover can be
easily lifted by releasing the two screws and the clip tab
from the front and held in a vertical position with the
help of rear hinges.
For a full shutdown procedure, access to the batteries
is required. This is also done via the lid as it can pivot
on the rear hinges and sit in a vertical position.
Note: Refer to the Installation Manual for more
information on how to lift the lid.
Once the lid is open, clear and direct access is
available to the batteries
The Door:
The second access is made by the front door. To open it,
the two key locks must be turned clockwise with the help
of the key. These items are shown in the picture to the
right.
The AC Side:
Looking at the AC side of the BlackMax
(left-hand side), you will find the items
shown in the picture to the right.
•15A INLET power point for the
generator (a 15 Amp lead is
required)
•15A OUTLET power point (a
standard 10A lead will also fit)
•Magnetic hook & key
Overview

BlackMax – User Manual
RE_PROD_0006 Version 1 Page 6 of 19 Issue Date 28/07/2020
Directly below you will find a small window. By releasing the two screws and the clip tab, this
window will lift and allow access to the Generator Input Breaker (MCB), the Power Usage Meter
(AC), the Power Point (RCBO) and Power Out (MCB).
The DC Side:
Looking at the DC side of the
BlackMax (right-hand side) you will
find the items shown in the picture to
the right.
Just like the AC side, by releasing
the two screws and the clips on the
bottom of the window, you will have
access to the Main Battery Isolator
as well as the Battery Status Monitor.
The screen will display the
instantaneous current, voltage,
power and energy delivered from the
batteries.
NOTE: When the batteries are charging, the current reading will be zero (0) as the meter is
unidirectional.
Next to the window are standard 5V USB and 12V power ports.
Below these are the Solar PV Isolator and the Solar connectors for PV panels for easy isolation
and connection/disconnection of your solar panel array.
The Base:
With its R2D2-like “feet”, the BlackMax allows the ventilation
inlet to be in the base of the unit.
Overview
Air Flow

BlackMax – User Manual
RE_PROD_0006 Version 1 Page 7 of 19 Issue Date 28/07/2020
Alino TL - Inverter
The Alino TL by Outback Power offers a complete inverter
and a solar charge controller in one attractive, compact
package. This inverter is certified to IEC62109-1 and -2 and
carries the CE mark.
It is listed on the Clean Energy Council (CEC) list which
means that when solar panels are installed by a CEC certified
installer, the government rebates can be claimed.
Emergency Power Feature: The Alino TL will generate power
from the solar panels even if the battery is flat/not connected.
This means that power is available ONLY if the sun is shining
on the solar panels. If a cloud should come over, the power
will drop out.
Lithium Battery
Batteries are a critical part of the Off-Grid system as they store energy generated from the solar
panels and fuel powered Generators. This power can then be utilised at times when solar energy
is not available.
The battery bank has been sized to meet your requirements according to your Load Profile and
energy assessment.
The self managed LFP battery with internal BMS offers you a safe lithium option for any solution
that requires reliability, ease of use and a product that outperforms others.
Built to the highest quality standards,
incorporating components of
exceptional reliability and durability, our
Australian manufactured LiFe Series
are engineered to outperform and
outlast its competitors.
What is in my BlackMax

BlackMax – User Manual
RE_PROD_0006 Version 1 Page 8 of 19 Issue Date 28/07/2020
Temperature Sensor
A temperature activated relay is positioned on the top left-hand side of the
rear panel as shown in the picture. This relay is connected to the fan also on
the rear and will turn them on once the set temperature is reached. In factory,
the dial is set to activate between the temperatures of 35⁰ and 40⁰ Celsius.
Fan
To help keep the inside of the BlackMax at an adequate temperature, a 230V
fan – activated by the temperature sensor – will push out the hot air and fresh air will come in
through the vents on the base.
Generator (External)
Because the BlackMax is an off-grid system, it is highly
recommended to purchase the unit with one of our
recommended generators e.g. Honda EU22i. However,
if purchasing separately, inverter-generators are
recommended for use with BlackMax due to their better
power quality. If voltage, frequency, or current
waveforms of the generator are not of a high enough
quality, then it will be rejected by the inverter.
NOTE: Some low-cost generators do not provide
sufficient power quality to be accepted by the BlackMax
and therefore not charge the batteries. Generators that
produce poor power quality will damaged devices over time.
Refer to the Installation Manual for minimum generator specification.
What is in my BlackMax

BlackMax – User Manual
RE_PROD_0006 Version 1 Page 9 of 19 Issue Date 28/07/2020
To turn on the unit you must follow the steps below:
NOTE: The “Quick Start Guide” label on the lid of the unit
can also be referenced.
1 Switch on the battery breakers on the top of each
LiFe lithium battery. The LED light on each battery
will come on.
2 Switch ON the Main Battery Isolator, found on the
RHS of the unit;
3 Switch on the PV Array Isolator, found on the RHS of
the unit;
4 Press the “On/Off” button on the display, found on
the lid of the unit;
5 Turn ON all AC circuit breakers, found on the LHS of
the unit;
The shutdown procedure is the reverse of the “turn on”
procedure and is shown below.
1 Turn OFF all AC circuit breakers, found on the LHS of the unit;
2 Press the “On/off” button on the display, found on the lid of the unit;
3 Switch on the PV Array Isolator, found on the RHS of the unit;
4 Switch on the Main Battery Isolator, found on the RHS of the unit;
Long Term Storage: The battery breaker on top of each battery does not have to be turned off if
the main battery breaker is already off. However, we do recommend turning off each battery
breaker for long term storage (up to 6 months).
Batteries should be charged every 6 months.
How to Turn ON / Shutdown my BlackMax

BlackMax – User Manual
RE_PROD_0006 Version 1 Page 10 of 19 Issue Date 28/07/2020
The BlackMax is setup to provide power in the most efficient way possible.
The priorities set on this system are to power the loads from the PV (solar) first, then the
Generator and finally the battery.
To understand this, imagine if in the middle of the day, the
generator is turned on and some appliances are running
(loads). The PV will provide power to the loads. If that is not
enough, the generator (if available) will provide the rest. If
that is still not enough, the battery will provide the rest.
As an off-grid system it is very important to get the maximum amount of “free” energy into the
batteries before the sun goes down. Batteries are only charged with the “excess” power. This
means that all the solar (and generator) power produced will go to the loads first and only the
excess will go into the batteries.
NOTE: If required to charge the batteries as quick as possible, switch off the Power Point and
Power OUT breakers (this will turn off all appliances connected to the BlackMax), turn on the
generator and the PV. This will take all the power from the generator and PV, and “push” it all into
the batteries.
How BlackMax Operates
PRIORITY – (SUB)
Solar – Utility (Generator) – Battery

BlackMax – User Manual
RE_PROD_0006 Version 1 Page 11 of 19 Issue Date 28/07/2020
As mentioned in the Turn on/Shutdown
procedure, the BlackMax has a few breakers
(RCB and RCBO) that must be operated correctly
in order to provide power.
Following the same steps as the Turn ON
procedure, the individual and main battery
breakers have printed on the handle a “I” or a
“O” which can be interpreted as “ON” and
“OFF” respectively.
The Solar PV Isolator is a rotary switch that can
be turned ON by turning the red handle
clockwise to the horizontal position. Or OFF,
counter-clockwise to the vertical position.
The AC breakers also have a “I” and “O” on the
handle to identify if the breaker is on or off.
For the generator’s power to reach the inverter,
the “Generator Input” breaker must be turned on.
If the generator is to overload the inverter, there
is an internal tripping mechanism that will protect
itself. If this happens, a button on the bottom side
of the inverter must be pressed to allow power
from the generator.
There are 2 breakers related to providing power
to the loads. The first is the “POWER OUTPUT
plug” that will turn the Power Output plug on or
off. And the second is the “Power out” that acts as a
main switch or in situation where the loads have been
hardwired to the system, they will be controlled by this
breaker.
How to Operate

BlackMax – User Manual
RE_PROD_0006 Version 1 Page 12 of 19 Issue Date 28/07/2020
Maintenance Schedule
Weekly
Check component operating lights are normal
Monthly
Clean inside the enclosure of dust, vermin or obstructions
Ensure safety labels/instructions remain visible
Clean air filter with vacuum or soft brush
Clean outside of enclosure soft brush or damp cloth
Bi-annually
Clean solar panel surfaces to ensure optimal performance
Annually
Visually inspect for loose cables or connections near inverter
Clear any vegetation or overgrowth over the solar panels
Inspect conditions of solar panels, cables, array frame for damage or corrosion
End of Life Recycling
Please contact RedEarth Energy Storage to arrange recycling of your battery.
Maintenance and End of Life

BlackMax – User Manual
RE_PROD_0006 Version 1 Page 13 of 19 Issue Date 28/07/2020
OPTION 1- On the Display:
The Alino TL display in the lid is designed to be as user-frendly as possible. With icons
repesenting different stages of the power and arrows to indicate the direction of power flow. Below
you will find a few pictures illustrating some of the most common situations. A detailed explanation
of the display icons can be found in the Outback Alino TL Quick Start Guide included with your
system.
Day Time – Solar power charging battery and
powering the loads
Day Time – Solar power helping the battery to
power the loads
Night Time – Battery powering the loads
Night Time – Generator powering the loads
and charging battery
OPTION 2 – Remote monitoring via RedEarth’s Portal
The BlackMax can be monitored online through the SwitchDin platform. If this option is available,
follow the steps below to register and sign-in to your account.
Registering
How to Monitor my BlackMax
1. If you haven’t received this email from us, please email
support@redearth.atlassian.net with the following information:
1. full name, address, unit’s serial number with subject: Setup online monitoring

BlackMax – User Manual
RE_PROD_0006 Version 1 Page 14 of 19 Issue Date 28/07/2020
1. During testing and commissioning, RedEarth will setup an account for the end user and send
out the following invitation.
2. Click on the link to create an account.
3. In a web browser, visit https://app.switchdin.com/accounts/sign-in?profile=redearth and log in
to view your system.
Monitoring
Once signed in, you will see the following page.
How to Monitor my BlackMax

BlackMax – User Manual
RE_PROD_0006 Version 1 Page 15 of 19 Issue Date 28/07/2020
Overview Tab
LIVE DATA - Illustrates the movement of PV production, battery power, generator and load
all in Real Time.
WEATHER - Displays the current weather at the location of the system, time of day when
solar is available, wind speed and humidity.
SYSTEM STATUS - Shows the last time data was collected from the BlackMax system and
updated to this profile.
SOC - This graph shows the State Of Charge (SOC)of the battery for today as a
percentage value.
SO FAR TODAY – This section has three charts. Two of these are doughnut charts and
relate to Production (PV) and Consumption (Loads). The third shows power values from solar,
load, generator and battery over time.
In this example the solar PV is producing 0.77kW of power, there is 0.05kW of load and solar PV is charging the
battery with 0.54kW. The battery is providing 0kW to the loads.
In the example above, 0.75kWh energy was produced from solar. 0.05kWh of it was “exported”
to the Loads and 0.71kWh was stored in the battery. Of the 0.05kWh “exported” (consumption),
0.05kWh came from the PV and 0kWh came from the battery.
How to Monitor my BlackMax

BlackMax – User Manual
RE_PROD_0006 Version 1 Page 16 of 19 Issue Date 28/07/2020
Performance Tab
The performance tab can be customised to see several historical data about the system.
If the “Battery Power” is a positive value (above the zero line) then it is in a charging state. If this is
a negative value (below zero the line), then it is discharging.
Live Tab
The Live Tab displays all the live readings of data in numerical form from the connected devices.
Users Tab
This tab shows the users who can view this system. This will include you, the customer, and the
RedEarth team involved in monitoring your system.
Alert Tab
The alert tab shows any errors or warnings received about the system. You will also receive an
email if an alert occurs.
Further Questions
For further questions, feel free to email us at support@redearth.atlassian.net or call us on 1800
733 637.
How to Monitor my BlackMax

BlackMax – User Manual
RE_PROD_0006 Version 1 Page 17 of 19 Issue Date 28/07/2020
1. “I lost power!” What should I do?
R: The most likely reason for this is that the battery has reached the low SOC limit and has
stopped inverting (producing 230V). In this situation, turn the system off, start the generator, turn
your BlackMax on again as recommended in the “Shutdown and Start-up” procedure in this
manual. HOWEVER, be sure to leave the Power OUT breaker turned off. This will allow all the
power generated to go directly to the battery and not to the load. Let the batteries charge for 15
minutes and then turn on the main breaker.
NOTE: You can turn the main breaker on again but be careful not to use more than is being
produced. This will lead to draining the batteries even more and possibly damaging them.
If you do not have a generator, then wait until there is PV power available. The inverter will
automatically recharge the battery and turn back on once the battery is at a safe level.
2. What happens if my batteries go flat (no lights on the battery itself)?
R: This will happen if the BlackMax is re-started and the battery not immediately charged. Contact
RedEarth’s technical support on 1800 733 637.
NOTE: This system will still work in Emergency Power Mode – meaning that limited power will be
available when the solar panel are in sunlight.
3. My Generator is not charging the batteries. What does this mean?
R: The first and most obvious thing to check in this situation is that the Power IN breaker is turned
on. If so, the power produced by the generator might not be within the inverter’s acceptable range.
Look at the generator requirements in Attachment C of the installation manual. Some cheap
generators do not produce power of sufficient quality to charge the batteries, even though they can
still run simple loads like fans and heaters. Another possibility is that the generator is supplying
power to the loads and there is not enough to recharge the batteries. Try turning off the Power
OUT breaker for a while and see if the batteries are now taking charge.
4. How do I know if the battery is full/empty?
Because the LiFe batteries don’t interact/communicate with the inverter, the SOC is a calculation
based on voltage parameters. What this means is that the SOC might not always be accurate.
The best way of estimating
the SOC of the batteries is by
analysing the Voltage. In the
example on the right, if the
battery has about 53V, the
SOC is neat to 100% (blue
arrow). Or, if at 48V, the
SOC is below 6% (red
arrow).
With a range between 64 and
45 Volts, identify the SOC
according to Attachment A in this manual.
FAQ’s

BlackMax – User Manual
RE_PROD_0006 Version 1 Page 18 of 19 Issue Date 28/07/2020
RedEarth can provide several options for the BlackMax;
•Membership of the RedEarth Customer Community
•Additional batteries for system expansion
•Remote and ongoing monitoring option
•Miscellaneous spare parts (including indicator lights for Generator start)
•BlackMax Power Kit: PV panels, racking and pre-terminated PV cables
•Generator with 2-wire auto start
•Generator backup kit (for on-grid applications)
RedEarth Energy Storage Ltd
15 Fienta Place
Darra – QLD 4076
Australia
Tel: 1800 733 637
Email: [email protected]
Web: www.redearth.energy
Services and options available for your BlackMax
RedEarth’s Monitoring and Customer Community Monitoring
Visit us in Brisbane

BlackMax – User Manual
RE_PROD_0006 Version 1 Page 19 of 19 Issue Date 28/07/2020
Battery curves:
Attachment - A
Other manuals for BlackMax
4
Table of contents
Other RedEarth Camera Accessories manuals
RedEarth
RedEarth HoneyBadger User manual

RedEarth
RedEarth HoneyBadger User manual

RedEarth
RedEarth TROPPO-4841 User manual

RedEarth
RedEarth SunRise SRS-3 Series User manual
RedEarth
RedEarth SunRise SRS-3 NS Series User manual

RedEarth
RedEarth SunRise SRS-1 NS Series User manual

RedEarth
RedEarth HoneyBadger User manual

RedEarth
RedEarth SunRise Single Phase User manual

RedEarth
RedEarth SUNRISE MINI SRM-2 Series User manual