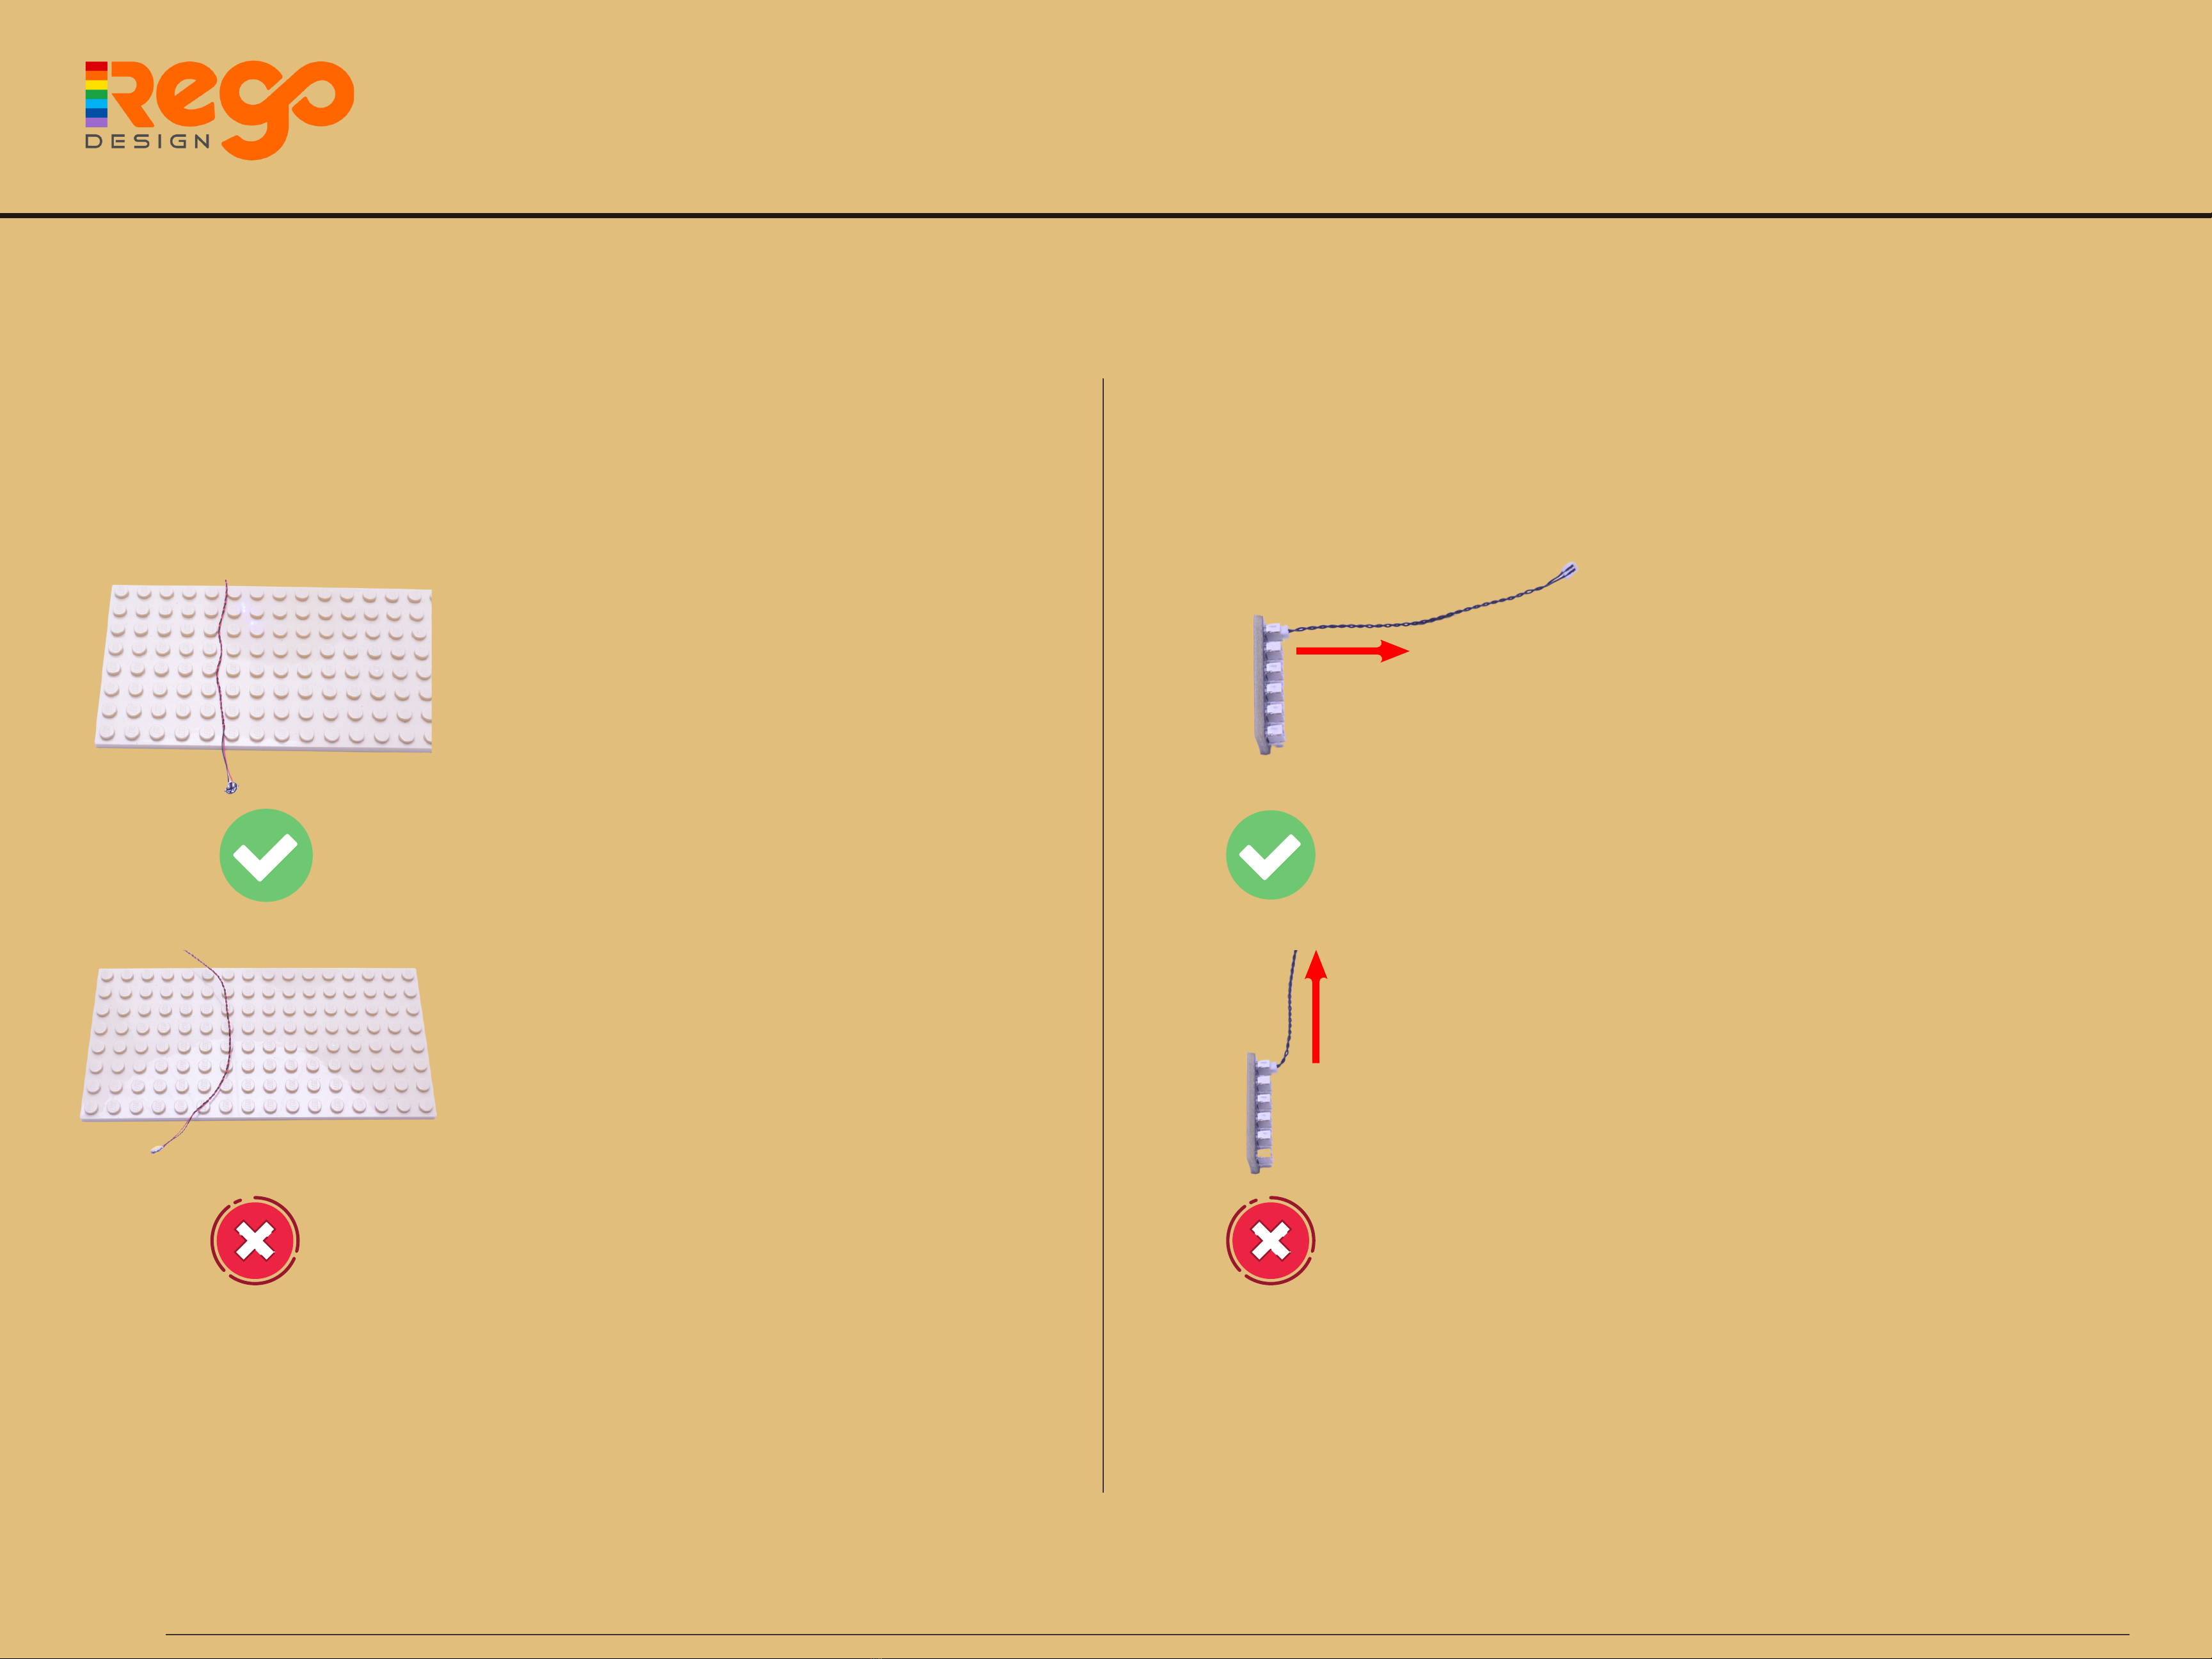
Laying cables in between
and underneath bricks
Cables can fit in between and underneath
LEGO® bricks, tiles, and plates providing they are
laid correctly between the LEGO® studs.
Please be careful when join LEGO® together
around cables; instead ensure they are laying
comfortably in between each stud.
CAUTION: You can't use force on LEGO® to
connect over a cable or it will result in damaging
the cable and light.
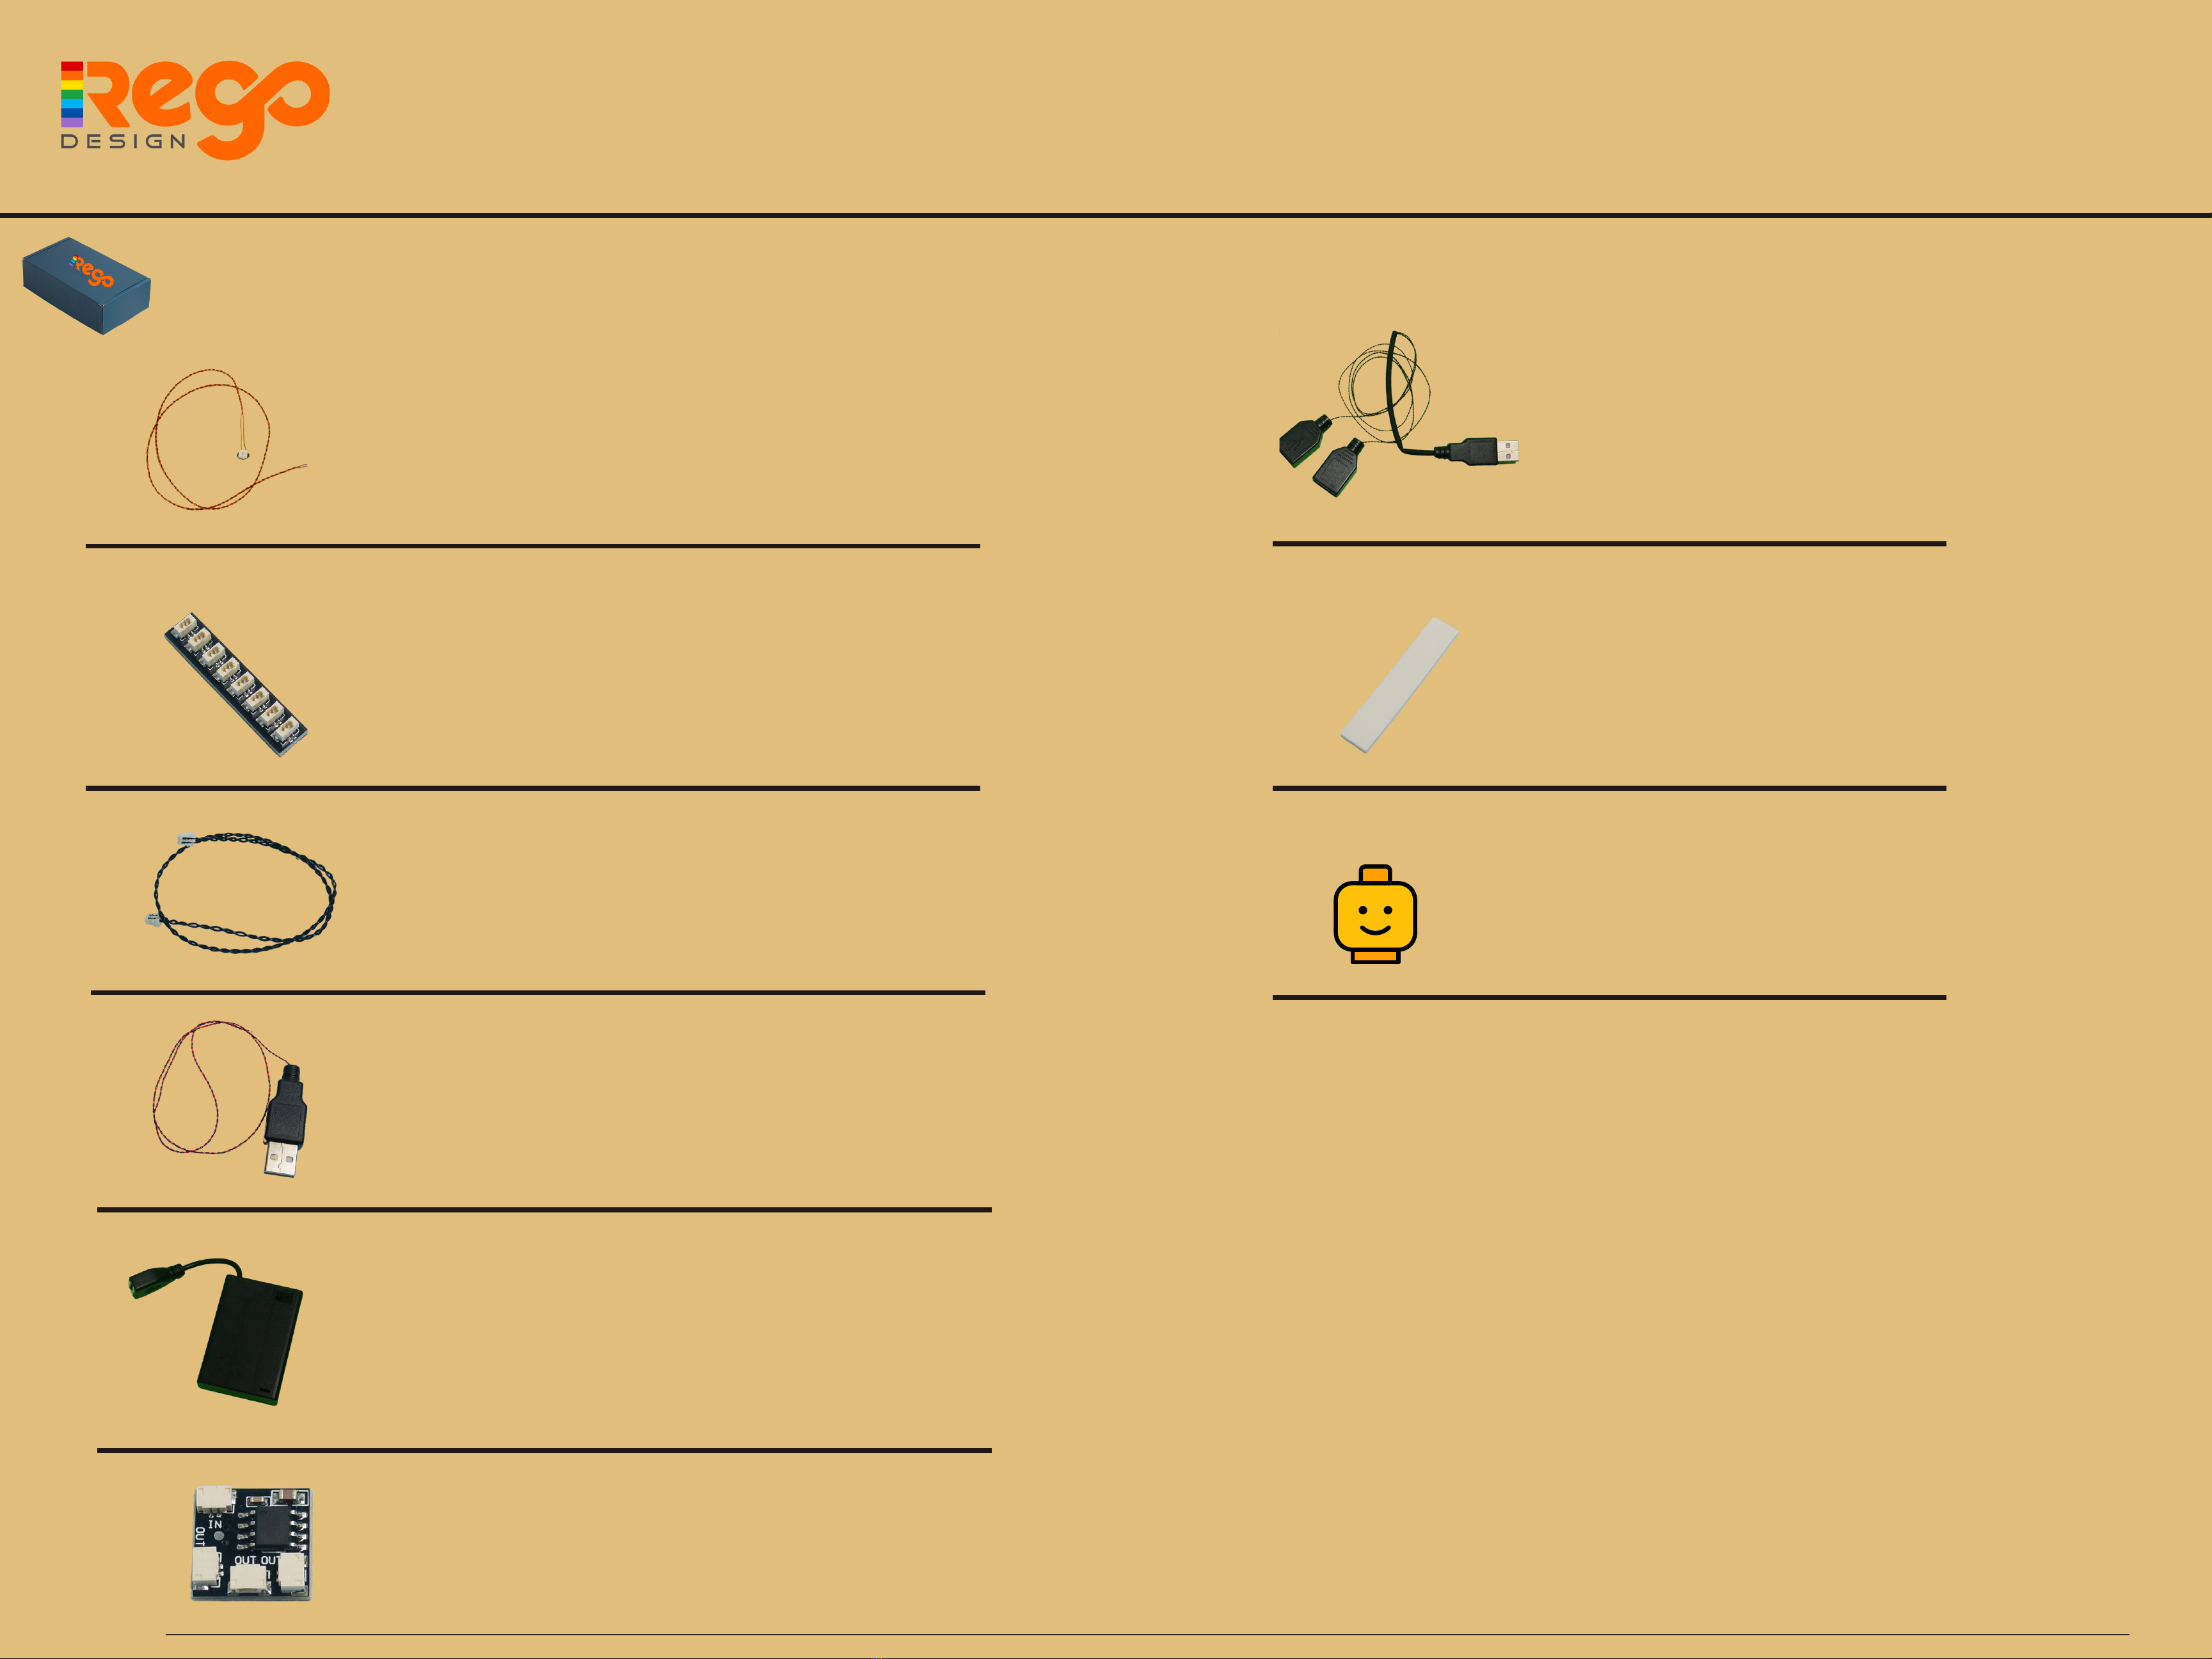
Before You Begin
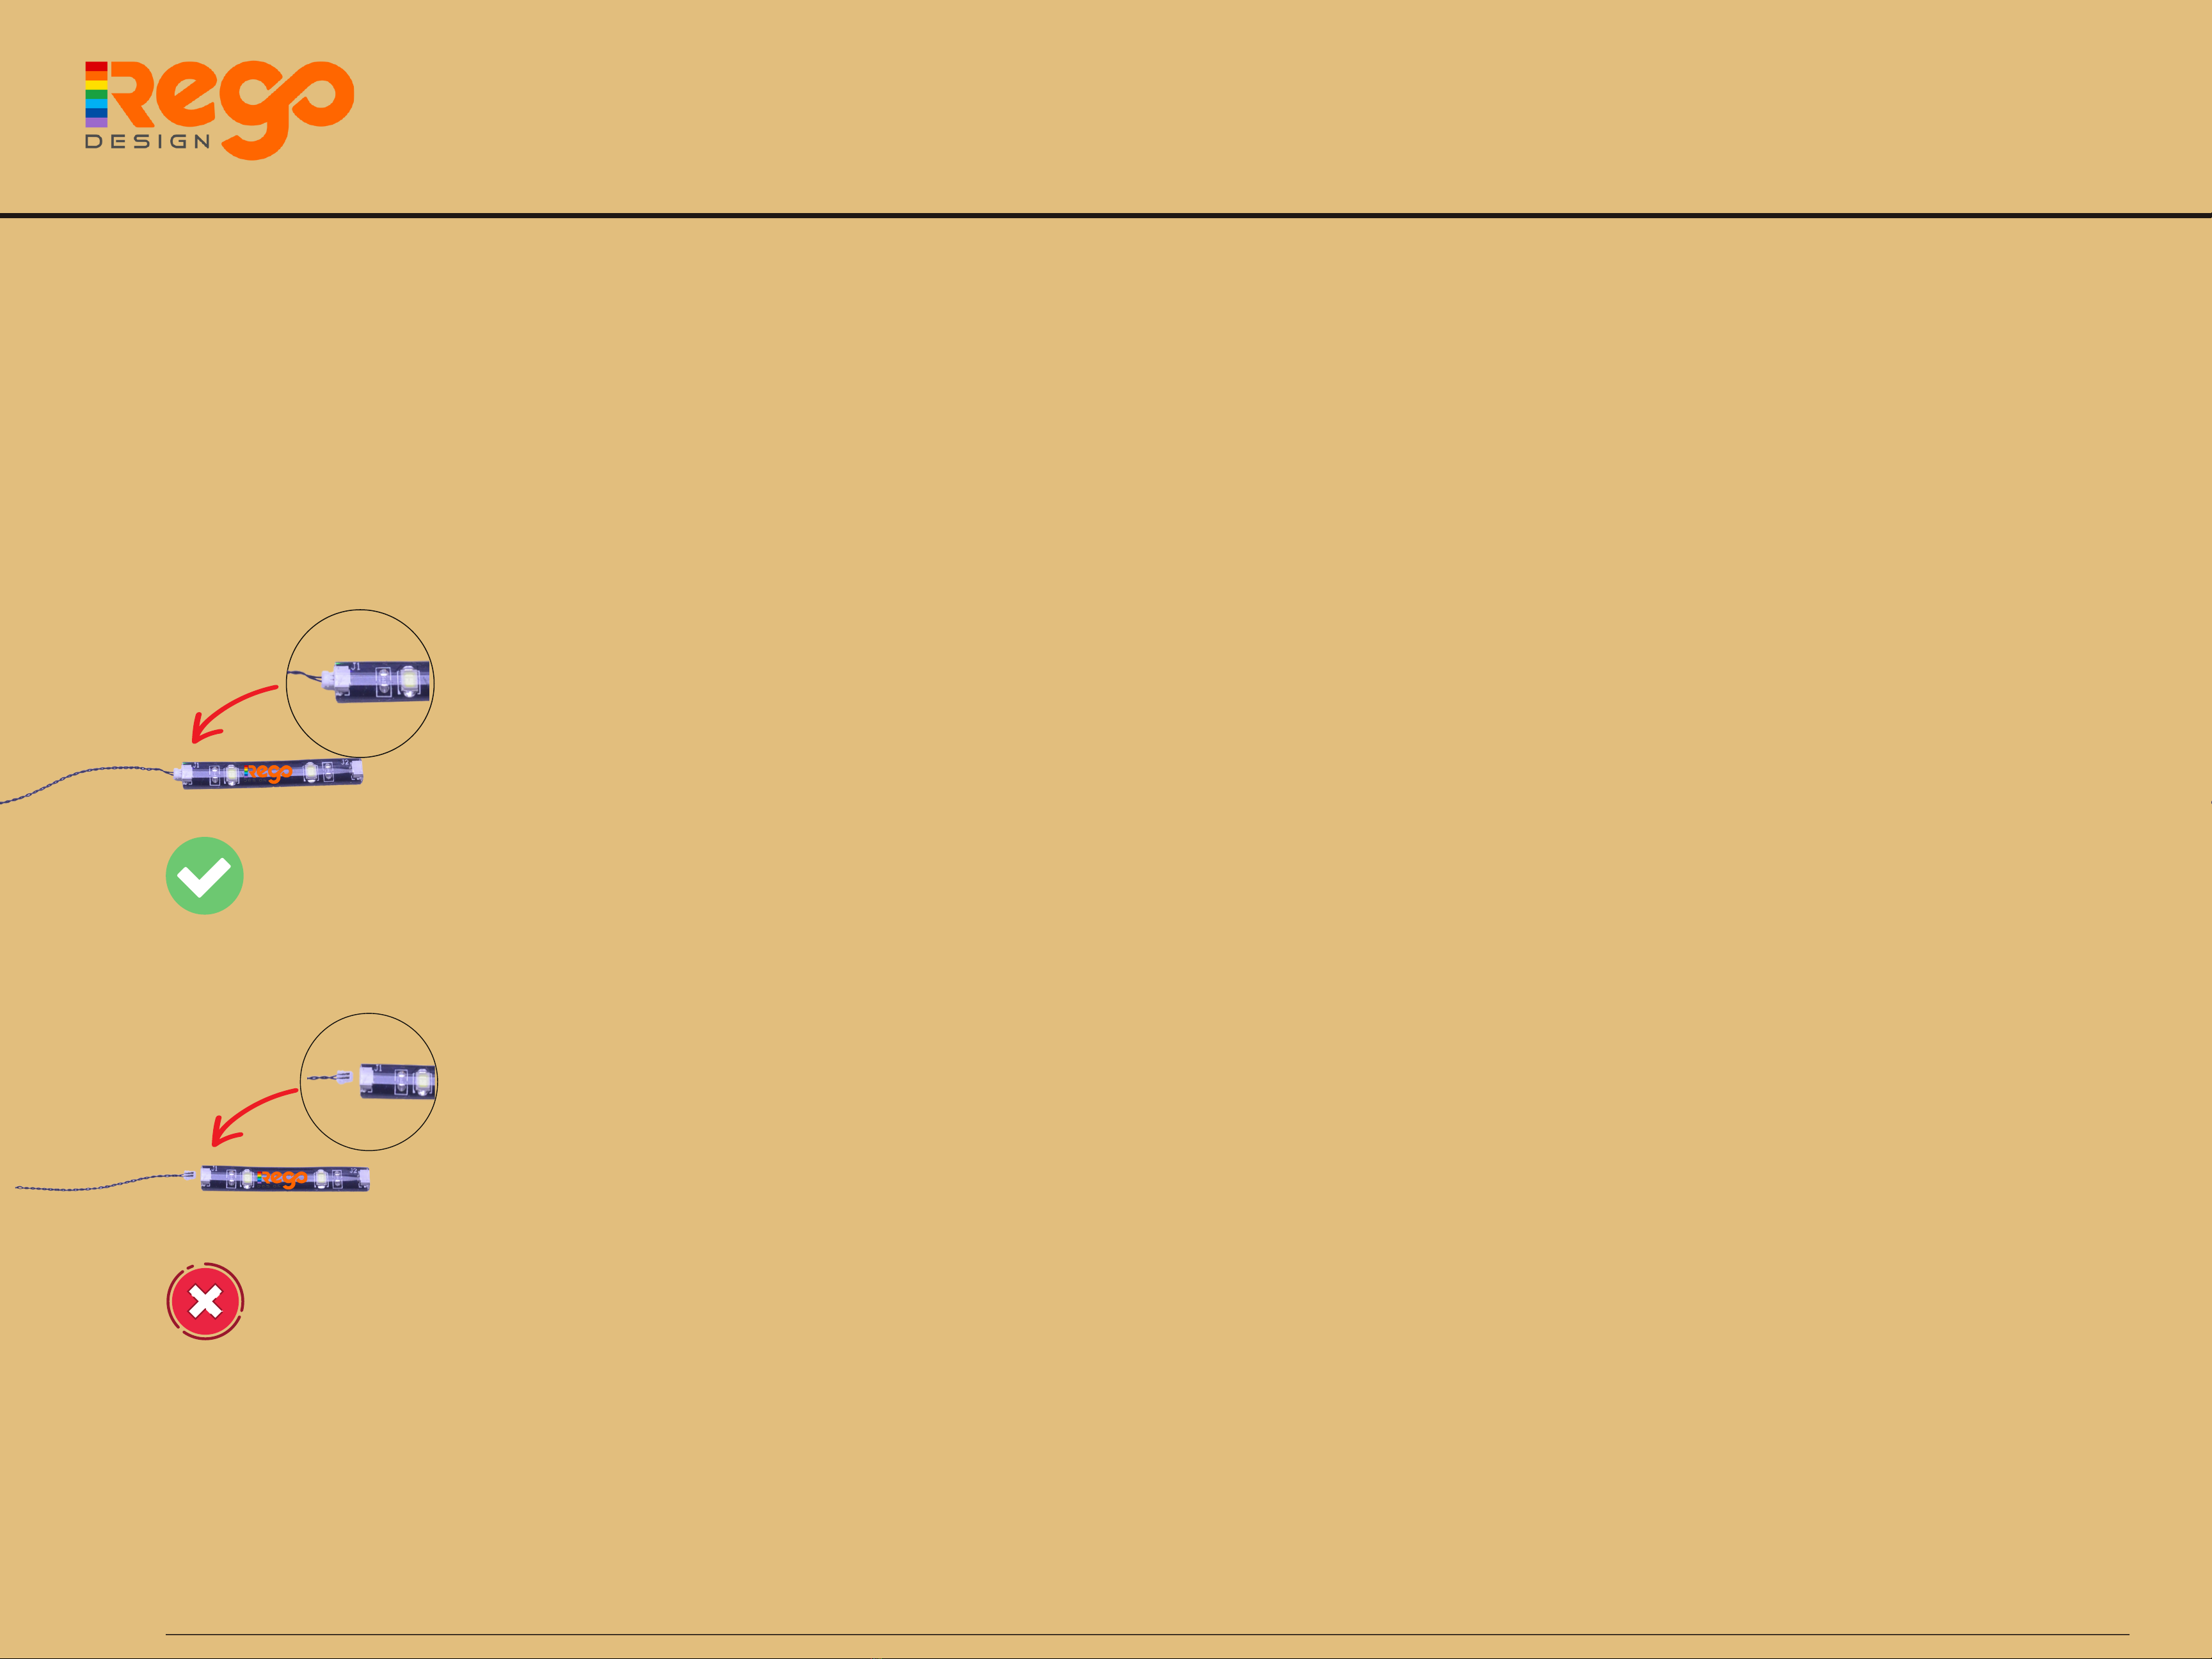
Connecting Cable Connectors To
Expansion Boards
Please paid extra care when inserting connectors to
ports of Expansion Boards. When connectors can be
inserted only one way and it is the right way. With
the expansion board facing up, look for the soldered
“=” symbol on the left side of the port. The connector
side with the wires exposed should be facing toward
the soldered “=” symbol as you insert into the port. If
a plug won’t fit easily into a port connector, which it
should. PLEASE DO NOT FORCE IT.
Incorrectly inserting the connector will result in bent
pins inside the port or even overheating of the
expansion board when connected. So please don't
do it.
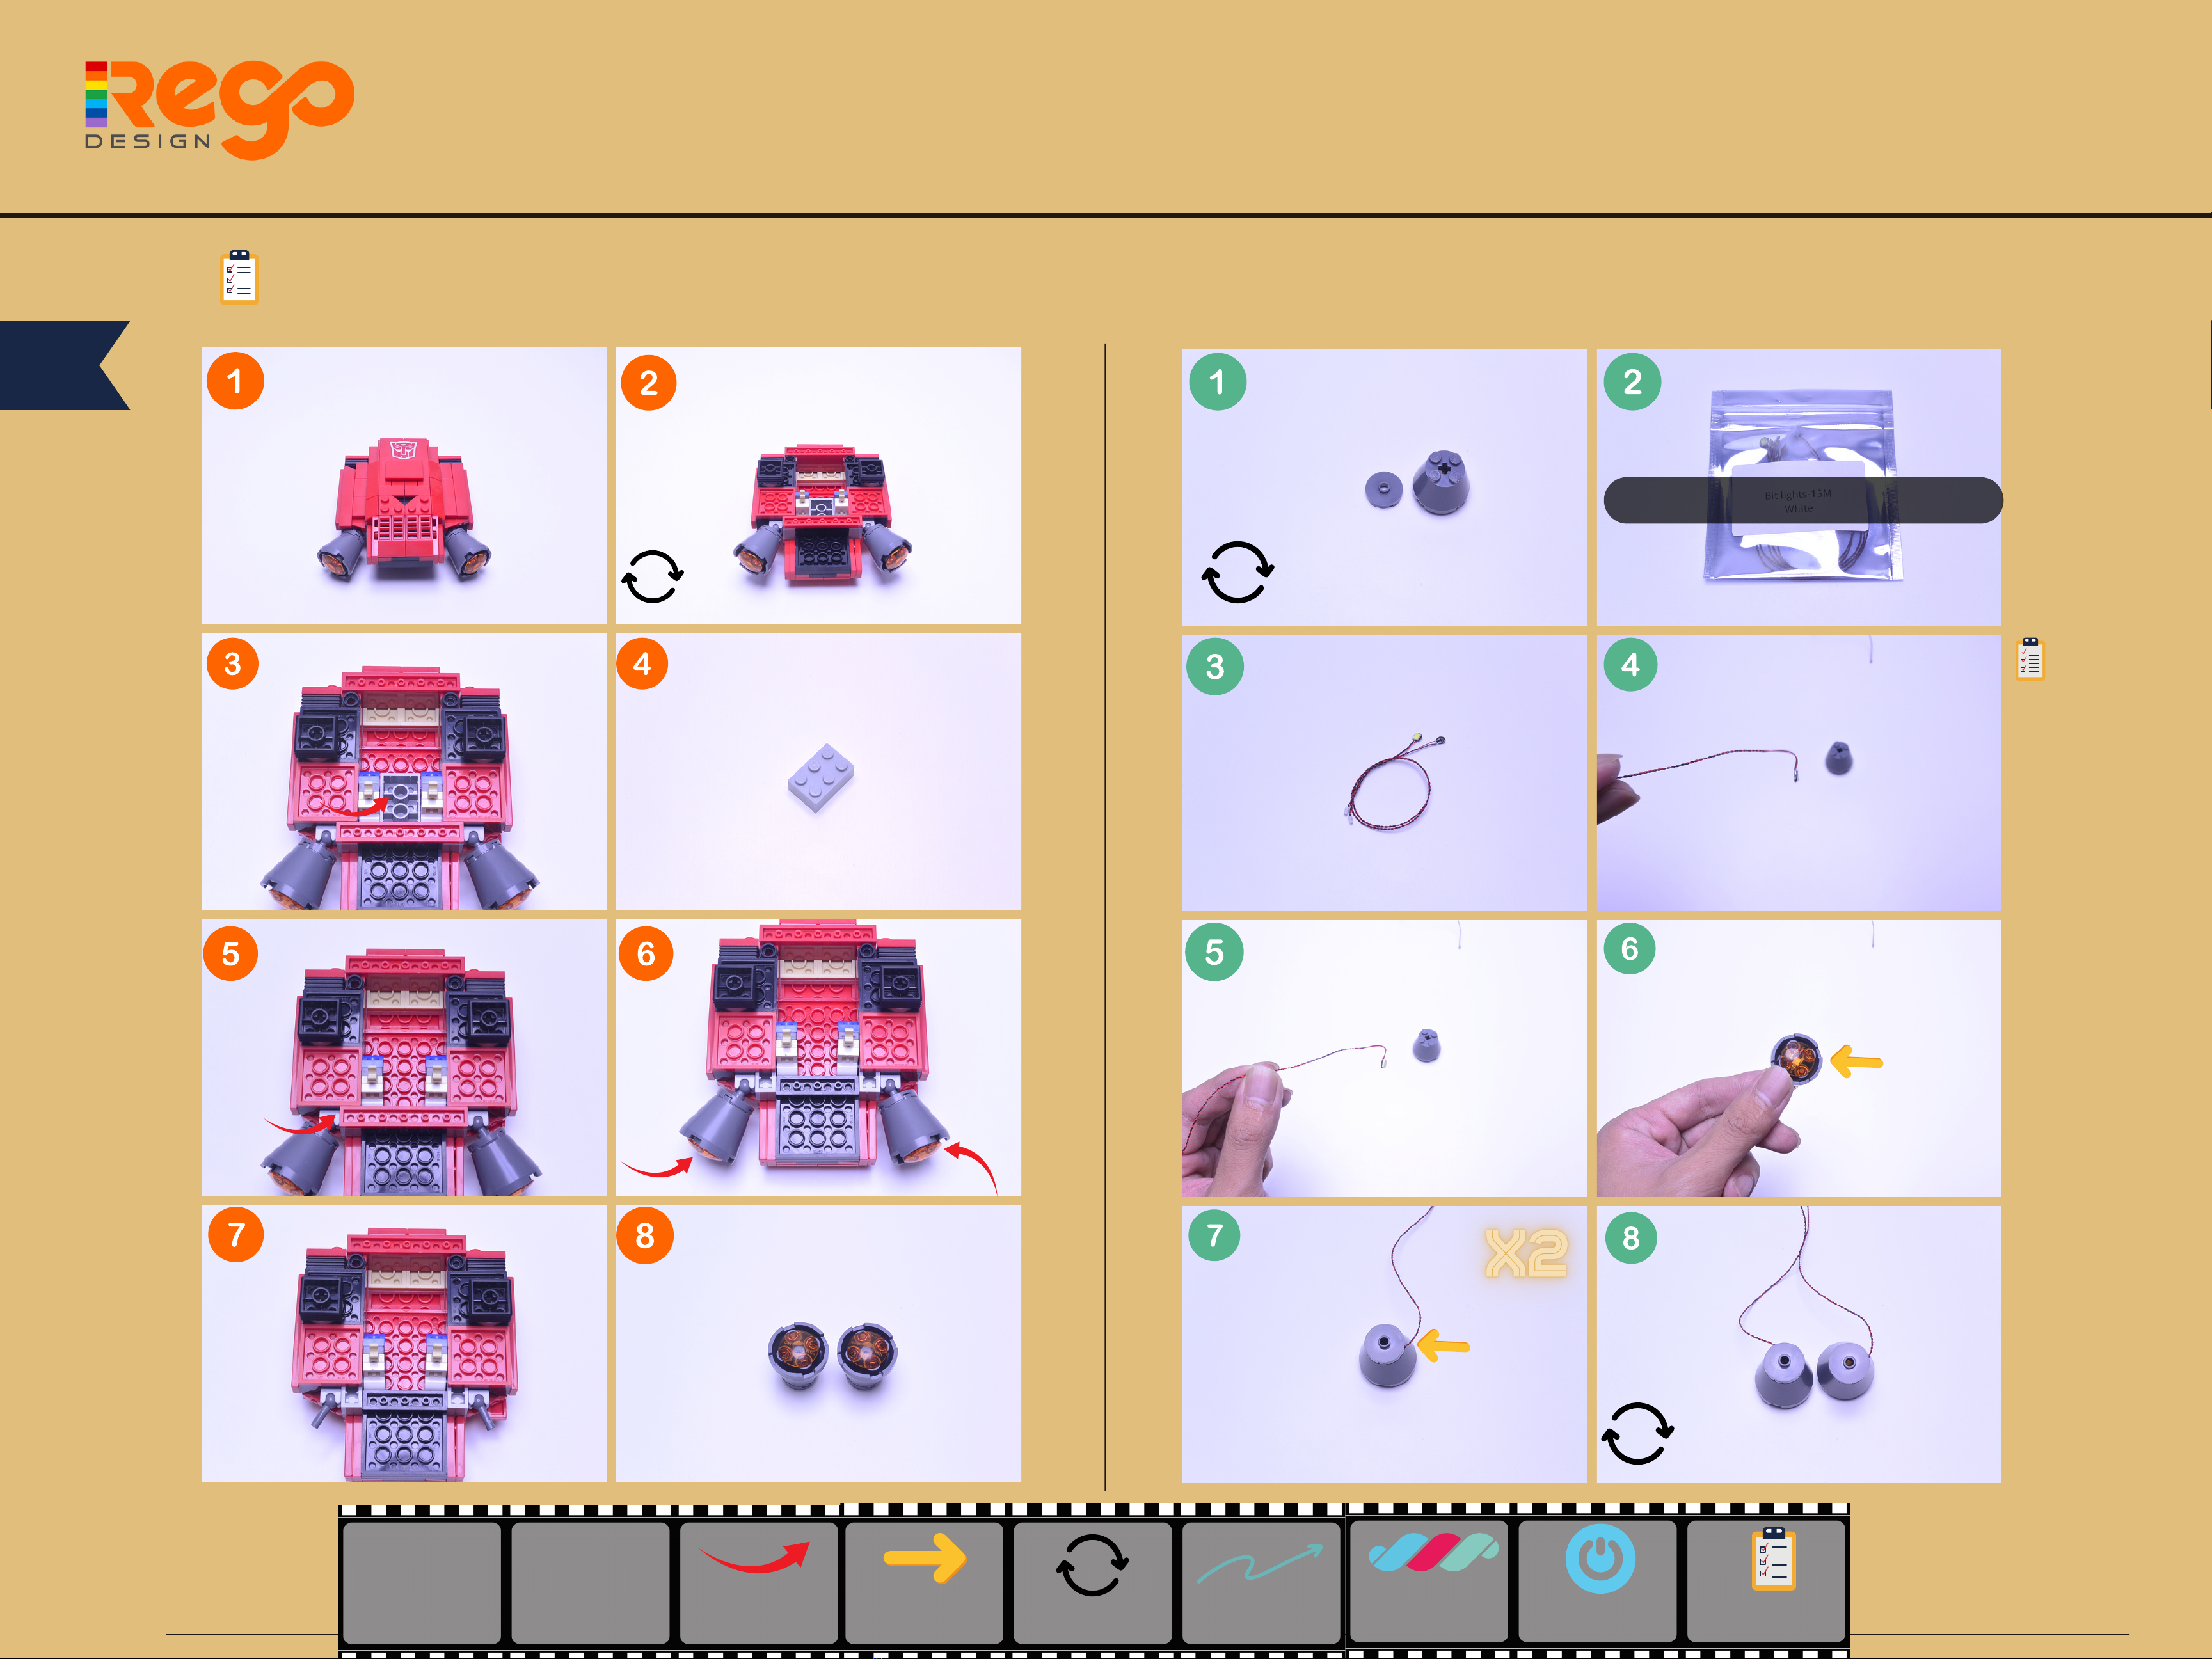
LEGO OPTIMUS PRIME #10302 LIGHT KIT INSTALLATION GUIDE
INSTRUCTIONS 5