manuals.online logo
Brands
  1. Home
  2. •
  3. Brands
  4. •
  5. Reimers
  6. •
  7. Boiler
  8. •
  9. Reimers AR Series User manual

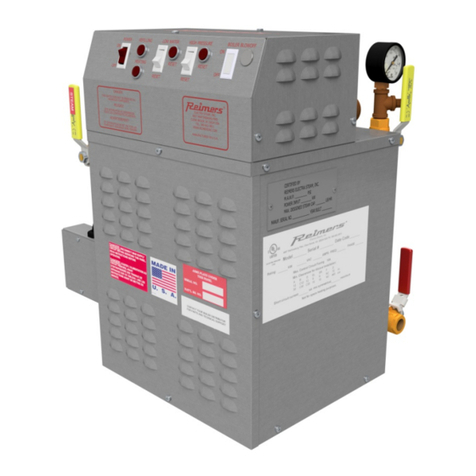
Reimers AR Series User manual

PAGE 1
Reimers Electra Steam, Inc. 03/15/2022 AR812 Manual REV 2
4407 Martinsburg Pike Phone: 5406623811
Clear Brook, VA 22624 Fax: 5406658101
USA email: [email protected]
web: www.reimersinc.com
_______
MODEL:
________
SERIAL#:
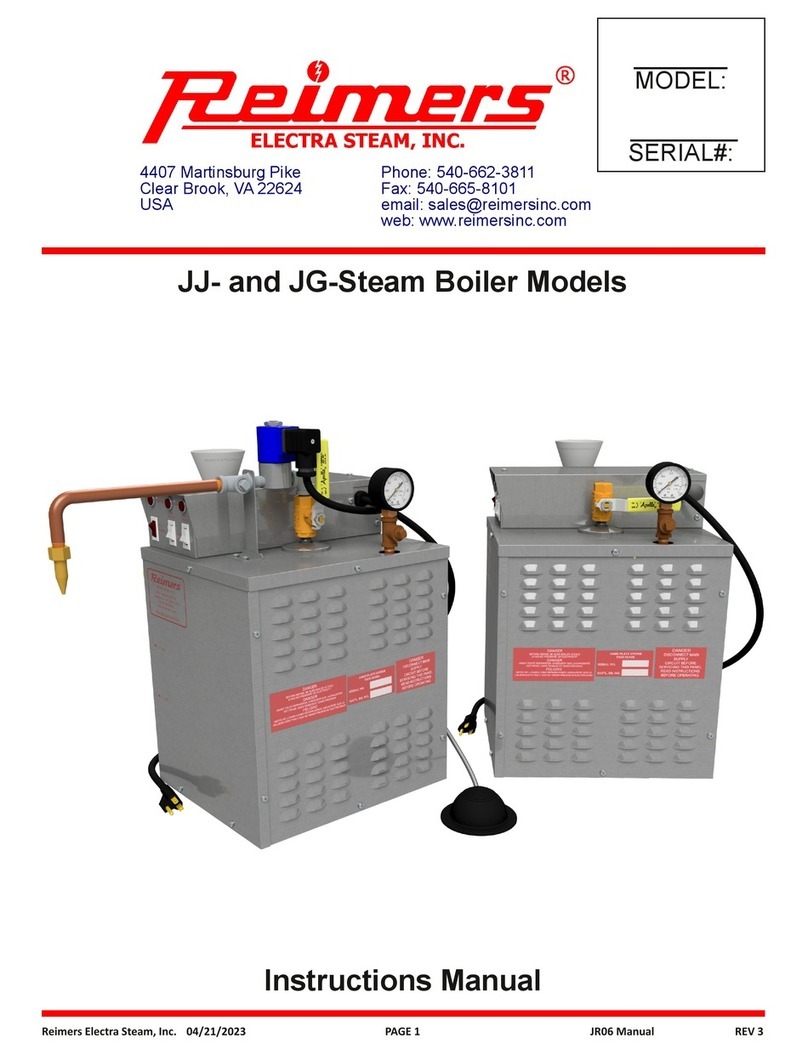
AR Steam Boiler Models
Instructions Manual
PAGE 2
Reimers Electra Steam, Inc. 03/15/2022 AR812 Manual REV 2
Limited Warranty Information........................................4
Important Safety Information.........................................5
Installation.....................................................................7
Location.........................................................................7
Water Supply.................................................................8
Steam Outlet.................................................................8
Safety Relief Valve........................................................8
Electrical........................................................................8
Blowdown Valve............................................................9
Operation......................................................................10
Boiler Startup................................................................10
Control Functions..........................................................10
Pressure Adjustment.....................................................10
Boiler Maintenance.......................................................11
Boiler Blowoff................................................................11
Safety Valve Test...........................................................11
Element Replacement and Element Cleaning..............11
Water Level Probe and Probe Baffle Box Cleaning......11
Gauge Glass Replacement...........................................12
Troubleshooting............................................................13
Parts Lists.....................................................................14
Parts List (Continued)...................................................15
TABLE OF CONTENTS
PAGE 3
Reimers Electra Steam, Inc. 03/15/2022 AR812 Manual REV 2
AR4 ‐ 8 STEAM BOILERS
4407 Martinsburg Pike Phone: 5406623811
Clear Brook, VA 22624 Fax: 5406658101
USA email: [email protected]
web: www.reimersinc.com
• Miniature boiler max. vessel volume 0.293
• Maximum safety valve seng 100psi
• All boilers are manufactured in accordance with the requirements of the
A.S.M.E. Boiler and Pressure Vessel Code and A.S.M.E. CSD‐1. Each boiler
bears the Naonal Board Stamp “M”.
• High quality saturated steam, operang pressure range 0 – 85psig
• Heavy duty carbon steel pressure vessel. Vessel jacket and electrical
enclosure 304 stainless steel
• Large selecon of oponal equipment
Features
Standard Equipment of Each Boiler Includes:
• A.S.M.E. pressure relief valve
• One (1) quick opening boom blowoff valve as per A.S.M.E. Code B31.1
• Bronze steam outlet ball valve
• High pressure feed pump on ARH‐models
• Low water cutoff control with manual reset
• One (1) high pressure cutoff control with manual reset
• One (1) operang pressure control
• Magnec contactor
• Indicator lights for POWER, REFILLING, HEATING and ALARMS
Applications
• Process Steam
• Dry Cleaning • Food Service(*)
• Laboratories
(*) DIRECT STEAM APPLICATIONS TO FOOD PRODUCTS: Reimers offers stainless steel boilers or #OPT1030 Brass/Bronze free boiler trim opon (see Page 5). This
alone does not guarantee the producon of culinary grade steam. Applicable safety standards (i.e. 3‐A T609) must be considered.
Model Number Key
Feed Water Options:
Blank = Solenoid Valve
H = Solenoid Valve + Pump
Boiler Power in kW
3 = 3kW
4 = 4kW
8 = 8kW Safety Relief
Valve Setting:
A = 15psi (1.03bar)
F = 100psi (6.9bars)
Blank = 120VAC power supply required
at boiler installation site for hookup
as boiler control voltage
X = Boiler is equipped with
transformer to provide 120VAC as boiler
control voltage. (Applies to 380 &
415V voltages only)
Example: ARH8E1F = AR‐Series boiler with feed water
solenoid and pump,8kW heang power, heang power
supply 240V, 1ph, control voltage power supply 120V 1ph,
safety valve set to 100psi.
(1) Each boiler model requires two (2)
power supplies: Primary heang power
and secondary control voltage. Nominal
control voltage is 120V, 50/60Hz. Boiler
models with the – X opon (this applies
to foreign voltages only, see Model
Number Key below) require only the
heang power supply of 240V 1PH,
50/60Hz.
(2) The STEAM CAPACITY listed above is
based on the evaporaon rate from and
at 212°F, at 0 psig. If the boiler feed
water temperature is 50°F, then the
STEAM CAPACITY for each model listed
above is approximately 15% lower.
Please note that all information provided within this brochure is approximate and subject to change without notice.
Please contact Reimers Electra Steam, Inc. with any questions regarding the specifications or dimensions detailed within.
• Air Humidificaon
A R 1
Voltage:
A = 120V
E = 240V
PAGE 4
Reimers Electra Steam, Inc. 03/15/2022 AR812 Manual REV 2
LIMITED WARRANTY – STEAM GENERATORS
Reimers Electra Steam, Inc. warrants the following products of its own manufacture against defects in
materials and workmanship under normal use and service. This warranty is in lieu and excludes all other
expressed or implied warranties or merchantability of fitness for any particular use. No person is authorized to
extend the terms of this warranty or assume any other liability except by written statement signed by an officer
of Reimers Electra Steam, Inc. Clear Brook, Virginia 22624.
WARRANTY PERIOD
The pressure vessel and electrical & mechanical components are warranted for one year from date of
shipment from Reimers Electra Steam, Inc. in Clear Brook, VA 22624.
LIMITATIONS
Products must be installed, used and maintained in accordance with our instructions, including reasonable &
necessary maintenance by the user. Users are responsible for the suitability of the products to their
application. There is no warranty for damage resulting from improper installation, abuse, power failure, fire,
flood, lightening, improper water, misuse, improper specification, misapplication or other operating conditions
beyond our control or parts that are normally expendable in usual course of operation.
Claims against carriers for damage in transit must be filed by the buyer. Reimers liability, if any, will not
exceed the price of Reimers products claimed to be defective.
Components manufactured by any supplier other than Reimers shall bear only that warranty made by the
manufacturer of that product and service for that warranty shall be the responsibility of that manufacturer and
not Reimers.
REMEDY
Claims under this Limited Warranty must be made by obtaining a Return Authorization Number from our office
(PHONE: 5406623811, FAX: 5406658101) & returning the defective part, freight prepaid to: Reimers
Electra Steam, Inc., 4407 Martinsburg Pike, Clear Brook, Virginia 22624
Defective items will be repaired or replaced as necessary within a reasonable time without charge, other than
incidental charges such as freight prepayment. Such repair or replacement within a reasonable time is the
exclusive remedy available from Reimers Electra Steam, Inc., under this Limited Warranty.
CONSEQUENTIAL DAMAGES
Reimers Electra Steam, Inc., is not liable for labor costs incurred in the removal, reinstallation, or unauthorized
repair of product, or for damages of any type whatsoever, including incidental and/or consequential damages.
THIS WARRANTY SUPERSEDES ALL PREVIOUS WARRANTIES.
PAGE 5
Reimers Electra Steam, Inc. 03/15/2022 AR812 Manual REV 2
You have just purchased a quality steam boiler designed to the ASME Boiler Code and registered with the National Board
of Boiler Inspectors. Treat this industrial equipment with care and respect. It is safe when installed, maintained, and used
properly. Read the instruction carefully and contact the factory if you have any questions.
Read this manual before installing and using this product.
Failure to do so can result in serious injury or death.
Your boiler should be marked with a complete set of WARNING/CAUTION labels shown below. If one of these labels is
missing, please contact our factory immediately.
US and All Other NonFrancophone Countries Canada and All Other Francophone Countries
Located on electrical enclosure door
Located on end caps of cylindrical boiler pressure vessel jacket
This manual contains safety messages. Each of the safety messages are preceded by one of the following signal word
panels:
Safety messages preceded by this label contain information, that if not followed will result in death or serious injury.
Safety messages preceded by this label contain information, that if not followed could result in death or
serious injury.
Safety messages preceded by this label contain information, that if not followed could result in minor or
moderate injury.
Messages preceded by this label contain important information, but are not hazardrelated.
Ensure that this manual is available to the boiler operator at any time.
Read carefully all safety labels attached to the boiler. If any safety label was damaged during shipment, contact the
factory immediately:
Ph. 5406623811; email: sale[email protected]
Read this manual before installing and using this product.
Failure to do so can result in serious injury or death.
NOTICE
CAUTION
WARNING
DANGER
WARNING
PAGE 6
Reimers Electra Steam, Inc. 03/15/2022 AR812 Manual REV 2
Important Safety Information
1. BLOWDOWN VALVE: This valve is utilized to blow impurities from the boiler chamber. When opened, a large volume
of hot water and steam is discharged. Ensure that this valve is properly piped for such discharge. State and local codes
must be met as applicable.
2. ELECTRICAL: All field wiring to the boiler must be in accordance with the National Electric Code and any local codes
that may apply. Wiring must be made by a competent certified electrician. Use copper wire only.
Ensure that all electrical components are in a dry location, free from any possibility of water soaking. Electric foot
switches when supplied must not be placed on a wet floor. They must be placed on dry surface, not subject to steam or
water.
3. GAUGE GLASS: The gauge glass protector guards must be on at all times. When replacing the glass, be sure that the
unit is not under pressure and is cool to touch. The gauge glass should be replaced once per year. If cracks or wear is
evident, replace the gauge glass immediately.
4. MODIFICATION/MISUSE: This boiler has been designed and constructed in accordance with the ASME Boiler and
Pressure Vessel Code. Any modification or misuse can result in a dangerous situation. Reimers Electra Steam, Inc. is
not liable for any product that has been modified or improperly used.
5. PRESSURE GAUGE: The pressure gauge indicates the internal pressure of the boiler. It can fail. Periodically have
your boiler inspector compare the gauge with a known gauge utilizing the test valve arrangement provided
6. REGISTRATION: Most states and cities require boiler registration and inspection. Check with your government
authorities.
7. INSTALLATION AND REPAIR:
Installation and repair work of this unit must be performed only by experienced personnel. Before commencing a repair,
ensure that the boiler is cold, not pressurized and electrically disconnected. All standard electrical and steam safety
precautions must be taken during testing.
8. SAFETY VALVE: The safety valve is designed to discharge hot steam when the set pressure is exceeded. Ensure
that the discharge port is pointing toward the back of the unit away from the operator or any aisles. Test the safety valve
periodically to ensure that it is operating properly. Test carefully at full pressure by lifting lever using pliers and let it
“slapping” shut. Steam discharge can scald. Ensure no one is exposed.
9. STEAM INSTALLATION:
Steam piping must be of black pipe, not galvanized. Work must be done by an experienced steam fitter. All state and
local codes must be met as applicable.
10. WATER: Ensure that all electrical components are in a dry location, free from any possibility of water soaking.
Electric foot switches when supplied must not be placed on a wet floor. They must be placed on dry surface not subject
to steam or water.
WARNING
PAGE 7
Reimers Electra Steam, Inc. 03/15/2022 AR812 Manual REV 2
1. Installation
REIMERS ELECTRA STEAM, INC. boilers are heated by one or more immersion type heating elements. Automatic
controls are provided to maintain preset operating pressure and proper water supply. Safety features include automatic low
water cutoff, automatic pressure control, safety valve and visible water level gauge. Each boiler is manufactured in accordance
with the ASME Power Boiler Code Standards and is individually inspected and stamped by an authorized National Board
Insurance Inspector. All boilers are registered with the National Board of Boiler and Pressure Vessel Inspectors. When boiler is
received, make sure it has not been damaged in shipment.
NOTE:
ASME DATA PLATE IS LOCATED ON END OF PRESSURE VESSEL BEHIND LABEL STAMPED WITH NATIONAL BOARD
NUMBER OF UNIT.
When boiler is received, make sure it has not been damaged in shipment.
Place the boiler in a level position, close to the equipment which it is to supply. This will insure minimum heat losses and allow
more economical piping arrangements. All steam lines should be insulated. Review the overall dimensions of your boiler model
on page 7 to select proper boiler location.
Regardless of the NFPA70 working space requirements shown below, provide a minimum of 3ft clearance on both sides of the
boiler for element servicing, 3ft of clearance to the front of the boiler and 1.5ft to the rear of the boiler.
a.) Working space:
Electric boiler spacing is dictated by NFPA70, Table 110.26 as follows:
Note: Where the conditions are as follows:
Condition 1 — Exposed live parts on one side of the working space and no live or grounded parts on the other side of the working space, or exposed
live parts on both sides of the working space that are effectively guarded by insulating materials.
Condition 2 — Exposed live parts on one side of the working space and grounded parts on the other side of the working space. Concrete, brick, or tile
walls shall be considered as grounded.
Condition 3 — Exposed live parts on both sides of the working space.
(a) DeadFront Assemblies. Working space shall not be required in the back or sides of assemblies, such as deadfront switchboards or motor control
centers, where all connections and all renewable or adjustable parts, such as fuses or switches, are accessible from
locations other than the back or sides. Where rear access is required to work on nonelectrical parts on the back of enclosed equipment, a minimum
horizontal working space of 762 mm (30 in.) shall be provided.
b.) Alcove or closet installation per UL834: Proper location of this boiler model with regard to combustible and noncombustible surfaces and materials is
coded on the boiler name plate. The following decoding sketch and description is provided for the user information:
Description of dimensions and symbols
A – Clearance above top of boiler
B – Clearance from front of boiler
Prefix C to numeral indicates suitability for closet or alcove installation
Prefix A indicates suitability for alcove but not for closet installation
D – Clearance from back of boiler
EL – Clearance from left side of boiler
ER – Clearance from right side of boiler
F – Indicates type of flooring: "NC" for noncombustible floor / "C" for combustible floor. Numeral indicates minimum clearance below suspended units to
combustible floor
1.1 Location
PAGE 8
Reimers Electra Steam, Inc. 03/15/2022 AR812 Manual REV 2
On models with pump and/or solenoid valve, connect
incoming water supply to intake side of solenoid valve.
AR & ARH steam boiler models require four (4) gallons of
feed water per hour for each 10 kW of electric heating
capacity of the boiler. Lines should be of adequate size and
meet local plumbing codes.
In order to ensure long term troublefree boiler operation,
we recommend that the water used as boiler feed water to
be tested for hardness. If the water in your area is harder
than 1grain (17mg/L), use a water softener. The main
cause for premature heating element failure in electric
steam boilers is water hardness. If severe corrosion during
inspection of the pressure vessel as indicated in chapter
3.4 of this manual becomes evident, additional tests of
your boiler feed water must be performed. A water analysis
should be performed by a qualified and recognized water
treatment company located in your area.
Recommended levels for boiler feed water:
Recommended levels for boiler water (water inside
pressure vessel when boiler is operating)
All piping from and to the boiler must comply with the
A.S.M.E. B31.1 Power Piping Code. All State and local
codes must be met. All piping must be done by a qualified
steam fitter.
Connect steam line of sufficient size from steam line valve
to the equipment. Steam piping must be black steel pipe,
not galvanized. Work must be done by an experienced
steamfitter. All state and local codes must be met.
The safety valve is designed to discharge hot steam when
the set pressure is exceeded. Ensure that the discharge
port is pointing toward the back of the unit away from the
operator and any aisles. If it is required that discharge
piping be installed from the safety valve, the pipe should
not be smaller than the valve outlet and should be rigidly
supported so as not to place weight on the valve itself.
Important: No valve in this line!
NOTICE Do not add any chemicals to
the boiler feed water unless
specifically recommended by a
qualified and recognized water
treatment company.
Boiler Feed
Water Supply
Safety Relief
Valve
1.2 Water Supply 1.3 Steam Outlet
1.5 Safety Relief Valve
Steam Outlet
FIGURE 03
FIGURE 05
FIGURE 04
PAGE 9
Reimers Electra Steam, Inc. 03/15/2022 AR812 Manual REV 2
To hookup power and control voltage to the boiler, please
proceed as follows. To ensure proper connection, please
refer also to the attached wiring diagram and labels next to
the field wiring terminals for proper conductor size and
maximum torques that can be applied to the terminal
contacts. All wiring must be installed in accordance with the
National Electric Code and any local codes that may apply.
Wiring must be done by a competent, certified electrician.
For this service, the N.E.C. requires supply wires rated at
125% of full load. Use only copper wire. Install a fused
disconnect switch within sight of the boiler. Connect power
supply to the terminals in control panel.
1.6.2 240V Boiler Models with Voltage Transformer
Connect power supply as indicated in FIGURE 07. Use
AWG #8 copper wire, rated for 75°C minimum.
1.6.3 Boiler Models without PreInstalled Power Cord
and Control Voltage Transformer
Connect power supply as indicated in FIGURE 08. Use
AWG #8 copper wire, rated for 75°C minimum.
Ensure that the voltage between the conductors L1 and L2
to NEUTRAL is 120V AC
If no 240V power source is available that measures 120V
AC from the conductors L1 and L2 to NEUTRAL, then
hookup two separate power supplies, see FIGURE 09:
 Power hookup, AWG #8 copper conductors, rated
75°C minimum
 Control voltage hookup, AWG #14 copper
conductors, rated 75°C minimum
1.6.4 120V Boiler Models without PreInstalled Power
Cord and Control Voltage Transformer
Connect power supply as indicated. Use AWG #10 copper
wire rated for 75°C minimum
When the blowdown valve is utilized, a
large volume of hot water and steam is
discharged. Ensure that this valve is
properly piped for this discharge. State and local codes
must be met as applicable.
1.6 Electrical
1.7 Blowdown Valve
CAUTION
GND
L2
L1
GND
L2
L1
NEUTRAL
INSTALL #14
AWG CONTROL
VOLTAGE WIRE
JUMPER
GND
L2
L1
NEUTRAL
FIGURE 07
FIGURE 08
FIGURE 09
GND
L
Power
Control
Voltage
GND
L1
NEUTRAL
FIGURE 10
Power
BLOWDOWN
VALVE
PAGE 10
Reimers Electra Steam, Inc. 03/15/2022 AR812 Manual REV 2
a. Open steam line valve slightly. This will allow the boiler
to be filled without producing back pressure.
b. Open upper and lower gauge glass fixture valve
c. Ensure that the feed water shutoff valve is in the OPEN
position
d. Close the boiler blow down valve
e. Throw the fused disconnect switch (not provided by
factory) to the ONposition and turn on the boiler control
voltage
f. After approximately 2 seconds, the WATER FEED light
turns on and water enters the boiler. As soon as the water
level reaches approximately half height in the gauge glass,
the automatic water feed turns off.
g. If the boiler controller indicates any alarms, then press
the corresponding RESET button(s).
As soon as no boiler alarms are indicated, the HEATING
light turns on and the boiler starts to build up pressure.
Observe the pressure gauge while pressure builds up, until
working pressure is reached. The working pressure should
have been factory set to your specification. However, if you
wish to change the working pressure setting, proceed as
follows.
All pressure controls are factory preset and require no
adjustment. However, if a change of the operating steam
pressure is required, then proceed as
follows:
• Disconnect all power supplies from the boiler.
• Close the steam outlet valve
• Remove the lower front cover.
• Turn the black knob of the operating pressure switch
clockwise to increase the pressure and counterclockwise
to decrease the pressure.
• Connect all power supplies to the boiler, open the steam
outlet valve, and install the lower front cover.
h. To shut off the boiler, turn the POWER switch on the
boiler controller OFF.
Stand clear of scalding water or steam.
Disconnect the boiler from all power
supplies.
2. Operation
2.1 Boiler Startup
NOTICE
WARNING
Do not let the pump to run dry for an
extended time as this will cause
damage to the pump.
FIGURE 13
2.2 Pressure Adjustment
GAUGE
GLASS
VALVES
BLOWDOWN
VALVE FEED WATER
SHUTOFF VALVE
STEAM OUTLET
VALVE
FIGURE 11
Turn the BLOWDOWN ENABLE
switch OFF if installed
Turn the POWER
switch ON
High Pressure
Safety Limit
Pressure Switch.
DO NOT ADJUST!
Operating
Pressure Switch
Optional Boiler
Blowoff Pressure
Switch. OPT1016
FIGURE 12
FIGURE 14
PAGE 11
Reimers Electra Steam, Inc. 03/15/2022 AR812 Manual REV 2
Boiler repairs must be performed by
experienced personnel only. Ensure boiler
water is cold and drained and that there is no pressure and
all electricity to the boiler is shutoff.
All boilers must be blown off periodically to remove
minerals, scale and other foreign matter, which accumulate
inside the pressure vessel. The concentration of this
deposit depends in part upon the condition of the water in
the area. When water is naturally soft, or has been
softened chemically, boiler blowoffs are required less often
than in areas where hard water is found. Water softeners
are suggested in hard water areas to minimize the
formation of hard scale on heating elements. Another factor
affecting water condition is the amount of condensate, if
any, that is being returned to the boiler. Since condensate
is essentially clean distilled water, it contains very few
impurities. If a large part of the condensate is being
returned and little makeup water is used, the boiler need
not be blown down as often as when little or no condensate
is returned to the boiler. We recommend blowoff of newly
installed steam boilers once per day until the first heating
element and pressure vessel inspection is performed (refer
to chapter 3.4). If no significant amount of sediment is
found on the bottom of the pressure vessel and on the
heating element sheaths, then the boiler blowoff frequency
can be reduced accordingly. The safest method to blowoff
Rseries steam boilers is to install a Reimers Electra
Steam, Inc. properly sized and fully trimmed blowdown
tank, model BTANK10. Reimers blowdown tanks are
designed and constructed to Section VIII of the A.S.M.E.
Code and inspected by a commissioned National Board
Boiler inspector.
3.1.1 Boiler Blowoff Frequency
In areas where water is soft or has been softened
chemically:
• When little condensate is returned blowdown once every
second day
• When a large part of the condensate is returned and little
makeup water is used, blowdown once every week.
In areas where hard water exists:
• When little or no condensate is returned, blowdown
once
• When a large part of the condensate is returned and little
makeup water is used, blowdown once every second
day
Stand clear of scalding water or steam.
Ensure that the Boiler Bottom Blowoff
Valve is properly piped.
This test should be performed once per month. Proceed as
follows:
• Increase the steam pressure as
shown in chapter 2.2 to
maximum operating pressure.
• Keep the steam outlet valve
closed
• Pull the trip lever and hold open
for five (5) seconds in order to
flush off the valve seat.
• Permit the valve to “slap” shut. If
a leak occurs, repeat this test
and if necessary, replace the
valve.
Ensure that the boiler is cold, drained
and all power supplies are
disconnected
Clean the element rods every six (6) months. To clean the
element rods, or if an element must be replaced, proceed
as follows:
• Remove the lower front cover
• Remove the element terminal cover from the front of the
boiler.
• Disconnect and label the terminal wires
• Remove all four (4) nuts from each element flange and
pull out the heating element
• Use a stiff wire brush to remove all scale and foreign
matter from the element rods.
• Clean the element flange surfaces before installing new
elements and gaskets
Ensure that the boiler is cold,
drained and all power supplies are
disconnected.
In order to provide reliable automatic water level control,
the water level probes are located inside a funnel shaped
probe baffle, welded to the inner wall of the pressure
vessel. The probe baffle has direct connection to the top
and bottom of the pressure vessel so that the probes can
read the water level, protected from foam and bursting
steam bubbles that form on the surface of the boiler
water.
The probe baffle must be cleaned every six (6) months of
sediments and other debris that accumulates at the bottom
of the baffle. To accomplish this, proceed as follows:
Step 1:
Remove the water
level probe cover,
disconnect from each
probe the wire and
label it.
Remove first the Short
Probe and inspect the
probe rod. If sediment
has accumulated, use
a stiff wire brush to
remove it. Install the
probe in its place in
the shell.
Repeat the above
cleaning procedure for
the other probe (if
applicable).
Don’t install the probe(s) yet.
Step 2:
Remove the pipe plug from the boiler blowoff line as
shown in FIGURE 17.
Step 3:
Insert two (2) 1/4in OD copper tubes or any other soft rods
through the probe opening and through the boiler blowoff
opening into the pressure vessel to remove sediments from
3. Boiler Maintenance
3.1 Boiler Blowoff
3.2 Safety Valve Test
3.3 Element Replacement and Element Cleaning
WARNING
WARNING
3.4 Water Level Probe and Probe Baffle Box Cleaning
WARNING
WARNING
Element Rods
Long
Probe Short
Probe
(If Installed)
FIGURE 15
FIGURE 16
FIGURE 17
PAGE 12
Reimers Electra Steam, Inc. 03/15/2022 AR812 Manual REV 2
the bottom of the
probe baffle.
Step 4:
Put a flash light above
the probe opening and
observe whether light
is visible through the
boiler blowoff opening.
If no light is visible,
then repeat inserting
the copper tube
through the Long
Probe opening and
pushing towards the
bottom to remove
further sediment from
the probe baffle.
If there is a significant amount of sediment visible at the
bottom of the pressure vessel, then the heating elements
must be removed as shown in chapter 3.3 and the
sediments scooped out through the element openings.
Step 5:
Install the probe(s) into the shell and connect all probe
wires.
Frequency: Minimum once per year.
Ensure that the boiler is cold,
drained and all power supplies are
disconnected.
3.5 Gauge Glass Replacement
Install new glass by
performing the
above procedur ein
reverse order.
Always install new
rubber washers.
WARNING
Rod
Rod
FIGURE 18
Close gauge
glass valves
(Top and Bottom)
Open drain valve
on bottom fixture
to drain glass
Remove gauge
glass protector &
rods
Loosen nuts at
top and bottom
of glass.
Slide glass up
Rotate top gauge
fixture, pull out
on bottom of
glass and
remove
Step 1 Step 2
Step 3 Step 4
Step 5 Step 6
PAGE 13
Reimers Electra Steam, Inc. 03/15/2022 AR812 Manual REV 2
4. Troubleshooting
WARNING
Ensure that the boiler is cold and has no pressure.
Electrical trouble shooting must be performed by a qualified electrician.
If trouble shooting did not resolve problem, please contact our service technicians at:
Phone: 5406623811
Email: techsup[email protected]
PAGE 14
Reimers Electra Steam, Inc. 03/15/2022 AR812 Manual REV 2
5. Parts list for AR, ARH Models
WARNING
Use Reimers replacement parts. All components are designed and approved to
be used in this Underwriters Laboratories listed and ASME National Board
Stamped boiler. Failure to do so may cause serious injury or death.
4
31
25
15
13
9
28
21
Low Water CutOff Probe (E3):
Connect this probe to wire marked “3”
*IF INSTALLED* Automatic Refill Probe (E1):
Connect this probe to wire marked “1”
22
19
14
8
27
29
11
20
2
5
1
4
6 6
8
30
26
18
5
2
3
2
23 24
PAGE 15
Reimers Electra Steam, Inc. 03/15/2022 AR812 Manual REV 2
.0"

Other manuals for AR Series

1

This manual suits for next models

3

Other Reimers Boiler manuals

Reimers RB Series User manual

Reimers

Reimers RB Series User manual

Reimers RHPHC-330 User manual

Reimers

Reimers RHPHC-330 User manual

Reimers RB Series Assembly instructions

Reimers

Reimers RB Series Assembly instructions

Reimers JR Series User manual

Reimers

Reimers JR Series User manual
Reimers HLR15 User manual

Reimers

Reimers HLR15 User manual

Reimers RE Series User manual

Reimers

Reimers RE Series User manual

Reimers AR Series User manual

Reimers

Reimers AR Series User manual
Reimers HLR120 User manual

Reimers

Reimers HLR120 User manual

Reimers RHP-120 User manual

Reimers

Reimers RHP-120 User manual
Popular Boiler manuals by other brands

Baxi Combi 630 user guide

Baxi

Baxi Combi 630 user guide

Baxi GA Combi & System Boiler Range Specifications

Baxi

Baxi GA Combi & System Boiler Range Specifications

Beretta EXCLUSIVE GREEN HE C.S.I. installer and user manual

Beretta

Beretta EXCLUSIVE GREEN HE C.S.I. installer and user manual

Saunier Duval Semia Condens F24 E Instructions for use installation and servicing

Saunier Duval

Saunier Duval Semia Condens F24 E Instructions for use installation and servicing

Lochinvar Sync Condensing Boiler 1.3 Installation & operation manual

Lochinvar

Lochinvar Sync Condensing Boiler 1.3 Installation & operation manual

Granby B*G-3 Installation, operation and service manual

Granby

Granby B*G-3 Installation, operation and service manual

Electro Industries EZB-Eco EZB-T1-05-240-1 Installation & operating instructions

Electro Industries

Electro Industries EZB-Eco EZB-T1-05-240-1 Installation & operating instructions

Immergas EOLO Superior PLUS 24 Technical documentation

Immergas

Immergas EOLO Superior PLUS 24 Technical documentation

Fröling PE1e installation instructions

Fröling

Fröling PE1e installation instructions

Potterton Performa System 12e Installation and servicing instructions

Potterton

Potterton Performa System 12e Installation and servicing instructions

Weil-McLain 380 user manual

Weil-McLain

Weil-McLain 380 user manual

Worcester danesmoor 12/14 Installation and servicing instrucnions

Worcester

Worcester danesmoor 12/14 Installation and servicing instrucnions

Main Heating Main Heat 12 Installation & service manual

Main Heating

Main Heating Main Heat 12 Installation & service manual

Strebel S-HQ installation instructions

Strebel

Strebel S-HQ installation instructions

Ferroli TEMPRA 24 Installation, service and user instructions

Ferroli

Ferroli TEMPRA 24 Installation, service and user instructions

Laars newport NP 75 Installation, operation and maintenance instructions

Laars

Laars newport NP 75 Installation, operation and maintenance instructions

Trianco Greenflame 40kW External Installation, operation and servicing manual

Trianco

Trianco Greenflame 40kW External Installation, operation and servicing manual

A2B Accorroni HUB RADIATOR MINI 6.0 technical information

A2B Accorroni

A2B Accorroni HUB RADIATOR MINI 6.0 technical information

manuals.online logo
manuals.online logoBrands
  • About & Mission
  • Contact us
  • Privacy Policy
  • Terms and Conditions

Copyright 2025 Manuals.Online. All Rights Reserved.