Rekluse Motor Sports Radius CX Clutch User manual

©2017 Rekluse Motor Sports
Rekluse Motor Sports, Inc.
support@rekluse.com
INSTALLATION & USER’S GUIDE
RadiusCX Clutch
For KTM/Husqvarna DDS clutches
Doc ID: 191-7905A
Revision: 081717

Pg. 2 Doc ID: 191-7905A
Doc Rev: 081717
TABLE OF CONTENTS
OVERVIEW.....................................................................................3
INSTALLATION TIPS......................................................................3
Tuning Note..................................................................................4
TOOLS NEEDED............................................................................5
INCLUDED PARTS.........................................................................6
DISASSEMBLE THE CLUTCH .......................................................7
INSPECT THE DAMPERS..............................................................9
INSTALL HUBS.............................................................................10
CLUTCH PACK INSTALLATION...................................................12
PRESSURE PLATE INSTALLATION............................................17
SLAVE CYLINDER INSTALLATION.............................................22
Step 1: Bleed the new slave cylinder..........................................22
Step 2: Replace OE slave cylinder.............................................25
SET THE INSTALLED GAP AND VERIFY BY CHECKING FREE
PLAY GAIN ...................................................................................32
Step 1: Find the starting point.....................................................33
Step 2: Learn how to check Free Play Gain...............................34
Two Ways to Check for Free Play Gain .....................................36
The Rubber Band Method..........................................................36
The Hand Method.......................................................................39
Step 3: Break-in the new clutch..................................................41
Step 4: Adjust the installed gap and Recheck Free Play Gain ...43
FREE PLAY GAIN ADJUSTMENTS .............................................45
MAINTENANCE............................................................................46
Disk inspection examples...........................................................48
TROUBLESHOOTING ..................................................................49
Performance issues....................................................................49
Clutch noise................................................................................49
EXP TUNING OPTIONS ...............................................................49
Changing the springs .................................................................50
Configuration chart.....................................................................52
Doc ID: 191-7905A
Doc Rev: 081717
Pg. 3
BUMP-STARTING.........................................................................52
NEED ADDITIONAL HELP? .........................................................53
OVERVIEW
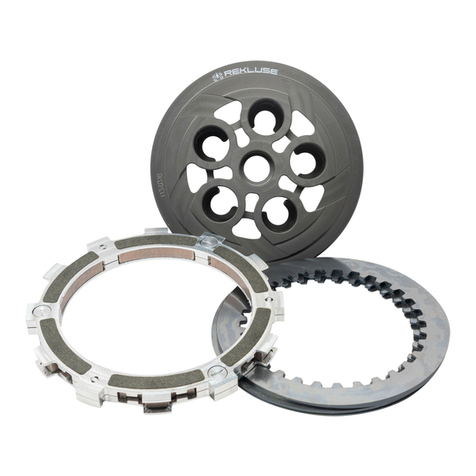
This kit replaces many of the OE (Original Equipment) clutch parts
while reusing some of the OE clutch parts. The following is a
summary of what is replaced and what is reused:
•The OE center clutch hub and OE pressure plate. The OE
clutch is replaced with high-quality billet components. These
parts are designed specifically for your motorcycle to ensure
optimal performance.
•All OE steel drive plates will be replaced with Rekluse TEC
drive plates
•All OE friction disks will be replaced with Rekluse TorqDrive®
disks
•All 6 of the OE drive pins will be reinstalled
•The OE clutch cover O-ring will be reused
INSTALLATION TIPS
•Read the safety information sheet
included with your kit.
•If you install this product for a customer or
another person, instruct them to read the Safety Information
document and the Installation and User Guide before operating
the bike with the product.
•Watch the “RadiusCX Auto Clutch Installation Video” by visiting
www.rekluse.com/support/videos.
•Protect eyes and skin – wear safety glasses and thin
disposable work gloves.
•Read this entire document before performing any steps.
•Lay the motorcycle on its left side when replacing the clutch.
This makes the clutch work easier and eliminates the need to
drain the oil.

Pg. 4 Doc ID: 191-7905A
Doc Rev: 081717
•Use an air or electric impact wrench to remove the center
clutch nut. If one is not available, you can place the bike in top
gear and hold the rear brake while loosening the center clutch
nut with a socket and breaker bar.
•Channel-lock pliers work best to bend the tabs of the washer
up over the center clutch nut.
•Use clean, quality JASO-MA or JASO-MA2 certified
transmission oil for best performance.
•Motorcycles with taller gearing or modified engines with
increased horsepower may require heavier wedges. These can
be purchased separately from Rekluse.
Tuning Note:(especially for 2-stroke owners):
•Once installed, if you desire your clutch to engage more
aggressively, one option is to purchase the heavier Belleville
spring from KTM (KTM calls it the “280” spring).
•Replacing this spring makes the clutch engagement more
aggressive. However, this will increase the pull on the clutch
lever. The spring comes stock on 2013 and newer Factory
Edition 450SX-F bikes, 2014 and newer 450SX-F/XC-F bikes,
2017 and newer 450/500 EXC-F bikes.
•The part number is KTM Part #: 78932005000

Doc ID: 191-7905A
Doc Rev: 081717
Pg. 5
TOOLS NEEDED
4 mm Allen Wrench 5 mm Allen Wrench 8 mm Socket 27 mm Socket
T-25 Torx Bit Torque Wrench Fluid Catch
Container Channel-lock
Pliers
Oil Recommended
Clutch Fluid
4mm
5 mm
8 mm
27 mm

Pg. 6 Doc ID: 191-7905A
Doc Rev: 081717
INCLUDED PARTS
Visit www.rekluse.com/support for
a full parts fiche illustration and part numbers.

Doc ID: 191-7905A
Doc Rev: 081717
Pg. 7
DISASSEMBLE THE CLUTCH
1. Turn the fuel petcock to “OFF” if applicable.
2. Lay the bike on its left side. Catch any fuel that might drain in a
suitable container.
3. Use an 8 mm socket to remove the clutch cover. If your bike has
an oil plug, loosen the plug before removing the cover.
4. Use an 8 mm socket to remove the following OE parts. When
removing the Bellville spring, make sure to note the orientation
of the spring. See following picture for reference.
•6 pressure plate screws
•Pressure ring
•Belleville spring
•Slider ring
•Pressure plate
•Throw-out bearing and washer
•Clutch pack
•6 drive pins
•Center clutch nut and washer
(Removed in step 5)

Pg. 8 Doc ID: 191-7905A
Doc Rev: 081717
Be careful that the drive pins do not fall into the engine while
disassembling.
5. Use a hammer and large screwdriver to bend down the tabs of
the washer tab, then remove the center clutch nut with an impact
wrench or breaker bar, and a 27 mm socket.

Doc ID: 191-7905A
Doc Rev: 081717
Pg. 9
6.Remove the tab washer.
7.Remove the center hub assembly from the steel basket while
leaving the thrust washer on the main shaft.
Check that the thrust washer is still on the main shaft and not stuck
to the bottom of the center hub assembly. Missing the thrust
washer will cause clutch performance issues.
INSPECT THE DAMPERS
The OE dampers inside the center hub assembly shrink due to heat
and use. Any movement between the dampers will shorten the life
of your clutch. Inspect the dampers before proceeding and replace
if necessary. Use the following instructions to inspect the dampers.
1. Hold the center hub assembly in your hands, then place your
thumbs on the inner hub by the embossed part numbers.

Pg. 10 Doc ID: 191-7905A
Doc Rev: 081717
2. Rotate the inner hub back and forth inside the outer hub.
Rekluse recommends replacing the dampers if you feel any play
between the two hubs –KTM part number #78132025100.
INSTALL HUBS
1. Remove the 6 rubber dampers from the OE center hub
assembly.
For 450SX-F/XC-F models, replace the OE inner hub with the
supplied inner hub.

Doc ID: 191-7905A
Doc Rev: 081717
Pg. 11
2. Install the 6 OE rubber dampers and inner hub onto the Rekluse
outer hub.
3. Install the new center hub assembly into the motorcycle.
4. Reinstall the OE tab washer and center clutch nut.
For 450SX-F/XC-F models, use the supplied lock tab washer in
place of OE lock tab washer.
5. Using the 27 mm socket and torque wrench, torque the center
clutch nut to 50 ft-lb (68 N-m).

Pg. 12 Doc ID: 191-7905A
Doc Rev: 081717
6. Using the channel-lock pliers, bend up both tabs of the tab
washer around the nut.
7. Seat the 6 OE drive pins into the Rekluse outer hub.
CLUTCH PACK INSTALLATION
Each clutch pack comes with a set of steel plates, a set of friction
disks, and an EXP disk.
The clutch pull effort has different settings and depends on the
thickness of the clutch pack. You will need to measure the clutch
pack before you begin if you wish to optimize the clutch pull effort
vs. clutch performance. Please refer to the Setup Sheet for clutch
pack specifications and information. Otherwise, continue with
following instructions.

Doc ID: 191-7905A
Doc Rev: 081717
Pg. 13
1. Soak the friction disks and EXP disk in new oil for at least 5
minutes. Make sure the EXP and friction disks are coated on
both sides.
2. Install a steel TEC drive plate by first aligning the drive pin
notches in the plate with the drive pins on the hub.
Drive pin notches
Drive pins

Pg. 14 Doc ID: 191-7905A
Doc Rev: 081717
3. Place the steel plates in the orientation shown with the shark
fin notches facing to the right. All drive plates will follow this
orientation.
Proper orientation of the drive plates is critical for optimal clutch
performance. If you install them backwards, the clutch will still
function but will lack proper modulation performance.
4. Add a fiction disk on top of the steel drive plate. Some friction
disks are marked with a small colored dot. This mark is used
for processing and can be ignored.
5. Continue alternating the steel drive plates with the friction
disks for the entire Rekluse clutch pack. See the following
picture for reference.
Shark fin
notches

Doc ID: 191-7905A
Doc Rev: 081717
Pg. 15
*Refer to the Setup Sheet included with the clutch
kit for the “Clutch Pack Height” specifications.

Pg. 16 Doc ID: 191-7905A
Doc Rev: 081717
6. Install the EXP disk on top of the last steel plate. Make sure
that the EXP disk is seated in the same slots as the clutch
pack.
Some OE basket have “half slots” at the top of the basket tangs.
Rekluse products require the entire clutch pack, including the EXP
disk, be installed into the MAIN (deeper) basket slots.
7. Reinstall the OE throw-out.

Doc ID: 191-7905A
Doc Rev: 081717
Pg. 17
PRESSURE PLATE INSTALLATION
1. Add a light film of oil between the lining plate and pressure plate.
This will help the plates stick together for ease of installation.
2. Install the supplied lining plate onto the pressure plate by lining
up the index tabs into the slots.
3. Install the pressure plate subassembly by lining up the index tabs
on the pressure plate with the slots in the hub.
When the pressure plate is seated correctly, the threaded standoffs
will come through the openings of the pressure plate.

Pg. 18 Doc ID: 191-7905A
Doc Rev: 081717
4. Place the OE slider ring on the pressure plate with the “top”
marking facing up. (The top side is rounded and the bottom edge
is sharp.)

Doc ID: 191-7905A
Doc Rev: 081717
Pg. 19
5. Place the OE Belleville spring onto the slider ring, with the
rounded dome side facing up.
The outer edge of the Bellville spring will make contact with the
slider ring. If it does not, the Bellville spring is upside down.
Incorrect – The Belleville spring is
upside down.
Correct – The Belleville spring
sits flat against the slider ring.

Pg. 20 Doc ID: 191-7905A
Doc Rev: 081717
6. Install the OE pressure ring, flat side up.
There are 3 possible settings on the OE pressure ring. Please
refer to the Setup Sheet for optimized pressure ring setting. For
a simple setting, set it to setting II (4-strokes and 2017 + 2-
strokes) or X (pre 2017 2-strokes). In most cases, this is the
best starting point for the clutch.
7. Install the Rekluse pressure plate screws.
Do not reuse the OE screws, or clutch cover interference will
occur!
8. Loosely tighten the screws, then use the T-25 Torx bit and torque
wrench to tighten to 55 in-lb (6 N-m).
Table of contents
Other Rekluse Motor Sports Motorcycle Accessories manuals

Rekluse Motor Sports
Rekluse Motor Sports Core EXP 3.0 Operation manual

Rekluse Motor Sports
Rekluse Motor Sports EXP Operation manual

Rekluse Motor Sports
Rekluse Motor Sports RadiusCX Clutch Operation manual

Rekluse Motor Sports
Rekluse Motor Sports Core Manual User manual

Rekluse Motor Sports
Rekluse Motor Sports EXP User manual
Popular Motorcycle Accessories manuals by other brands

Kemo Electronic
Kemo Electronic M073N Assembly instructions

hepco & becker
hepco & becker TRIUMPH Bonneville T 120 quick start guide

N-Com
N-Com SPCOM00000109 quick start guide

Bagster
Bagster 7540CB Fitting instructions

KTM Power Parts
KTM Power Parts 78001095000 quick start guide

LSL
LSL 153T055R FITTING INSTRUCTION