USER INSTRUCTIONS C81
Thank you for purchasing the Reliable™ C81 vacuum and up-air pressing
table. Please follow the instructions carefully. With proper care and
maintenance, your ironing table will provide years of dependable service.
The C81 is equipped with a powerful and fast motor with vacuum and up-air.
The strong vacuum will give you a clean-crisp finish to your garments,
guaranteeing professional results. The up-air (blowing) feature will help
eliminate impressions on delicate fabrics.
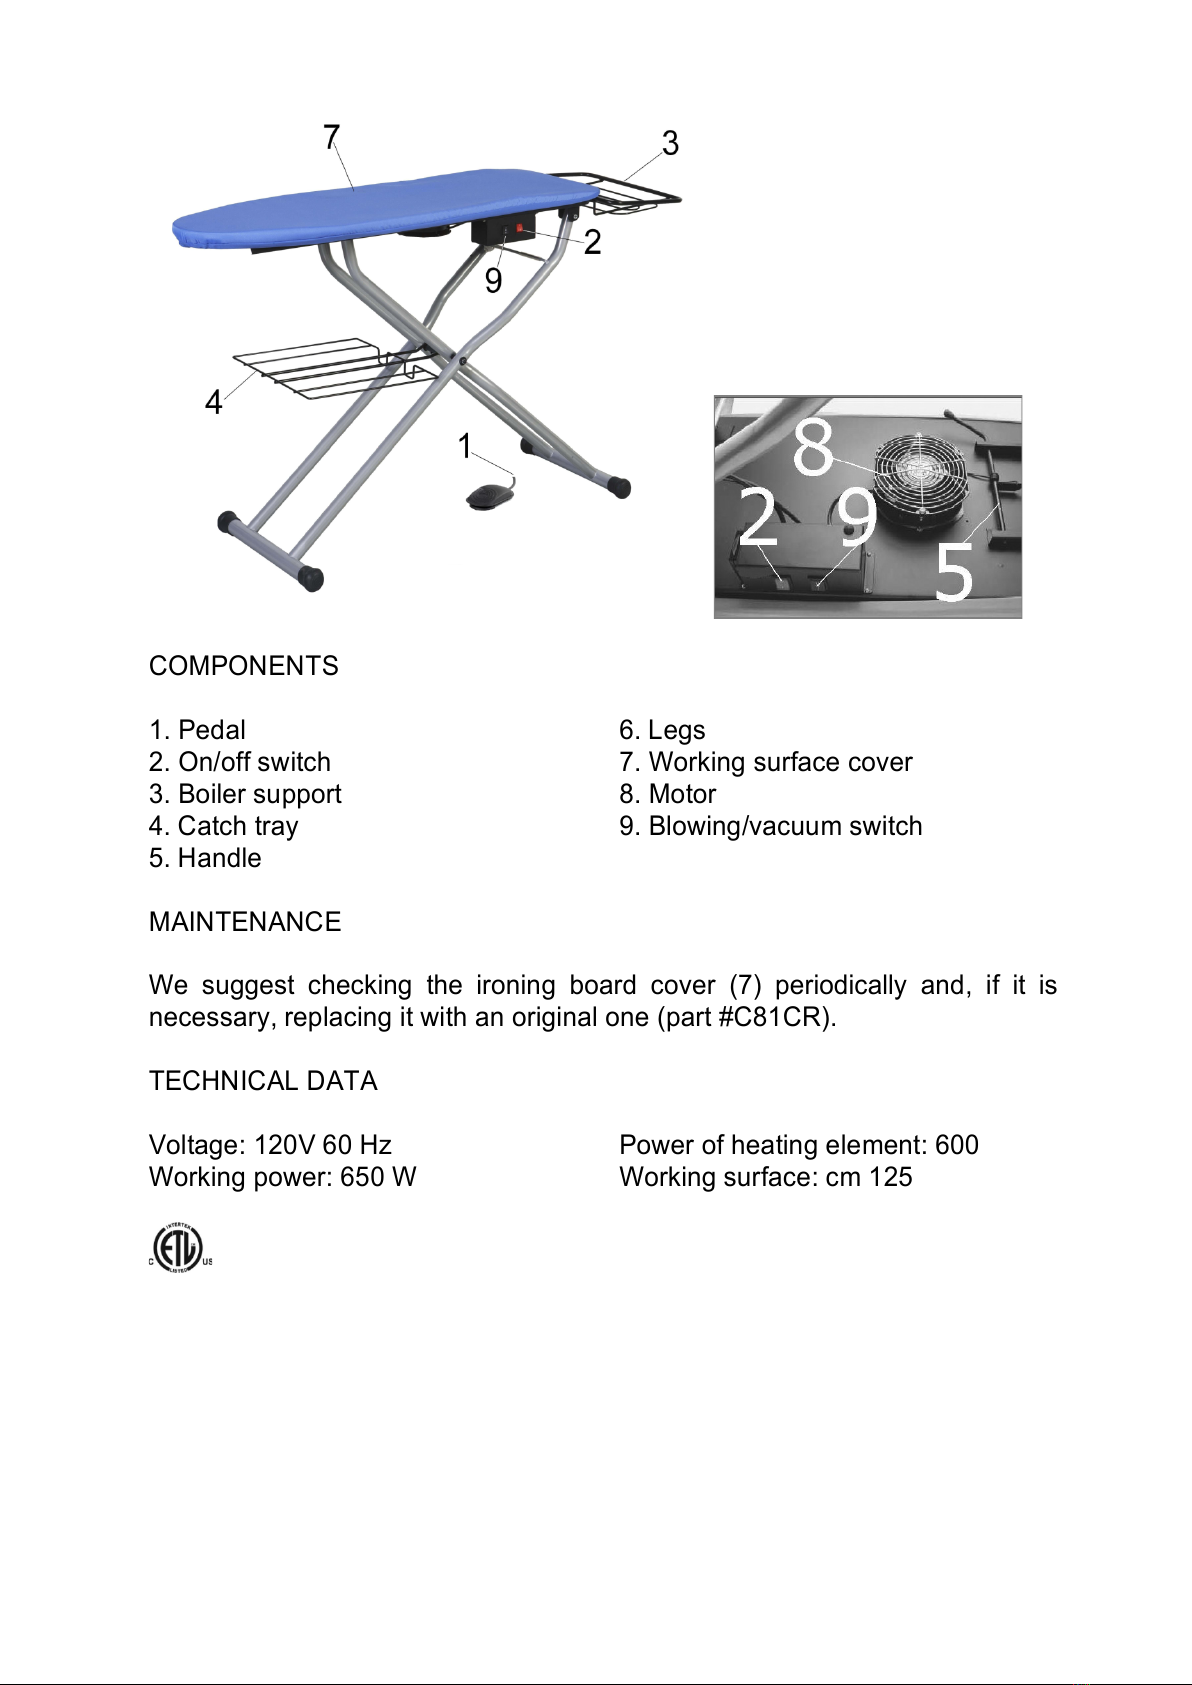
1. Unfolding: Hold the ironing board in a vertical position with the tip
downwards; press the handle (5) placed underneath the board and lift up
the working surface by pulling with the foot outwards until the desired
height is reached.
2. Unfold the boiler support (3) and place the steam generator on the shelf.
3. Insert the electrical plug into an electrical outlet.
4. Place the pedal (1) near the working area.
5. Push the on/off switch (2) on the “I” position.
6. Wait for a few minutes until the working surface is warmed up.
7. Start ironing.
8. Push the blowing/vacuum switch (10) as follows:
9. I: vacuum function;
10. 0: the pedal stops working;
11. II: blowing function.
12. You can use the vacuum or the blowing function at the same time as you are
ironing, or you can use it after ironing (for very light fabrics this may be the
preferred way).
13. At the end of ironing we suggest you leave the on/off switch (2) on for a
few minutes to ensure the inside of the table is dry and free of
condensation.
14. Folding: turn the on/off switch (2) off, remove the plug from the outlet.
Take the boiler and the iron off of the boiler support (3), fold the boiler
support (3), and make sure there is no garment on the working surface
and/or on the catch tray (4).
15. As soon as the working surface is cool, position the ironing board
vertically with the tip downwards, press the handle (5) placed under the
working surface and at the same time pull the legs (6) inward.