manuals.online logo
Brands
  1. Home
  2. •
  3. Brands
  4. •
  5. Remington
  6. •
  7. Hair Clipper
  8. •
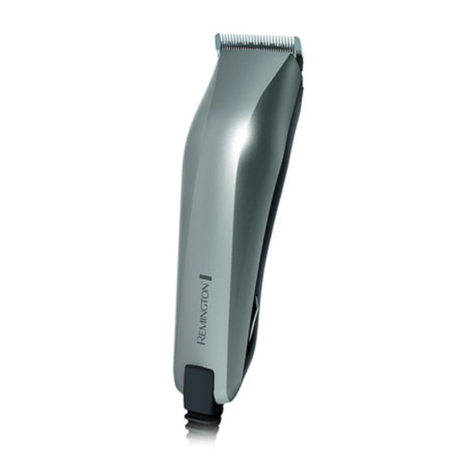
  9. Remington HC6525 User manual

Remington HC6525 User manual

HC6525
Use and Care Guide
DANGER
To reduce the risk of electric shock:
■Keep away from water. Do not use in area that can be dropped into a sink or bath.
■Do not reach for an appliance that has fallen into water. Unplug it immediately.
■Do not use while bathing or in the shower.
■Do not place or drop into water or other liquid.
■Do not place or store this appliance where it can fall or be pulled into a tub or sink.
■Unplug this appliance before cleaning it.
WARNING
To reduce the risk of burns, fire, electric shock or injury to persons:
■This appliance is for household use only.
■Close supervision is necessary when this appliance is used by, on, or near
children or persons with special needs or other disabilities.
■Use this appliance only for its intended use as described in this manual.
■Do not use attachments not recommended by the manufacturer.
■Keep the cord away from heated surfaces.
■Never operate this appliance if it has a damaged cord or plug, if it is not working
properly, if it has been dropped or damaged, or if it has been dropped into water.
If any of these things happen, return the appliance to an authorized service
center for examination and repair.
■Never drop or insert any object into any of the appliance’s openings.
■Do not use outdoors or operate where aerosol (spray) products are being used, or
where oxygen is being administered.
■
Make sure the cord is disconnected
from the clipper while storing this appliance
and cord in a moisture-free area. Do not store it in temperatures exceeding
140°F (60°C).
■Do not use this appliance with a damaged or broken cutter unit, as injury may
occur. Always make sure blades are aligned properly.
IMPORTANT SAFETY
INSTRUCTIONS SAVE THESE INSTRUCTIONS
■Do not use an extension cord or a voltage converter with this appliance.
■Do not wrap the cord around the appliance.
Remington®hair clippers provide a quick and easy way to create
professional-looking haircuts. Developed to combine professional grade blades with
premium guide combs, this hair clipper enables you to achieve customized, modern
looks and traditional hairstyles. To help you create those styles, and to extend the
life of your hair clipper, please read all instructions before using.
Product Features
Register Your New Product Today!
By registering your new Remington®product, you will receive these important benefits:
Proof of Ownership • Product Protection • Product Registration • Special Offers
Register online at: RemingtonProducts.com
Blade Removal Attaching Guide Comb
Comb Guide Length
#0 Red 1/16” (1.5mm)
#1 Orange 1/8” (3mm)
#2 Yellow 1/4” (6mm)
#3 Light Green 3/8” (9mm)
#4 Green 1/2” (12mm)
#5 Teal 5/8” (16mm)
#6 Blue 3/4” (18mm)
#7 Dark Blue 7/8” (22mm)
#8 Purple 1” (25mm)
Hair Length Settings
7
8
910 11 13
12
15 16 17
14
2
1
3
4
5
6
1. Blade set
2. Vacuum intake
3. Easily removable vacuum chamber
4. Vacuum chamber release button
5. On/off switch
6. Power indicator
7. Nine length guide combs
8. Neck brush
9. Left and right ear combs
10. Three sectioning clips
11. Scissors
12. Blade cover
13. Barber comb
14. Oil bottle
15. Fade guide
16. Neck liner
17. Cleaning brush
18. Travel pouch (not shown)
1. Unit must be off. Hold unit securely in
one hand. Grip blade and push with
your thumb the top of the blade away
from the unit.
2. Use enough force to move the blade
off the retaining snaps and rotate
blade off bottom tab.
3. Pull blade away from unit. Reverse
order to reattach blade.
Note: This clipper is not intended for professional use.
Before Cutting Hair
1. Make sure your hair clipper is operating correctly.
2. The vacuum feature will not function properly if the hair chamber is removed.
3. The person should be seated so that the top of his head is at your eye level.
4. Comb the hair as it is normally styled.
5. Comb out all knots and tangles.
6. Ensure the hair is dry. Hair clippers perform best with dry hair, making it easier to
see how much hair is being cut.
7. Hold the hair clipper in the palm of one hand with your thumb resting firmly on
the top of the hair clipper. This grip provides comfortable cutting control.
Giving A Comfortable, Even Cut
■ Allow the clipper to cut through the hair without moving
it too quickly. Moving the clipper too quickly may create a
pulling sensation. As the clipper cuts the hair, the vacuum
sucks the clippings through the inlet into the hair chamber.
■ Use short strokes when cutting, and initially use the longest
trimming guide. You can always use a closer trimming guide
later if you want a closer cut.
How to Give a Haircut
STEP 1 – Nape of the neck
• Set the comb to 3mm or 6mm.
• Hold the clipper with the blade teeth pointing upwards. Begin
starting at the centre of the head at the base of the neck.
• Slowly lift the clipper, working upwards and outwards
through the hair, trimming just a little at a time.
STEP 2 – Back of the head
• With the comb set at 12mm or 18mm, cut the hair at the
back of the head.
Using the fade guide: Work the fade guide, with the widerteeth
upwards, into the hair from one side. Run the clipper over the
guide to clip the hairs poking through. Keep the guide at the
same height as you work yourway around the head.
How to Use
1. Guide combs should be installed by first hooking the blade teeth to front side of
guide comb. Then press the back of the guide comb down until it snaps into place.
2. Ensure comb is attached before beginning to cut hair.
3. To remove, pull the snap tab on back side of guide comb and pull the comb off.
STEP 3 – Side of the head
• With the comb set at 3mm or 6mm, trim sideburns. Then change to the longer
9mm guide comb and continue to cut up to the top of the head.
• To trim around the ears, remove the trimming guide and replace with either the
left or right ear guide. The shorter guide teeth are designed to be toward the ear.
Hold the ear forward to keep it out of the way. Move the clipper from the back of
the head to the front. This creates a tapered effect around the
ear and back of the neck.
STEP 4 – Top of the head
• With the 18mm or 22mm guide comb attached, cut hair
on top of the head against the direction in which the hair
normally grows.
Note: For longer desired lengths of more than 22mm, place
finger over hairs and guide into the guide comb and blade to
better guide the hair trimmings into the vacuum chamber.
• Always work from the back of the head.
STEP 5 – The finishing touches
• The final trim can be made with the hair clipper or the
included scissors. Make sure to check over the entire head
for any uneven areas. For styled hair or giving quick trims,
you may prefer using your hair clipper without the trimming
guide.
• Use the clipper without a guide comb for close trimming
around the base and sides of the neck.
• To produce a clean straight line at the sideburns, reverse the
hair clipper.
• Place the reversed clipper at right angles to the head, tips of the
blades lightly touching the skin and then work downwards.
Using the neck liner:With the handle side up, place and hold
the neck liner just above where you want to create a clean
trimming line. Use the clipper without a guide comb to trim
the neck hairs up to the liner.
Emptying Hair Chamber:
1. Turn off the unit.
2. Hold the unit from the back end of unit, cradling the bottom with one hand.
3. Push the chamber release button with your gripping hand thumb and with your
other hand rotate and then lift the chamber off.
4. To empty contents grip the chamber securely in hand with opening facing down
over desired collection container. Shake chamber up and down, but stopping
rapidly on the down stroke. This may have to be repeated several times.
5. You may have to vigorously shake the chamber or scoop out some of the
compacted hair clippings.
6. Be careful not to puncture the screens on the hair chamber while emptying the unit.
7. The mesh side of the vacuum chamber can be opened to aid in hair removal and
cleaning of the mesh.
The mesh can be brushed or rinsed under water to be cleaned; however it needs to
be completely dry before it is reattached to the unit.
8. Once finished emptying, place the chamber back onto the unit by putting the scoop
end in first and then gently rotating the mesh end back into place until it clicks.
Longer Styles
• For optimum performance do not trim hair 18mm or longer with one pass of the
clipper.
• When cutting hair 18mm or longer use a finger on your free hand in between the
comb and clipper to guide hair into the blade by applying slight pressure. As you
move the clipper up to cut, your finger will help keep the longer hairs from slipping
away before they can be cut. If the hair extends well past the hair collection
chamber opening, place your finger on top of the chamber near the opening.
Short Tapered Styles – “Flat Tops” and Short Cuts
• Starting with the longest guide comb attached (25mm),
cut from the back of the neck to the crown. Hold the guide
comb flat against the head and slowly move the clipper
through the hair.
• Use the same procedure from the lower side to the upper
side of the head.
• Then cut the hair against the direction in which it grows and
level with the sides.
• To give a “flat top” look, the hair on top of the head must be cut over the top of a
flat comb.
• Use a closer guide comb to taper the hair down to the neckline as desired.
Cleaning and Maintenance
Troubleshooting
Limited Two-Year Warranty
Spectrum Brands, Inc. warrants this product against any defects that are due to faulty
material or workmanship for a two-year period from the original date of consumer
purchase. This warranty does not include damage to the product resulting from
accident or misuse. If the product should become defective within the warranty
period, we will replace it free of charge. Return your product and sales receipt with
your name, address and day time phone number to: Remington Returns Center, 507
Stokely Dr., P.O. Box 1, Deforest, WI 53532. For more information call 800-736-4648
in the U.S. or Canada.
Warranty excludes: Storage pouch
KEEP ORIGINAL SALES RECEIPT AS PROOF OF PURCHASE FOR WARRANTY
PURPOSES.
This warranty does not cover products damaged by the following:
■ Accident, misuse, abuse or alteration of the product
■ Servicing by unauthorized persons
■ Use with unauthorized accessories
■ Connecting it to incorrect current and voltage
■ Wrapping cord around appliance causing premature wear and breakage
■ Any other conditions beyond our control
No responsibility, obligation, or liability is assumed for the installation or mainte-
nance of this product.
SPECTRUM BRANDS, INC. SHALL NOT BE RESPONSIBLE FOR ANY
INCIDENTAL, SPECIAL OR CONSEQUENTIAL DAMAGES RESULTING FROM THE
USE OF THIS PRODUCT. ALL IMPLIED WARRANTIES, INCLUDING BUT NOT
LIMITED TO IMPLIED WARRANTIES OF FITNESS AND MERCHANTABILITY, ARE
LIMITED IN DURATION TO TWO YEARS FROM DATE OF ORIGINAL PURCHASE.
This warranty gives you specific legal rights and you may also have other rights
which vary from state to state or province to province. Some states do not allow
the exclusion or limitation of incidental, special or consequential damages.
Spectrum Brands, Inc. Money-back Offer
If within 30 days after you have purchased your Remington®branded product,
you are not satisfied and would like a refund, return it with the sales slip indicat-
ing purchase price and date of purchase to the retailer from whom it was pur-
chased. Spectrum Brands, Inc. will reimburse all retailers who accept the product
within 30 days from the date of purchase. If you have any questions concerning
the money-back guarantee, please call 800-736-4648 in the U.S. or Canada.
Warranty Remington Guarantees Satisfaction After 30 Days!
Remington 60-Day Money Back Guarantee*
If within 60 days after purchasing any Remington®branded product, you are not
completely satisfied and would like a refund, return it with the original dated
sales receipt directly to Remington and receive a full refund.** For questions
concerning the money-back guarantee, please call
800-736-4648 in the U.S. or Canada.
*Applies to U.S. and Canadian customers’ returns only.
**Terms and conditions apply.
Terms and Conditions
1. Refund will be in the form of a check issued in U.S. Dollars and will be provided
only if all Terms and Conditions are met.
2. The following items must be returned to Remington and postmarked no later
than 60 days after purchase of the Remington®branded product:
a. The Remington®product;
b. The original sales receipt indicating price and date purchased; and
c. The completed 60-day money back guarantee form located at
RemingtonProducts.com/60day.
3. In addition, Remington, in its discretion, must determine that the returned product
was used in accordance with the instruction booklet (included with the product
at the time of purchase).
4. Returns should be mailed prepaid (no collect returns accepted) to:
Remington 60-Day MBG
507 Stokely Drive, Box 1
DeForest, WI 53532
5. Refund does not include postage costs for the return of the product, but will
include applicable taxes paid by customer, if any.
6. No responsibility will be accepted for late, lost, stolen, misdirected or damaged
product.
7. Please allow 4–6 weeks to receive your refund by check.
Questions or comments: Call 800-736-4648 in the U.S.
or Canada or visit RemingtonProducts.com.
Dist. by: Spectrum Brands, Inc., Middleton, WI 53562
® Registered Trademark of Spectrum Brands, Inc.
© 2017 Spectrum Brands, Inc. 2/17 17108-00
Made in China.
T22-0004538-A
1) Press to release.
Mesh Release Tab
2) Then, Grip/Push to
swing mesh open.
Mesh is hinged to swing
open and closed.
Clipper cutters do not move:
■ The cutting unit may be dirty and clogged. Clean the unit as directed in Cleaning
and Maintenance section.
Vacuum not functioning properly:
■ Ensure that the chamber has been emptied and correctly placed back into
the unit.
■ Check for obstructions in the inlet and air flow path.
Fan chamber clogged up:
■ Remove the hair chamber.
■ Using the cleaning brush that has been provided, gently brush between the
protective exhaust vents. If necessary, blow into the fan chamber. Hair clippings
should become loose and fall out.
Cleaning and Maintaining Your Clipper
After each use:
■Brush the accumulated hair from the cutters.
■Rinse blade.
Rinsing your blades
- Turn off clipper and detach blades. Rinse the inside of the blades.
- Ensure all loose hairs are removed from the blades.
- Once blades are cleaned, ensure the blades and unit are thoroughly
wiped dry.
Caution: Do not rinse the clipper. Only rinse the blades.
■Place a few drops of clipper oil onto the blades gliding surface. Wipe off
excess oil.
Every Six Months
■At regular intervals the blade set should be removed and cleaned.
■Brush out hairs from between the blades with soft cleaning brush. Do not
remove the lubricating grease on the plastic components. It is not necessary
to remove the small moving blade from the unit.
■Place a few drops of clipper oil onto the blades gliding surface. Wipe off
excess oil.
Cleaning Cautions:
■Do not use liquid cleaners on the cutters or harsh or corrosive chemicals on the
cutter casing.
■Unplug the clipper from the power outlet when not in use and when cleaning.
Storage
■Always store this appliance and cord in a moisture-free area.
■Do not wrap the cord around the appliance.
■Do not store in temperatures above 140ºF.
Blades
■It is recommended to oil the blades after every use.
■Place 2 to 3 drops of lubricating oil on the moving blade and turn on the
clipper.The oil should distribute on its own. Wipe off any excess oils.
Other Remington Hair Clipper manuals

Remington HC6550 User manual

Remington

Remington HC6550 User manual

Remington ProPower HC7151 User manual

Remington

Remington ProPower HC7151 User manual

Remington HC650 User manual

Remington

Remington HC650 User manual

Remington HC-5030 User manual

Remington

Remington HC-5030 User manual

Remington HC5780 User manual

Remington

Remington HC5780 User manual

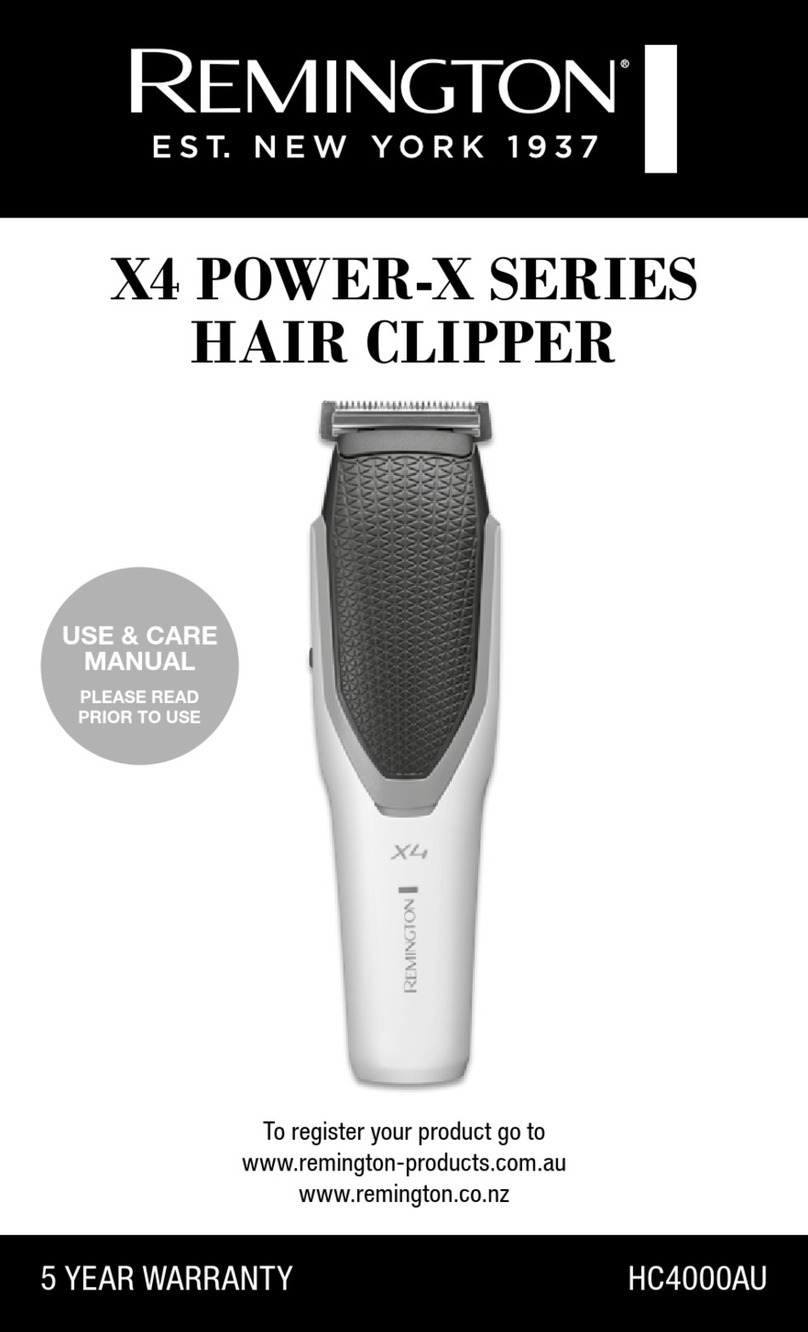
Remington X4 Power-X Series User manual

Remington

Remington X4 Power-X Series User manual

Remington HC5950 User manual

Remington

Remington HC5950 User manual

Remington HC500 User manual

Remington

Remington HC500 User manual

Remington HC535 User manual

Remington

Remington HC535 User manual

Remington X5 Power-X Series User manual

Remington

Remington X5 Power-X Series User manual

Remington HC4000AU User manual

Remington

Remington HC4000AU User manual

Remington HC5811 User manual

Remington

Remington HC5811 User manual

Remington HC5350/5550/5750 User manual

Remington

Remington HC5350/5550/5750 User manual

Remington RAPID CUT TURBO HC4300AU User manual

Remington

Remington RAPID CUT TURBO HC4300AU User manual

Remington X5 Power-X Series User manual

Remington

Remington X5 Power-X Series User manual

Remington HC-60 User manual

Remington

Remington HC-60 User manual

Remington HC2000 Series User manual

Remington

Remington HC2000 Series User manual

Remington HighPrecision HC-600 User manual

Remington

Remington HighPrecision HC-600 User manual

Remington HC-5030 User manual

Remington

Remington HC-5030 User manual

Remington Classic HC450 User manual

Remington

Remington Classic HC450 User manual

Remington Easy Fade User manual

Remington

Remington Easy Fade User manual

Remington HC5950 User manual

Remington

Remington HC5950 User manual

Remington HC-822A User manual

Remington

Remington HC-822A User manual

Remington Omniblade HG1000 User manual

Remington

Remington Omniblade HG1000 User manual

Popular Hair Clipper manuals by other brands

Dannyco BaByliss PRO Ace operating instructions

Dannyco

Dannyco BaByliss PRO Ace operating instructions

Philips BT1005 quick start guide

Philips

Philips BT1005 quick start guide

Grundig MC 8540 manual

Grundig

Grundig MC 8540 manual

Andis MBA 23125 Specification sheet

Andis

Andis MBA 23125 Specification sheet

Andis AE Use and care

Andis

Andis AE Use and care

Andis UltraEdge AGC2 parts list

Andis

Andis UltraEdge AGC2 parts list

PROZIS Rey user manual

PROZIS

PROZIS Rey user manual

Hyundai HC 530 instruction manual

Hyundai

Hyundai HC 530 instruction manual

O.K. OHT 103 user manual

O.K.

O.K. OHT 103 user manual

Maestro MR 662 owner's manual

Maestro

Maestro MR 662 owner's manual

Aesculap BASECut XT407 Instructions for use/Technical description

Aesculap

Aesculap BASECut XT407 Instructions for use/Technical description

Moser 1901 user guide

Moser

Moser 1901 user guide

Wella XPERT HS 71 instruction manual

Wella

Wella XPERT HS 71 instruction manual

Atlanta ATH-845 instruction manual

Atlanta

Atlanta ATH-845 instruction manual

SOLAC CP7304 Instructions for use

SOLAC

SOLAC CP7304 Instructions for use

Maestro MR652C owner's manual

Maestro

Maestro MR652C owner's manual

Clatronic HSM 2686 instruction manual

Clatronic

Clatronic HSM 2686 instruction manual

Oster 76105 instruction manual

Oster

Oster 76105 instruction manual

manuals.online logo
manuals.online logoBrands
  • About & Mission
  • Contact us
  • Privacy Policy
  • Terms and Conditions

Copyright 2025 Manuals.Online. All Rights Reserved.