2.1 First, connect the Glide-Aside Track motor to
your power supply and turn on at the mains. The
motor will beep quickly 5 times to confirm it is on.
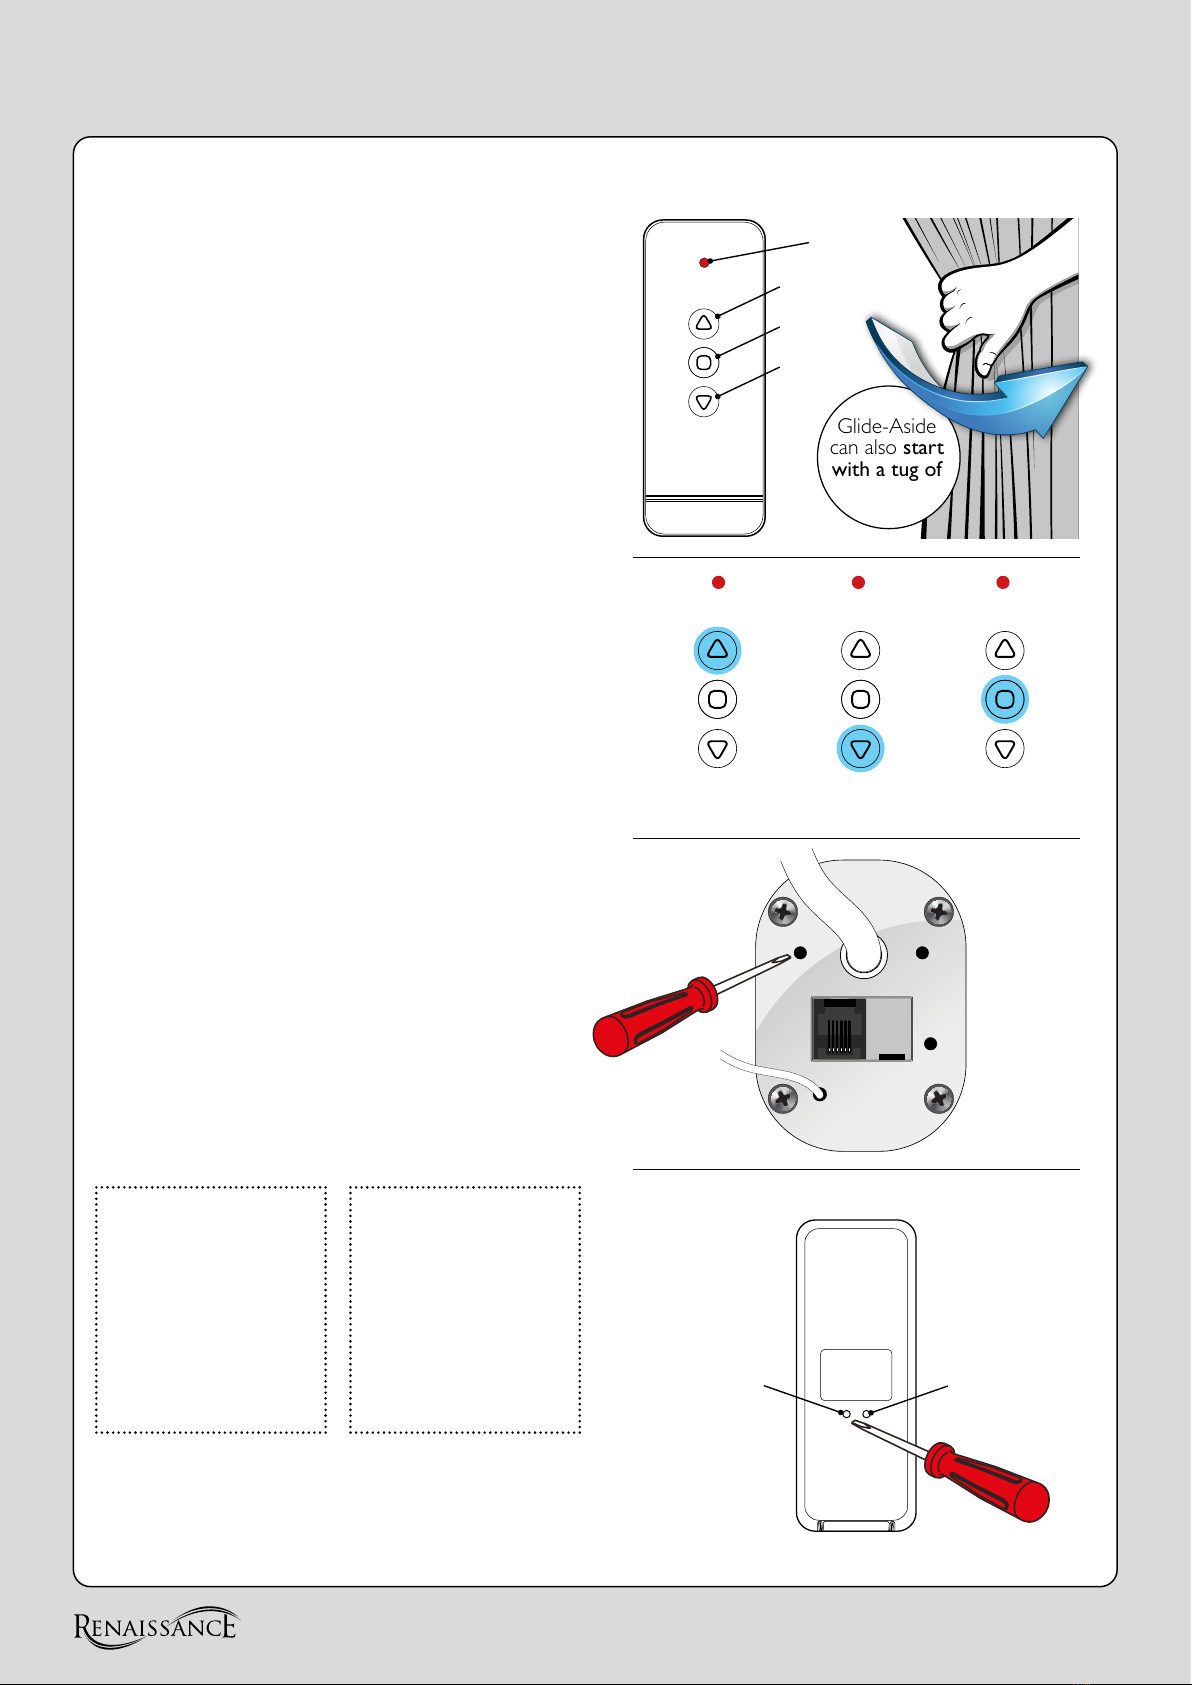
2.2 Press CLOSE (UP) key on your Remote –
the motor on the track should start – if there is no
response go to step 2.8 to reconnect your remote
and start again once it is connected and working.
2.3 The curtains will run to the end position
on the rail and the motor will automatically stop.
The Close Limit is now set.
2.4 Now Press OPEN (DOWN) on your Remote.
NOTE: You can also draw the curtain by hand –
the tug motion will automatically start the motor.
2.5 The curtains will run to the beginning position
on the rail and the motor will automatically stop.
The Open Limit is now set.
2.6 Now the limit settings are set you can use the
Open/Close buttons to move to the automatically
set limits – you can stop the motor to have the
curtains partly open with the STOP key at any time.
To Reset Open & Close Limits
2.7 Using a paperclip/small screwdriver press and
hold the RESET button on the base of the motor.
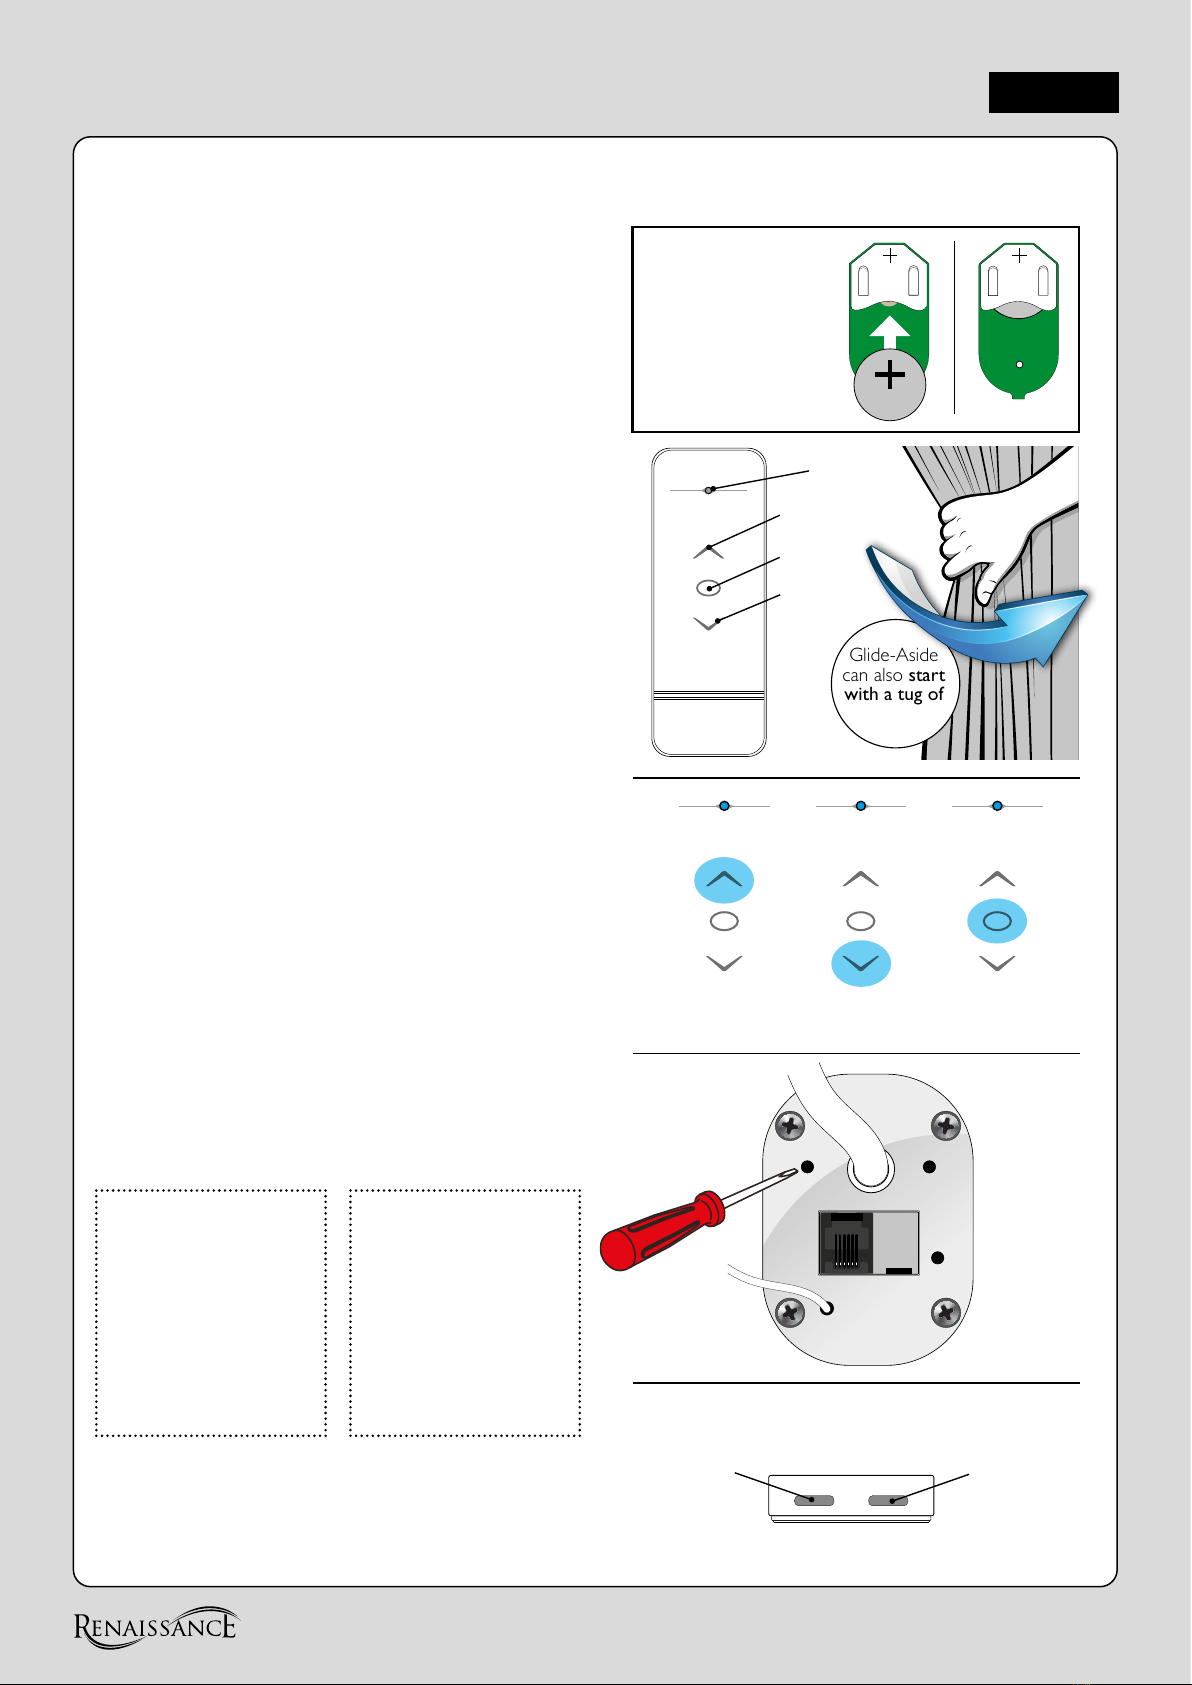
To Reconnect your Remote
2.8 Using a paperclip or small screwdriver, press
and hold in the SETTING button on the base
of the motor for 3 seconds until the motor beeps,
then release. Discovery Mode is now activated.
2.9 Now press the CONFIRM button located
on the bottom of your Handheld Remote Control.
The motor will beep 4 times to confirm pairing.
Press & hold for
3 seconds
then release
The motor will make
long beeps with a gap
This means discovery
mode is activated*
Continue to
Press & Hold for
7 seconds
Motor will beep quickly
8 times then go silent
All limit settings have
now been DELETED.
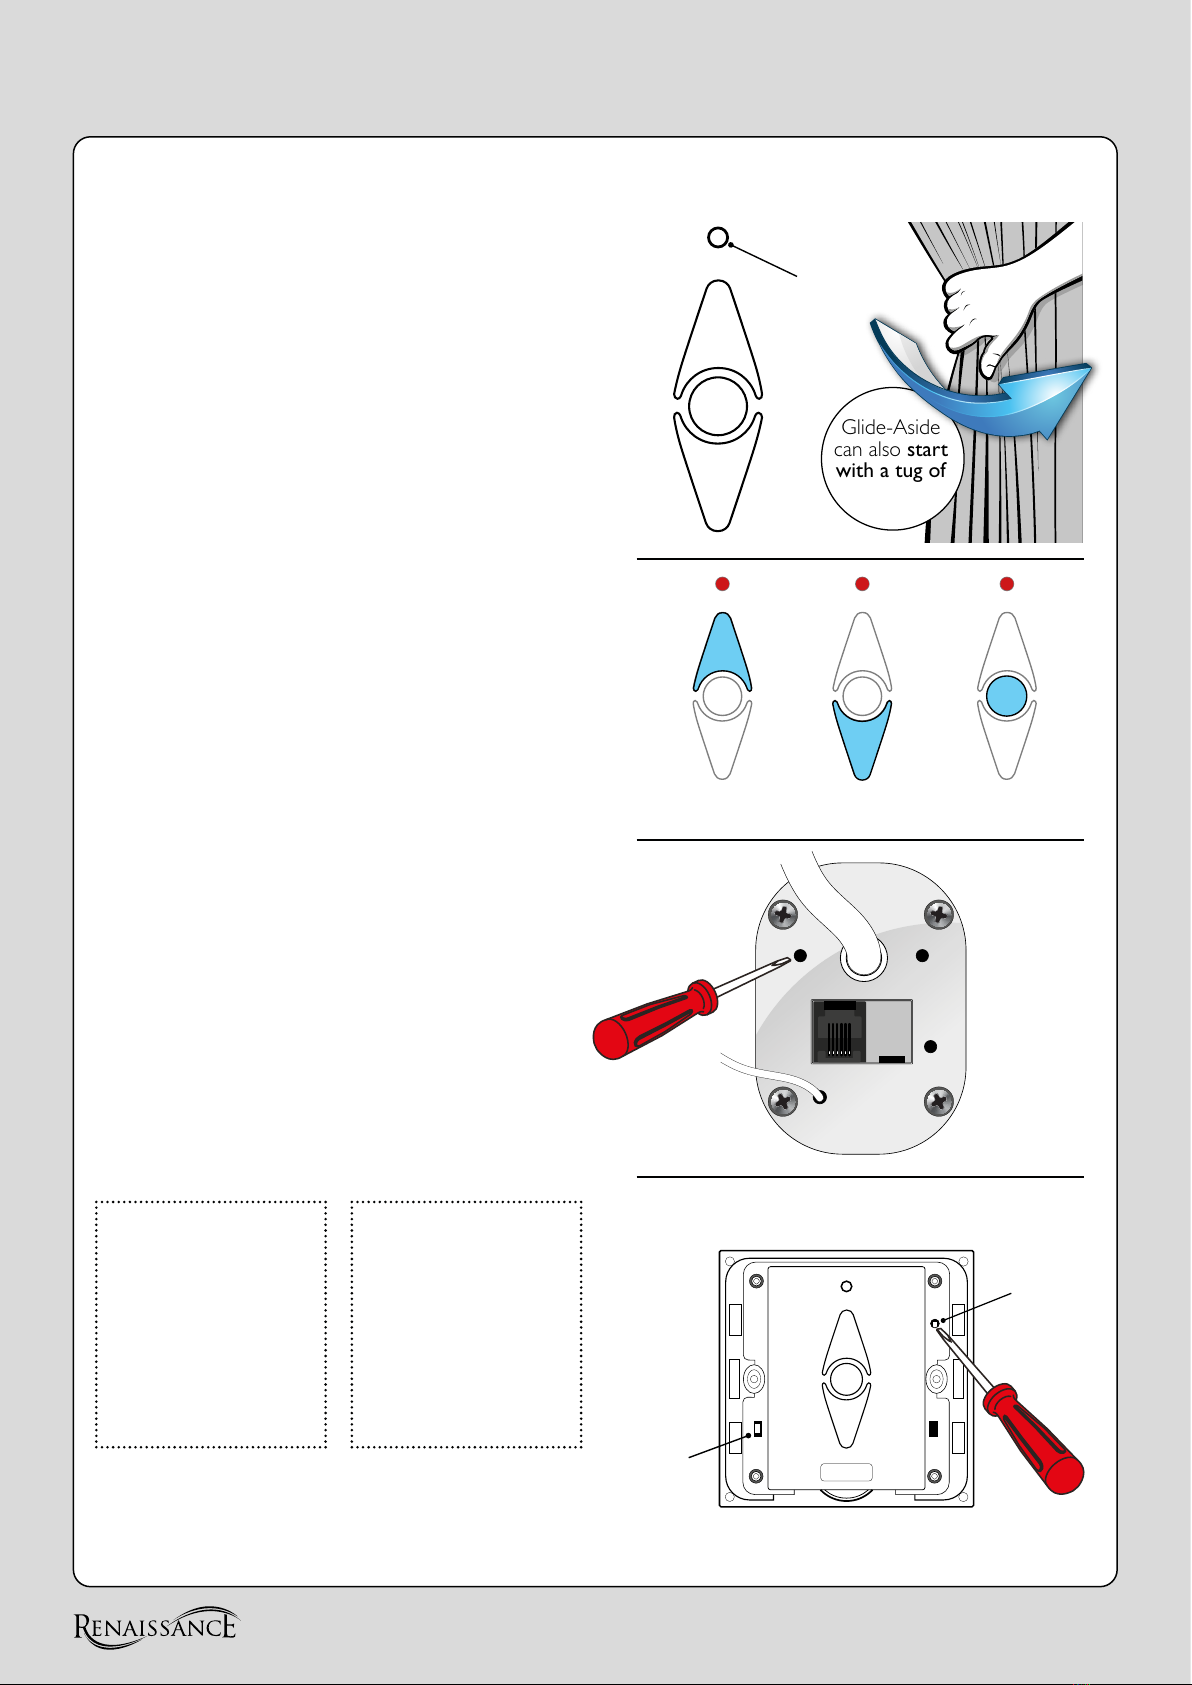
STOP
Glide-Aside
can also start
with a tug of
the curtain
NOTE: You should set the OPEN & CLOSE LIMITS when connecting to power for the first time.
Ensure the remote LED lights up when a button is pressed – if not then your battery may be flat!
DOWN
UP
STOP
LED
Bottom of Handheld Remote Control
CONFIRM
BUTTON
LIMIT
RESET
FRONT
Battery Setup
To insert the Battery
into your Handheld
Remote Control by
simply sliding down
the back and lift off to
reveal the power slot
POWER
CR2450
CLOSEOPEN
ANT
ON OFF
Setting Reset
* Discovery Mode remains active and motor will continue to beep for 25 seconds ONLY. If you run out of time, simply repeat the process again.
Programming your remote Handheld Single Channel Model:BF
REN073-2020NEW-06_v1
Tel 0113 250 4499 •Email sales@rca-uk.com •Visit rca-uk.com