Renault Cobra 6825 User manual

rev04
Operating instructions
Instructions d’utilisation
Istruzioni per l’utilizzo
Instrucciones de uso
FRA
DEU
ENG
ESP
ITA
NLD
PTG
6825
Instrucções de utilização
Gebruiksaanwijzing
Betriebsanleitung
06DE3566A 03/11/2011 1/104
Alarme - alarm - alarm - alarma -
allarme - alarm - alarme

rev04
Dear Customer,
While thanking you for your preference, we hereby inform you that this product is a technologically advanced anti-theft system that
complies with European Union directives.
Please read the instruction manual with care and you will undoubtedly get the utmost satisfaction from the product you have purchased.
You are also advised to keep this manual along with your vehicle documents so that it can be quickly consulted when needed.
4/104, 17/104
Cher Client,
Nous vous remercions pour la confiance que vous avez accordé à notre marque en choisissant ce système de protection, qui a été conçu
pour répondre au standard de performance des constructeurs automobiles et être conforme aux directives européennes en viguer.
Afin de profiter des prestations de votre système nous vous invitons à lire attentivement ce manuel.
Pour une consultation rapide en cas de nécessité, nous vous suggérons de le garder avec les papiers de votre véhicule.
18/104, 31/104
Gentile cliente,
Nel ringraziarla per la scelta fatta la informiamo che questo prodotto è un sistema di antifurto tecnologicamente avanzato, conforme alle
direttive comunitarie.
Legga il manuale con attenzione: trarrà la massima soddisfazione dal prodotto acquistato.
Le consigliamo inoltre di conservare questo manuale insieme ai documenti dell’auto per una più facile consultazione in caso di necessità.
32/104, 44/104
Estimado Cliente,
Agradeciéndole por haber elegido nuestro producto, le informamos que el mismo es un sistema antirrobo tecnológicamente avanzado, de
conformidad con las directivas comunitarias.
Lea atentamente el manual: de este modo el producto comprado lo satisfará plenamente.
Le aconsejamos además conservar este manual junto con los documentos del automóvil para una consultación más fácil en caso de
necesidad.
45/104, 57/104
ENG
FRA
ITA
ESP

rev04
Ex.mo Cliente,
agradecendo pela Sua escolha informamos que este produto é um sistema anti-roubo tecnologicamente avançado, correspondente às
directivas comunitárias.
Aconselhamos leia o presente manual com atenção de modo a poder colher a máxima satisfação do produto adquirido.
Aconselhamos também que conserve o manual juntamente com os documentos do automóvel a fim de o poder consultar facilmente em
caso de necessidade.
58/104, 70/104
Beste klant,
Wij danken u voor de keuze die u gemaakt heeft en informeren u dat dit product een technologisch geavanceerde diefstalbeveiliging is, in
overeenstemming met de Europese richtlijnen.
Lees de handleiding aandachtig door opdat u tevreden kunt zijn over ons product.
Wij raden u tevens aan deze handleiding samen met uw autopapieren te bewaren om hem makkelijk te kunnen raadplegen in geval dit
nodig mocht zijn.
71/104, 83/104
Lieber Kunde,
Wir danken Ihnen hiermit für das Vertrauen, das Sie uns mit dem Erwerb dieser fortschrittlichen Diebstahlsicherung geschenkt haben, die
den geltenden Bestimmungen der Europäischen Union entspricht.
Lesen Sie das Handbuch aufmerksam durch, um alle Leistungen des erworbenen Produkts voll ausnutzen zu können.
Bewahren Sie dieses Handbuch zusammen mit den Kfz-Papieren auf, damit Sie es bei Bedarf sofort finden.
84/104, 96/104
PTG
NLD
DEU

rev04
4
Thank you for choosing this Cobra product. We recommend you to read this guide carefully and keep it for future reference.
Table of contents
1. Introduction 6
2. Arming / disarming of the security system 6
2.1.
Arming / disarming without Main-libre function (use as a conventional transmitter)
6
2.2. Arming / disarming with Main-libre function 7
3. Protection functions 7
4. Alarm cycle 7
4.1. Reduction of audible alarm power 8
4.2. Check control function 8
4.3. Alarm memory 8
5. Main-libre 8
5.1. Selection of the Main-libre (use of the remote control) 9
6. Temporary deactivation of the movement sensor 9
7. Panic function 10
8. Anti-hijack function 10
9. Back-up battery supply 10
10. Service Mode 11
Operating instructions
ENG

rev04
5
11. Adjustment of movement detection sensitivity 11
12. “Turn indicator on” audible warning signal 12
13. Selectable functions – Enabling and disabling procedures 12
14. Automatic timed switch-off function (sleep function) 14
15. Emergency disarming via PIN code 14
15.1. Reading the PIN code 15
15.2. Changing the PIN code 15
16. Features of the radio transmitter 15
16.1. Realignment of a transmitter 16
16.2. Pairing of new transmitters 16
17. Troubleshooting guide 17
18. Technical data 17
Operating instructions

rev04
6
1. INTRODUCTION
Your vehicle is fitted with an original protection system against intrusion attempts, controlled via remote control of your vehicle.
This device ensures complete protection:
1 anti-lifting protection against attempt of theft of tyres/rims and vehicle removal;
2 shock detection;
3 connection wiring protection (anti-sabotage);
4 protection against engine start-up attempts;
5 Panic function.
2. ARMING/DISARMING OF THE SECURITY SYSTEM
2.1. Arming/disarming without Main-libre function (use of the remote control)
To activate the system, press push-button n. 1 of the transmitter once.
Arming is confirmed by:
• Three short flashes of the turn indicators.
• Three sharp sound signals (if this function is enabled – see paragraph 13)
• The dashboard LED lights up.
The LED remains on with constant light for about 60 s. This is the arming period, which allows for the stabilisation of the control unit (first 20
s) and subsequently for the testing of the functions (40 s) – see paragraph 8, “Check control function”.
Once this period has elapsed, the LED starts flashing, to indicate that the system is fully active.
To deactivate the system press push-button n. 1 of the transmitter once.
Disarming is confirmed by:
• A long flash of the turn indicators (*)
• A deep sound signal (if this function is enabled – see paragraph 13)
• The dashboard LED extinguishes.
(*) A short additional flash indicates that the transmitter battery is getting flat and needs replacement.
Operating instructions

rev04
7
2.2. Arming/disarming with Main-libre function
Once ignition is turned off, the security system activates automatically within 21 s after the transmitter has quit the operating range of the
receiver (about 3 meters).
Arming is confirmed by:
• Three short flashes of the turn indicators;
• Three sharp sound signals (if this function is enabled – see paragraph 13);
• The dashboard LED lights up.
The LED remains on with constant light for about 20 s. This is the short arming period, which the unit needs to stabilise. Once this period
has elapsed, the LED starts flashing, to indicate that the system is fully active.
If the Main-libre function is activated, disarming is also automatic as the driver returns to the protected vehicle and the transmitter signal
reaches the operating range of the receiver.
It is confirmed by:
• A long flash of the turn indicators; (*)
• A deep audible tone (if this function is enabled; see paragraph 13);
• The dashboard LED extinguishes.
(*) A short additional flash indicates that the transmitter battery is getting flat and needs replacement.
3. PROTECTION FUNCTIONS
Movement detection. Triggers the alarm in the event of e.g. lifting, towing, forcing the steering lock. It is ensured by a revolutionary sensor
that detects changes in the vehicle position over 360 degrees.
Ignition lock tamper protection. Triggers the alarm if ignition is turned on while the system is armed.
Anti-sabotage protection (see also paragraph 9). In the event that the normal power supply is interrupted (e.g. in the event that the cables
of the battery are cut), the integrated back-up battery allows the alarm system to sound (if armed) and thus signal the sabotage.
4. ALARM CYCLE
Any irregularity being detected:
- by the movement sensor (e.g. an attempt to drag the vehicle away)
- by the ignition lock tamper protection circuit (e.g. an attempt to force the lock) generates a 30 s alarm cycle.
The alarm condition is signalled by the 114 dB piezoelectric siren that is integrated in the device (sound warning) as well as by the flashing
of the turn indicators (visual warning).
Operating instructions

rev04
8
During the alarm condition pressing the remote control button n. 1 once will simply silence the siren and stop the indicators, leaving the
system armed and ready to detect further irregularities. In order to disarm the system it is necessary to press the push-button twice.
In order to minimise environmental disturbance, the alarm cycles in an activation period are limited to a maximum of 10/sensor trigger input.
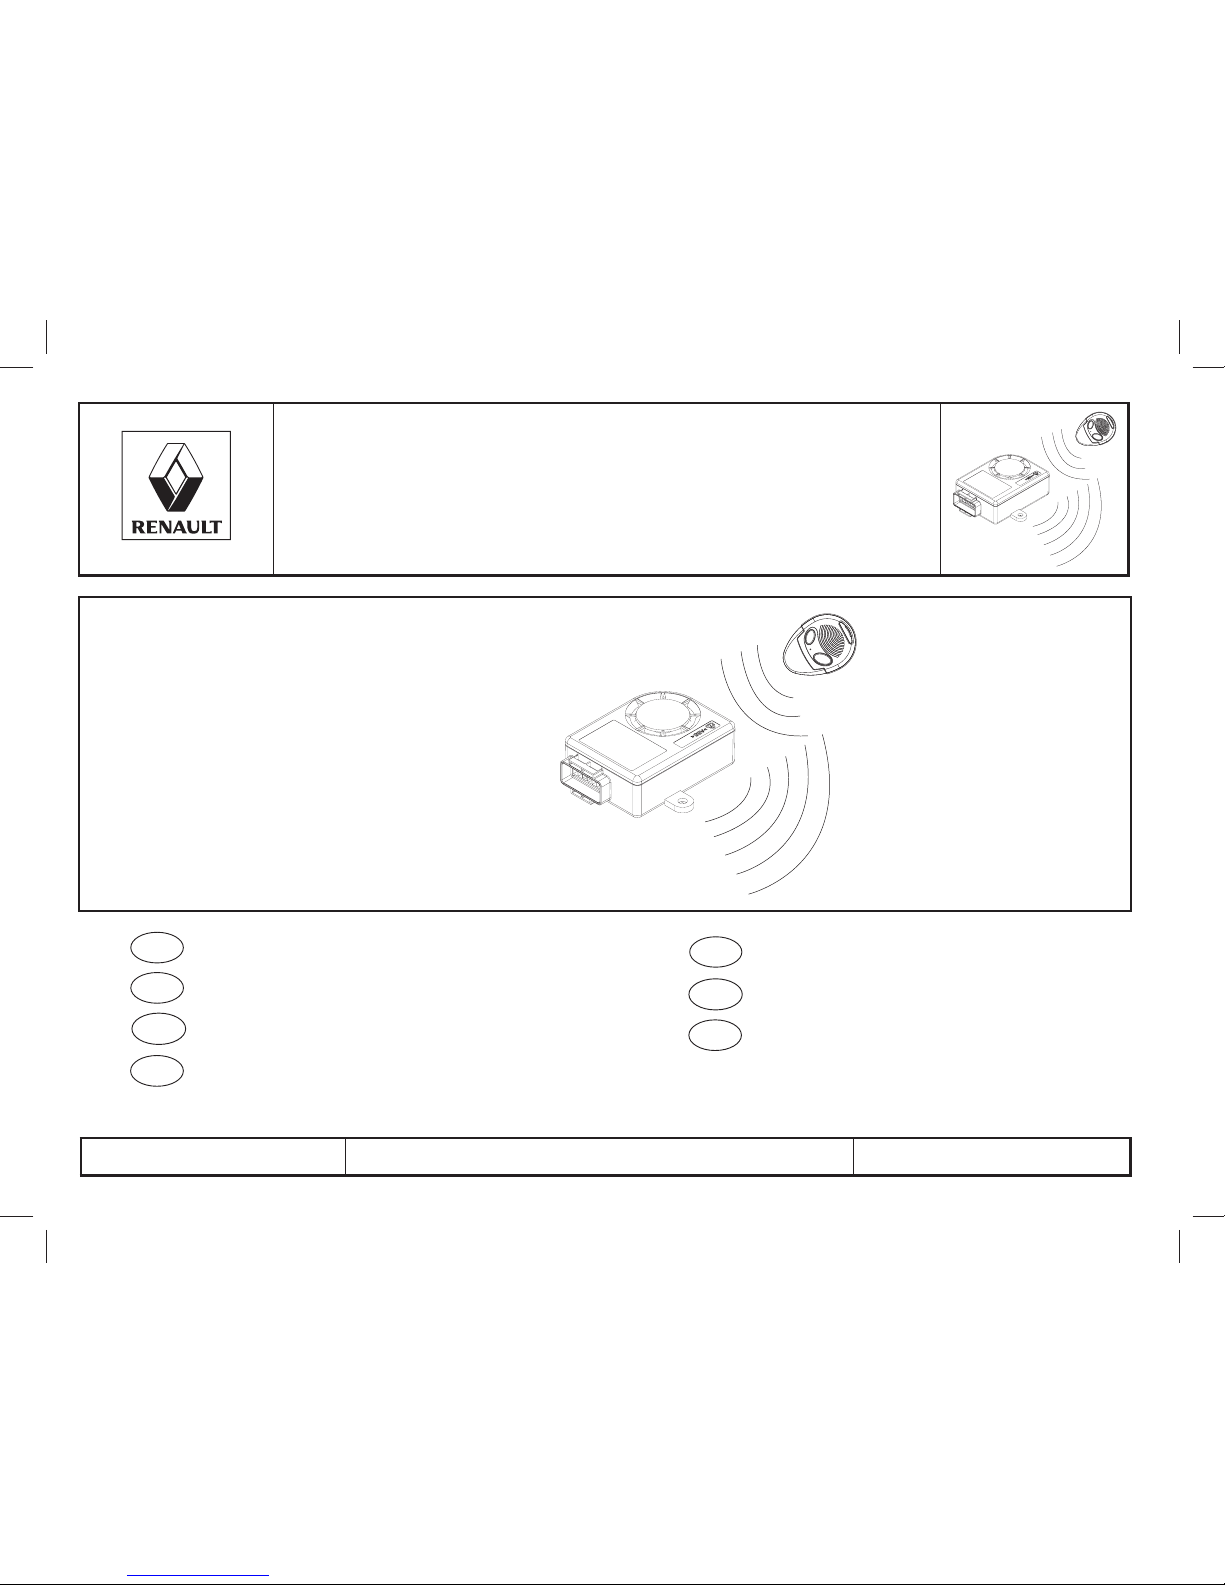
4.1. Check control function
During the arming time the protection functions of the system can be tested without generating an alarm cycle.
Arm the system, wait 20 s to allow for stabilisation, then test the protection functions as appropriate during the remaining 40 s:
a) Test the movement sensor, by e.g. simulating an attempt to force the steering lock, dragging the vehicle or tilting it up from the side-stand
to vertical. ÄIf the simulation is detected correctly, it is signalled by sharp audible signals. If required, adjust sensitivity.
b) Turn ignition on. ÄIf the ignition lock tamper protection circuit works properly, you will hear a sequence of sharp audible signals.
4.2. Alarm memory
If the security system has been triggered during your absence, upon disarming you will be warned by different audible signals, depending
of the nature of the alarm cause:
a) 1 audible signal = tampering with the ignition lock, cut of power supply
b) 2 audible signals = lifting or dragging the vehicle
c) 3 audible signals = a + b
The warning signal remains stored until the end of the inhibition time (60 s) that follows the subsequent arming.
4.3. Reduction of audible alarm power
The sound alarm can be weakened when the vehicle is parked in areas where unnecessary noise has to be avoided. When arming, keep
push-button n. 1 of the transmitter pressed for about 7 s. Upon arming, keep push-button n. 1 pressed for about 7 s. The reduction of the
sound power is confirmed by two deep short audible signals. This setting is valid for one arming period only.
5. MAIN-LIBRE FUNCTION
Besides its operation as a conventional remote control key, the transmitter can be used in Main-libre mode (recognition of the driver). This
function is selectable.
When the Main-libre function is enabled, the transmitter sends a coded signal at regular intervals (1,5 s). The small LED on the transmitter
Operating instructions

rev04
9
flashes at the same rate. In this configuration the security system activates automatically as the transmitter goes beyond the range of the
receiver, that is when the driver walks away from the parked vehicle with the transmitter in his/her pocket more than about 3 meters. Similarly
it deactivates when the driver returns to his/her vehicle and the transmitter signal reaches the receiver. For more details regarding arming
and disarming in Main-libre mode, please see also the information provided in the paragraphs below.
5.1. Selection of the Main-libre function
This selection shall be made on both the control unit and the transmitter.
For the setting of the control unit, please refer to the chart included in paragraph 13, which provides general information about the possible
configurations of the system (5 selectable functions).
Additionally, the Main-libre function shall be activated/deactivated from the transmitter:
To activate, press and hold down both push-buttons at the same time until the small LED located on the transmitter starts to flash quickly
for about 2 s. (*)
To deactivate, press and hold down both push-buttons until you get a long flash from the LED (*).
If you expect to leave this function unused for a long time, it is recommended to deactivate it at least from the transmitter, because this
reduces the current consumption rate conspicuously and makes the battery life longer.
(*): to avoid accidental arming or activation of the panic function (which may occur if the two buttons are not pressed exactly at the same
time), carry out this operation at a distance from the vehicle, outside the range of the receiver.
6. TEMPORARY DEACTIVATION OF THE MOVEMENT SENSOR
The system can be armed without activating the movement sensor.
This facility may be useful to prevent false alarm when anti-theft protection is required but the vehicle is subject to movement (for example
on a ferry).
Procedure:
• Press push-button n. 1 to arm the system;
• Within 20 s press also push-button n. 2;
• A sharp audible signal will confirm that the sensor has been deactivated.
The cancellation is temporary, that is valid for an arming period only. The movement detection function is reinstated the next time the system
is armed.
Operating instructions

rev04
10
7. PANIC FUNCTION
Sound and audible alarm can be triggered deliberately, e.g. with the purpose of deterring a thief buzzing around the vehicle. To do so, press
push-button n. 2 of the transmitter. Panic alarm can be stopped by pressing push-button n. 1. This function is selectable (see paragraph 13).
8. ANTI-HIJACK FUNCTION
This function has been studied in response to the fast growing phenomenon of hi-jacking, that is the forceful seizure of control aboard a
vehicle, which takes place typically while the driver is waiting before a stop sign or the traffic lights.
The system switches to anti-hijack mode if the stolen vehicle is running and the victim of the seizure is still in possession of the remote
control transmitter with enabled Main-libre function.
After the coded signal from the transmitter has been absent for 2 min., the siren starts to sound, first with weakened sound power,
subsequently with full sound power,and the turn indicators flash in an uninterrupted sequence of alarm cycles. When the vehicle ignition is
turned off, the complete security system arms itself automatically and starting becomes impossible. Disarming is only possible via the remote
control or the emergency disarming PIN code.
Remark: the same will happen if you get out of the transmitterrange while the ignition of your vehicle is on.
Important: to be able to benefit from this function if required, do not forget to ALWAYS keep the transmitter with yourself. NEVER
attach it to the ignition key of the vehicle.
This function is also selectable, that is it can be enabled or disabled as chosen by the user. Please refer to the table included in paragraph
13, which provides general information about the possible configurations of the system (5 selectable functions).
9. BACK-UP BATTERY SUPPLY
The 6825 is equipped with internal Ni-MH back-up batteries that recharge with the run of the vehicle.
In the event that the power supply is interrupted (e.g. in the event that the cables of the vehicle battery are cut), the integrated back-up
battery will allow the alarm system to sound (if armed) and thus signal the sabotage. When the power supply is reinstated, the system sets
itself to the same status (armed/disarmed) as it was before the interruption.
Operating instructions

rev04
11
10. SERVICE MODE
If you are using the transmitter in Main-libre mode and you need to have your vehicle serviced but you prefer not to leave the transmitter
with it, this quicker procedure will allow you to temporarily disable automatic arming/disarming and the anti-hijack function without entering
the selection procedure (Service set-up).
Turn ignition on and press push-button n. 2 of the transmitter. ÄThe system sets itself to service mode. This is confirmed by a short sharp
audible signal.
The Main-libre operation mode will be reinstated the first time push-button n. 1 is pressed again. In the meantime you will hear four short
sharp audible reminder signals every time ignition is turned off.
11. ADJUSTMENT OF MOVEMENT DETECTION SENSITIVITY
The movement detector can be adjusted to 8 different levels of sensitivity to displacement + 8 different levels of sensitivity to shock. Normally
it is fine-tuned for optimal performance by the installer during the final testing, but the procedure is simple and sensitivity can be modified
by the user if required.
1. While the system is disarmed, turn ignition on. Ä20 s later the LED lights up and remains on for 3 s.
2. During this lapse of time, press push-button n. 1 of the transmitter. ÄA sharp audible signal confirms you have entered the procedure
of adjustment of the sensitivity to displacement (e.g. towing / lifting).
3. Press push-button n. 1 to increase sensitivity. ÄA short sharp audible signal confirms the success of the operation.
Press push-button n. 2 to decrease sensitivity. ÄA short deep audible signal confirms the success of the operation.
The minimum and the maximum sensitivity levels are signalled by 3 audible signals in sequence.
4. Once the appropriate sensitivity level has been selected, turn ignition off, then turn it on immediately again. ÄA deep audible signal
confirms you have entered the procedure of adjustment of the sensitivity to shock.
5. Operate as described at pos. 3).
6. Once the appropriate sensitivity level has been selected, turn ignition off. ÄA sharp audible signal confirms you have quit the selection
procedure.
To test the movement sensor and determine the optimal sensitivity level more easily, you can simulate displacement / shock before quitting
the procedure; if the sensitivity is sufficient to trigger the unit, you will get a sharp audible signal (instead of a full alarm cycle).
Remarks:
• To ensure accurate adjustment, avoid generating shocks while selecting the level of sensitivity to displacement.
• It is recommended to evaluate the optimal sensitivity levels once both adjustments have been set, before quitting the procedure.
Operating instructions

rev04
12
12. “TURN INDICATOR ON” AUDIBLE WARNING SIGNAL
This ancillary function does not relate to anti-theft protection, but it can make riding easier and safer. If you enable it, the system will remind
you with audible warning signals after a turn indicator has been flashing for more than 24 s.
The procedure of selection is described in paragraph 13.
13. SELECTABLE FUNCTIONS – ENABLING AND DISABLING PROCEDURES
The functions listed beloware selectable, that is they can be enabled or disabled as chosen by the user. The set-up is stored until the next
time a different configuration is selected.
- Main-libre (see paragraph 5)
- On/off audible signals (see paragraph 2) and panic function (see paragraph 7)
- “Turn indicator on” audible warning signal (see paragraph 12)
- Anti-hijack function (see paragraph 8)
- Polarity of instantaneous alarm trigger input - NOT USED FUNCTION (this selection shall be operated by the installer and shall not be
altered by the user after the security system has been fitted).
Procedure:
While the security system is disarmed, turn ignition on, press and hold down push-button n. 1 of the transmitter about 7 s, until the LED lights
up, then release. ÄThe LED remains on about 3 s. ÄDuring this lapse of time, press push-button n. 1 again. ÄA short sharp audible
signal confirms the procedure has been entered. The LED switches off shortly, then it provides five different visual indications that relate to
the five selectable functions.
Operating instructions

rev04
13
Please refer to the chart below:
VISUAL
INDICATION
SELECTABLE
FUNCTION
TO SELECT TO DESELECT
CONFIRMATION SIGNAL CONFIRMATION SIGNAL
1 flash Mode Main-libre
Press push-button n. 1 of the transmitter after
the first flash
Three (3) sharp audible signals follow
Press push-button n. 2 of the transmitter after
the first flash
One (1) sharp audible signal follows
2 flashes Arming and disarming audible
signals + panic function
Press push-button n. 1 of the transmitter after
the second flash
Three (3) sharp audible signals follow
Press push-button n. 2 of the transmitter after
the second flash
One (1) sharp audible signal follows
3 flashes “Turn indicator on” audible warning
signal
Press push-button n. 1 of the transmitter after
the third flash
Three (3) sharp audible signals follow
Press push-button n. 2 of the transmitter after
the third flash
One (1) sharp audible signal follows
4 flashes Anti-hijack function
Press push-button n. 1 of the transmitter after
the fourth flash
Three (3) sharp audible signals follow
Press push-button n. 2 of the transmitter after
the fourth flash
One (1) sharp audible signal follows
5 flashes
Polarity of the instantaneous alarm
trigger input (this is a DEALER
operation !!!)
NOT USED FUNCTION
Press push-button n. 1 of the transmitter after
the fifth flash
Positive polarity
Press push-button n. 2 of the transmitter after
the fifth flash
Negative polarity
Once the selections are finalised, a long low audible sound will confirm that they have been entered successfully.
Remark 1): it is sufficient to operate when you come to the functions that you wish to modify. It is not necessary to re-confirm those
selections that are already appropriate.
Remark 2): in the event of a mistake, turn ignition off to quit without making any changes.
Remark 3): do not alter the polarity of the instantaneous alarm trigger input (5 flashes) as set up by the installer, or this protection function
will stop working NOT USED FUNCTION.
Remark 4): the audible on/off signals and the “panic” function are not allowed by the Road Rules in some Countries. Please check your local
regulations and set up the system accordingly.
Operating instructions

rev04
14
14. AUTOMATIC TIMED SWITCH-OFF FUNCTION (SLEEP FUNCTION)
Although the current consumption rate of this security systems is extremely low, another special feature has been implemented with the
purpose of protecting the battery of your vehicle: the radio receiver that is integrated in the unit switches off automatically after the vehicle
has been unused for 7 days and the current consumption rate drops considerably. When it is in sleep condition, the alarm system does not
therefore react to the radio transmitter.
In order to reinstate the normal functions of the device:
• If the system is disarmed, turn ignition on;
• If the system is armed, turn ignition on and press push-button n. 1. If the transmitter is not available, enter the emergency disarming pin
code as described in paragraph 15. If turning the ignition on is not followed by pressing the transmitter on/off button or the pin code is not
entered correctly, the siren will sound.
15. EMERGENCY DISARMING VIA PIN CODE
In the event of loss or failure of the radio remote control, you can deactivate the security system by means of the procedure below, using the
PIN code you can find on the last page of this manual or the code that you have possibly entered in replacement (see paragraph 15.2). The
last page of this manual includes also a quick description of the disarming procedure; we recommend that you record or apply the PIN code
there, then cut the card away and keep it in your wallet for future reference.
1. Turn ignition on. ÄThe alarm starts to sound.
2. Wait. ÄThe alarm stops. The LED switches off, then it starts to flash slowly.
3. Count the number of flashes. As soon as the number of flashes equals the first number of your PIN code, turn ignition off (for example, if
the first number of your code is 3, then wait for the LED to flash 3 times before turning the ignition OFF). ÄThe LED switches off.
4. Within three s, turn ignition on again. Count the number of flashes. As soon as the number of flashes equals the second number of your
PIN code, turn ignition off (for example, if the second number of your code is 10, then wait for the LED to flash ten times before turning
the ignition OFF). ÄThe LED switches off.
5. Enter the remaining numbers of the PIN code using the same procedure. ÄIn the event of a mistake, an alarm cycle will follow. At the
end of the alarm cycle it will be possible to restart the procedure.
ONCE ALL THE DIGITS HAVE BEEN ENTERED CORRECTLY, THE SYSTEM DISARMS WITH A LONG BLEEP FOLLOWED BY FOUR
SHORTER AUDIBLE SIGNALS, THEN IT SWITCHES TO SERVICE MODE (see paragraph 10).
Operating instructions

rev04
15
15.1. Reading the PIN code
If you have lost the PIN code but you have a working transmitter, you can recover the code with this simple procedure:
• While the system is disarmed, turn ignition on then press and hold down push-button n. 1 of the transmitter about 7 s. ÄThe LED
illuminates about 3 s, then it switches off for a short time and subsequently it displays 4 strings of flashes.
• Count and note the number of flashes in each string. Those are the numbers of the PIN code.
• The end of the reading is confirmed by a short sharp audible signal.
15.2. Changing the PIN code
If you wish, you can replace the original PIN code by a new one. The procedure is described below:
• While the system is disarmed, turn the ignition on then press and hold down push-button n. 1 of the transmitter about 7 s. ÄThe LED
illuminates about 3 s.
• During this lapse of 3 s, press push-button n. 2. ÄA short sharp audible signal confirms you have entered the procedure. The LED
extinguishes, then it starts to flash slowly.
• Count the flashes. As soon as you reach the number you have chosen as the first number of your PIN code, turn ignition off.
• Turn ignition on again and follow the same procedure to select the 3 remaining numbers. ÄA short sharp audible signal will confirm that
the procedure has been completed successfully.
• Read the code you have entered (see paragraph 15.1) to make sure it is correct, then record it.
Remark 1): You can select figures between 1 and 18. Once the LED has flashed 18 times, the procedure stops and needs to be repeated:
Remark 2): To quit the procedure without making any changes, turn ignition off before the new code is completed.
16. FEATURES OF THE RADIO TRANSMITTER
The radio transmitter (p/n 8742) has two buttons with different functions and a small LED in the middle, that
flashes during transmission.
It is protected against the use of code scanners and grabbers.
It is powered by a Lithium CR2032 3 V-battery. When the battery is close to flat, the user is warned by an
additional flash of the turn indicators upon disarming. Replace it as soon as possible and dispose of it at the
appropriate collection points. Do not delay the replacement of the battery, especially if you are using the Main-
libre, because the system activates automatically when it does not receive any signals from the transmitter!
Operating instructions

rev04
16
Remark: to ensure good contact, take the new battery out of its package and place it into the transmitter without touching it directly with your
fingers (use a soft cloth to manipulate it).
16.1. Realignment of a transmitter
The transmitters that come with the kit are paired originally, therefore they are already operating. Realignment is needed when a paired
transmitter gets desynchronised from the receiver.
This can happen if e.g. the transmitter is operated repeatedly outside the range of the receiver, because the transmitted code is incremental,
that is it changes every time the alarm is turned on/off thanks to an advanced method of random encryption (anti-scanning / anti-grabbing
protection).
To realign, just press and hold down push-button n. 1 of the transmitter for at least 7 s. A sequence of flashes of the turn indicators will confirm
the success of realignment. If the system is armed, it will disarm.
16.2. Pairing of new transmitters
In the event of loss of failure, one or two new transmitters can be paired as follows:
• If the security system is armed, disarm it with the remaining transmitter (if it is available) or enter your emergency disarming PIN code (see
procedure in paragraph 15).
• Turn ignition on and wait 20 s. ÄThe dashboard LED illuminates and remains on about 3 s.
• Before the dashboard LED extinguishes, turn ignition off and then on again. ÄA short and sharp sound signal confirms that the system is
ready for pairing. The LED switches off. You have 6 s at your disposal to complete the operation as described below.
• Press push-button n. 1 of a transmitter (or press both transmitters in turn, if you want to pair two). ÄThe LED illuminates shortly, to confirm
that pairing has been successful.
• Once the operation is completed, turn ignition off. If ignition remains on, the system will quit the pairing procedure anyway. In both cases
the exit from the procedure is confirmed by a short sharp audible signal.
Important:
1) For security reasons, every system can accept a maximum of two remote transmitters.
2) Every pairing procedure disables the transmitters which the receiver had previously been paired with. Therefore: if you have lost a
transmitter and you wish to pair a spare one, do not forget that the one which has remained in your possession has to be re-paired too (or
it will stop working). If you do not wish or you cannot pair a spare transmitter in a short time, re-pair the transmitter which has remained
in your hands: so doing you will disable the one you have lost.
Operating instructions

rev04
17
17. TROUBLESHOOTING GUIDE
Malfunction Recommended inspections / operations
The alarm does not respond to the
transmitter.
- Make sure the system has not entered the sleep condition (see paragraph 14)
- Operate the transmitter closer to the unit (the area might be affected by noises interfering with the radio
signal)
- Replace the transmitter battery
- Realign the transmitters (see paragraph 16.1)
- If none of these operations is successful, contact your dealer (in the meantime, if the system is armed,
disarm it with the PIN code (see paragraph 15)
The system is not triggered by
moving/lifting
- Has the inhibition time elapsed?
- Is the movement detector activated (not deselected)?
- If necessary, please adjust the movement detector (see paragraph 11).
- If none of these operations is successful, contact your dealer
18. TECHNICAL DATA
Power supply (control unit) Nom. 12 V Max 17 V Min. 9 V
Current consumption rate < 1 mA OFF; 1 mA ON (including the LED)
Back-up battery Rechargeable 7,2V 170 mAh NiMH battery
Operating temperature -20 °C / +85 °C
Siren sound power 114 dB @ 1 m
Size of the control unit 90 x 67 x 30 mm
Size of the transmitter 50 x 37 x 12,5
Transmitter battery 3 V CR2032
Transmitter battery life Min.12 months (with Main-libre function on)
Operating instructions

rev04
18
Merci d’avoir choisi le système de sécurité Cobra. Nous vous recommandons de lire et garder soigneusement ce mode d’emploi.
Répertoire
1. Introduction 20
2. Armement / désarmement du système de sécurité 20
2.1 Armement / désarmement sans mise en service de la fonction Main-libre
(manipulation des émetteurs) 20
2.2 Armement / désarmement avec la fonction Main-libre 21
3. Fonctions de protection 21
4. Déclenchement de l’alarme 21
4.1 Réduction de la puissance de l’alarme acoustique 22
4.2 Fonction Check control 22
4.3 Mémorisation des déclenchements 22
5. Fonction Main-libre 23
5.1 Sélection de la fonction Main-libre 23
6. Suppression temporaire du détecteur de déplacement 23
7. Fonction panique 24
8. Fonction anti-agression 24
9. Auto-alimentation 24
Instructions d’utilisation
FRA

rev04
19
10. Mode garage 25
11. Réglage de la sensibilité du détecteur de déplacement 25
12. Rappel acoustique “indicateur de direction en service” 26
13. Fonctions sélectionnables – Procédure de mise en service et de mise
hors service 26
14. Désarmement automatique temporisé (fonction sleep)27
15. Désarmement de secours par code PIN 28
15.1 Lecture du code PIN 28
15.1 Personnalisation du code PIN 29
16. Caractéristiques de la télécommande radio 29
16.1 Réalignement d’un émetteur 30
16.2 Programmation de nouveaux émetteurs 30
17. En cas de panne 31
18. Données Techniques 31
Instructions d’utilisation

rev04
20
1. INTRODUCTION
Votre véhicule est équipé d’un système de protection contre les tentatives de vol, contrôlé par radio commande.
Le système assure une protection complète.
1. Protection anti-soulèvement.
2. Détection des chocs.
3. Protection du faisceau de connexion (sabotage).
4. Protection contre les tentatives de démarrage.
5. Fonction panic
2. ARMEMENT / DESARMEMENT DU SYSTEME DE SECURITE
2.1. Armement / désarmement sans mise en service de la fonction Main-libre (manipulation des
télécommandes)
Pour armer le système, appuyez une fois sur le bouton n. 1 de l’émetteur. L’armement est confirmé par :
• Trois clignotement courts des indicateurs de direction
• Trois signaux sonores aigus (si cette fonction est activée – voir paragraphe 13)
• L’allumage du voyant LED.
La LED demeure allumée avec lumière fixe pendant env. 60 s. Il s’agit de la période d’inhibition, qui permet la stabilisation de la centrale (au
cours des premières 20 s) et ensuite l’essai des fonctions de protection (40 s) – voir paragraphe 8 « Fonction check control ». Une fois cette
période écoulée, la LED commence à clignoter, pour indiquer que le système est opérationnel à tous les effets.
Pour désarmer le système, appuyez une fois sur le bouton n. 1 de l’émetteur. Le désarmement est confirmé par:
• Un clignotement prolongé des indicateurs de direction (*)
• Un signal sonore grave (si cette fonction est activée – voir paragraphe 13)
• L’extinction du voyant LED.
(*) Un court clignotement supplémentaire indique que la batterie de la télécommande va s’épuiser et qu’il faut la remplacer au plus tôt.
Instructions d’utilisation
Table of contents
Languages:
Other Renault Car Alarm manuals