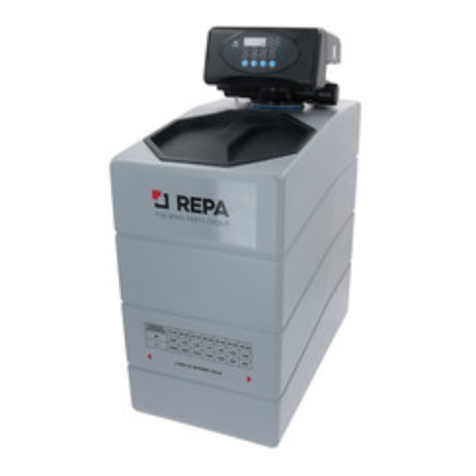
REPA ECO User manual

ECO
WATER SOFTENER
Instruction manual

2
INSTRUCTION MANUAL 3
MANUALE D‘USO 11
BEDIENUNGSANLEITUNG 19
MANUAL DE INSTRUCCIONES 27
MANUEL D‘INSTRUCTIONS 35
TABLE OF
CONTENTS

3
ECO
WATER SOFTENER
Water softener system with chronometric
head AUTOTROL 366/604
Instruction manual
Version: 1
Issued date: January 2021
INSTRUCTIONS FOR USE 4
ADJUSTMENTS 7
MAINTENANCE 8
TROUBLE SHOOTING 9
Please read the instruction manual carefully before using the machine.
Please keep it in a safe place for future reference.

4
DESCRIPTION OF SIMPLIFIED ELECTRONIC TIMER 366/604
The system has a valve with a timer where all operation controls are located.
COMMISSIONING
In order to use the system in a safe way, it is fundamentally important to follow the indications of the next paragraphs, as
well as checking the protection and safety devices before each use.
IN ORDER TO START OPERATING THE SYSTEM, MAKE SURE THAT:
• The water connections are compliant with the standards;
• The electrical connections are compliant with the standards.
PROCEDURE
1. Turn on the timer and start up the forced regeneration by pushing the button .
2. Open the water supply tap.
3. Check the discharge device so that air goes out before water for 1 minute in total.
4. Close the supply tap and make the regeneration stages proceed by keeping the and buttons pushed at the same
time for 4 seconds and than release.
5. Let it continue in automatic mode until the valve returns to its initial position.
6. Fill the vat with salt, add 10L of water and operate the system by opening the supply and the output taps, closing the by-
pass.
If the water is still a bit coloured, leave it flush from the output tap until it gets clear.
OPERATING THE SOFTENER
IMPORTANT
Before operating the softener clear the air form the system and remove the resins that, at the beginning, could give a yellowish/red-
dish colour to the water.
CONTROLS
A Start manual regeneration
B Display
C Time setting
D Salt consumption setting
E Programming regeneration at days interval
F Cap closure
G Indication of regeneration delay/decimal value
H Position indicator
I Camshaft indicator
INSTRUCTIONS FOR USE
A B C
FG
DE
H
I

5
The system has 4 dierent regeneration cycles indicated by the codes U1 – U2 – U3 – U4.
Choose the most suitable for your application according to the size of the cylinder and to the quantity of resin it contains.
IMPORTANT
The regeneration cycle is set by the manufacturer.
TIMER AND ICONS FRONTAL DESCRIPTION
DISPLAY
The display shows clearly visible 2-digit numbers.
SET UP BUTTONS
Set ups have been simplified and reduced for each function and for each single button.
MANUAL REGENERATION
It is possible to set up an additional regeneration at any time or making it start immediately by pushing the relevant button.
POSITION INDICATOR
During the regeneration process the current position is displayed.
FRONTAL CLOSING BLOCK
A special device blocks the opening of the frontal.
The buer battery, which maintains time set up in case of black out, is not present.
The system maintains the time stored for about 6 hours and then resets.
This buttons allows setting the hour, the system does not allow to set minutes.
This button allows setting the quantity of brine needed for resin regeneration.
This setting is made by the manufacturer.
This button allows setting the regeneration break.
It is possible to choose a regeneration break every 8 working hours (3 regenerations per day) up to a regeneration every 30
days.
The regeneration time of reference is 2:00 a.m.. In case of 3 regenerations per day, these will start at 2:00 a.m., 10:00 a.m.
and at 6:00 p.m., while in case of 2 regenerations per day, these will start at 2:00 a.m. and at 2:00 p.m.

6
STOP
The system can be stopped as follows:
TEMPORARY STOP
• Unplug the power and close the water taps.
• Disconnect the connection pipes.
• Empty the brine tank and wash it inside.
• Clean the softener and place it in a dry place, protected from the elements and with restricted access (keep it out of
children’s reach or incompetent persons).
PERMANENT STOP
Repeat the same operations as for temporary stop, then proceed to:
• Wrap the machine with cardboard, polystyrene or other materials and deliver it to the sta in charge (authorized waste
disposal or second-hand collection).
RESTART AFTER A LONG PERIOD OF INACTIVITY
• Always ask a skilled and qualified technician to ensure that the system has kept well-protected electrical equipment.
• Supply voltage to the machine connecting it to the power supply and check the timer.
• Slowly open the water input valve and start a forced regeneration.
• Introduce salt into the related container, 10 l of mild water and 50 ml common water disinfectant such as Amuchina.
• Wait till the end of regeneration (not shorter than 2 ½ hours), then open the water output valve and close the by-pass
valve.
IN CASE OF EMERGENCY/DANGER, THE SYSTEM CAN BE STOPPED AS FOLLOWS:
1. Disconnecting power supply;
2. Closing water input/output valves.
In this way you can immediately stop the system.
WARNING
Make sure water does not get inside the system during out-of-service periods in order to avoid short-circuits or malfunctioning.

7
SET UP
ADJUSTMENTS
IMPORTANT
During the set up procedure, if no button is pushed for 5 seconds the display will automatically show current time and the system
will set to the operating stage
IMPORTANT
This adjustment is generally made by the manufacturer, though from the time of regeneration to that of installation it could reset.
For the adjustment strictly follow the indication of the table of litres of resin contained in the machine (see table 1).
TIME ADJUSTMENT
Push the icon button until the display shows current time. The button only allows setting the hour until 11:00 p.m., than
it goes back to 00:00. The default time is 00:00.
REGENERATING QUANTITY ADJUSTMENT
REGENERATION FREQUENCY ADJUSTMENT
Push the icon button until displaying the following options:
.3 ) Regeneration frequency every 8 hours (3 times per day). At 2:00 a.m., 10:00 a.m. and at 6:00 p.m.
.5 ) Regeneration frequency every 12 hours (2 times per day). At 2:00 a.m. and at 2:00 p.m.
1-30 ) With the value set at 1, you will have a daily frequency, with 2 the regeneration will start every 2 days and so on until
the value of 30, with a regeneration every 30 days. The regeneration will always start at 02:00 a.m.
Push the icon button until the display shows the value derived from the table attached.
MANUAL REGENERATION
DELAYED REGENERATION
For a delayed regeneration, push the con button and release it immediately.
In this way, a delayed regeneration will be set, at 2:00 a.m. of the following day, independently from the regenerations already
set. A flashing dot will be displayed next to the time to confirm the correct set up.
To cancel this set up, push the button again.
IMMEDIATE REGENERATION
For an immediate regeneration keep the icon button pushed for 3 seconds.
The display will show ( - - ) in vertical cascade, indicating the counter washing stage processing.
For each stage C2 - C3 etc. will be displayed until the regeneration is complete has been completed.
To scroll the regeneration cycle after having launched manual regeneration, push and release the and buttons at the
same time until the display shows the following cycle.
To reset the regeneration programme and go back to the operating stage push the and icon buttons at the same time
for 3 seconds.

8
TABLE 1 ADJUSTMENT OF REGENERATING AGENT (BRINE)
LT RESIN MODELS ADJUSTMENT TIMER SET UP
4 ECO 5 0.6 U3
6 ECO 8 0.9 U3
8 ECO 12 1.2 U3
TABLE 2 CYCLE DESCRIPTION AND TIMES
C# CYCLE
DESCRIPTION
REGENERATING TIMES FOR
SINGLE PHASES AND CYCLES NOTES
U1 min U2 min U3 min U4 min
C1 Counter-washing 8 8 1 3 A washing is done inverting the flow of water in the resin
C2 Brine suction and
slow rinse 25 45 25 45 Brine is sucked from the salt container and resin is
rinsed slowly
C3 Repressurization 3 3 3 3 Valve pause
C4 Fast rinse 3 3 1 3 Resin is rinsed fast
C5 2nd Counter-washing 1 1 1 1 Resin is repositioned with a
2nd counter-washing
C6 2nd Fast rinse 1 1 1 1 2nd fast rinse
C7 Brine level restoring Water is sent to the salt container to produce new brine
for the following regeneration
GENERAL WARNINGS
This chapter contains the complete list of requirements and of procedures referring to maintenance.
A good maintenance requires ordinary checks and inspections, performed directly by the operator and/or by skilled sta,
and periodic checks, including cleaning operations and replacement, performed by skilled sta.
During cleaning, maintenance or repair operations, be careful not to disperse the products used in the environment.
After all maintenance operations restore and correctly fasten all protection removed or opened.
MAINTENANCE
IMPORTANT
Do not perform any operation, change or repair except those indicated by this manual.
Only skilled technical sta or sta authorized by the manufacturer have the necessary know-how of the system and the experience
to correctly perform any operation.
All maintenance sta must comply with safety regulations and must wear protection gloves and shoes to move or remove objects
that could be harmful.
WARNING
All maintenance operations must be performed with the system in the” safety stop” condition and disconnected from all power and
supply sources.

9
MAINTENANCE
Immediately repair possible failures or damages to covers and electric appliances.
OPERATIONS BEFORE COMMISSIONING:
• General visual inspection (evident warps or damages of structure, protections, etc.);
• Check of the conditions of the power supply cable.
The softener does not require any kind of ordinary maintenance but the check and refill of salt.
The hour set must correspond to current time. It is important to check the softener periodically to safeguard the eciency
of connected devices.
These operations include checking water hardness and input and output capacity, the right execution of the dierent stages
and the conditions of resins to replace them if necessary.
DANGER
Never perform the operations above with wet or damp hands.
TROUBLE SHOOTING
PROBLEMS, CAUSES AND SOLUTIONS
PROBLEMS CAUSES SOLUTIONS
Regeneration starts at a wrong time Timer set up incorrectly Set up the timer
The programmer stops during
the regeneration cycle
Burnt out engine Replace
Power supply failure Check connection
Incorrect voltage or frequency Check the right voltage or frequency
The camshaft is blocked Remove damaging bodies from the valve
or from the camshaft
Excessive supply pressure Install a pressure adjuster
The softener regenerates or discharges
water continuously
Valve 3 or 4 or both remain open Remove damaging bodies that could
make the valves remain open
Power supply failure Check the voltage
Blocked or burnt out engine Replace the engine
PERIODIC CHECKS
AFTER THE FIRST 6-12 MONTHS, AND THEN EVERY 6-12 MONTHS:
Clean the salt container following the procedure hereunder:
• Remove the remaining salt from the bottom;
• Clean all the walls of the container from muddy, oozy or dry salt deposits;
• Rinse several times with running water using a water disinfectant such as Amuchina and a sponge;
• Rinse again, add the same quantity of water and then add the salt.
Periodically clean the washable cartridge of the pre-filter by removing all impurities from the bottom and from the surface
of the cartridge. It is sucient to use running water.

10
PROBLEMS CAUSES SOLUTIONS
The programmer does not regenerate
automatically or when the start up
button is pushed
Power supply disconnected Connect
Damaged engine Replace engine
Damaged card Replace card
The programmer does not regenerate
automatically but only by pushing the
start up button
Daily regeneration has not been set Set up regeneration
Lack of softened water between
two cycles
Incorrect regeneration Repeat the regeneration cycle checking
that the correct amount of salt is provided
Polluted resins Wash or replace resins
Wrong set up of the quantity of salt Check and set up again
Mixing screw too fastened Unfasten and check hardness
External by-pass, if present, open Close by-pass
Failure in brine suction
Insucient input pressure Set at least 1.4 bar
Output pipe blocked Remove obstruction
Obstructed injector Clean injector
Damaged injector Replace
Valves 2 and 6 blocked in
the open position Remove the cause of the block
Valve line not sealed Replace the whole valve line
An excessive quantity of brine is fed
into the tub
Valve 1 remains open Manually activate the valve to remove
the cause of the block
The input speed has not been checked Remove and clean the adjuster
Valve 2 does not remain closed during
suction
Manually activate the valve to remove
the cause of the block
Air suction in the connection pipe to
the tub
Check the tightness of brine connector
and pipes
Excessive quantity of salt set Set up again following the indications of
the relevant table
Salt consumption not corresponding to
what is foreseen
Wrong adjustment Set up again
Damaging bodies in the brine flowmetre Remove and clean the flowmetre
Intermittent or irregular brine suction Insucient input pressure Set at least 1.4 bar
Damaged injector Replace injector
After regeneration water has not been
softened
The softener did not regenerate Repeat regeneration
Salt shortage in the tub Refill the salt in the tub
Lack of resins Replace resins
Excessive or insucient capacity of the
counter-washing
Wrong type of adjuster Replace
The adjuster is obstructed Remove and clean
Water comes out from the tub after
regeneration Membrane 1 remains open
Manually activate it to remove
impurities blocking it or replace the
membrane series
Hard operation water seeping
Wrong regeneration Repeat regeneration
O-ring 44F damaged Replace
External by-pass, if present, open or
mixing screw adjusted incorrectly
Close the by-pass or adjust the mixing
screw

11
ADDOLCITORE
ECO
Impianto addolcitore d’acqua con testata
cronometrica AUTOTROL 366/604
Manuale d‘uso
Versione: 1
Data di emissione: Gennaio 2021
ISTRUZIONI D’USO 12
REGOLAZIONI 15
MANUTENZIONE 16
RICERCA GUASTI 17
Leggere attentamente il manuale d’uso prima di utilizzare la macchina.
Si prega di conservarlo in un luogo sicuro per future consultazioni.

12
DESCRIZIONE TIMER ELETTRONICO SEMPLIFICATO A TEMPO 366/604
L’impianto è dotato di una valvola con un timer nel quale sono presenti tutti i comandi di funzionamento.
MESSA IN FUNZIONE
Per un utilizzo in sicurezza dell’impianto è indispensabile seguire accuratamente le indicazioni dei paragrafi seguenti,
nonché ricontrollare i dispositivi di protezione e di sicurezza prima di ogni nuovo utilizzo.
PER LA MESSA IN FUNZIONE DELL’IMPIANTO, VERIFICARE CHE:
• Le connessioni idrauliche siano a norma;
• Le connessioni elettriche siano a norma.
PROCEDURA
1. Azionare al timer e avviare la rigenerazione forzata premendo il tasto .
2. Aprire il rubinetto di erogazione dell’acqua.
3. Controllare il dispositivo di scarico in modo che l’aria esca prima dell’acqua per un totale di 1 minuto.
4. Chiudere il rubinetto di erogazione e fare eseguire le fasi di rigenerazione tenendo premuto per 4 secondi
contemporaneamente i tasti e , poi rilasciare.
5. Lasciare proseguire in modo automatico fino a che la valvola torna alla posizione iniziale.
6. Riempire la vaschetta di sale, aggiungere 10lt di acqua e avviare il sistema aprendo il rubinetto di entrata e quello di
uscita, chiudendo il by-pass.
Nel caso l’acqua risulti ancora leggermente colorata, lasciarla scorrere dal rubinetto di uscita finchè non diventa trasparente.
AVVIAMENTO ADDOLCITORE
IMPORTANTE
Prima di mettere in funzione l’addolcitore eliminare l’aria dal sistema e rimuovere le resine che, all’inizio, potrebbero dare un colore
giallastro/rossastro all’acqua.
COMANDI
A Avvio rigenerazione manuale
B Display
C Regolazione orario
D Regolazione consumo sale
E Programmazione rigenerazione a intervalli di giorni
F Chiusura coperchio
G Indicatore del ritardo alla rigenerazione/punto decimale
H Indicatore di posizione
I Indicatore di albero a camme
ISTRUZIONI D’USO
A B C
FG
DE
H
I

13
Il sistema dispone di 4 dierenti cicli di rigenerazione indicati dalle sigle U1 – U2 – U3 – U4.
Si raccomanda di scegliere quello più idoneo alla propria applicazione, in base alla dimensione della bombola e alla quantità
di resina in essa contenuta.
IMPORTANTE
Il ciclo di rigenerazione è impostato dal costruttore.
DESCRIZIONE FRONTALE TIMER E SIMBOLI
DISPLAY
Il display evidenzia numeri a 2 cifre ben visibili.
TASTI PROGRAMMI
Le programmazioni sono state semplificate e ridotte per ogni funzione ad ogni singolo tasto.
RIGENERAZIONE MANUALE
È possibile impostare una rigenerazione aggiuntiva in qualsiasi momento o farla partire immediatamente premendo il
relativo pulsante.
INDICATORE DI POSIZIONE
Durante la rigenerazione viene visualizzata la posizione attuale.
BLOCCO CHIUSURA FRONTALINO
Un apposito dispositivo blocca l’apertura del frontalino.
La batteria tampone, che mantiene il tempo impostato in caso di black out, non è insclusa.
Tuttavia il sistema mantiene il tempo memorizzato per circa 6 ore e poi si resetta.
Questo pulsante consente di impostare l’ora, il sistema non è impostato per programmare i minuti.
Questo pulsante consente di impostare la quantità di salamoia necessaria per la rigenerazione della resina.
Tale programmazione viene eettuata dal costruttore.
Questo pulsante consente di impostare l’intervallo di rigenerazione.
È possibile scegliere una pausa di rigenerazione ogni 8 ore di lavoro (3 rigenerazioni al giorno) fino a una rigenerazione ogni
30 giorni.
L’orario di riferimento per la rigenerazione è le 2:00 del mattino. Nel caso di 3 rigenerazioni al giorno, queste inizieranno
alle 2:00, alle 10:00 e alle 18:00, mentre nel caso di 2 rigenerazioni al giorno, queste inizieranno alle 2:00 e alle 14:00.

14
ARRESTO
L’impianto può essere arrestato nel modo seguente:
TEMPORANEO
• Staccare la presa di corrente e chiudere i rubinetti dell’acqua.
• Staccare i tubi di allacciamento.
• Svuotare il serbatoio salamoia e lavarlo internamente.
• Pulire l’addolcitore e riporlo in ambiente asciutto a riparo da intemperie e con accesso limitato. Conservare fuori dalla
portata dei bambini o di persone incompetenti).
DEFINITIVO
L’impianto può essere arrestato nel modo seguente:
• Imballare la macchina con cartone, polistirolo o altri materiali e consegnarla al personale preposto (smaltimento rifiuti
autorizzato o ritiro usato).
RIAVVIO DOPO LUNGA INATTIVITÀ
• Rivolgersi sempre a un tecnico esperto e qualificato per assicurarsi che l’impianto abbia mantenuto le apparecchiature
elettriche ben protette.
• Dare tensione alla macchina collegando l’alimentatore e verificare il funzionamento del timer.
• Aprire lentamente la valvola d’ingresso dell’acqua quindi avviare una rigenerazione forzata.
• Inserire nell’apposito contenitore sale, 10 lt di acqua tiepida e 50 ml di Amuchina.
• Attendere la fine della rigenerazione (comunque non prima di due ore e mezzo), quindi aprire la valvola di uscita
dell’acqua e chiudere quella di by-pass.
IN CASO DI EMERGENZA/PERICOLO L’IMPIANTO PUÒ ESSERE ARRESTATO COME SEGUE:
1. Scollegando l’alimentatore di corrente;
2. Chiudendo le valvole d’ingresso/uscita acqua.
In questo modo si ottiene l’arresto immediato dell’impianto.
ATTENZIONE
Assicurarsi che l’acqua non penetri nell’impianto durante i periodi di inutilizzo per evitare cortocircuiti o malfunzionamenti.

15
PROGRAMMAZIONE
REGOLAZIONI
IMPORTANTE
Durante la programmazione se nessun tasto viene premuto per 5 secondi, il display tornerà a mostrare l’ora corrente, e dunque il
sistema si posizionerà nella fase di esercizio.
IMPORTANTE
Questa regolazione viene impostata di norma dal costruttore anche se dal momento della regolazione a quello dell’ installazione e av-
viamento potrebbe riazzerarsi. Per la regolazione attenersi comunque alla tabella comparativa ai litri resina contenuti dalla macchina
(vedi tabella 1).
REGOLAZIONE ORARIO
Premere il tasto ragurante l’icona fino a che il display mostrerà l’ora attuale. Il tasto prevede esclusivamente
l’avanzamento delle ore fino alle 23:00 ripartendo subito dopo dalle 00:00. L’ora di default è 00:00.
REGOLAZIONE QUANTITÀ RIGENERANTE
REGOLAZIONE FREQUENZA RIGENERAZIONI
Premere il tasto ragurante l’icona finché il display mostrerà le seguenti opzioni:
.3 ) Frequenza di rigenerazione ogni 8 ore (3 volte al giorno). Alle ore 02:00, alle 10:00 e alle 18:00.
.5 ) Frequenza di rigenerazione ogni 12 ore (2 volte al giorno). Alle ore 02:00 e alle 14:00.
1-30 ) Con valore impostato 1 la frequenza sarà giornaliera, con valore 2 ogni 2 giorni e così via fino a valore 30 che sarà
ogni 30 giorni. La rigenerazione verrà sempre eettuata alle ore 02:00.
Premere il tasto ragurante l’icona finché il display mostrerà il valore ricavato dalla tabella allegata.
RIGENERAZIONE MANUALE
RIGENERAZIONE RITARDATA
Per una rigenerazione ritardata premere il tasto ragurante l’icona e rilasciarlo subito.
Verrà così programmata una rigenerazione posticipata alle ore 02:00 del giorno successivo,, indipendentemente dalle
rigenerazioni già programmate. A conferma della programmazione avvenuta, apparirà un puntino lampeggiante nel display
accanto all’orario. Per annullare questa programmazione premere nuovamente il tasto.
RIGENERAZIONE IMMEDIATA
Per una rigenerazione immediata mantenere premuto il tasto ragurante l’icona per 3 secondi.
Il display visualizzerà ( - - ) in cascata verticale che indica il procedere della fase in contro lavaggio.
Per tutte le altre fasi verrà visualizzato C2 - C3 ecc. fino al completamento della rigenerazione.
Perfar scorrereil ciclodi rigenerazioneunavolta lanciatala rigenerazionemanuale,premere erilasciarecontemporaneamente
i tasti e fino a quando sul display apparirà il ciclo seguente.
Per azzerare il programma di rigenerazione e ritornare alla fase di esercizio premere contemporaneamente per 3 secondi i
tasti e .

16
TABELLA N°1 DI REGOLAZIONE RIGENERANTE (SALAMOIA)
LT RESINA MODELLI REGOLAZIONE PROGRAMMA TIMER
4 ECO 5 0.6 U3
6 ECO 8 0.9 U3
8 ECO 12 1.2 U3
TABELLA N°2 DESCRIZIONE CICLI E RELATIVI TEMPI
C# DESCRIZIONE
CICLO
TEMPI DI RIGENERAZIONE PER
SINGOLE FASI E CICLI NOTE
U1 min U2 min U3 min U4 min
C1 Contro lavaggio 8 8 1 3 Viene eettuato un lavaggio invertendo il flusso
dell’acqua nella resina
C2 Aspirazione salamoia e
lavaggio lento 25 45 25 45 Aspirazione della salamoia dal contenitore sale e
risciacquo lento della resina
C3 Ripressurizzazione 3 3 3 3 Pausa della valvola
C4 Lavaggio veloce 3 3 1 3 Risciacquo della resina con lavaggio veloce
C5 2° Contro lavaggio 1 1 1 1 Riposizionamento della resina con un 2° lavaggio in
controcorrente
C6 2° Risciacquo veloce 1 1 1 1 2° risciacquo veloce
C7 Ripristino livello
salamoia
Invio di acqua al contenitore sale per la produzione di
nuova salamoia necessaria alla rigenerazione sucessiva
AVVERTENZE GENERALI
Questo capitolo contiene l’elenco completo dei requisiti e delle procedure relative alla manutenzione da eettuare.
Una buona manutenzione richiede controlli e verifiche ordinarie eseguite direttamente dall’operatore e/o da personale
specializzato, e controlli periodici, comprese le operazioni di pulizia e sostituzione, eseguiti da personale istruito a tale
scopo.Durante le operazioni di pulizia, manutenzione o riparazione, fare attenzione a non disperdere nell’ambiente i prodotti
utilizzati. Dopo ogni operazione di manutenzione, ripristinare e fissare correttamente tutte le protezioni rimosse o aperte.
MANUTENZIONE
AVVERTENZA
Non eseguire nessun intervento, modifica o riparazione di qualsiasi genere, all’infuori di quelle indicate in questo manuale.
Solamente il personale tecnico specializzato o autorizzato dal costruttore possiede la necessaria conoscenza dell’impianto e l’espe-
rienza per eseguire correttamente qualsiasi intervento.
Tutti i manutentori devono agire nel pieno rispetto delle norme antinfortunistiche e dovranno indossare guanti e scarpe protettive
per spostare o rimuovere oggetti che possono provocare lesioni.
ATTENZIONE
Tutte le operazioni di manutenzione devono essere eseguite con l’impianto in stato di arresto sicuro e scollegato dalle fonti di ener-
gia e alimentazione.

17
MANUTENZIONE
Si raccomanda di riparare immediatamente eventuali rotture o danneggiamenti alle coperture e alle apparecchiature elettriche.
INTERVENTI PRIMA DELL’AVVIAMENTO:
• Verifica visiva generale (evidenti deformazioni o rotture di struttura, protezioni ecc.);
• Controllo delle condizioni del cavo elettrico d’alimentazione.
L’addolcitore non richiede alcun tipo di manutenzione ordinaria se non il controllo e la ricarica del sale.
L’ora impostata deve corrispondere all’ora corrente.
È importante controllare periodicamente l’addolcitore al fine di salvaguardare l’ecienza dei dispositivi collegati.
Queste operazioni comprendono il controllo della durezza dell’acqua, la capacità di ingresso e uscita, il corretto svolgimento
delle fasi di lavoro nonché le condizioni delle resine nonché l’eventuale sostituzione.
PERICOLO
Non eseguire mai le operazioni sopra indicate con le mani umide o bagnate.
VERIFICHE PERIODICHE
DOPO I PRIMI 6-12 MESI, SUCCESSIVAMENTE OGNI 6-12 MESI:
Si raccomanda di eettuare la pulizia del contenitore sale eseguendo le seguenti operazioni:
• Rimuovere il sale rimasto sul fondo;
• Pulire le pareti del contenitore da eventuali depositi fangosi o melmosi e di sale secco;
• Lavare diverse volte con acqua corrente servendosi di un disinfettante tipo Amuchina ed una spugna;
• Risciacquare nuovamente, aggiungere la stessa quantità di acqua come in precedenza e infine aggiungere sale.
Pulire periodicamente la cartuccia lavabile del prefiltro rimuovendo tutte le impurità dal fondo e dalla superficie della
cartuccia. È suciente usare acqua corrente.
RICERCA GUASTI
INCONVENIENTI, CAUSE E RIMEDI
INCONVENIENTI CAUSE RIMEDI
La rigenerazione avviene ad un’ora sbagliata Orologio mal regolato Programmare orologio
Il programmatore si ferma durante
il ciclo di rigenerazione
Motore bruciato Sostituire
Mancanza di corrente Verificare presa di corrente
Voltaggio o frequenza non corretti Verificare voltaggio o frequenza corretti
Blocco albero a camme Rimuovere corpi estranei da valvola o
albero a camme
Pressione di alimentazione eccessiva Installare regolatore pressione
L’addolcitore rigenera o scarica acqua in
continuo
La valvola 3 o 4 o entrambe rimangono
aperte
Rimuovere eventuali corpi estranei che
potrebbero fare restare aperte le 2 valvole
Mancanza di corrente Verificare tensione
Motore bloccato o bruciato Sostituire motore

18
INCONVENIENTI CAUSE RIMEDI
Il programmatore non rigenera
automaticamente o quando il pulsante di
avvio viene premuto
Alimentazione elettrica scollegata Collegare
Motore difettoso Sostituire motore
Scheda difettosa Sostituire scheda
Il programmatore non rigenera
automaticamente ma solo mediante il
pulsante avvio
Rigenerazioni giornaliere non
programmate Programmare rigenerazioni
Mancanza di acqua addolcita fra due
rigenerazioni
Rigenerazione non corretta Ripetere la rigenerazione verificando che
venga utilizzata la giusta quantità di sale
Resine inquinate Lavare o sostituire le resine
Errata programmazione quantità di sale Verificare e riprogrammare
Vite miscelatrice troppo avvitata Svitare la vite e controllare la durezza
By-pass esterno, se presente, aperto Chiudere by-pass
Mancata aspirazione salamoia
Pressione di alimentazione insuciente Impostare almeno 1,4 bar
Tubazione di scarico ostruita Rimuovere le ostruzioni
Iniettore ostruito Pulire iniettore
Iniettore difettoso Sostituire
Valvole n°2 o n° 6 bloccate in posizione
aperta Eliminare le cause del blocco
Linea della valvola non sigillata Sostituire l’intera linea della valvola
Il tino salamoia si riempie troppo
La valvola n°1 resta aperta Azionare manualmente la valvola stessa
per rimuovere l’impurità che la blocca
Velocità di riempimento non controllata Smontare e pulire il regolatore
La valvola n°2 non resta chiusa durante
l’aspirazione salamoia
Azionare manualmente la valvola per
rimuovere l’impurità
Aspirazione d’aria nel tubo di
collegamento al tino salamoia
Verifica tenuta dei raccordi salamoia e
del tubo
Programmazione quantità sale eccessiva Riprogrammare seguendo le indicazioni
riportate nell’apposita tabella
Irregolare consumo di sale rispetto a
quanto previsto
Errore di regolazione Impostare nuovamente
Presenza di corpi estranei nel flussimetro
salamoia Smontare e pulire il flussimetro
Aspirazione salamoia intermittente o
irregolare
Pressione di alimentazione insuciente Impostare almeno 1,4 bar
Iniettore difettoso Sostituire iniettore
Dopo la rigenerazione l’acqua non è
addolcita
L’addolcitore non ha rigenerato Ripetere la rigenerazione
Mancanza di sale nel tino Riempire il tino di sale
Resine esaurite Sostituire resine
Portata di controlavaggio eccessiva o
insuciente
Il regolatore è del tipo sbagliato Sostituire correttamente
Il regolatore è ostruito Smontare e pulire
Fuoriesce acqua nel tino salamoia dopo
la rigenerazione La membrana n°1 resta aperta
Azionarla manualmente per rimuovere le
impurità che la blocca oppure sostituire
serie membrane
Trafilamento di acqua dura all’esercizio
Cattiva rigenerazione Ripetere la rigenerazione
O-ring 44F danneggiato Sostituire
By-pass esterno, se presente, aperto o
vite miscelatrice mal regolata
Chiudere il by-pass o regolare vite
miscelatrice

19
WASSERENTHÄRTER
ECO
Wasserenthärtungsanlage mit
chronometrischer Kopf AUTOTROL 366/604
Bedienungsanleitung
Version: 1
Ausgabedatum: Januar 2021
BEDIENUNGSANLEITUNG 20
EINSTELLUNGEN 23
WARTUNG 24
FEHLERSUCHE 25
Bitte lesen Sie die Bedienungsanleitung sorgfältig durch, bevor Sie das Gerät benutzen.
Bewahren Sie sie bitte zum weiteren Nachschlagen an einem sicheren Ort auf.

20
BESCHREIBUNG DER ELEKTRONISCHEN, VEREINFACHTEN ZEITSCHALTUHR 366/604
Die Anlage verfügt über ein mit einer Zeitschaltuhr ausgestattetes Ventil, wo Sie alle Bedienelemente finden können.
INBETRIEBNAHME
Für eine gefahrlose Benutzung der Anlage gehen Sie wie folgt vor, und überprüfen Sie vor jeder Benutzung die Schutz – und
Sicherheitsvorrichtungen.
ZUR INBETRIEBNAHME DER ANLAGE SOLLEN SIE ÜBERPRÜFEN, OB:
• Die hydraulischen Anschlüsse ordnungsgemäß sind;
• Die elektrischen Anschlüsse ordnungsgemäß sind.
VERFAHREN
1. Die Zeitschaltuhr an die Stromversorgung anschließen und bei Drücken der Taste die Zwangsregeneration auslösen.
2. Den Wasserzulaufhahn önen.
3. Überprüfen Sie, ob zuerst Luft und danach Wasser aus dem Gummiablauf herausläuft (Gesamtzeit: 1 Minute).
4. Den Wasserzulaufhahn schließen und die Regenerationsphasen weiterführen, indem Sie vier Sekunden lang die Taste
und , gleichzeitig drücken und dann loslassen.
5. Automatisch laufen lassen, bis das Ventil in die Ausgangsposition zurückkehrt.
6. Den Behälter mit Salz und 10 Liter Wasser füllen und das System starten, indem Sie den Wasserzulaufhahn und den
Wasserablaufhahn önen und das Bypass-Ventil schließen.
Wenn Wasser noch leicht gefärbt ist, lassen Sie Wasser vom Ablaufhahn solange herauslaufen, bis es transparent ist.
START DES ENTHÄRTERS
WICHTIG
Vor Inbetriebnahme des Enthärters ist das Saugsystem zu entlüften und die Harze zu reinigen. Die gereinigten Harze könnten
das Wasser gelb-rötlich färben.
BEDIENELEMENTE
A Manuelle Regenerationsauslösetaste
B Anzeigefenster
C Einstellung der Uhrzeit
D Einstellung des Salzverbrauchs
E Programmierung der Regeneration in festen
Tages-Intervallabständen
F Verschlussschalter
G Anzeiger der Regenerationsverzögerung/Dezimalpunkt
H Positionsanzeiger
I Nockenwellenanzeige
BEDIENUNGSANLEITUNG
A B C
FG
DE
H
I
This manual suits for next models
5
Table of contents
Languages:
Other REPA Water Dispenser manuals
Popular Water Dispenser manuals by other brands

Premier
Premier TH-5136 instruction manual

Pelican Water Technologies
Pelican Water Technologies PS48 owner's manual

Philips
Philips ADD4952 user manual

AOX
AOX Natural AOX-3T user guide

Kenmore
Kenmore 300 Series owner's manual

Hague Quality Water
Hague Quality Water WaterMax ST Series Owner's manual and installation guide

Marco
Marco ECOBOILER UC10 quick start guide

Frigidaire
Frigidaire FQC153MBHW instruction manual

Quooker
Quooker Scale Control Plus installation guide

BWT
BWT Rondomat Duo Series Installation and operating manual

GE
GE GXMH31H00 Owner's manual and installation instructions

Crysalli
Crysalli CR-2 Installation & service manual