REPA MILLENNIUM V8 BASIC PLUS User manual

MILLENNIUM
WATER SOFTENER
Instruction manual

2
INSTRUCTION MANUAL 3
MANUALE D‘USO 25
BEDIENUNGSANLEITUNG 47
MANUAL DE INSTRUCCIONES 69
MANUEL D‘INSTRUCTIONS 91
TABLE OF
CONTENTS
MILLENNIUM
WATER SOFTENER
Water softener system with valve 69P1/69P3
Models: CRONO - VOLUME
Instruction manual
Version: 1
Issued date: January 2021
HYDRAULIC CONNECTION 4
COMMISSIONING 5
ADJUSTMENTS 21
MAINTENANCE 22
TROUBLESHOOTING 24
Please read the instruction manual carefully before using the machine.
Please keep it in a safe place for future reference.

4
1. HYDRAULIC CONNECTION
The hydraulic connection must be made with fittings and piping sized to suit the connections of the water softener
to ensure sucient flow to itself and to the machine it is connected to.
PICTURE 1
WATER INLET (IN) WATER OUTLET (OUT)
DRAIN
A
Both valve models (CRONO and VOLUME) are equipped with a by-pass.
In the VOLUME version, the by-pass is equipped with a fan (A) to detect the volume of water.
Hydraulic connection
WARNING
Pay attention when disassembling the by-pass so that the fan does not come out of its housing.

5
2. COMMISSIONING
In order to operate the system safely, it is essential to follow the instructions listed in the following paragraphs carefully.
Check the protective and safety devices before each new use.
2.1 STARTING THE SOFTENER
Slowly open the water flow.
POSITION IN SERVICE
(WORKING SOFTENER)
POSITION BY-PASS
(SOFTENER EXCLUDED)
WHEN STARTING UP THE SYSTEM, CHECK THAT:
• The hydraulic connections are in accordance with the regulations;
• The electrical connections are in accordance with regulations.

6
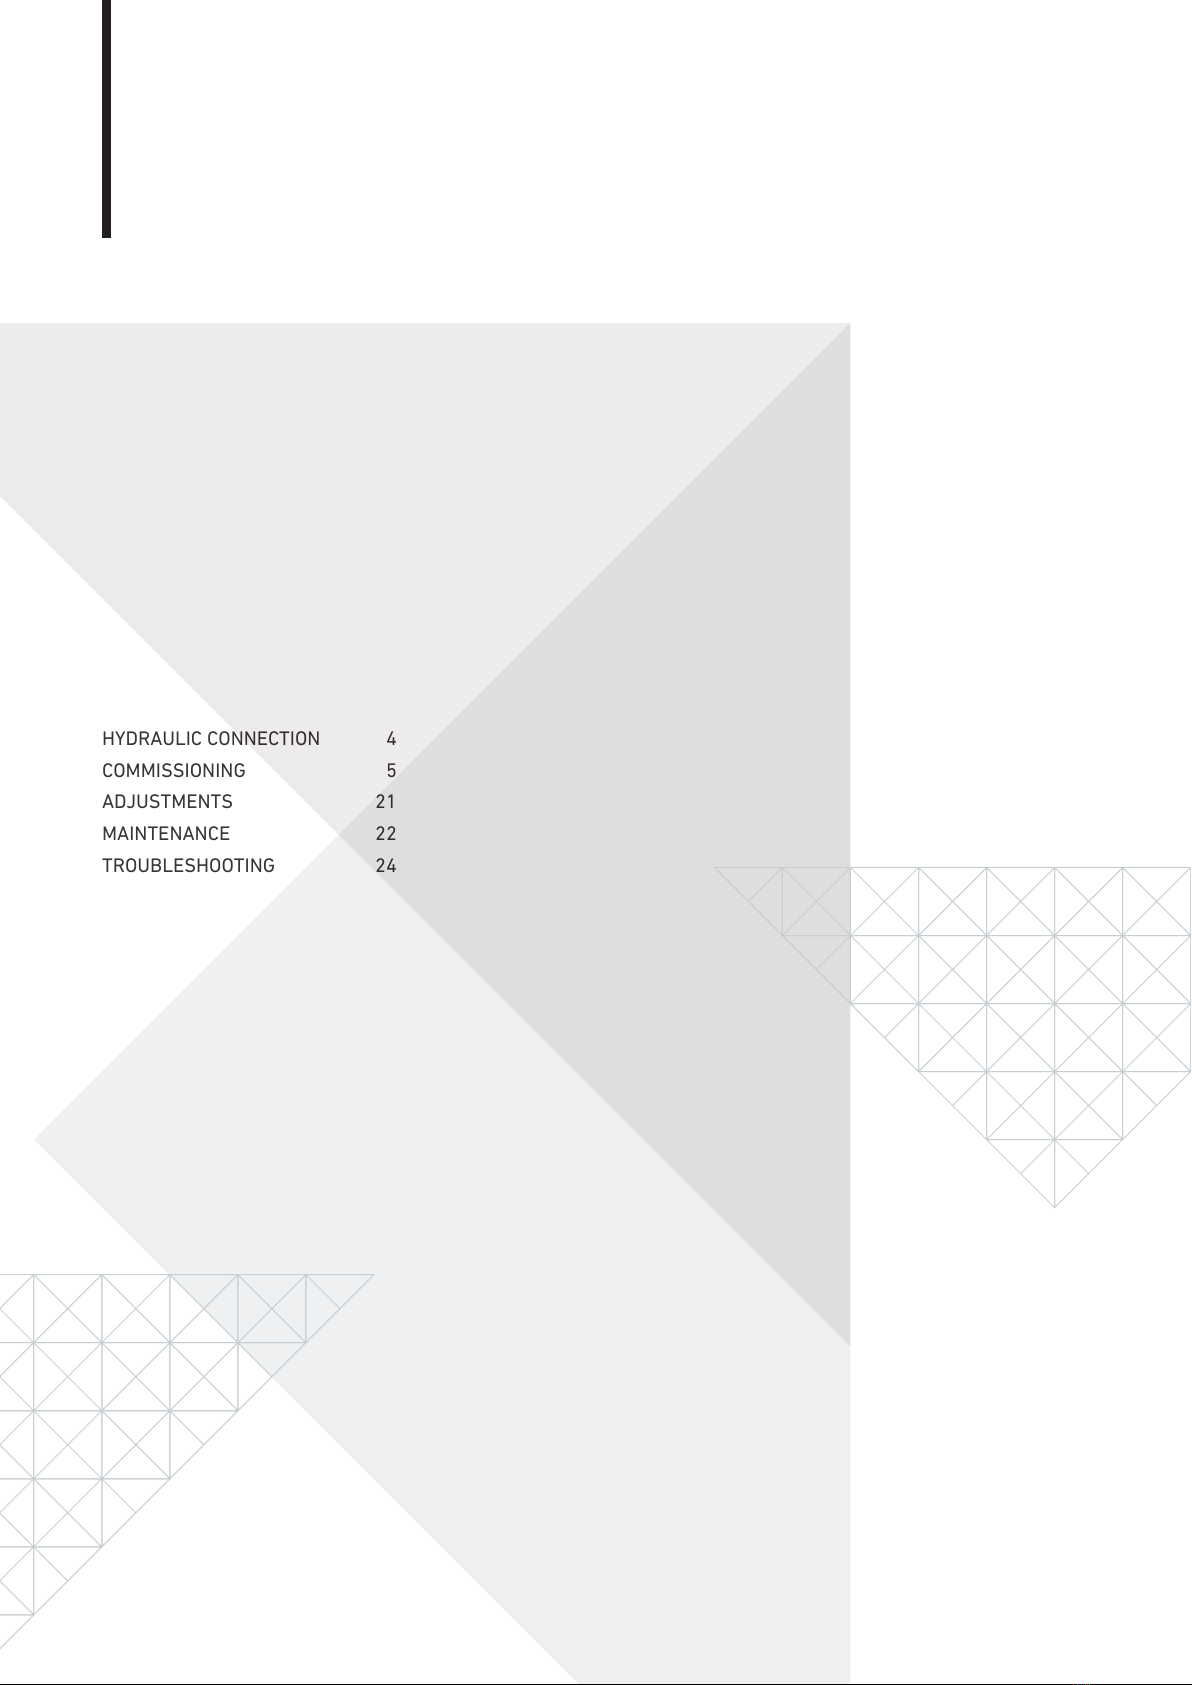
2.2 COMMANDS
The system is equipped with a valve with a timer where all the operating commands are present.
2.2.1 COMMANDS DESCRIPTION
* COMMAND PRESENT ONLY IN THE VOLUME VERSION.
A) Day
B) Cubic meters *
C) Cubic meters per hour *
D) Minutes
E) Salt water suction and slow washing
F) Salt water restoration
G) Setting
H) Key lock
I) Up
J) Down
K) Start manual regeneration
L) Menu/Confirm
M) Time
N) Fast washing
O) Service
P) Counter-current washing
Q) Display
D
m3/h
m3
M
A
B
C
FO
Q
GN
D
EP
HM
L K J I
PICTURE 2
Timer description
7
D
m3/h
m3
M
D
m3/h
m3
M
D
m3/h
m3
M
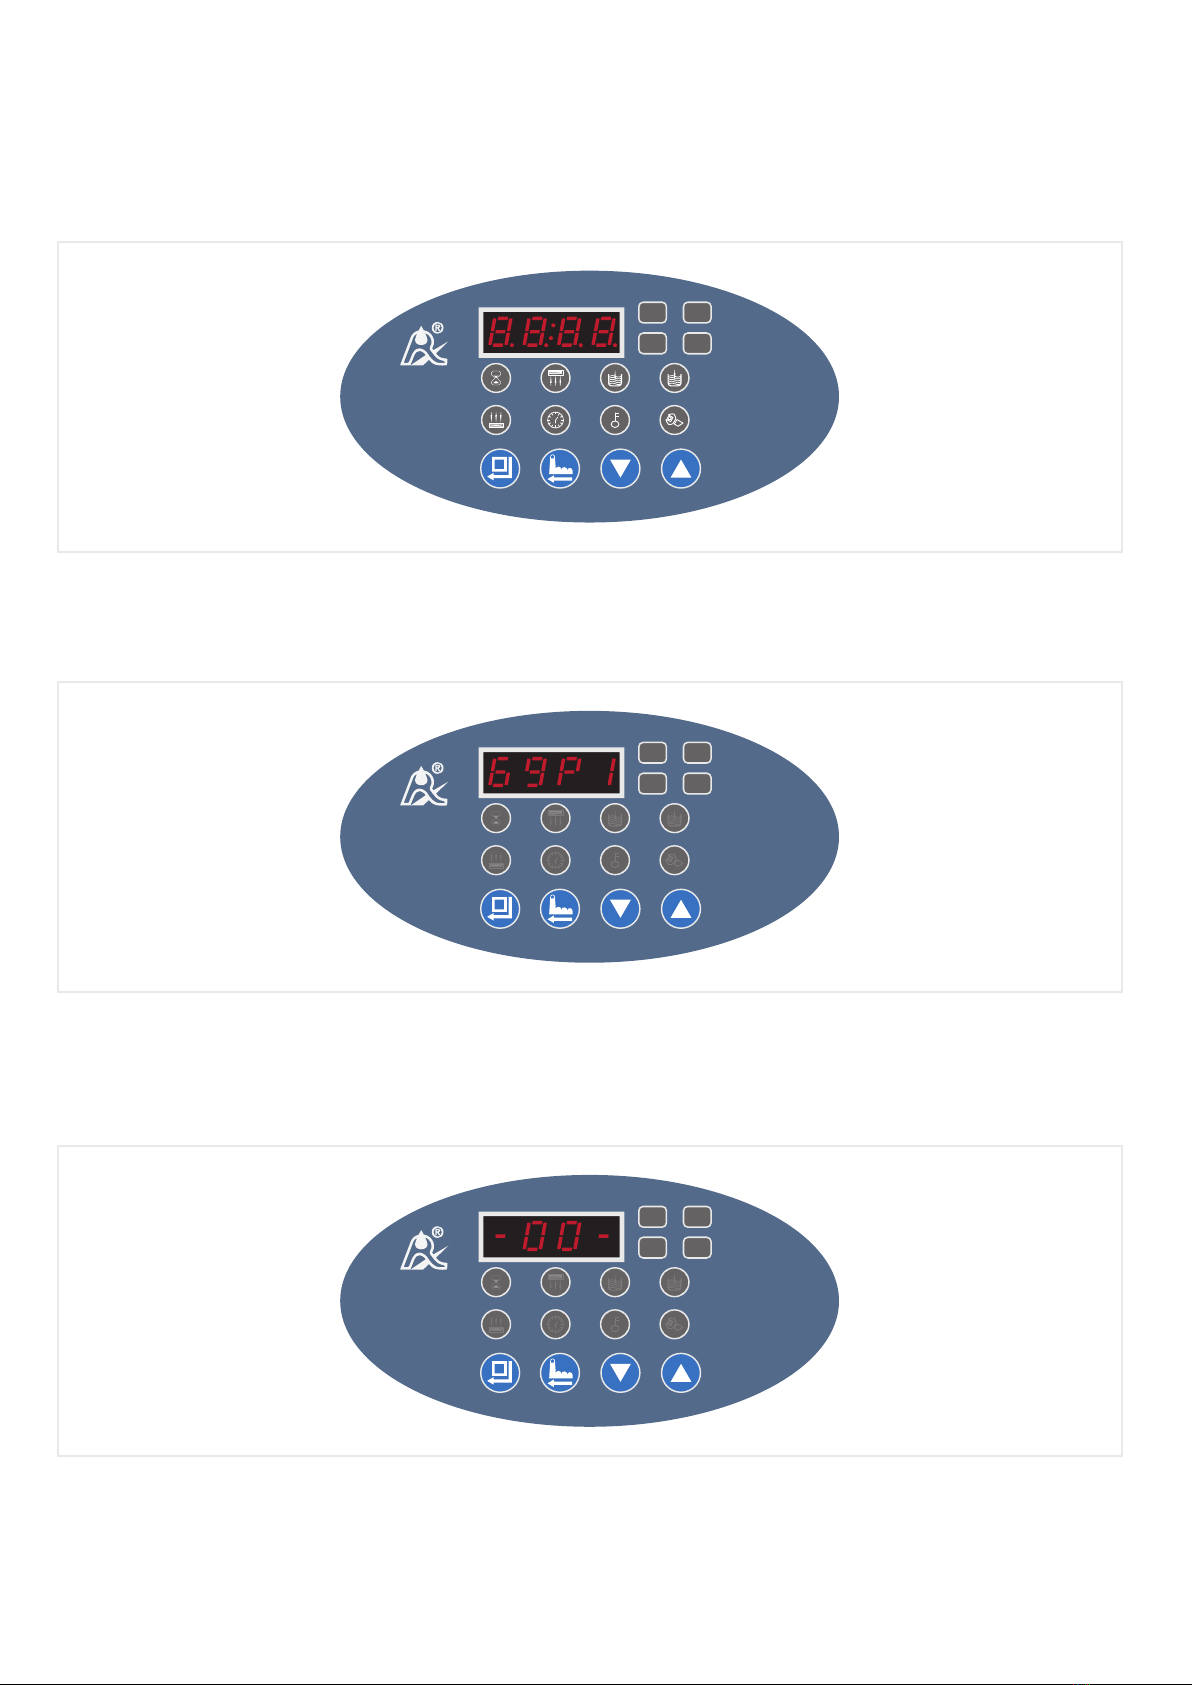
2.2.2 MODEL CRONO
• Connect the plug from the transformer to that of the valve. Insert the transformer into a socket, making sure that it
complies with the regulations.
• As soon as the valve is powered up, the timer icons and display will light up.
PICTURE 3
PICTURE 4
PICTURE 5
Display 1
Display 2
Display 3
• Subsequently a message showing the model of the valve will appear on the display (69P1).
• After a few seconds the valve will carry out a complete selfcheck, lasting about 30 seconds and the following message
will appear on the display - 00 -.
8
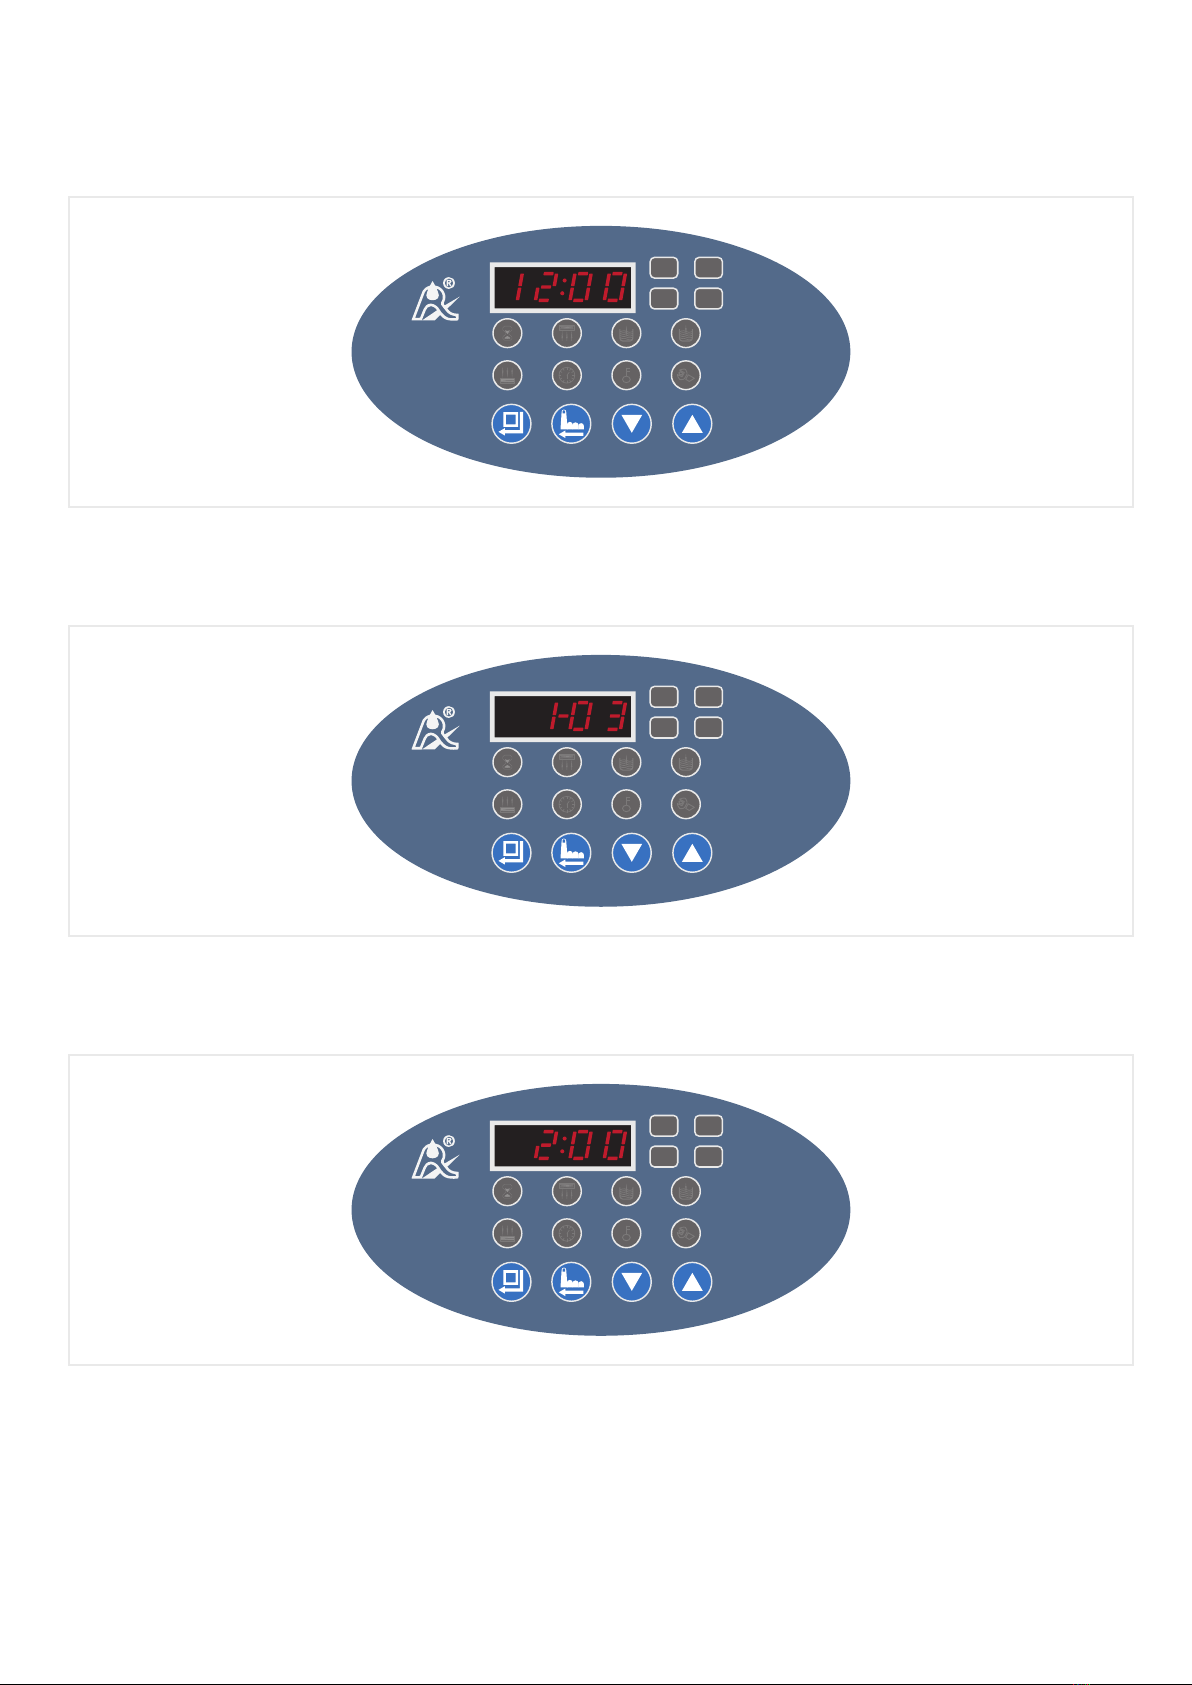
• Upon completing this operation, the valve will assume the operating position and the display will alternate between the
following indications:
TIME
D
m3/h
m3
M
D
m3/h
m3
M
D
m3/h
m3
M
PICTURE 6
PICTURE 7
PICTURE 8
Time
Regeneration frequency
Regeneration time
REGENERATION FREQUENCY
REGENERATION TIME

9
• After about 20 seconds without pressing any keys, an audible key lock will sound and a key icon will light up on the timer
(Key lock function).
• The softener in the construction phase is programmed to default to the following data.
REGENERATION TIME
• Regeneration time: h 02,00 > 02 - 00
TIME
• Current time 12 - 00
FREQUENCY
• Regeneration frequency: 1 - 03
NOTE
N.B: This means that 1 regeneration process will occur every 3 days.
NOTE
N.B. This value may not be up to date due to failure to power the valve for more than 7 days. If it is not updated, adjust the current time.

10
2.2.3 VALVE PROGRAMMING (MODEL CRONO)
1) TIME SETTING
Press and hold the buttons at the same time for 5 seconds until you hear the sound and the unlocked key appears.
Press the button and the symbol for the wrench will light up on the display .
Press the button again and the first 2 digits of the display representing the hours of the day 12 - 00 will start flashing.
Use the buttons to set the exact hour.
Again press the button and the second 2 digits of the display representing the minutes of the day 12 - 00 will start flashing.
Use buttons to set the exact minutes.
Confirm with the button and wait 60 seconds until the key lock sounds with a beep.
NOTE
The valve is protected by a key lock indicated by the continuous ignition of the icon depicting a key .
N.B: It will be possible to modify each value set in the valve, bearing in mind that if no changes are made within 60 seconds, the valve
will again enter a key lock with the appearance of the icon depicting the key .
2) PROGRAMMING THE REGENERATION TIME
Press and hold the buttons at the same time for 5 seconds until you hear the sound of a beep and the item is unlocked.
Press the button and the symbol for the wrench will light up on the display .
Press the button .
Press again the button and the first 2 digits of the display representing the regeneration hours 02 - 00 will start flashing.
This manual suits for next models
15
Table of contents
Languages:
Other REPA Water Dispenser manuals


