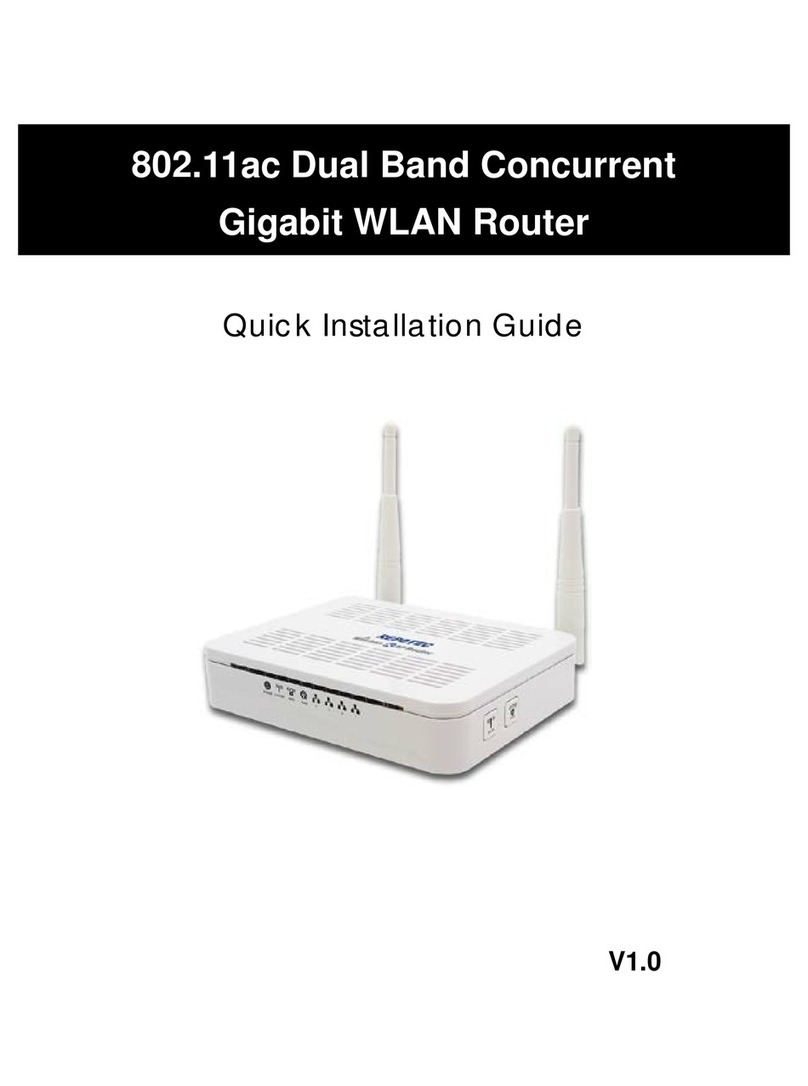
Repotec RP WR0582 ML User manual

IEEE 802.11a+g WLAN Router
USER’S GUIDE
VERSION 2.0, JULY. 2004

Copyright Statement
No part of this publication may be reproduced, stored in a retrieval system, or transmitted in
any form or by any means, whether electronic, mechanical, photocopying, recording or
otherwise without the prior writing of the publisher.
Windows 95/98/Me and Windows 2000 are trademarks of Microsoft Corp.
Pentium is trademark of Intel.
All copyright is reserved.
1

TABLE OF CONTENT
INTRODUCING THE 802.11A+G ROUTER ................................................................................................... 3
OVERVIEW OF THE 802.11A+G ROUTER............................................................................................................ 4
802.11A+G ROUTER APPLICATIONS.................................................................................................................. 4
A SECURITY OVERVIEW.................................................................................................................................... 5
802.11A+G ROUTER FEATURES......................................................................................................................... 6
SETTING UP THE DEVICE ................................................................................................................................... 6
INSTALLING THE 802.11A+G ROUTER .................................................................................................... 7
WHAT’S IN THE BOX?....................................................................................................................................... 7
A PHYSICAL LOOK AT THE BACK PANEL............................................................................................................ 8
A PHYSICAL LOOK AT THE FRONT PANEL .......................................................................................................... 9
CONNECTING THE CABLES.............................................................................................................................. 10
HIGH LEVEL CONFIGURATION STEPS REQUIRED FOR THE 802.11A+G ROUTER .............................................. 10
SETTING UP A WINDOWS PC OR WIRELESS CLIENT AS DHCP CLIENTS ........................................................... 11
CONFIGURING A PC RUNNING MS-WINDOWS 95/98/ME:............................................................................... 11
CONFIGURING A PC RUNNING MS-WINDOWS XP/2000:................................................................................. 12
CONFIRMING YOUR PC’S IP CONFIGURATION:............................................................................................... 12
CONNECTING MORE DEVICES THROUGH A HUB TO THE 802.11A+G ROUTER............................................... 12
BASIC CONFIGURATION OF THE 802.11A+G ROUTER..................................................................... 13
LOGGING ON................................................................................................................................................... 14
SETUP WIZARD ............................................................................................................................................... 15
ADVANCED SETTINGS............................................................................................................................... 26
OPERATIONAL MODE...................................................................................................................................... 26
PASSWORD SETTINGS...................................................................................................................................... 28
SYSTEM MANAGEMENT .................................................................................................................................. 29
SNMP SETTINGS ............................................................................................................................................ 31
DHCP SERVER SETTINGS ............................................................................................................................... 33
MULTIPLE DMZ.............................................................................................................................................. 35
VIRTUAL SERVER SETTINGS ........................................................................................................................... 36
SPECIAL APPLICATIONS .................................................................................................................................. 37
MAC FILTERING SETTINGS............................................................................................................................. 39
IP FILTERING SETTINGS .................................................................................................................................. 40
IP ROUTING SETTINGS .................................................................................................................................... 42
WIRELESS SETTINGS ....................................................................................................................................... 44
RADIUS SETTINGS......................................................................................................................................... 45
DYNAMIC DNS SETTINGS............................................................................................................................... 47
MANAGING YOUR 802.11A+G ROUTER................................................................................................. 48
HOW TO VIEW THE DEVICE STATUS ................................................................................................................ 48
HOW TO VIEW THE SYSTEM LOG .................................................................................................................... 49
DHCP CLIENT TABLE..................................................................................................................................... 50
WIRELESS CLIENT TABLE ............................................................................................................................... 51
BRIDGE TABLE................................................................................................................................................ 52
RADIO TABLE.................................................................................................................................................. 53
UPGRADING FIRMWARE.................................................................................................................................. 54
HOW TO SAVE OR RESTORE CONFIGURATION CHANGES................................................................................. 55
HOW TO REBOOT YOUR 802.11A+G ROUTER .................................................................................................. 57
WHAT IF YOU FORGOT THE PASSWORD?......................................................................................................... 57
SPECIFICATION........................................................................................................................................... 58
2

Introducing the 802.11a+g Router
This manual gives a basic introduction to 802.11a+g Wireless Router. It provides
information to configure the 802.11a+g Router to operate in common applications
such as connecting to the Internet.
We’ll describe how to use your web browser to configure the 802.11a+g Router and to perform
various management functions, e.g. upgrading the software, or viewing the system log, a task that can
be useful in ongoing operations.
This manual consists of the following chapters and appendixes:
Chapter One, Introduction, summarizes features and capabilities of the 802.11a+g Router.
Chapter Two, Installing the 802.11a+g Router, gives steps you should follow to install the 802.11a+g
Router and configure your PCs.
Chapter Three, Configuring the 802.11a+g Router, describes how to log in to the Web Manager, the
browser screen, and steps needed to configure your 802.11a+g Router for specific applications. It gives
easy-to-follow instructions for quick Internet access and provides a guide to basic 802.11a+g Router
configuration.
Chapter Four, Advanced Configuration, provides information on advanced router configuration.
Chapter Five, Managing your 802.11a+g Router, explains other management features of the 802.11a+g
Router.
C
h
a
p
ter
1
3

Overview of the 802.11a+g Router
The 802.11a+g Router is a small desktop router that sits between your local Ethernet network and a
remote network (e.g., the Internet). The 802.11a+g Router contains a WAN port connecting to an
external ADSL/Cable modem, a four-port 10/100Mbps Ethernet switch for connection to PCs on
your local wired network, and two wireless interfaces for connection to your local wireless network:
one supports 802.11a, another can be configured to support either both 802.11b and 802.11g or
802.11g only (both radios support a data rate of up to 54 Mbps).
Data comes into the 802.11a+g Router from the local wired and wireless LAN and then is “routed” to
the Internet, and vice versa.
802.11a+g Router Applications
ACCESSING THE INTERNET
The most common use of the 802.11a+g Router is to provide shared Internet access to allow everyone
on your LAN to surf the web and send/receive emails or files. The 802.11a+g Router can
automatically acquire a public IP address when connecting to the Internet. In turn, it will automatically
assign IP addresses to PCs (requesting DHCP client devices) on your LAN - you don’t have to apply
for and assign IP addresses to PCs on your network.
ACCESSING SERVERS FROM THE PUBLIC NETWORK
If you want special servers to be accessible to remote users across the Internet (e.g., an e-mail server, an
FTP server, or a web server), you can configure the 802.11a+g Router to proxy the service using its
(public) IP address. It means a remote user can access the server by using the 802.11a+g Router’s IP
address. Upon receiving a request, the 802.11a+g Router will re-direct the request to the actual server
on your local network.
OPERATING AS AN ACCESS POINT
Additionally, the Wireless Router can also be configured as an Access Point, and acts as the central
point of your local wireless network supporting a data rate of up to 54 Mbps. It allows client devices on
4

your wireless network to access the Internet, to communicate with other wireless devices on your
wireless network, or to communicate with devices on your wired LAN network.
Since 802.11g is based on the same 2.4GHz radio band as the 802.11b technology, the 802.11a+g
Router can inter-operate with existing 11Mbps 802.11b devices. Therefore you can protect your
existing investment in 802.11b client cards, and migrate to the high-speed 802.11g standard as your
needs grow.
Besides, the 802.11a+g Router also provides connection to 802.11a client devices. It can provide both
802.11a and 802.11b/g connections simultaneously.
A Security Overview
More and more people are concerned about protecting your local network from the Internet. The
802.11a+g Router provides several ways to keep your network secure:
Devices on your wired or wireless network are assigned private IP addresses; therefore remote
users from the Internet cannot see nor access them.
The 802.11a+g Router implements IP packet filtering with SPI (Stateful Packet Inspection)
capabilities, which you can use to selectively filter (discard) packets to/from the Internet.
You can selectively restrict management from remote devices.
To address the growing security concern in a wireless LAN environment, different levels of security
can also be enabled in the 802.11a+g Router, including:
To disable SSID broadcast so to restrict association to only client stations that are already pre-
configured with correct SSIDs
To enable WEP (Wireless Encryption Protocol) encryption to implement privacy of your data
Support of Access Control List to allow you to grant/deny access to/from specified wireless
stations (using MAC addresses)
Provisioning of centralized authentication through 802.1x and RADIUS Server(s).
5

To enable WPA (WiFi Protected Access) to assure authorized access as well as to implement
privacy of your data. WPA comes with two modes: 802.1x for enterprise users and PSK (Pre-
Shared Key) for SOHO users.
802.11a+g Router Features
Compliant with 802.11a, 802.11b, and 802.11g standards with roaming capability
Support of NAT for multiple users to share Internet access
IP routing (RIP1/RIP2) support
VPN (Virtual Private Network) support for PPTP pass-through
Support of PPPoE and PPTP client function for xDSL connections
Support of Internet Games (WarCraftIII, AOEII) pass-through.
Support of the Virtual Server function
Support of the standard Access Point mode for connection to wireless clients
Built-in DHCP server to assign IP addresses to DHCP client devices on both wired and
wireless LAN
Multiple security measures: to enable IP packet filtering, to disable SSID broadcast, to define
Access Control List, to enable WEP based encryption (up to 152 bits), to enable WPA, plus
enhanced Security with 802.1x using a primary and a backup RADIUS Server
Extensive monitoring capability such as event logging, traffic/error statistics monitoring
Easy configuration and monitoring through the use of a Web-browser based GUI (only
support IE6.0 or above) or SNMP commands from a remote SNMP management station
Setup Wizard for easy configuration/installation
Setting Up the device
A local PC on either the wired or wireless LAN network can manage the 802.11a+g Router. To do this,
the 802.11a+g Router must have an IP address, which can be statically configured, or is dynamically
obtained from a DHCP server on the LAN.
6

C
h
a
p
ter
2
Installing the 802.11a+g Router
This section describes the installation procedure for your 802.11a+g Router. It starts
with a summary of the content of the package you have purchased, followed by
steps of how to connect and power up your 802.11a+g Router. Finally, it describes
how to configure a Windows PC to communicate with your 802.11a+g Router.
What’s in the Box?
The 802.11a+g Router package comes with the following items:
One 802.11a+g Router
One 5V DC/2A power adapter with a barrel connector
One CD contains 802.11a+g Router User’ Guide
7

A physical look at the back panel
The following illustration shows the rear panel of 802.11a+g Router.
DC 5V/2A RESET WAN
LAN
(1) 4 RJ-45 10/100 Switch connectors for connecting to PCs and workstations or connecting
external Ethernet hub, or switch with auto-sensing.
(2) 1 RJ-45 WAN connector for connecting to Internet via ADSL/Cable modem.
(3) 1 DC 5V/2A power connector for connecting through a DC power adapter (included as part
of the product) to the wall power outlet.
(4) 1 Reset button to restore the device back to the factory settings.
8

A physical look at the front panel
The LEDs on the front of the 802.11a+g Router reflect the operational status of the unit.
802.11a+g Router LED Description
Label LAN WAN 11g (WLAN) 11a (WLAN) Power
Steady Green Link is active Link is active Link is active Link is active System boot-up
OK
OFF No LAN
connection No connection Radio off Radio off No Power
Flashing Green XMT/RCV Data XMT/RCV Data XMT/RCV Data XMT/RCV Data Under boot-up
9

Connecting the Cables
Follow these steps to install your 802.11a+g Router:
Step 1. Connect ADSL/Cable modem to the Wireless Router WAN port using CAT5 UTP
LAN cable.
Step 2. Connect a PC/Workstation to one of the LAN ports of the Wireless Router.
Step 3. Connect one end of the DC adapter to the Wireless Router and plug the other end into
an electrical outlet.
High Level Configuration Steps Required for the 802.11a+g Router
This section describes configuration required for the 802.11a+g Router before it can work properly in
your network.
Normally, devices on both LANs (except for servers) are configured to obtain their IP addresses
automatically. Depending on whether there is a separate DHCP server available in your LAN
environment network, thus to determine if you need to enable the built-in DHCP server in the
Wireless Router. The following configuration step assumes that the router’s built-in DHCPS will be
used.
Additionally, since you need to perform various configuration changes to the 802.11a+g Router,
including the SSID, Channel number, the WEP key, …, etc., it is necessary to associate a fixed IP
address with the 802.11a+g Router, which is why the 802.11a+g Router will be shipped with a factory
default private IP address of 192.168.1.1 (and a network mask of 255.255.255.0).
10

Setting up a Windows PC or wireless client as DHCP clients
The following will give detailed steps of how to configure a PC or a wireless client to “obtain IP
addresses automatically”. For other types of configuration, please refer to the corresponding user
manual.
For the case of using a LAN attached PC, the PC must have an Ethernet interface installed properly,
be connected to the 802.11a+g Router either directly or through an external LAN switch, and have
TCP/IP installed and configured to obtain an IP address automatically from a DHCP server in the
network.
For the case of using a wireless client, the client must also have a wireless interface installed properly,
be physically within the radio range of the 802.11a+g Router, and have TCP/IP installed and
configured to obtain an IP address automatically from a DHCP server in the network.
Configuring a PC running MS-Windows 95/98/Me:
1. Click the Start Button, and select Settings.
2. Click the Control Panel. The Win95/98/Me Control Panel will appear.
3. Open the Network setup window by double-clicking the Network icon.
4. Check your list of Network items. If TCP/IP is already installed, proceed to step 5. Otherwise:
(You may need your Windows CD to complete the installation of TCP/IP.)
Click the ADD button.
In the Network Component Type dialog box, select Protocol.
In the Select Network Protocol dialog box, select Microsoft.
In the Network Protocols area of the same dialog box, select TCP/IP and click OK.
5. With TCP/IP installed, select TCP/IP from the list of Network Components.
6. In the TCP/IP window, check each of the tabs and verify the following settings:
Bindings: Select Client for Microsoft Networks and Files and printer sharing for Microsoft
Networks
Gateway: All fields are blank.
DNS Configuration: Select Disable DNS.
WINS Configuration: Select Use DHCP for WINS Resolution.
IP address: Select the Obtain IP address automatically radio button.
7. Reboot the PC.
11

Configuring a PC running MS-Windows XP/2000:
1. Click the Start button, and choose Control Panel (in Classic View).
2. In the Control Panel, double-click Network Connections.
3. Double-click Local Area Connection.
4. In the LAN Area Connection Status window, select Internet Protocol (TCP/IP) and click
Properties.
5. Select the Obtain an IP address automatically and the Obtain DNS server address automatically
radio buttons.
6. Click OK to finish the configuration.
Confirming your PC’s IP Configuration:
There are two tools useful for finding out a computer's IP address and default gateway:
WINIPCFG (for Windows 95/98/Me) Select the Start button, and choose Run. Type winipcfg, and a
window will appear listing the IP configuration. You can also type winipcfg in the MS-DOS prompt.
The procedure required to set a static IP address is not too much different from the procedure
required to set to “obtain IP addresses dynamically” - except that instead of selecting “obtain IP
addresses dynamically, you should specify the IP address explicitly.
Connecting More Devices Through A Hub To The 802.11a+g Router
The Wireless Router provides four LAN ports to allow up to four PCs or Workstations to be
connected to it directly. If you want to connect more devices, you can connect an external hub or
switch to any of the LAN ports using a LAN cable.
12

C
h
a
p
ter
3
Basic Configuration of the 802.11a+g Router
This section contains basic configuration procedure for the 802.11a+g Router. It
describes how to set up the 802.11a+g Router for Internet Access operation, and
how to set up the LAN configuration.
The 802.11a+g Router is designed so that all basic configuration may be easily invoked through the a
standard Web browser such as Internet Explorer. Currently only the Internet Explorer 6.0 (or above) is
supported.
To access the WLAN 11a+g Router’s management interface for the first time, enter the default
IP address of the WLAN 11a+g Router in your Web browser http://192.168.1.1/.
13
Note: The IP address of your PC must be in the same IP subnet as the 802.11a+g Router. It is preferred that you
configure the PC to obtain an IP address automatically from the 802.11a+g Router.
The Home Page of the 802.11a+g Router screen will appear, with its main menu displayed on the
screen, showing the following top-level choices: Setup Wizard, Device Status, System Tools,
Advanced Settings, and Help. Selecting any will allow you to navigate to other configuration menus.

Logging On
When you attempt to access a configuration screen from the browser menu, an administrator login
screen will appear, prompting you to enter your password to log on. Once you are logged in, you will
not be asked to log in again unless your “session” expires such as due to inactivity timeout.
If you are logging in for the first time after you received your 802.11a+g Router, you should use the
factory default password, “password” to log in. (You should change it as soon as after you log in.)
Characters you type (as your password) will be echoed back as a string of asterisks (“*”) for security
reasons. After you enter the password, clicking the LOG ON button will begin the password
verification process and, if successful, your configuration session can begin.
Note: Should there be no settings or access on the web management screen, system will logout
automatically in 10 minutes.
14

Setup Wizard
The Setup Wizard will guide you through a series of configuration screens to set up the basic
configuration of your 802.11a+g Router. At the end of the Setup Wizard screens, you should press the
“finish” button, and all your configuration modifications will take effect.
SET UP YOUR LOCAL TIME ZONE AND DATE/TIME
After logging in, the Time Settings page appears. The router time will first be set to the local time of
the PC (on which the browser is running). If this time is not correct, modify the appropriate fields as
necessary, and then click “NEXT”.
15

CONFIGURE THE ISP PROFILE
In the following configuration screen, as with the usual convention, radio buttons are used to
make a selection when only one out of multiple mutually exclusive choices can be selected, while
square check boxes can be used to select multiple non-mutually-exclusive choices.
When configuring the device for Internet access, decide which one of the following multiple
choices to select (through radio buttons):
1. You can use a static IP address provided by your ISP to connect to the Internet. In this case,
you need to configure the following information:
• IP Address Assigned by Your ISP: the IP address of the WAN interface of your router.
• IP Subnet Mask: the IP subnet mask of the WAN interface of your router.
• ISP Gateway IP Address: the IP address of your ISP’s Gateway.
• DNS IP Address: the IP address of the DNS server.
2. You use the user name and password assigned by your ISP to connect to the Internet
(required for the underlying PPPoE protocol). In this case, you need to configure the
following information:
• User Name: the username of your ISP account.
• Password: the password of your ISP account.
• Service Name: the service name of your ISP account
• Connection Type: There are 3 options for this option.
Always on: the connection is always on no matter there is traffic or not. If the connection
is lost (e.g. the PPPoE server is down or the ADSL/Cable line is disconnected), the
connection will be brought up right after the connection is recovered.
Demand Dialing: the connection will be brought up only when there is traffic. That is, it
requires an outgoing packet to trigger the connection.
Manual: Users have to bring up and take down the connection manually.
• MTU/MRU: This is to set the values of MTU (Maximum Transmit Unit) and MRU
(Maximum Receive Unit) that is used between the 802.11 a+g Router and the ISP device
at the other side. Users are not encouraged to change these values unless you know what
you are doing.
• Session Type: There are 3 options for this setting.
Normal: This option only supports one PPPoE session.
Unnumbered Link: This option can let your LAN be a public IP subnet. That is, PC’s on
the LAN can be configured with public IP addresses provided by your ISP. You can put
your own servers on the LAN, and then people on the Internet can access these servers.
The source IP address of the traffic from these PC’s to the Internet is not modified (i.e.
NAT is not applied) either. If you still want to keep a private LAN, you can check the
Maintain Private LAN setting and enter the IP Address and IP Subnet Mask of your
16

private LAN. If you do not keep a private LAN, the “Device IP Settings” menu at the left
side will disappear.
Multiple PPPoE: You can define more than one PPPoE sessions by using this option.
The primary session is configured at the ISP Settings page, and other sessions are
configured at the Multiple PPPoE page.
3. You use DHCP to connect to the Internet (most likely through a cable modem connection).
In this case, your ISP may require you to configure the Host Computer Name:
• Host Name: The Host Name provided by your ISP.
4. You use PPTP to connect to the Internet. In this case, your ISP requires you to configure
PPTP's tunnel IP address, the username, and password. In this case, configure the static IP
address as in the above and then configure the following information:
• PPTP Local IP Address: the IP address on the local side of the PPTP tunnel provided
by your ISP.
• PPTP IP Netmask: the Netmask on the local side of the PPTP tunnel provided by your
ISP.
• PPTP Remote IP Address: the IP address of the remote side of the PPTP tunnel
provided by your ISP.
• User Name: the username of your ISP account.
• Password: the password of your ISP account.
• Idle time: The Idle Timeout is the number of seconds of "inactivity" before the PPTP
connection is taken down.
Its value should be between 0 to 60 minutes, with 5 (minutes) being the default value, and
0 meaning the connection will never time out.
5. Cloned MAC Address: Some ISPs expect a PC to be connected to their service, and use the
MAC address of this PC’s LAN card for identification purposes. By checking the following
“Cloned MAC address” square check box, your 802.11a+g Router allows a MAC address to
be configured and “cloned” in the router to simulate a PC.
If the device is a PC based on WIN 95/98/Me, you can run winipcfg to find out the MAC Address
of its LAN card. If the device is a PC based on WIN 2000/NT/XP, you need to run "ipconfig/all"
to find out the MAC address of its LAN card.
17

18
This manual suits for next models
1
Table of contents
Other Repotec Wireless Router manuals

Repotec
Repotec RP-WR0254 User manual

Repotec
Repotec 300Mbps Wireless-N Broadband Router User manual

Repotec
Repotec WR1440A User manual

Repotec
Repotec WR5822 User manual

Repotec
Repotec 1T1R User manual

Repotec
Repotec RP-WR5441L User manual

Repotec
Repotec WR3211 ML User manual

Repotec
Repotec RP-WR1134 User manual