F
6 MU1H-1118GE23 R0220
1 Règles de sécurité
1. Suivez les instructions d'installation.
2. Utilisez le dispositif
• Conformément à l'usage auquel il est destiné
• Dans un bon état
• En tenant dûment compte de la sécurité et des
risques.
3. Notez que le dispositif est exclusivement réservé à
une utilisation dans les applications décrites en détails
dans les présentes instructions d'installation (Voir 2
Caractéristiques techniques). Toute autre utilisation
sera considérée comme non conforme aux exigences
et entraînera une annulation de la garantie.
4. Notez que seules les personnes autorisées sont
habilitées à effectuer les travaux d'assemblage, de
mise en service, de maintenance et de réglage.
5. Éliminez immédiatement tout dysfonctionnement
susceptible d'entraver la sécurité.
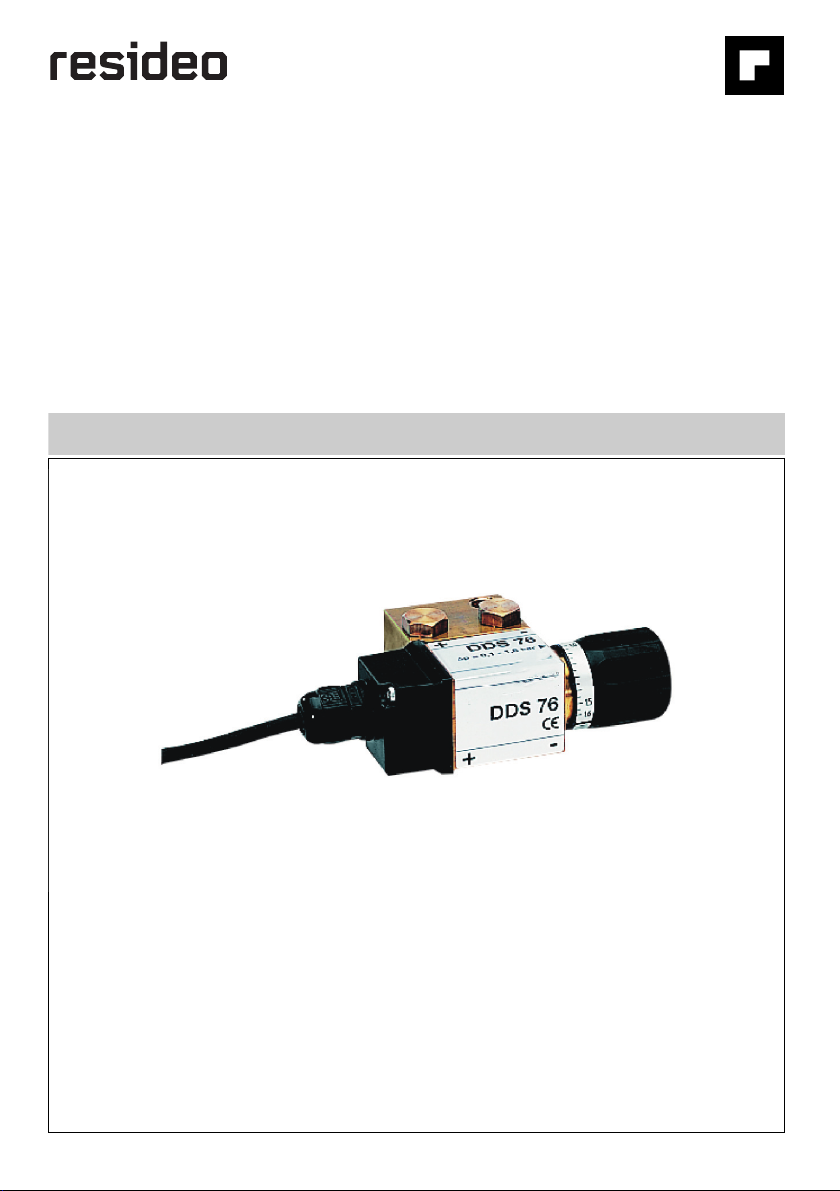
2 Caractéristiques techniques
*Le fonctionnement parfait de l’appareil n’est garanti que jusqu’à une
pression de 16 bars. Cependant, l’appareil est protégé des
endommagements jusqu’à 25 bars. Dans ce dernier cas, la fonction de
commutation ne peut plus être utilisée.
3 Assemblage
3.1 Consignes d'installation
L'emplacement d'installation doit être à l'abri du gel et la
protection du dispositif contre les substances chimiques, les
peintures, les détergents, les solvants et leurs vapeurs et
contre les influences environnementales doit être garantie
3.2 Montage sur filtre
1. Fermer la vanne d'isolement côté entrée et sortie
2. Relâcher la pression côté entrée (p. ex. par le robinet
à eau)
3. Fermer le robinet d'arrêt à la sortie
4. Enlever du filtre l’obturateur en laiton et le manomètre
5. A l’aide de la clé pour vis à 5 pans creux fournie,
visser les 2 nipples avec leur bague d’étanchéité dans
les tubulures filetées (pour F76S) ou dans les
perforations du boîtier (pour F76S-F)
6. Placer l’interrupteur de pression différentielle sur les
nipples et serrer les deux écrous-raccords
• La flèche située sur l’interrupteur de pression
différentielle doit indiquer la même direction que
celle qui est placée sur le boîtier du filtre
7. Refermer le manomètre hermétiquement et le visser
dans la tubulure filetée de l’interrupteur de pression
différentielle.
8. Ouvrir lentement la vanne d'arrêt à l'entrée
9. Ouvrir lentement la vanne d'arrêt à la sortie
10. Contrôler l’étanchéité entre l’interrupteur depression
différentielle et le boîtier du filtre
• Resserrer éventuellement les nipples ou les
écrous-raccords
3.3 Raccordement au dispositif
automatique de rétrolavage
1. Monter le dispositif automatique de rétrolavage sur le
filtre (voir les instructions demontage de ce dispositif)
2. Si un dispositif automatique de rétrolavage est déjà
disponible, enlever la prise d’alimentation au réseau
3. Desserrer les vis du boîtier du dispositif automatique
de rétrolavage et soulever le couvercle du boîtier
4. Entrer le câble de l’interrupteur depression
différentielle dans le boîtier en passant par le boulon
« Pg » libre
5. Connecter les 2 brins du câble aux bornes Start et U+
(une permutation est possible)
6. Refermer le couvercle du boîtier
7. Rebrancher la prise
• Déclenchement d’un rétrolavage
• Se procurer une sortie d'eau ou un récipient
collecteur
Fluides
Milieu: Eau potable
Températures de fonctionnement
Plage de réglage: 0,1 - 1,6 bar (réglage usine 1
bar)
Valeurs de pression
Pression statique max.*: 25 bar
Pression de service
statique max.*:
16 bar
Spécifications
Câble d'alimentation: 1 m avec douille d'extrémité de
câble
Hystérésis du
commutateur miniature:
Environ 2 %
Données de charge
maximum du commutateur
miniature:
Umax = 24 V Imax = 0.8 A Pmax =
19.2 W
pour F76,
F76S
pour F76S-F
DDS76-1/2 1/2" + 3/4" -
DDS76-1 1" + 11/4" DN65/80/100
DDS76-11/2 11/2"+2" -