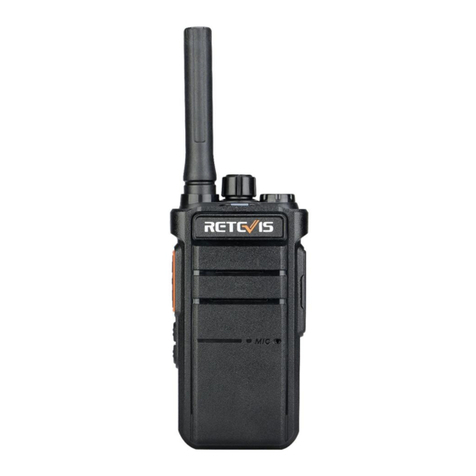
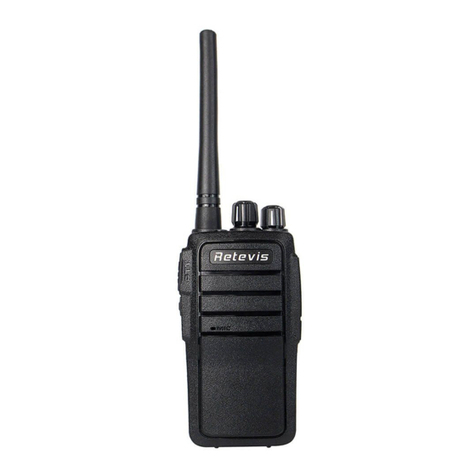
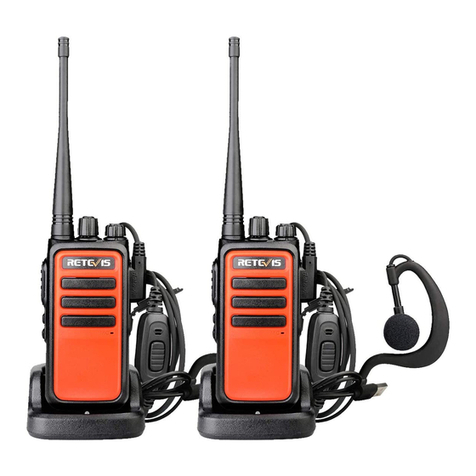
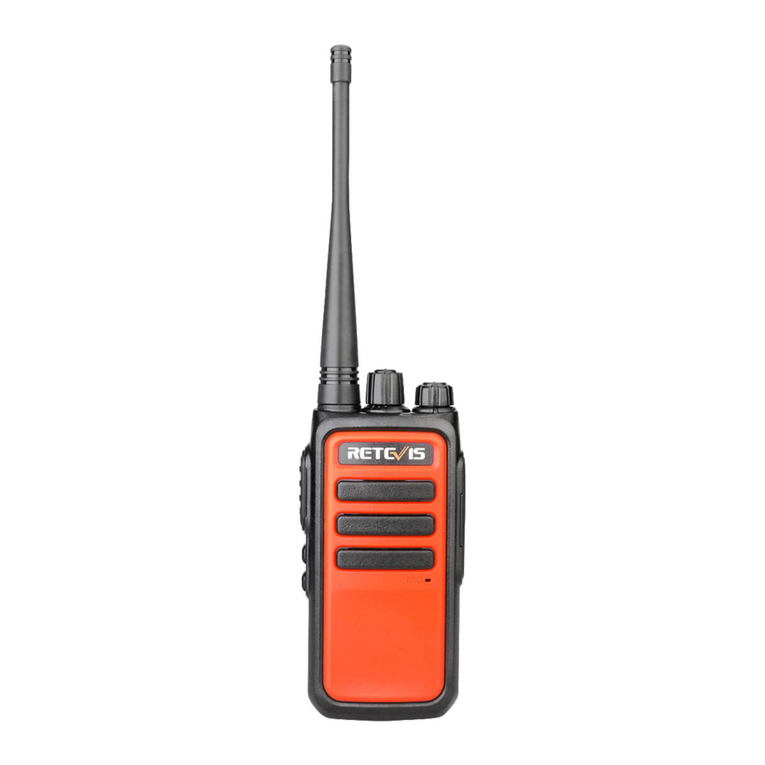
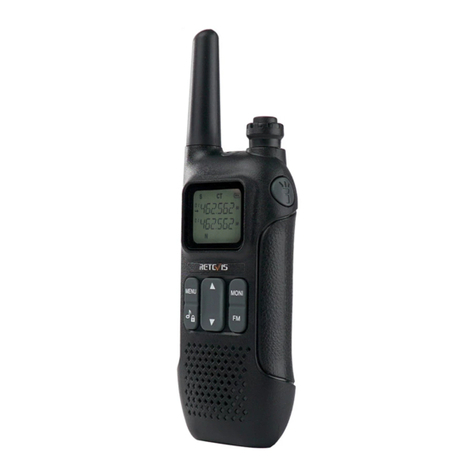
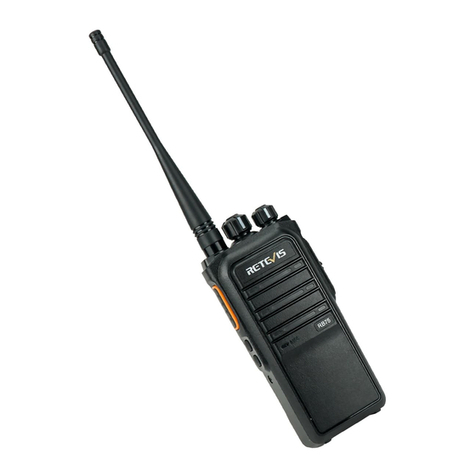
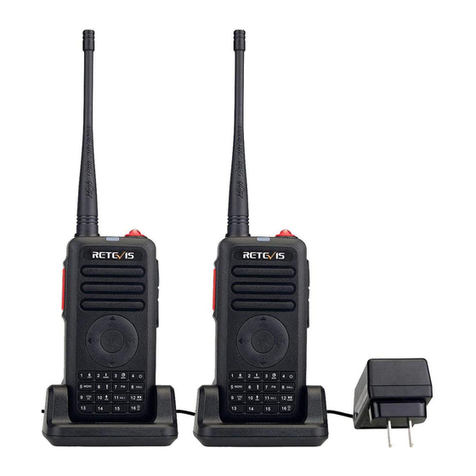
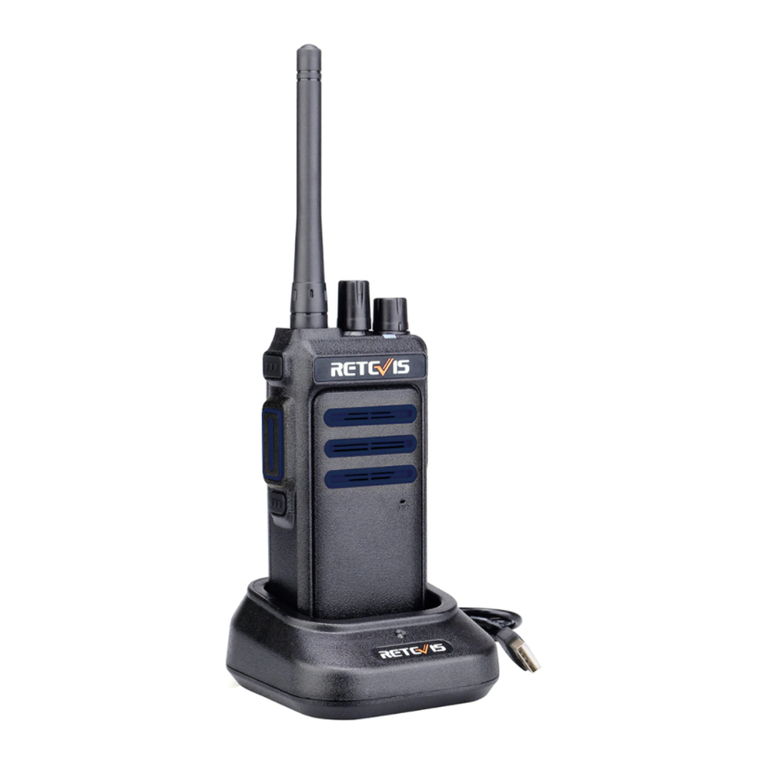
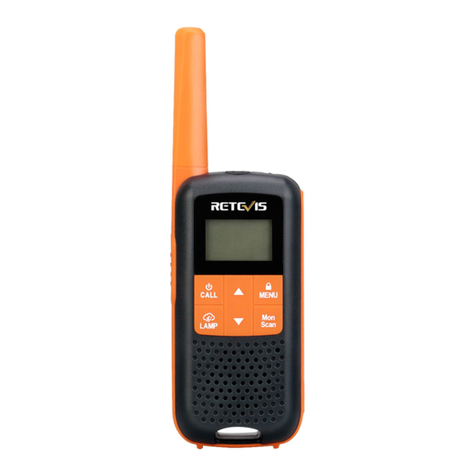
Retevis RT40 User manual

USER’S MANUAL
RT40

Warning
Please read this manual carefully before using this walkie-talkie.
•Please do not charge this walkie-talkie in areas that are flammable, explosive and
where radio communication is prohibited (e.g. petrol stations, gas stations, airports,
etc.).
•Please do not operate this walkie-talkie without a licence in areas where it is
prohibited by government law.
•Please make sure that the walkie-talkie is protected from sunlight and avoid placing
it near any heating device.
•Please make sure this radio avoids any dusty, humid and water splashed place, and
also avoids to put it near any heating device
•If the walkie-talkie smells or smokes, please remove the battery pack from the
walkie-talkie immediately, and then contact your nearest dealer.
•The repair of this walkie-talkie is the responsibility of a professional technician and
is not be dismantled by yourself.
Charging precautions
•Please use the charging base that matches this model for charging.
•When charging the whole walkie-talkie, it is recommended to switch off the
walkie-talkie.
•For optimum battery performance use, please charge the battery for at least 5 hours
for the first time.
•Please do not charge the battery for a long time as this will shorten the life of the
battery. When the battery is fully charged, please stop charging promptly.
•This charger will only charge the battery of this walkie-talkie, please do not charge
other batteries as this will damage the charger and the battery.
•The battery pack should be stored in a cool, dry place after it has been fully
charged. Please do not place the batterry near fire or in the sun as this is a safety
hazard.
•It is not recommended to transmit the walkie-talkie while the it is being charged.
•It is normal for the battery to heat up slightly during the charging process.

Contents
------------------------------------------------------------------01
------------------------------------------------------------------------01
------------------------------------------------------------------02
---------------------------------------------------------------------02
----------------------------------------------------04
-----------------------------------------------------------05
-----------------------------------------------------------------------------06
Getting Acquainted
LED indicators
Battery level inquiry
Basic Operations
Programmable Keypad Menu
Technical Specifications
WARNING
DE(10-19)
FR(20-29)
IT(30-39)
ES(40-49)
For downloading further resources:
Brochures, Software/Firmware, Manual etc, Please contact
your direct reseller first OR go to website retevis.com and
check “support” in the each product link to download it.

01
Getting Acquainted
LED indicators
Serial number Name
1 PTT
2 Side Key
3 Channel knob
4 Power /VOL knob
5 LED indicators
6 SP / MIC
7 Mic
LED indicator Status
Green light is always on Being received
Red light is always on Being transmited
Green light flashing slowly Being scanned
Prepare for use
Do not shake the radio by holding the top of the antenna to avoid degrading the performance and cycle life of the
antenna.
Install the back clip
1.Take out the battery pack and back clip parts from the inner box.
2. Align the back clip with the notched end of the battery pack and push it in smoothly.
Install the battery
1. Align the battery positioning post with the battery slot in the back case, gently press the top of the battery and
snap it into the battery.
2. The battery unloader will naturally slide off and lock the battery pack.
Installing accessories
1. Lift the accessory interface cover and push the audio accessory into the interface smoothly.
2. Make sure the radio is turned off before pushing in.
Charging
Since the battery is not fully charged at the factory, please complete the necessary pre-charging of the new
battery before use! General
Under normal circumstances, the battery needs to be charged for a full 5 hours when it is used for the first time.
Please make sure that the radio is turned off when charging.

To prevent fire or injury, please use the original factory standard lithium battery adapter for charging!
Battery level inquiry
When the radio starts to emit the periodic "low battery, please charge" beep, it indicates that the battery is about
to run out of power and shut down, please replace the battery immediately or turn off the radio and put it into the
charger for charging.
Press the pre-programmed [Battery power prompt] key to check the current battery power status.
Power saving mode
In order to make the battery play better power saving and last longer, it is recommended to turn on the power
saving mode. This item is set by the dealer. The default power saving is 1:1.
Basic Operations
1. Power on / off
To turn on the power, turn the [Power/Volume] knob clockwise until you hear a "click".
To turn off the power, turn this knob counterclockwise until you hear a click.
2. Volume adjustment
After powering on, turn the volume key clockwise to increase the volume, and counterclockwise to decrease the
volume
3.Selecting a region (side-key - factory default)
A zone is a group of channels that allows you to include channels with the same attributes in a zone (to be added
automatically in the zone options), allowing you to manage existing channels efficiently. The unit supports 16
zones, each containing up to 16 channels.
Select a zone by pre-programming the [Zone Switch] key with the side button. If the radio has enabled the voice
announcement tone function, the radio will announce the region number after switching to the desired region.
4.Selecting a channel
The channel is the channel for signal transmission. Rotate the [Channel knob] to select the channel.
If the radio has enabled the voice announcement tone function, the radio announces the channel number when
switching the channel by turning on the power or rotating the [Channel knob].
5.Digital Calling
You can make single, group or full calls to the contacts preset on the current digital channel (full call permission
needs to be enabled by the dealer).
Single call is a one-to-one call.
Group call is a one-to-many call.
All call is a call initiated to all contacts on the current digital channel.
6.Initiating a call
You can initiate a call by the following methods.
In standby, press and hold the [PTT] key to initiate an single call, group call, or all-call directly to a preset single
call contact, group call contact, or all-call contact on the current digital channel.
When the dealer configures [One-Touch Call] to call a personal call contact or group call contact, press the [PTT]
key after pressing the [One-Touch Call] shortcut key to initiate the call.
During radio, place the radio vertically 2-3.5 cm away from your mouth and the red LED lights up.
Release the [PTT] key to receive an answer.
If you set the channel transmit power to "low" and cannot make a successful call, you can use the
pre-programmed [Power Adjust] key to temporarily switch to high power transmission.
7.Receiving calls/responding to calls
When a call is received, you can answer the call without any operation. During an single or group call, press and
02

hold the [PTT] key to answer the call within the preset time.
8.Ending a call
Single/group call: The radio will end the single/group call when no one presses the [PTT] key to speak and the
call hold time is exceeded.
All-call: When the caller releases the PTT key, the radio will end the all-call.
9.Analog Calling
An analog call is a call initiated on an analog channel, adjusted to correspond to the area.
To transmit, press and hold the [PTT] key and speak into the microphone. To receive, release the [PTT] key.
10.Scan
Scan means that when a radio scans for activity on a channel, it will stay on that channel to listen. A scan list is a
list of channels that are listened to.
You can create up to 32 scan lists and keep at least one scan list. Each scan list has a maximum of 16 channels
(can include a mix of analog and digital channels).
How to turn on scanning:
Method 1: Press the pre-programmed [Scan] key to turn on the scan function.
Method 2: When a channel is enabled with "Auto Scan" and a scan list is configured, the radio will automatically
turn on scanning when switching to that channel.
Note: When you turn on scanning, please make sure that the current channel has been added to the
corresponding scan list.
How to exit scanning:
Method 1: Scan status, press the [Scan] key to exit.
Method 2: Channel auto-scan is on, switch the channel.
11.Encryption
Encryption is the end-to-end encryption of voice or data using a key that can be decrypted by the receiver only if
the key is consistent, thus preventing voice and data from being eavesdropped.
Radios can be assigned only one of the above encryption types. To decrypt an encrypted call or data
transmission, the radio to be pre-programmed must have the same "encryption key" as the transmitting radio (for
basic encryption).
If your radio receives an encrypted call with a different encryption key or a different key value and key ID, then
you will hear a messy transmission (basic encryption).
12.DMR Emergency Alerts
The alarm function allows users to request assistance in times of crisis. The alarm function can only be triggered
by pressing the [Emergency Mode On] key when the channel is configured with an alarm system. The following
alarm types can be programmed by the CPS.
-Hoot only: When an alarm is activated, the radio emits a sharp hooting sound for alert.
-Secret: When the alarm is triggered, the radio calls the emergency alarm number urgently, and the initiating
radio does not have any audible or visual prompts.
-Secret with voice: when the alarm, the radio emergency call emergency alarm number, and the initiating party
radio are without any visual prompt, but can receive voice.
-Normal: When the alarm is on, the radio calls the emergency alarm number urgently. Emergency call is a call
with the highest priority, which can interrupt the current ongoing ordinary call. The process of an emergency call
is similar to a normal call
13.SMS (send only)
The radio can initiate one-key short message service to the target contact through the preset one-key operation
(CPS software preset shortcut text message). The SMS function supports the following SMS formats.
H-SMS: SMS text communication with Hytera DMR radio is allowed.
M-SMS: Allows SMS text communication with Motorola DMR radios.
D-SMS: Allows SMS text communication with DMR alliance manufacturers' radios.
14.Initiating an alarm
Press the pre-programmed [Emergency Mode On] key to initiate an alarm to a pre-programmed contact.
During an emergency call or alarm call, if the radio is turned on the automatic emergency call function, you do
03

not need to press and hold the [PTT] key to speak. When the number of automatic emergency calls exceeds the
number pre-programmed by the dealer, if you need to initiate an emergency call again, press and hold the [PTT]
key.
15.Answering an alarm
When an emergency call is received, you can answer it without any operation.
16.Ending an alarm
The caller can end the alarm in the following ways.
Way 1: Press the pre-programmed [Emergency Mode Off] key.
Mode 2: Turn off the phone.
The called can exit the alarm alert by switching channels or turning off the phone.
17.Working alone
If you encounter an unexpected situation during working alone and cannot operate the radio within the
pre-programmed time, the radio will automatically make an alarm to inform your companion or control center for
help.
Working Mode - Alarm: The current channel needs to be preset with DMR alarm system, and the alarm will be
triggered automatically when the programmed time condition is reached.
Work Mode - Beep: The current channel will only sound a periodic siren when the programmed time is reached.
Press the pre-programmed [Work Alone] key to turn on work alone.
18.Straight-through dual capacity
Direct dual capacity refers to the DMR digital radio's time division multiple access direct mode, the same
frequency point in this mode supports two different time slots of calls at the same time. radios in the same group
must use the same time slot to make calls, so as to ensure that they will not interfere with the radios using other
time slots.
Note: When you turn on straight-through dual time slot communication, the radios need to be in the same time
slot in order to achieve the pass-through connection.
In order to ensure the good performance of this product as well as to extend its service life, please familiarize
yourself with the following for better daily maintenance and cleaning of this product.
-Do not puncture or scratch the product with hard objects.
-Do not store the product in an environment that contains substances that corrode electronic circuits.
04
Options
No function
Power Adjustment
Emergency mode switch
Encryption
VOX
One Touch Call 1...5
Region Switching
Keypad/Channel Lock
Digital-analog mode switching
Steady-state listening
Battery level alert
Scanning
Scheduling
Working Alone
Squelch Level
Description
No function is associated with this key, and pressing this key is not valid.
Quickly switch between high and low power.
Quickly establishes an emergency call. Press this button to turn the alarm
function on or off.
Press this key to turn encryption on or off.
Press this key to turn on or off the sound control function for the current channel.
Call shortcut key to send corresponding call, short message or other application
functions after pressing a key call.
Quick region selection, allowing users to switch between multiple regions.
Press this key to turn the keypad/channel lock function on or off.
Quickly switch the current channel properties.
Press this key to switch to monitor squelch mode, and press it again to return to
receive squelch mode.
Quick access to the battery charge level. Voice broadcast of high, medium and
low battery levels.
Quickly turn scanning on or off.
Quickly send 1750 lead signal.
Press this key to toggle between separate work functions on and off.
Press this key to toggle the current channel squelch level (normal/strict).
Programmable Keypad Menu

-Do not use the portable antenna or headphone cable while carrying or using the product.
-When the accessory is not in use, please cover the accessory connector cover.
Cleaning
Use a clean and dry lint-free cloth or brush to wipe off the dust and dirt on the surface of the radio and the battery
pole piece periodically.
-The radio's buttons, control knobs, and housing are highly susceptible to dirt. Do not use chemicals such as
detergents, alcohols, aerosols or petroleum agents to avoid damage to the product surface and housing.
-After cleaning, make sure that the radio is thoroughly dry, otherwise, please do not use it.
Note: Before cleaning, please turn off the machine and remove the battery.
05
Frequency Range PMR446
Memory Channel 16
audio distortion <5%
Operation Temperature Range -20℃+55℃
Antenna Impendance 50Ω
Output power ≤0.5W
frequency stability ±2.5ppm
maximum frequency deviation ≤±[email protected]
stray radiation ≤-57dBm
Modulation type 11 [email protected]
Current ≤750mA
Receiver sensitivity Analog≤-121dBm@12dB SINAD ; Digital≤-119dBm@5% BER
Adjacent channel selectivity ≥60dB
Inter-modulation 65dB
Rated Voltage DC 3.7V
Technical Specifications

RF ENERGY EXPOSURE AND PRODUCT SAFETY GUIDE FOR TWO-WAY RADIOS
•User instructions should accompany the device when transferred to other users.
•Do not use this device if the operational requirements described herein are not met.
This two-way radio uses electromagnetic energy in the radio frequency (RF) spectrum to provide communica-
tions between two or more users over a distance. RF energy, which when used improperly, can cause biological
damage.
All Retevis two-way radios are designed, manufactured, and tested to ensure they meet government-established
RF exposure levels. In addition, manufacturers also recommend specific operating instructions to users of
two-way radios. These instructions are important because they inform users of RF energy exposure and provide
simple procedures on how to control it.
Please refer to the following websites for more information on what RF energy exposure is and how to control
your exposure to assure compliance with established RF exposure limits: http://www.who.int/en/
When two-way radios are used as a consequence of employment, the Local Government Regulations requires
users to be fully aware of and able to control their exposure to meet occupational requirements. Exposure
awareness can be facilitated by the use of a product label directing users to specific user awareness information.
Your Retevis two-way radio has a RF Exposure Product Label. Also, your Retevis user manual, or separate
safety booklet includes information and operating instructions required to control your RF exposure and to satisfy
compliance requirements.
Radio License(only applicable to licensed radio)
Governments keep the radios in classification, business two-way radios operate on radio frequencies that are
regulated by the local radio management departments (FCC, ISED, OFCOM, ANFR, BFTK, Bundesnetzagen-
tur...).To transmit on these frequencies, you are required to have a license issued by them. The detailed
classification and the use of your two radios, please contact the local government radio management
departments.
Use of this radio outside the country where it was intended to be distributed is subject to government regulations
and may be prohibited.
Unauthorized modification and adjustment
Changes or modifications not expressly approved by the party responsible for compliance may void the user’s
authority granted by the local government radio management departments to operate this radio and should not
be made. To comply with the corresponding requirements, transmitter adjustments should be made only by or
under the supervision of a person certified as technically qualified to perform transmitter maintenance and repairs
in the private land mobile and fixed services as certified by an organization representative of the user of those
services.
Replacement of any transmitter component (crystal, semiconductor, etc.) not authorized by the local government
radio management departments equipment authorization for this radio could violate the rules.
FCC Requirements:
This equipment has been tested and found to comply with the limits for a Class A digital device, pursuant to part
15 of the FCC Rules. These limits are designed to provide reasonable protection against harmful interference
when the equipment is operated in a commercial environment. This equipment generates, uses, and can radiate
radio frequency energy and, if not installed and used in accordance with the instruction manual, may cause
harmful interference to radio communications. Operation of this equipment in a residential area is likely to cause
harmful interference in which case the user will be required to correct the interference at his own expense.
•(Only applicable to home)This equipment has been tested and found to comply with the limits for a Class B
digital device, pursuant to part 15 of the FCC Rules. These limits are designed to provide reasonable protection
against harmful interference in a residential installation. This equipment generates, uses and can radiate radio
frequency energy and, if not installed and used in accordance with the instructions, may cause harmful
interference to radio communications. However, there is no guarantee that interference will not occur in a
Before using this radio, read this guide which contains
important operating instructions for safe usage and rf energy
awareness and control for compliance with applicable
standards and regulations.
06

particular installation. If this equipment does cause harmful interference to radio or television reception, which
can be determined by turning the equipment off and on, the user is encouraged to try to correct the interference
by one or more of the following measures:
—Reorient or relocate the receiving antenna.
—Increase the separation between the equipment and receiver.
—Connect the equipment into an outlet on a circuit different from that to which the receiver is connected.
—Consult the dealer or an experienced radio/TV technician for help.
CE Requirements:
•(Simple EU declaration of conformity) Shenzhen Retevis Technology Co., Ltd. declares that the radio equipment
type is in compliance with the essential requirements and other relevant provisions of RED Directive 2014/53/EU
and the ROHS Directive 2011/65/EU and the WEEE Directive 2012/19/EU; the full text of the EU declaration of
conformity is available at the following internet address: www.retevis.com.
•Restriction Information
This product can be used in EU countries and regions, including: Belgium (BE), Bulgaria (BG), Czech Republic
(CZ), Denmark (DK), Germany (DE), Estonia (EE), Ireland (IE), Greece (EL), Spain (ES), France (FR), Croatia
(HR), Italy (IT), Cyprus (CY), Latvia (LV), Lithuania (LT), Luxembourg (LU), Hungary (HU), Malta (MT),
Netherlands (NL), Austria (AT), Poland (PL), Portugal (PT), Romania (RO), Slovenia (SI), Slovakia (SK), Finland
(FI), Sweden (SE) and United Kingdom (UK).
For the warning information of the frequency restriction, please refer to the package.
•Disposal
The crossed-out wheeled-bin symbol on your product, literature, or packaging reminds you that in the European
Union, all electrical and electronic products, batteries, and accumulators (rechargeable batteries) must
be taken to designated collection locations at the end of their working life. Do not dispose of these
products as unsorted municipal waste. Dispose of them according to the laws in your area.
(1) Separated recycling of „old devices“
Electric and electronic devices that have become waste are called old devices. Owners of such old devices have
to bring these to recycling facilities, where these are handled and recorded separately from urban solid waste.
Old devices must not end up in the household refuse. In fact they have to be collected in special collecting and
recycling systems.
(2)Batteries and accumulators
If possible, electric and electronic equipment has to be disposed separately from built-in batteries and /
oraccumulators.
a) After use, batteries can be handed back free of charge at the selling point.
b) The user is obliged as per law to return/hand back the used batteries.
(3) Possibility for disposal of „old devices“
Owners of old devices from private households can dispose these at the public waste disposal authorities or
bring them to producer or seller related disposal locations. You can find these disposal locations online:
https://www.ear-system.de/ear-verzeichnis/sammel-und-ruecknahmestellen.jsf
(4)Privacy information
Old devices often contain private data, especially appliances from data processing and communication
equipment, such as smartphones or hard discs. In your own interest, please arrange to eliminate all personal and
private data from your disposed equipment.
(5) Producer´s WEEE registration number
As a producer in terms of the German ElektroG we are registered with the German registration authority Stiftung
Elektro-Altgeräte-Register (Benno-Strauß-Str. 1, 90763 Fürth), having been granted the following WEEE
registration number:DE 83916430
RF Exposure Compliance and Control Guidelines and Operating Instructions
•Occupational/Controlled Radio, this radio is designed for and classified as “Occupational/Controlled Use Only”,
meaning it must be used only during the course of employment by individuals aware of the hazards, and the
ways to minimize such hazards; NOT intended for use in a General population/uncontrolled environment.
•General population/uncontrolled Radio, this radio is designed for and classified as “General population/uncon-
trolled Use”.
To control your exposure and ensure compliance with the occupational/controlled environment exposure limits,
always adhere to the following procedures. When operating in front of the face, worn on the body, always place
the radio in a Retevis approved clip, holder, holster, case, or body harness for this product. Using approved
body-worn accessories is important because the use of Non-Retevis approved accessories may result in
07

exposure levels, which exceed the IEEE/ICNIRP RF exposure limits.
Transmit no more than the rated duty factor of 50% of the time. To Transmit (Talk), push the Push to Talk (PTT)
button. To receive calls (listen), release the PTT button. Transmitting necessary information or less, is important
because the radio generates measurable RF energy exposure only when transmitting in terms of measuring for
standards compliance.
•DO NOT operate the radio without a proper antenna attached, as this may damage the radio and may also
cause you to exceed RF exposure limits. A proper antenna is the antenna supplied with this radio by the
manufacturer or an antenna specifically authorized by the manufacturer for use with this radio, and the antenna
gain shall not exceed the specified gain by the manufacturer declared.
•DO NOT transmit for more than 50% of total radio use time, more than 50% of the time can cause RF exposure
compliance requirements to be exceeded.
•During transmissions, your radio generates RF energy that can possibly cause interference with other devices or
systems. To avoid such interference, turn off the radio in areas where signs are posted to do so.
•DO NOT operate the transmitter in areas that are sensitive to electromagnetic radiation such as hospitals,
aircraft, and blasting sites.
•Portable Device, this transmitter may operate with the antenna(s) documented in this filing in Push-to-Talk and
body-worn configurations. RF exposure compliance is limited to the specific belt-clip and accessory configura-
tions as documented in this filing and the separation distance between head and the device or its antenna shall
be at least 2.5 cm.
Hand-held Mode(if applicable)
• Hold the radio in a vertical position with the microphone (and other parts of the radio including the
antenna) at least 2.5 cm (one inch) away from the nose or lips. The antenna should be kept away from
the eyes. Keeping the radio at a proper distance is important as RF exposure decreases with
increasing distance from the antenna.
Electromagnetic Interference/Compatibility
NOTE: Nearly every electronic device is susceptible to electromagnetic interference (EMI) if inadequately
shielded, designed, or otherwise configured for electromagnetic compatibility.
Avoid Choking Hazard
Small Parts. Not for children under 3 years.
WARNING
Turn off your radio power in the following conditions:
•Turn off your radio before removing (installing) a battery or accessory or when charging battery.
•Turn off your radio when you are in a potentially hazardous environments: Near electrical blasting
caps, in a blasting area, in explosive atmospheres (inflammable gas, dust particles, metallic
powders, grain powders, etc.).
•Turn off your radio while taking on fuel or while parked at gasoline service stations.
To avoid electromagnetic interference and/or compatibility conflicts
•Turn off your radio in any facility where posted notices instruct you to do so, hospitals or health
care facilities (Pacemakers, Hearing Aids and Other Medical Devices) may be using equipment that
is sensitive to external RF energy.
•Turn off your radio when on board an aircraft. Any use of a radio must be in accordance with
applicable regulations per airline crew instructions.
• Use the lowest volume necessary to do your job.
• Turn up the volume only if you are in noisy surroundings.
• Turn down the volume before adding headset or earpiece.
• Limit the amount of time you use headsets or earpieces at high volume.
• When using the radio without a headset or earpiece, do not place the radio's speaker directly
against your ear
• Use careful with the earphone maybe possible excessive sound pressure from earphones and
headphones can cause hearing loss
Note: Exposure to loud noises from any source for extended periods of time may temporarily or
permanently affect your hearing. The louder the radio's volume, the less time is required
WARNING
Protect your hearing:
08

WARNING
WARNING
WARNING
Avoid Burns
Safety Operation
Approved Accessories
before your hearing could be affected. Hearing damage from loud noise is sometimes
undetectable at first and can have a cumulative effect.
Antennas
•Do not use any portable radio that has a damaged antenna. If a damaged antenna comes into
contact with the skin when the radio is in use, a minor burn can result.
Batteries (If appropriate)
•When the conductive material such as jewelry, keys or chains touch exposed terminals of the
batteries, may complete an electrical circuit (short circuit the battery) and become hot to cause
bodily injury such as burns. Exercise care in handling any battery, particularly when placing it inside
a pocket, purse or other container with metal objects
••BATTERY WARNING: KEEP OUT OF REACH OF CHILDREN
•Store spare batteries securely
•If the battery compartment (if applicable) does not close securely, stop using the product and keep
it away from children
•If you think batteries might have been swallowed or placed inside any part of the body, seek
immediate medical attention
•Dispose of used batteries immediately and safely
Long transmission
•When the transceiver is used for long transmissions, the radiator and chassis will become hot.
Forbid
•Do not use charger outdoors or in moist environments, use only in dry locations/conditions.
•Do not disassemble the charger, that may result in risk of electrical shock or fire.
•Do not operate the charger if it has been broken or damaged in any way.
•Do not place a portable radio in the area over an air bag or in the air bag deployment area. The
radio may be propelled with great force and cause serious injury to occupants of the vehicle when
the air bag inflates.
To reduce risk
•Pull by the plug rather than the cord when disconnecting the charger.
•Unplug the charger from the AC outlet before attempting any maintenance or cleaning.
•Contact Retevis for assistance regarding repairs and service.
•The adapter shall be installed near the equipment and shall be easily accessible
•This radio meets the RF exposure guidelines when used with the Retevis accessories supplied or
designated for the product. Use of other accessories may not ensure compliance with the RF
exposure guidelines and may violate regulations.
•For a list of Retevis-approved accessories for your radio model, visit the following website:
http://www.Retevis.com
09

10
Bekannt werden
LED-Anzeigen
Seriennummer Name
1 PTT
2 Seitliche Taste
3 Kanal-Knopf
4 Leistungs-/Lautstärkeknopf
5 LED-Anzeigen
6 Lautsprecher / Mikrofon
7 Mikrofon
LED-Anzeige Status
Grünes Licht ist immer an Empfangen werden
Rotes Licht leuchtet immer Wird gesendet
Grünes Licht blinkt langsam Wird gescannt
Gebrauch vorbereiten
Schütteln Sie das Funkgerät nicht, indem Sie es oben an der Antenne festhalten, um eine Beeinträchtigung der
Leistung und Lebensdauer der Antenne zu vermeiden.
Bringen Sie den hinteren Clip an
1.Nehmen Sie den Akkupack und die hinteren Clipteile aus der inneren Box.
2. Richten Sie den hinteren Clip am eingekerbten Ende des Akkus aus und drücken Sie ihn sanft hinein.
Setzen Sie die Batterie ein
1. Richten Sie den Akkupositionierungsstift am Akkufach im hinteren Gehäuse aus, drücken Sie vorsichtig auf
die Oberseite des Akkus und lassen Sie ihn in den Akku einrasten.
2. Der Batterieentlader gleitet natürlich ab und verriegelt den Batteriesatz.
Zubehör installieren
1. Heben Sie die Abdeckung der Zubehörschnittstelle an und schieben Sie das Audiozubehör sanft in die
Schnittstelle.
2. Vergewissern Sie sich, dass das Funkgerät ausgeschaltet ist, bevor Sie es hineinschieben.
Laden
Da der Akku werksseitig nicht vollständig geladen ist, führen Sie bitte vor dem Gebrauch die notwendige
Vorladung des neuen Akkus durch! Allgemein
Unter normalen Umständen muss der Akku bei der ersten Verwendung volle 5 Stunden geladen werden.

11
Bitte stellen Sie sicher, dass das Radio während des Ladevorgangs ausgeschaltet ist.
Um Brände oder Verletzungen zu vermeiden, verwenden Sie zum Aufladen bitte den Original-Lithium-Batterie-
adapter der Fabrik!
Abfrage des Batteriestands
Wenn das Radio beginnt, den periodischen Piepton "Batterie schwach, bitte aufladen" auszugeben, zeigt dies
an, dass die Batterie fast leer ist und sich abschaltet. Bitte ersetzen Sie die Batterie sofort oder schalten Sie das
Radio aus und stecken Sie es in das Ladegerät aufladen.
Drücken Sie die vorprogrammierte Taste [Aufforderung zur Batterieleistung], um den aktuellen Status der
Batterieleistung zu prüfen.
Energiesparmodus
Damit der Akku besser energiesparend spielt und länger hält, wird empfohlen, den Energiesparmodus
einzuschalten. Dieser Punkt wird vom Händler eingestellt. Die Standardstromeinsparung ist 1:1.
Grundoperationen
1. Einschalten / Ausschalten
Um das Gerät einzuschalten, drehen Sie den [Power/Volume]-Knopf im Uhrzeigersinn, bis Sie ein "Klicken"
hören.
Um das Gerät auszuschalten, drehen Sie diesen Knopf gegen den Uhrzeigersinn, bis Sie ein Klicken hören.
2. Lautstärkeregelung
Drehen Sie nach dem Einschalten den Lautstärkeregler im Uhrzeigersinn, um die Lautstärke zu erhöhen, und
gegen den Uhrzeigersinn, um die Lautstärke zu verringern
3.Auswählen einer Region (Seitentaste - Werkseinstellung)
Eine Zone ist eine Gruppe von Kanälen, die es Ihnen ermöglicht, Kanäle mit denselben Attributen in eine Zone
aufzunehmen (wird automatisch in den Zonenoptionen hinzugefügt), wodurch Sie vorhandene Kanäle effizient
verwalten können. Das Gerät unterstützt 16 Zonen mit jeweils bis zu 16 Kanälen.
Wählen Sie eine Zone aus, indem Sie die Taste [Zone Switch] mit der Seitentaste vorprogrammieren. Wenn das
Radio die Sprachansagetonfunktion aktiviert hat, sagt das Radio die Regionsnummer nach dem Umschalten auf
die gewünschte Region an.
4.Auswählen eines Kanals
Der Kanal ist der Kanal für die Signalübertragung. Drehen Sie den [Kanalknopf], um den Kanal auszuwählen.
Wenn das Funkgerät die Sprachansagetonfunktion aktiviert hat, sagt das Funkgerät die Kanalnummer an, wenn
der Kanal durch Einschalten oder Drehen des [Kanalknopfs] umgeschaltet wird.
5. Digitaler Anruf
Sie können Einzel-, Gruppen- oder vollständige Anrufe an die auf dem aktuellen digitalen Kanal voreingestellten
Kontakte tätigen (die vollständige Anruferlaubnis muss vom Händler aktiviert werden).
Ein Einzelanruf ist ein Eins-zu-Eins-Anruf.
Gruppenanruf ist ein Eins-zu-viele-Anruf.
Alle Anrufe sind Anrufe, die an alle Kontakte auf dem aktuellen digitalen Kanal eingeleitet werden.
6. Anruf einleiten
Sie können einen Anruf mit den folgenden Methoden initiieren.
Halten Sie im Standby-Modus die [PTT]-Taste gedrückt, um einen Einzelruf, Gruppenruf oder Rundruf direkt an
einen voreingestellten Einzelrufkontakt, Gruppenrufkontakt oder Rundrufkontakt auf dem aktuellen digitalen
Kanal zu tätigen.
Wenn der Händler [One-Touch-Anruf] konfiguriert, um einen persönlichen Anrufkontakt oder Gruppenanrufkon-
takt anzurufen, drücken Sie die [PTT]-Taste, nachdem Sie die [One-Touch-Anruf]-Schnelltaste gedrückt haben,
um den Anruf einzuleiten.

12
Halten Sie das Funkgerät während des Radios senkrecht 2-3,5 cm von Ihrem Mund entfernt und die rote LED
leuchtet auf.
Lassen Sie die [PTT]-Taste los, um eine Antwort zu erhalten.
Wenn Sie die Sendeleistung des Kanals auf „Niedrig“ eingestellt haben und keinen erfolgreichen Anruf
tätigen können, können Sie die vorprogrammierte Taste [Power Adjust] verwenden, um vorübergehend
auf die Übertragung mit hoher Leistung umzuschalten.
7.Anrufe entgegennehmen/Anrufe beantworten
Wenn ein Anruf eingeht, können Sie den Anruf ohne weitere Bedienung entgegennehmen. Halten Sie während
eines Einzel- oder Gruppenanrufs die [PTT]-Taste gedrückt, um den Anruf innerhalb der voreingestellten Zeit
anzunehmen.
8.Anruf beenden
Einzel-/Gruppenruf: Das Funkgerät beendet den Einzel-/Gruppenruf, wenn niemand die [PTT]-Taste zum
Sprechen drückt und die Gesprächshaltezeit überschritten wird.
Sammelruf: Wenn der Anrufer die PTT-Taste loslässt, beendet das Funkgerät den Sammelruf.
9.Analoger Anruf
Ein analoger Anruf ist ein Anruf, der auf einem analogen Kanal initiiert wird, der so angepasst ist, dass er dem
Bereich entspricht.
Halten Sie zum Senden die Taste [PTT] gedrückt und sprechen Sie in das Mikrofon. Lassen Sie zum Empfangen
die [PTT]-Taste los.
10.Scan
Scannen bedeutet, dass ein Funkgerät, wenn es nach Aktivitäten auf einem Kanal sucht, auf diesem Kanal
bleibt, um zuzuhören. Eine Scan-Liste ist eine Liste von Kanälen, die angehört werden.
Sie können bis zu 32 Scanlisten erstellen und mindestens eine Scanliste führen. Jede Scan-Liste hat maximal 16
Kanäle (kann eine Mischung aus analogen und digitalen Kanälen enthalten).
So aktivieren Sie das Scannen:
Methode 1: Drücken Sie die vorprogrammierte Taste [Scan], um die Scanfunktion einzuschalten.
Methode 2: Wenn ein Kanal mit „Auto Scan“ aktiviert und eine Scan-Liste konfiguriert ist, schaltet das Radio
automatisch den Scan ein, wenn es zu diesem Kanal wechselt.
Hinweis: Wenn Sie das Scannen einschalten, vergewissern Sie sich bitte, dass der aktuelle Kanal zur
entsprechenden Scan-Liste hinzugefügt wurde.
So beenden Sie das Scannen:
Methode 1: Scanstatus, drücken Sie zum Beenden die Taste [Scan].
Methode 2: Die automatische Kanalsuche ist aktiviert, schalten Sie den Kanal um.
11.Verschlüsselung
Verschlüsselung ist die Ende-zu-Ende-Verschlüsselung von Sprache oder Daten mit einem Schlüssel, der vom
Empfänger nur entschlüsselt werden kann, wenn der Schlüssel konsistent ist, wodurch das Abhören von
Sprache und Daten verhindert wird.
Funkgeräten kann nur eine der oben genannten Verschlüsselungsarten zugewiesen werden. Um einen
verschlüsselten Anruf oder eine verschlüsselte Datenübertragung zu entschlüsseln, muss das vorzuprogrammie-
rende Funkgerät den gleichen „Verschlüsselungsschlüssel“ haben wie das sendende Funkgerät (für
Basisverschlüsselung).
Wenn Ihr Funkgerät einen verschlüsselten Anruf mit einem anderen Verschlüsselungsschlüssel oder einem
anderen Schlüsselwert und einer anderen Schlüssel-ID empfängt, hören Sie eine unordentliche Übertragung
(Basisverschlüsselung)..
12.DMR-Notfallwarnungen
Die Alarmfunktion ermöglicht es Benutzern, in Krisenzeiten Hilfe anzufordern. Die Alarmfunktion kann nur durch
Drücken der Taste [Emergency Mode On] ausgelöst werden, wenn der Kanal mit einem Alarmsystem konfiguriert

13
ist. Die folgenden Alarmtypen können vom CPS programmiert werden.
-Nur Hup: Wenn ein Alarm aktiviert ist, gibt das Radio einen scharfen Hupton zur Warnung ab.
-Geheim: Wenn der Alarm ausgelöst wird, ruft das Funkgerät dringend die Notrufnummer an, und das
auslösende Funkgerät hat keine akustischen oder visuellen Aufforderungen.
-Geheimnis mit Stimme: Wenn der Alarm, die Notrufnummer des Funknotrufs und das Funkgerät der
einleitenden Partei ohne visuelle Aufforderung sind, aber Sprache empfangen können.
-Normal: Wenn der Alarm eingeschaltet ist, ruft das Radio dringend die Notrufnummer an. Notruf ist ein Anruf mit
der höchsten Priorität, der den laufenden normalen Anruf unterbrechen kann. Der Ablauf eines Notrufs ähnelt
einem normalen Anruf
13.SMS (nur senden)
Das Funkgerät kann über die voreingestellte Ein-Tasten-Bedienung (CPS-Software-voreingestellte Shortcut-Text-
nachricht) einen Ein-Tasten-Kurznachrichtendienst an den Zielkontakt initiieren. Die SMS-Funktion unterstützt die
folgenden SMS-Formate.
H-SMS: SMS-Textkommunikation mit Hytera DMR-Funk ist erlaubt.
M-SMS: Ermöglicht SMS-Textkommunikation mit Motorola DMR-Funkgeräten.
D-SMS: Ermöglicht SMS-Textkommunikation mit Funkgeräten der DMR-Allianz-Hersteller.
14.Auslösen eines Alarms
Drücken Sie die vorprogrammierte Taste [Notmodus Ein], um einen Alarm an einen vorprogrammierten Kontakt
auszulösen.
Wenn während eines Notrufs oder Alarmrufs die automatische Notruffunktion des Funkgeräts eingeschaltet ist,
müssen Sie die [PTT]-Taste nicht gedrückt halten, um zu sprechen. Wenn die Anzahl der automatischen Notrufe
die vom Händler vorprogrammierte Anzahl übersteigt, halten Sie die [PTT]-Taste gedrückt, wenn Sie erneut
einen Notruf tätigen müssen.
15.Beantworten eines Alarms
Wenn ein Notruf eingeht, können Sie ihn ohne Bedienung entgegennehmen.
16.Beenden eines Alarms
Der Anrufer kann den Alarm auf folgende Weise beenden.
Möglichkeit 1: Drücken Sie die vorprogrammierte Taste [Notmodus Aus].
Modus 2: Schalten Sie das Telefon aus.
Der Angerufene kann den Alarm beenden, indem er den Kanal wechselt oder das Telefon ausschaltet.
17.Alleine arbeiten
Wenn Sie während der Arbeit alleine auf eine unerwartete Situation stoßen und das Funkgerät nicht innerhalb
der vorprogrammierten Zeit bedienen können, gibt das Funkgerät automatisch einen Alarm aus, um Ihren
Begleiter oder die Leitstelle um Hilfe zu bitten.
Arbeitsmodus - Alarm: Der aktuelle Kanal muss mit dem DMR-Alarmsystem voreingestellt sein, und der Alarm
wird automatisch ausgelöst, wenn die programmierte Zeitbedingung erreicht ist.
Arbeitsmodus - Signalton: Der aktuelle Kanal lässt nur dann eine periodische Sirene ertönen, wenn die
programmierte Zeit erreicht ist.
Drücken Sie die vorprogrammierte Taste [Allein arbeiten], um „Allein arbeiten“ zu aktivieren.
18.Straight-through dual capacity
Direct dual capacity refers to the DMR digital radio's time division multiple access direct mode, the same
frequency point in this mode supports two different time slots of calls at the same time. radios in the same group
must use the same time slot to make calls, so as to ensure that they will not interfere with the radios using other
time slots.
Note: When you turn on straight-through dual time slot communication, the radios need to be in the same time
slot in order to achieve the pass-through connection.

14
Um die gute Leistung dieses Produkts zu gewährleisten und seine Lebensdauer zu verlängern, machen Sie sich
bitte mit den folgenden Punkten für eine bessere tägliche Wartung und Reinigung dieses Produkts vertraut.
- Durchstechen oder zerkratzen Sie das Produkt nicht mit harten Gegenständen.
- Lagern Sie das Produkt nicht in einer Umgebung, die Substanzen enthält, die elektronische Schaltkreise
angreifen.
-Verwenden Sie nicht die tragbare Antenne oder das Kopfhörerkabel, während Sie das Produkt tragen oder
verwenden.
- Wenn das Zubehör nicht verwendet wird, decken Sie bitte die Abdeckung des Zubehöranschlusses ab.
Reinigung
Verwenden Sie ein sauberes und trockenes, fusselfreies Tuch oder eine Bürste, um regelmäßig Staub und
Schmutz von der Oberfläche des Funkgeräts und des Batteriepolstücks abzuwischen.
-Die Tasten, Bedienknebel und das Gehäuse des Radios sind sehr schmutzanfällig. Verwenden Sie keine
Chemikalien wie Reinigungsmittel, Alkohole, Aerosole oder Petroleummittel, um Schäden an der Produktober-
fläche und am Gehäuse zu vermeiden.
- Stellen Sie nach der Reinigung sicher, dass das Radio vollständig trocken ist, andernfalls verwenden Sie es
bitte nicht.
Hinweis: Schalten Sie das Gerät vor der Reinigung aus und entfernen Sie den Akku.
Optionen
Keine Funktion
Leistungsanpassung
Schalter für Notbetrieb
Verschlüsselung
VOX
One-Touch-Anruf 1...5
Regionsumschaltung
Tastatur-/Kanalsperre
Digital-Analog-Modus-
Umschaltung
Steady-State-Hören
Batteriestandswarnung
Scannen
Planung
Alleine arbeiten
Squelch-Pegel
Beschreibung
Dieser Taste ist keine Funktion zugeordnet, und das Drücken dieser Taste ist
nicht zulässig.
Wechseln Sie schnell zwischen hoher und niedriger Leistung.
Stellt schnell einen Notruf her. Drücken Sie diese Taste, um die Weckfunktion
ein- oder auszuschalten.
Drücken Sie diese Taste, um die Verschlüsselung ein- oder auszuschalten.
Drücken Sie diese Taste, um die Tonsteuerungsfunktion für den aktuellen Kanal
ein- oder auszuschalten.
Anruf-Schnelltaste zum Senden des entsprechenden Anrufs, einer Kurznachric-
ht oder anderer Anwendungsfunktionen nach dem Drücken einer Anruftaste.
Schnelle Regionsauswahl, sodass Benutzer zwischen mehreren Regionen
wechseln können.
Drücken Sie diese Taste, um die Tastatur-/Kanalsperrfunktion ein- oder
auszuschalten.
Wechseln Sie schnell die aktuellen Kanaleigenschaften.
Drücken Sie diese Taste, um in den Monitor-Squelch-Modus zu wechseln, und
drücken Sie sie erneut, um zum Empfangs-Squelch-Modus zurückzukehren.
Schneller Zugriff auf den Ladezustand des Akkus. Sprachübertragung von
hohem, mittlerem und niedrigem Batteriestand
Schalten Sie das Scannen schnell ein oder aus
Senden Sie schnell ein 1750-Lead-Signal
Drücken Sie diese Taste, um zwischen separaten Arbeitsfunktionen ein- und
auszuschalten.
Drücken Sie diese Taste, um den Squelch-Pegel des aktuellen Kanals
umzuschalten (normal/streng).
Programmierbares Tastaturmenü

15
Frequency Range PMR446
Memory Channel 16
audio distortion <5%
Operation Temperature Range -20℃+55℃
Antenna Impendance 50Ω
Output power ≤0.5W
frequency stability ±2.5ppm
maximum frequency deviation ≤±[email protected]
stray radiation ≤-57dBm
Modulation type 11 [email protected]
Current ≤750mA
Receiver sensitivity Analog≤-121dBm@12dB SINAD ; Digital≤-119dBm@5% BER
Adjacent channel selectivity ≥60dB
Inter-modulation 65dB
Rated Voltage DC 3.7V
Technische Spezifikationen

16
HF-ENERGIEEXPOSITION UND PRODUKTSICHERHEITSLEITFADEN FÜR FUNKGERÄTE
•Die Bedienungsanleitung sollte dem Gerät beiliegen, wenn es an andere Benutzer übertragen wird.
•Verwenden Sie dieses Gerät nicht, wenn die hier beschriebenen betrieblichen Anforderungen nicht
erfüllt sind.
Dieses Zwei-Wege-Funkgerät verwendet elektromagnetische Energie im Hochfrequenzspektrum (RF), um die
Kommunikation zwischen zwei oder mehr Benutzern über eine Entfernung zu ermöglichen. HF-Energie, die bei
unsachgemäßer Verwendung biologische Schäden verursachen kann.
Alle Retevis Zwei-Wege-Funkgeräte wurden entwickelt, hergestellt und getestet, um sicherzustellen, dass sie die
staatlich festgelegten HF-Expositionswerte erfüllen. Darüber hinaus empfehlen die Hersteller den Anwendern
von Funkgeräten auch spezifische Bedienungsanleitungen. Diese Anweisungen sind wichtig, da sie die Benutzer
über die HF-Energieexposition informieren und einfache Verfahren zur Steuerung bieten.
Weitere Informationen darüber, was hf-Energieexposition ist und wie Sie Ihre Exposition kontrollieren können, um
die Einhaltung der festgelegten HF-Expositionsgrenzwerte sicherzustellen, finden Sie auf den folgenden
Websites: http://www.who.int/en/
Wenn Funkgeräte als Folge der Beschäftigung verwendet werden, verlangen die Vorschriften der lokalen
Regierung, dass die Benutzer ihre Exposition vollständig kennen und kontrollieren können, um die beruflichen
Anforderungen zu erfüllen. Das Bewusstsein für die Exposition kann durch die Verwendung eines Produktetiketts
erleichtert werden, das die Benutzer zu spezifischen Informationen zur Sensibilisierung der Benutzer leitet. Ihr
Retevis Funkgerät verfügt über ein RF Exposure Product Label. Außerdem enthält Ihr Retevis-Benutzerhand-
buch oder ihre separate Sicherheitsbroschüre Informationen und Bedienungsanleitungen, die zur Kontrolle Ihrer
HF-Exposition und zur Erfüllung der Compliance-Anforderungen erforderlich sind.
Radiolizenz (gilt nur für lizenziertes Radio)
Regierungen halten die Funkgeräte in der Klassifizierung, Business-Funkgeräte arbeiten auf Funkfrequenzen,
die von den lokalen Radiomanagementabteilungen (FCC, ISED, BAKOM, ANFR, BFTK, Bundesnetzagentur...)
reguliert werden. Um auf diesen Frequenzen zu senden, benötigen Sie eine von ihnen ausgestellte Lizenz.
Für die detaillierte Klassifizierung und die Verwendung Ihrer beiden Funkgeräte wenden Sie sich bitte an die
lokalen Radioverwaltungsabteilungen.
Die Verwendung dieses Funkgeräts außerhalb des Landes, in dem es verbreitet werden sollte, unterliegt
staatlichen Vorschriften und kann verboten sein. Nicht autorisierte Änderung und Anpassung
Änderungen oder Modifikationen, die nicht ausdrücklich von der für die Einhaltung verantwortlichen Partei
genehmigt wurden, können die von den lokalen Funkverwaltungsabteilungen erteilte Befugnis des Benutzers
zum Betrieb dieses Funkgeräts aufheben und sollten nicht vorgenommen werden. Um die entsprechenden
Anforderungen zu erfüllen, sollten Senderanpassungen nur von oder unter der Aufsicht einer Person
vorgenommen werden, die als technisch qualifiziert für die Wartung und Reparatur von Sendern in privaten
mobilen und festen Landdiensten zertifiziert ist, die von einer Organisation, die den Nutzer dieser Dienste vertritt,
zertifiziert wurde.
Der Austausch von Senderkomponenten (Kristall, Halbleiter usw.), die nicht von den örtlichen Radioverwal-
tungsabteilungen für die Ausrüstungsgenehmigung für dieses Funkgerät autorisiert wurden, könnte gegen die
Regeln verstoßen.
FCC-Anforderungen:
Dieses Gerät wurde getestet und erfüllt die Grenzwerte für ein digitales Gerät der Klasse A gemäß Teil 15 der
FCC-Regeln. Diese Grenzwerte sollen einen angemessenen Schutz vor schädlichen Störungen bieten, wenn
das Gerät in einer kommerziellen Umgebung betrieben wird. Dieses Gerät erzeugt, verwendet und kann
Hochfrequenzenergie abstrahlen und kann, wenn es nicht in Übereinstimmung mit der Bedienungsanleitung
installiert und verwendet wird, schädliche Störungen der Funkkommunikation verursachen. Der Betrieb dieser
Geräte in einem Wohngebiet kann zu funktechnischen Störungen führen, in diesem Fall muss der Benutzer die
Störung auf eigene Kosten korrigieren.
• (gilt nur für zu Hause) Dieses Gerät wurde getestet und entspricht den Grenzwerten für ein digitales Gerät der
Klasse B gemäß Teil 15 der FCC-Regeln. Diese Grenzwerte sollen einen angemessenen Schutz vor schädlichen
Bevor Sie dieses Funkgerät verwenden, lesen Sie dieses
Handbuch, das wichtige Bedienungsanleitungen für die
sichere Verwendung und das Bewusstsein und die Kontrolle
der HF-Energie zur Einhaltung der geltenden Normen und
Vorschriften enthält.

17
Störungen in einer Wohnanlage bieten. Dieses Gerät erzeugt, verwendet und kann Hochfrequenzenergie
abstrahlen und kann, wenn es nicht gemäß den Anweisungen installiert und verwendet wird, funktechnische
Störungen verursachen. Es gibt jedoch keine Garantie dafür, dass in einer bestimmten Installation keine
Interferenzen auftreten. Wenn dieses Gerät schädliche Störungen des Radio- oder Fernsehempfangs verursacht,
die durch Aus- und Einschalten des Geräts festgestellt werden können, wird der Benutzer aufgefordert, zu
versuchen, die Störung durch eine oder mehrere der folgenden Maßnahmen zu beheben:
– Richten Sie die Empfangsantenne neu aus oder verlegen Sie sie.
– Vergrößern Sie den Abstand zwischen Gerät und Empfänger.
– Schließen Sie das Gerät an eine Steckdose an, die sich von dem Stromkreis unterscheidet, an den der
Empfänger angeschlossen ist.
– Wenden Sie sich an den Händler oder einen erfahrenen Radio-/TV-Techniker, um Hilfe zu erhalten.
CE-Anforderungen:
• (Einfache EU-Konformitätserklärung) Shenzhen Retevis Technology Co., Ltd. erklärt, dass der Funkanlagentyp
den grundlegenden Anforderungen und anderen relevanten Bestimmungen der RED-Richtlinie 2014/53/EU und
der ROHS-Richtlinie 2011/65/EU und der WEEE-Richtlinie 2012/19/EU entspricht; der vollständige Text der
EU-Konformitätserklärung ist unter folgender Internetadresse abrufbar: www.retevis.com.
•Einschränkungsinformationen
Dieses Produkt kann in EU-Ländern und -Regionen verwendet werden, darunter: Belgien (BE), Bulgarien (BG),
Tschechische Republik (CZ), Dänemark (DK), Deutschland (DE), Estland (EE), Irland (IE), Griechenland (EL),
Spanien (ES), Frankreich (FR), Kroatien (HR), Italien (IT), Zypern (CY), Lettland (LV), Litauen (LT), Luxemburg
(LU), Ungarn (HU), Malta (MT), Niederlande (NL), Österreich (AT), Polen (PL), Portugal (PT), Rumänien (RO),
Slowenien (SI), Slowakei (SK), Finnland (FI), Schweden (SE) und Vereinigtes Königreich (UK).
Die Warnhinweise zur Frequenzbeschränkung entnehmen Sie bitte dem Paket.
•Entsorgung
Das durchgestrichene Mülleimersymbol auf Ihrem Produkt, Ihrer Literatur oder Ihrer Verpackung erinnert Sie
daran, dass in der Europäischen Union alle elektrischen und elektronischen Produkte, Batterien und
Akkumulatoren (Akkus) am Ende ihrer Lebensdauer an bestimmte Sammelstellen gebracht werden
müssen. Entsorgen Sie diese Produkte nicht als unsortierten Siedlungsabfall. Entsorgen Sie sie
gemäß den Gesetzen in Ihrer Nähe.
(1) Getrennte Erfassung von Altgeräten
Elektro- und Elektronikgeräte, die zu Abfall geworden sind, werden als Altgeräte bezeichnet. Besitzer von
Altgeräten haben diese einer vom unsortierten Siedlungsabfall getrennten Erfassung zuzuführen. Altgeräte
gehören insbesondere nicht in den Hausmüll, sondern in spezielle Sammel- und Rückgabesysteme.
(2) Batterien und Akkus
Besitzer von Altgeräten haben Altbatterien und Altakkumulatoren, die nicht vom Altgerät umschlossen sind, im
Regelfall vor der Abgabe an einer Erfassungsstelle von diesem zu trennen. Dies gilt nicht, soweit die Altgeräte
bei öffentlich-rechtlichen Entsorgungsträgern abgegeben und dort zum Zwecke der Vorbereitung zur
Wiederverwendung von anderen Altgeräten separiert werden.
a) Batterien können nach Gebrauch unentgeltlich in der Verkaufsstelle zurückgegeben werden.
b) Der Nutzer ist zur Rückgabe gebrauchter Batterien gesetzlich verpflichtet.
(3) Möglichkeiten der Rückgabe von Altgeräten
Besitzer von Altgeräten aus privaten Haushalten können diese bei den Sammelstellen der öffentlich-rechtlichen
Entsorgungsträger oder bei den von Herstellern oder Vertreibern im Sinne des ElektroG eingerichteten
Rücknahmestellen abgeben. Ein Onlineverzeichnis der Sammel- und Rücknahmestellen finden Sie hier:
https://www.ear-system.de/ear-verzeichnis/sammel-und-ruecknahmestellen.jsf
(4) Datenschutz-Hinweis
Altgeräte enthalten häufig sensible personenbezogene Daten. Dies gilt insbesondere für Geräte der
Informationsund Telekommunikationstechnik wie Computer und Smartphones. Bitte beachten Sie in Ihrem
eigenen Interesse,dass für die Löschung der Daten auf den zu entsorgenden Altgeräten jeder Endnutzer selbst
verantwortlich ist.
(5) Hersteller-Registrierungsnummer
Als Hersteller im Sinne des ElektroG sind wir bei der zuständigen Stiftung Elektro-Altgeräte Register
(BennoStrauß-Str. 1, 90763 Fürth) unter der folgenden Registrierungsnummer registriert: DE 83916430
RF Exposure Compliance und Steuerungsrichtlinien und Bedienungsanleitungen
• Occupational/Controlled Radio, dieses Funkgerät ist für "Occupational/Controlled Use Only" konzipiert und
klassifiziert, was bedeutet, dass es nur während der Beschäftigung von Personen verwendet werden darf, die
sich der Gefahren und der Möglichkeiten zur Minimierung solcher Gefahren bewusst sind; NICHT für die
Verwendung in einer allgemeinen Bevölkerung / unkontrollierten Umgebung bestimmt.
Table of contents
Languages:
Other Retevis Two-way Radio manuals

Retevis
Retevis RT15 User manual

Retevis
Retevis RT47V User manual

Retevis
Retevis RT-35 User manual

Retevis
Retevis RT30 User manual

Retevis
Retevis RM40 User manual

Retevis
Retevis RT45P User manual

Retevis
Retevis RT649B User manual

Retevis
Retevis RB39P User manual

Retevis
Retevis RA35 User manual

Retevis
Retevis RA15 User manual

Retevis
Retevis RB75 User manual

Retevis
Retevis RT602 User manual

Retevis
Retevis A7105A User manual

Retevis
Retevis RB22 User manual

Retevis
Retevis H777S User manual

Retevis
Retevis RT18 User manual

Retevis
Retevis RT639 User manual

Retevis
Retevis RT66 User manual

Retevis
Retevis RT76P User manual

Retevis
Retevis RT22 User manual