manuals.online logo
Brands
  1. Home
  2. •
  3. Brands
  4. •
  5. Revolution Galaxy
  6. •
  7. TV Mount
  8. •
  9. Revolution Galaxy BLANDY 300 User manual

Revolution Galaxy BLANDY 300 User manual

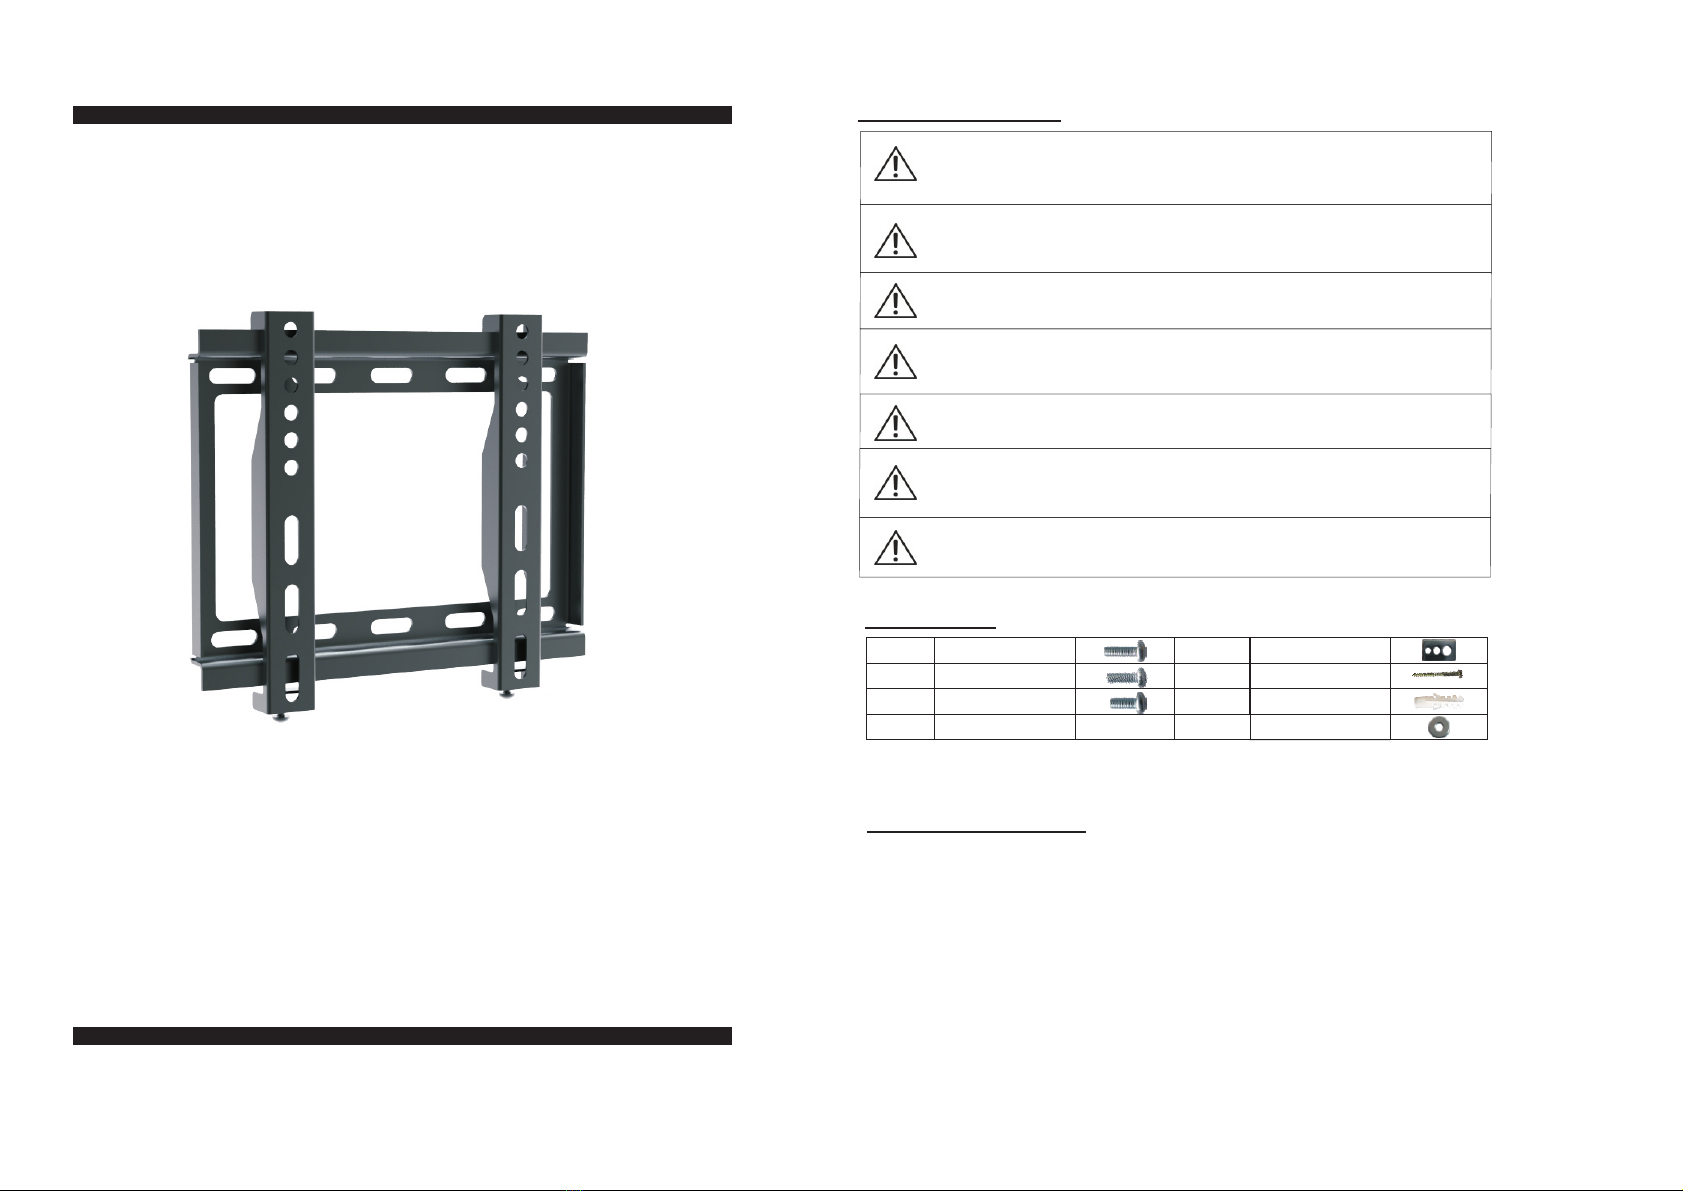
Tilt Flat Panel Bracket
Installation instruction
Warning Statements
Prior to the installation of this product, the installation instructions should be read and completely
understood. The installation instructions must be read to prevent personal injury and property
damage. Keep these instructions in an easily accessible location for future reference.
Recommended mounting surfaces: wooden studs and brick.If the mount is to be installed on
any surface other than wooden studs,use suitable hardware (which is commercially available).
Do not install on a structure that is prone to vibration, movement or chance of impact. Failure
to do so could result in damage to the display and/or damage to the mounting surface.
Don't install near heater, fireplace, direct sunlight,air conditioning or any other source of direct
heat energy. Failure to do so may result in damage to the display and could increase the risk of
fire.
The maximum loading weight is 30 kg.Use of heavier screen than the specified
A secure structure must support the weight or load of the display,When mounting to a wall
that contains wooden studs,dead center of the wooden stud must be confirmed prior to
installation.
At least two qualified people should perform the installation procedure.Injury and/or damage
can result from dropping or mishandling the display.
IMPORTANT:If you don't understand the right installation procedure,
please consult with an installation specialist
Step1: Wall plate installation
Wood Stud Installation
NOTE
least 16"apart.
:For secure wood stud mounting,the wall plate must be mounted to two studs at
Use a high-quality electronic stud finder (commercially available) to locate two adjacent studs
and mark their locations with a pencil.
1
Mark the right (upper and lower) and the left (upper and lower) positions of the small horizontal slots that are in
alignment with the studs.
2
3
1
With the help of an assistant, and using the bubble level to ensure the wall plate is at level, position the wall
plate against the wall in the desired mounting location.
4
Mark four positions total.
5
Pre-drill a 5mm hole 50mm depth in the wall stud at each marked location.
6
please position the wall plate against the wall and line up the mounting slots with drilled holes
7
For each location, insert a lag bolt and washer into the wall
8
Tighten bolt with an open ended socket wrench by turning clockwise until tight.
weight might result in injury and/or damage.
Fixed Wall Mount
TV Size:14"-37"
Max load capacity:25kgs/55lbs
wall distance:23.5mm
Bubble level system included
Universal Mounting Pattern
VESA: 200X200 mm
Hardware kit:
A
B
C
(×4) M5×16 screw
(×4) M6×16 screw
(×4) M8×16 screw
D
E
F
G
(×4) M8/M6/M5 Washer
(×6) M8 Bolt
(×6) M8 concrete anchor
(×6) M8 Washer
D
A/B/C
screw
BALANCE-ADJUSTING 5mm
50mm 12mm
50mm
F
G
H
CAUTION:
CAUTION:
Do not over-tighten the bolts.Doing so may cause unnecessary damage to the wall.
Avoid excessive torque.
Concrete/Brick Installation
Concrete anchors must be used for concrete wall installation.
NOTE:
Begin by placing the wall plate into position against the wall, using the bubble level to keep it at level.
Insert a concrete anchor into each hole.
If necessary, a hammer can be used to lightly tap each anchor into place so that they are flush with the
wall.
Once all of the anchors are in place ,move the wall plate back into position .
1
2
3
4
Step2 Display bracket Installation
To ensure optimal installation,this kit includes various screws of different diameters and lengths.
Place your TV screen down on a soft,flat surface,and locate the threaded mounting points that are
located on the back of the display.
Determine which screw (A/B/C)is of the correct length.
According to the size of the screen hole,choose the corresponding screw and hole on the rectangle washer,
then thread them in line as showed
1
2
3
4
Step3 Final Installation & Adjustment
Hook the TV Rails over the top of the wall plate.The TV Rail could be tilted down by 10 degree and
tighten the screws by screw driver to adjust the tilting hardness.
Lock the bracket with the safe lock screws.
1
2
Do not release the wall plate until it is properly mounted and secured to the wall.
Mark off four holes to be used for securing the mount.
Drill holes using an electric drill and 12mm masonry bit 50mm depth.
5
6
7Attach the bolt into the washer that is placed in the wall .
8Do not tighten until all screws are in place .

Popular TV Mount manuals by other brands

Krüger & Matz KM1300 owner's manual

Krüger & Matz

Krüger & Matz KM1300 owner's manual

Barkan E220 manual

Barkan

Barkan E220 manual

Bauhn ACTVB-1120 installation guide

Bauhn

Bauhn ACTVB-1120 installation guide

Vantage Point Products CB01 instructions

Vantage Point Products

Vantage Point Products CB01 instructions

Ergotron Neo Flex Cantilever UHD user guide

Ergotron

Ergotron Neo Flex Cantilever UHD user guide

ECG LD 174203 instruction manual

ECG

ECG LD 174203 instruction manual

StarTech.com FPCEILBTB user manual

StarTech.com

StarTech.com FPCEILBTB user manual

VonHaus 05/038 instruction manual

VonHaus

VonHaus 05/038 instruction manual

Techlink ECHO TV manual

Techlink

Techlink ECHO TV manual

Sandstrom SSTVMC12X instruction manual

Sandstrom

Sandstrom SSTVMC12X instruction manual

Kanto RCAD590 user manual

Kanto

Kanto RCAD590 user manual

Forging Mount HY9440 instruction manual

Forging Mount

Forging Mount HY9440 instruction manual

ICW SCACC18 installation instructions

ICW

ICW SCACC18 installation instructions

LG WM-L640V owner's manual

LG

LG WM-L640V owner's manual

Gembird WM-65ST-01 user manual

Gembird

Gembird WM-65ST-01 user manual

ERARD FiTUP XXL 035320 quick start guide

ERARD

ERARD FiTUP XXL 035320 quick start guide

PEERLESS PLCK-1 Installation and assembly

PEERLESS

PEERLESS PLCK-1 Installation and assembly

GEM GEM GP001 instructions

GEM

GEM GEM GP001 instructions

manuals.online logo
manuals.online logoBrands
  • About & Mission
  • Contact us
  • Privacy Policy
  • Terms and Conditions

Copyright 2025 Manuals.Online. All Rights Reserved.