RFXCOM RFXtrxLAN User manual

Copyright, RFXCOM 2021
RFXtrxLAN Rev. 2.0 page 1 / 14
RFXtrxLAN kit
www.rfxcom.com

Copyright, RFXCOM 2021
RFXtrxLAN Rev. 2.0 page 2 / 14
Table of Contents
1.
Introduction....................................................................................................................................... 3
2.
Contents of the kit. ........................................................................................................................... 3
3.
Install the RFXtrx433XL or RFXtrx868XL in the RFXtrxLAN. .......................................................... 4
4.
Install the RFXtrx433E in the RFXtrxLAN. ....................................................................................... 5
5.
Installation of the RFXtrxLAN........................................................................................................... 6
6.
LAN version ...................................................................................................................................... 6
6.1.
Configure the LAN controller ................................................................................................... 6
6.2.
Configure the Serial Port ......................................................................................................... 7
6.3.
Configure the TCP communication.......................................................................................... 8
7.
WiFi version...................................................................................................................................... 9
7.1.
Configure the WiFi module ...................................................................................................... 9
7.2.
Set STA (station) mode ........................................................................................................... 9
7.3.
Configure the STA settings...................................................................................................... 9
7.4.
Configure the UART. ............................................................................................................. 10
8.
Restore factory settings.................................................................................................................. 10
9.
Configure the transceiver ............................................................................................................... 11
10.
Update transceiver firmware...................................................................................................... 12
11.
Warning: .................................................................................................................................... 14
12.
License ...................................................................................................................................... 14
13.
Copyright notice......................................................................................................................... 14
14.
Revision History......................................................................................................................... 14

Copyright, RFXCOM 2021
RFXtrxLAN Rev. 2.0 page 3 / 14
1. Introduction
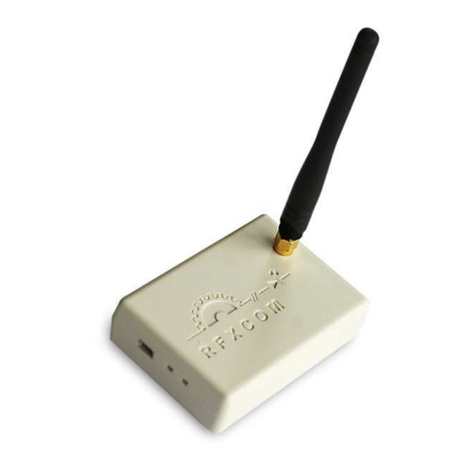
The RFXtrxLAN can have the RFXtrx433XL or RFXtrx868XL transceiver installed.
The RFXtrxLAN is not designed for the RFXtrx433E but can used if you have soldering experience.
The transceiver is accessed using TCP/IP.
The default settings are:
- TCP port 10001 and DHCP
- Username/Password: admin / admin
Important:
The USB connection of the RFXtrx must not be used!!
It can’t be used because the data connection is not present and the USB power is connected to the 5V
power adapter.
2. Contents of the kit.

Copyright, RFXCOM 2021
RFXtrxLAN Rev. 2.0 page 4 / 14
3. Install the RFXtrx433XL or RFXtrx868XL in the
RFXtrxLAN.
Important:
First thing to do is cut the PCB trace between the connection point R and the FT230X pin 15.
With a PTF (PressToFit) connector in the RFXtrxLAN:
- Press the RFXtrx on the PTF with the antenna connector upwards.
With a solder header in the RFXtrxLAN:
- Solder the RFXtrx on the header with the antenna connector upwards.

Copyright, RFXCOM 2021
RFXtrxLAN Rev. 2.0 page 5 / 14
4. Install the RFXtrx433E in the RFXtrxLAN.
The RFXtrxLAN is not developed to have the RFXtrx433E installed in the RFXtrxLAN in an easy way
but it is possible with some solder and glue work.
It is not advised for people without soldering experience.
1. Cut one trace at the top side.
2. Remove the 4 pins header from the RFXtrxLAN PCB. (or request RFXCOM to deliver the
RFXtrxLAN without the 4 pins header)
3. Solder 4 wires between the RFXtrxLAN PCB and the RFXtrx433E.
4. Fix a small 5mm bar with double sided tape next to IC2 (FT232 chip) and position the
RFXtrx433E on the RFXtrxLAN PCB so that the USB connector fits in the front panel and the
antenna connector is correct positioned in the case.
Cut one trace at the bottom side.

Copyright, RFXCOM 2021
RFXtrxLAN Rev. 2.0 page 6 / 14
5. Installation of the RFXtrxLAN
Connect the antenna.
Connect the 5V/1Amp DC power supply and the Ethernet cable.
The red LED of the RFXtrx should be on for about 3 seconds followed by a short blink of the
green/yellow LED. And the right LED on the Ethernet connector should blink and the left LED should
be on.
Note: Do not locate the RFXtrxLAN close to metal objects, electronic equipment or power lines.
6. LAN version
6.1. Configure the LAN controller
The RFXtrxLAN is delivered with DHCP.
To find the IP address of the RFXtrxLAN use for example the free NetScan tool
https://www.netscantools.com
Use a browser to configure the LAN-controller and enter the IP address of the RFXtrxLAN, for
example: http://192.168.1.237 or use the Host Name http://rfxtrxlan
Default Username / Password: admin admin
Set a fixed IP address for normal use. (select DHCP OFF) or configure the RFXtrxLAN in your router.
If multiple RFXtrxLAN devices are in use set the Host Name unique.
Advice: If you change the Username/Password write it down on a label inside the RFXtrxLAN

Copyright, RFXCOM 2021
RFXtrxLAN Rev. 2.0 page 7 / 14
6.2. Configure the Serial Port
The COM port is delivered with the correct settings.

Copyright, RFXCOM 2021
RFXtrxLAN Rev. 2.0 page 8 / 14
6.3. Configure the TCP communication
The RFXtrxLAN is delivered with the correct configured TCP Server with port 10001
You can change the Local Port and Max Accept if required.
Set Max Accept to 1 unless you want to connect the RFXtrxLAN with multiple applications

Copyright, RFXCOM 2021
RFXtrxLAN Rev. 2.0 page 9 / 14
7. WiFi version
7.1. Configure the WiFi module
For the first time you connect the RFXtrxLAN using a laptop.
Power the RFXtrxLAN and connect the WiFi network with SSID HF-A11x_AP
When the wireless connection is OK, open a web browser and access http://10.10.100.254
Connect with username / password: admin / admin
7.2. Set STA (station) mode
7.3. Configure the STA settings
Configure the AP to be used, click on Search and select your WiFi network.
Set the fixed IP address for the TCP server, for example
192.168.1.100
255.255.255.0
192.168.1.255
8.8.8.8

Copyright, RFXCOM 2021
RFXtrxLAN Rev. 2.0 page 10 / 14
7.4. Configure the UART.
Select 38400,8, None, 1, Disable
Set MAX TCP num to 1 unless you want to connect the RFXtrxLAN with multiple applications.
8. Restore factory settings
Version without Restore button:
•Make a connection for at least 3 seconds between pin 6 and 10 of the LAN controller.
Version with Restore button:
•To restore the module to factory settings, press the reload button for at least 3 seconds.

Copyright, RFXCOM 2021
RFXtrxLAN Rev. 2.0 page 11 / 14
9. Configure the transceiver
The transceiver can be tested and configured with the RFXmngr program.
Set the IP address of the RFXtrxLAN or use the Host Name.
Connect port 10001:
Select the protocols necessary for receive and click Set Mode followed by Save Settings.
No need to select protocols for transmit!
Note that you can only select 1 protocol for receive in the RFXtrx868XL because each protocol uses
different frequencies and modulation!!!
RFXtrx433XL settings:
RFXtrx868XL settings:

Copyright, RFXCOM 2021
RFXtrxLAN Rev. 2.0 page 12 / 14
10. Update transceiver firmware
If required, the transceiver firmware can be updated with the RFXflash program.
Stop all connections with the transceiver and be sure that no other program connects the transceiver
during flash of the transceiver!
Start the RFXflash program, select the IP address and select the port (normally 10001).
Click the connect button:
Click the Open HEX file and select the correct firmware file.

Copyright, RFXCOM 2021
RFXtrxLAN Rev. 2.0 page 13 / 14
Click the Write device button. The firmware will be flashed in about one minute:
At the end of the flash proceure click the Normal Execution Mode button:
Test the RFXtrx with RFXmngr.

Copyright, RFXCOM 2021
RFXtrxLAN Rev. 2.0 page 14 / 14
11. Warning:
•RF signals are possible disturbed, and it has not been justified for this equipment at uses in
circumstances where life-threatening or dangerous situations are possible.
•RFXCOM HARDWARE AND SOFTWARE IS NOT INTENDED FOR USE IN THE OPERATION
OF NUCLEAR FACILITIES, AIRCRAFT NAVIGATION OR COMMUNICATION SYSTEMS, AIR
TRAFFIC CONTROL SYSTEMS, LIFE SUPPORT MACHINES OR OTHER EQUIPMENT IN
WHICH THE FAILURE OF THE SOFTWARE COULD LEAD TO DEATH, PERSONAL INJURY,
OR SEVERE PHYSICAL OR ENVIRONMENTAL DAMAGE.
12. License
•You are allowed to use RFXCOM software, protocols and Written Materials with RFXCOM
hardware only.
•All copyright and other proprietary notices associated with RFXCOM software, protocols and
Written Materials shall be visible to all users.
•You may not sell, distribute, loan, rent, lease, license, sublicense or otherwise assign or transfer
RFXCOM software or RFXtrx protocols or Written Materials unless expressly authorized in writing
by RFXCOM.
•You may not use any RFXCOM device, software or protocol as part of an exclusive or patented
product without the express prior written permission of RFXCOM.
•You may not alter, modify, adapt or create derivative works based on any part of RFXCOM
software or protocols or Written Materials in any way, including translating, reverse engineering,
disassembling or decompiling the software.
13. Copyright notice
•All RFXCOM hardware, software, protocols and Written Materials are protected by copyright laws,
and may not be reproduced, republished, distributed, transmitted, displayed, broadcast or
otherwise exploited in any manner without the express prior written permission of RFXCOM.
•Netherlands Copyright and international treaty provisions protect the SOFTWARE, HARDWARE,
RFXtrx protocols and Written Materials and shall be subject to the exclusive jurisdiction of the
Netherlands Courts
•RFXCOM reserves all rights not expressly granted herein.
14. Revision History
Version 0.0 October 7, 2021
Initial version
Version 1.0 October 25, 2021
Installation of RFXtrx433E added
Version 2.0 November 5, 2021
Don’t use USB added
Restore factory setting text added
This manual suits for next models
1
Table of contents
Other RFXCOM Transceiver manuals