Rhodes V8 User manual

Owner’s Manual

Owner’s Manual
2
Table of Contents
INSTALLATION 3
Installation Locations: Windows 3
Installation Locations: Mac 3
Activation 3
OVERVIEW 4
loading the plugin 4
Playing notes 4
Changing Parameters 4
Navigation 4
SUSTAIN AND EXPRESSION 5
Sustain 5
Expression (learn MIDI CC) 5
Profiles 6
Presets 6
Selecting, saving and loading 6
THE RHODES SOUND & FRONT
PANEL CONTROLS 7
Preamp: Volume 7
Preamp: Envelope [V8 Pro] 7
Preamp: Drive 7
Equalizer: Low/High Gain 8
Equalizer: Mid Band Gain and Frequency 8
[V8 Pro]
Vari-Pan 8
Vari-Pan Depth 8
Vari-Pan: Wave [V8 Pro] 9
Vari-Pan: Rate 9
FRONT PANEL FX CONTROLS 10
Compressor [V8 Pro] 10
Chorus [V8 Pro] 10
Phaser [V8 Pro] 10
Delay [V8 Pro] 11
SETUP PAGE 12
Navigating Setup [V8 Pro] 12
Level, Damper, Fine Tune, Timbre [V8 Pro] 12
DETAIL PAGE 13
Tuning 13
Mechanical Noise 13
Timbre Shift 13
Level [V8 Pro] 14
Profile EQ [V8 Pro] 14
Velocity Curve & Depth 14
Pedal Level & Init Level 15
Pan Slew & Smooth [V8 Pro] 15
Compressor Threshold [V8 Pro] 15
Chorus Delay, Phase, Spread [V8 Pro] 16
Phaser Resonance, Phase, Spread [V8 Pro] 16
Delay Jitter & Spread [V8 Pro] 16
Amp / Cab and Mic Type [V8 Pro] 17

Owner’s Manual
3
INSTALLATION
To install the Rhodes V8 once downloaded onto your system, start by running
the setup file [DMG disk image on Mac; EXE file on Windows].
From here, complete the installation process, referring to the End User
License Agreement and selecting installation locations if preferred.
The Rhodes V8 installer will install multiple elements in multiple locations.
These include the audio data required to run the instrument, the plugin itself,
and user-accessible Presets and Profiles.
Installation
INSTALLATION LOCATIONS: MAC
On a Mac, the plugin itself is installed in the default folders. These are located at…
Macintosh HD/Library/Audio/Plug-Ins/[format]
On a Mac, factory Presets and Profiles are installed at…
Macintosh HD/Library/Application Support/Rhodes/Rhodes V8 Pro/Assets/
On a Mac, user Presets and Profiles are installed at…
Macintosh HD/[User]/Library/Application Support/Rhodes/Rhodes V8 Pro/Assets/
INSTALLATION LOCATIONS: WINDOWS
On Windows, the plugin itself is installed by default at…
C:\Program Files\Vstplugins\Rhodes
…but this location can be changed during the installation process.
On Windows, the plugin’s content files (audio data) are installed by default at…`
C:\ProgramData\Rhodes\Rhodes V8 Pro
ACTIVATION
On first running the plugin, you will be prompted to enter your license information or continue your trial.
To activate the plugin using a license you have purchased, enter or paste it into the 16-digit License
Code field (you may need to right-click in the field to paste), and click Activate License.

Owner’s Manual
4
LOADING THE PLUGIN
Once the plugin has been installed, start or restart your
DAW, or rescan your plugin library. The plugin should be
available in VST, AAX and Audio Units [on Mac] versions.
The plugin may be named Rhodes V8 / V8 Pro or V8 / V8
Pro. This may be different between DAWs and formats.
Overview
CHANGING PARAMETERS
To change a parameter, simply click on a button to toggle its function on or
off or cycle through its states. To adjust dials and sliders, simply click and
drag up or down on the control to change its value.
Some dials within the Rhodes V8/V8 Pro have centre and collar (ring) dials,
and each of their functions are labelled underneath those dials.
You can reset any control to its default position by holding Alt/Option and clicking on it.
Parameter values appear in the Parameter readout on the right of the top bar when you move a control.
PLAYING NOTES
To begin playing notes, check your DAW is
receiving MIDI data from your MIDI controller,
arm the track containing the Rhodes V8/V8 Pro
plugin, and begin playing. In the MAIN view of the
plugin, you can also click on the keyboard notes
within the GUI to play them.
The MIDI light on the right of the top bar will
illuminate when the plugin successfully receives
any MIDI note message.
NAVIGATION
There are three main tabs to navigate within the
Rhodes V8/V8 Pro plugin. The MAIN tab is where
you can access the instruments core features and
controls, as well as the keyboard. The SETUP page
lets you adjust level, damping, fine tuning timbre on a per-note basis. The DETAIL page lets you access
the advanced settings of the V8/V8 Pro’s EQ, effects and functions.
You can also access the information page by clicking on the I icon at the top right of the plugin.

Owner’s Manual
5
SUSTAIN
To get the most out of the Rhodes V8 and V8 Pro plugins, you may want to
use a sustain pedal. The Sustain Pedal light in the top right hand corner of the
plugin lights up when it recognises that a sustain pedal has been plugged in.
This light will also activate as a sustain pedal message is pressed during
performance or playback.
Sustain and Expression
EXPRESSION (LEARN MIDI CC)
You can also assign any of the parameters on the front panel of the V8
or V8 Pro to an expression pedal. To do this, right-click on any control or
parameter within the MAIN view, click Learn MIDI CC, then move any CC
control knob on your MIDI controller or move your expression pedal, and it
will now be in control of that parameter.

Owner’s Manual
6
PROFILES
Profiles capture all the detailed under-the-hood electronic/mechanical
aspects of the piano itself. Essentially, these include all the per-note settings
that are normally accessed under the lid of a hardware Rhodes piano by an
expert Rhodes technician.
The idea behind Profiles was to grant the user access to different full setups
of Rhodes pianos, a library of interesting options that respond differently and
offer their own characteristics.
Profiles save the current settings of the SETUP page, as well as the top row
of settings in the DETAIL page, excluding the Tuning parameter.
Presets and Profiles
There are two main file types within the Rhodes V8 and V8 Pro.
SELECTING, SAVING AND LOADING
Both Profiles and Presets have two buttons on the right of the preset name.
The leftmost acts to Save the setup, and the rightmost acts to Save As.
Pressing Save will capture the current settings and ask you if you want to
overwrite the current preset or profile with the same name (replace).
Each Preset will save a Profile within it. If you choose a Profile, leaving that
Profile’s settings untouched, and then save a Preset, the Preset will be
recalled faithfully.
However, if you have chosen a Profile, changed the Profile Settings and then
saved a Preset including it, the Profile saved within the Preset will revert to
the saved version, not the changed version.
IMPORTANT: To save your Preset with a changed Profile saved inside, first
save the Profile and then the Preset.
PRESETS
Presets globally save every single parameter on both the plugin’s front panel
as one file. This includes capture of advanced effects settings, Amp/Mic
selection, and also the current live parameters in the currently used Profile at
the time of saving. In other words, a Preset includes the Profile as well.

Owner’s Manual
7
PREAMP: VOLUME
Provides gain control for the output of the plugin. This provides adjustment
in dB only, and doesn’t colour the sound. While this dial is placed on the
left-hand side of the instrument, its position in the signal chain makes it the
final stage of processing. You can change the Volume to compensate for
changes made in the SETUP window, the Equalizer or the effects.
The Rhodes Sound & Front Panel Controls
The unique and legendary Rhodes sound is generated by pressing a key, which then actuates
a rubber-tipped hammer, which in turn hits a metal wire (tine). This tine is directly coupled to a
sympathetically resonating ‘tonebar’, which extends the sustain of the tine and gives the piano its
inherent character. The tine and tonebar together form what is widely known as the ‘asymmetrical
tuning fork’ (designed by Harold Rhodes). The vibration from the asymmetrical tuning fork assembly
is then captured by a pickup (one per-note) and sent into the piano’s preamp and effects system for
further processing and enhancement.
The first chain of processors that this direct signal hits consists is known as the Preamp. This includes
Volume, Envelope, Drive, Equalizer and Vari-Pan. Controls for all these processors are located on the
left-hand side of the front panel in the V8 Pro and the MK8 piano. The V8 Pro takes its front panel
controls directly from the MK8 hardware instrument, matching its capabilities and sound. Note that
the V8 has a stripped-down front panel compared to the V8 Pro, with Volume, Drive, Low/High EQ
controls and a Pan section (with square wave only and no audio-rate modulation capabilities.
PREAMP: DRIVE
Add distortion to the signal with this circuit. The distortion flavour was
tailor-made for the MK8 to turn the smooth tones into an aggressive and
sometimes biting feel.
PREAMP: ENVELOPE [PRO VERSION ONLY]
A new featured designed for the Rhodes MK8 piano, the V8 Pro’s Envelope
control modulates the Equalizer Mid band’s Frequency settings, with the
source for that modulation being the strength of your playing.
The best example of the Envelope’s use is as an Auto-Wah. Set the EQ Mid
Frequency to its minimum, turn up the Mid Gain to maximum and turn up the
Envelope control to get this effect, ‘opening up’ the Mid filter as you play
each note. You can change the setting of the Envelope dial, Mid Frequency
and Mid Gain to customize the effect to taste.

Owner’s Manual
8
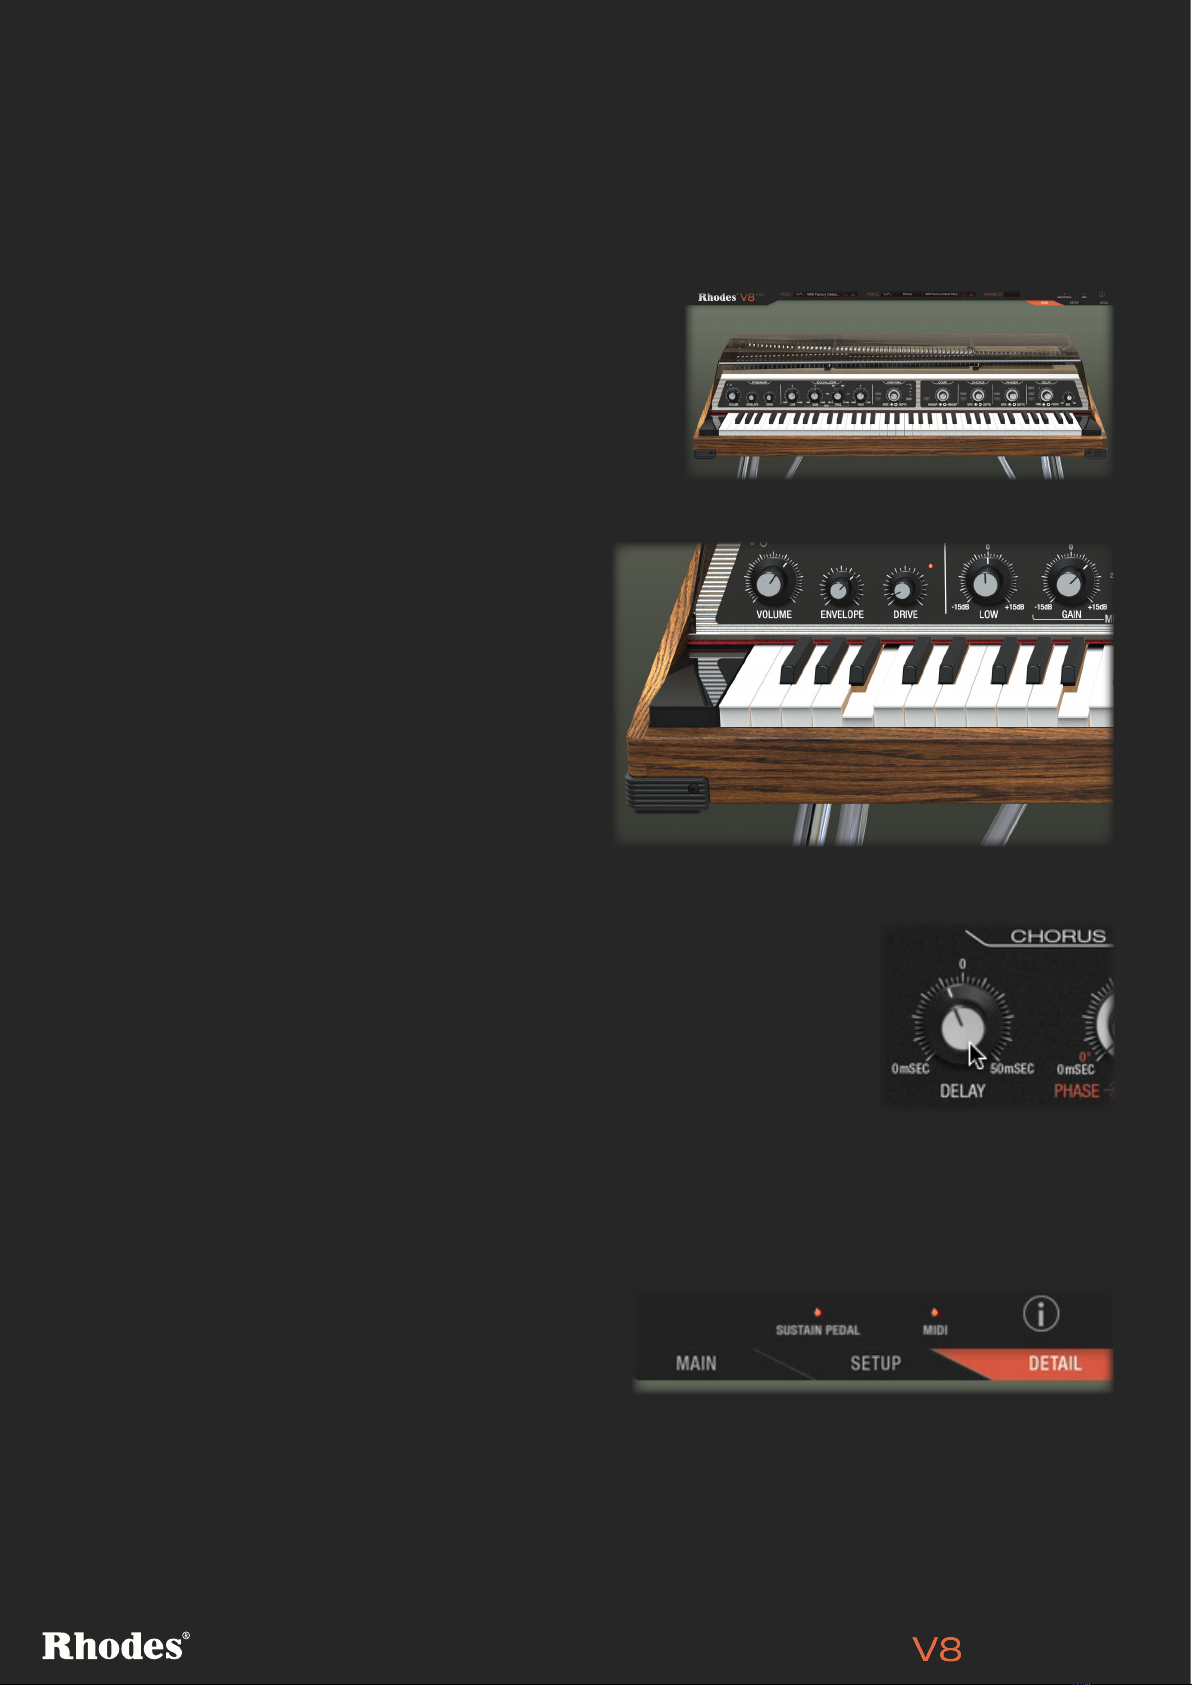
EQUALIZER: LOW/HIGH GAIN
The V8 Pro’s EQ features a shelf-type Low EQ (centred
around 75 Hz) and a parametric High EQ (centred around
3KHz), both of which are modelled directly from the MK8
piano. Low changes the gain on a fixed low-shelf filter,
while High changes the gain on a parametric filter which
was specifically tuned to the Rhodes pickup rail and
electronics. This allows boosting of the high end to add air
and clarity whilst minimising noise at the outputs. The way
you employ the two filters will depend on context: your playing style, the effect you want to achieve, the
other instruments you’re playing alongside, and any effects you’ve added the sound.
Increase the Low EQ gain up to 15dB to add weight and low-end warmth, bolstering lower notes of
the register especially. Reduce the Low gain up to -15dB to scoop out lows and improve definition.
Increase the High EQ gain up to 15dB to add clarity and air – especially to higher notes of the register.
Decrease the High EQ gain down to -15dB to take the edge off and create a more mellow sound.
EQUALIZER: MID BAND GAIN AND FREQUENCY
[PRO VERSION ONLY]
Between the Low and High EQ controls on the front panel, you’ll find a
parametric resonant mid filter with sweepable frequency, used to provide
detailed cut or boost to frequencies in the middle of the frequency spectrum.
Mid Gain will increase or decrease the strength of frequencies around those
set by the Freq control, applying up to 15dB of boost or cut.
NOTE: The Profile EQ, found in the V8’s DETAIL page, acts differently to the
front-panel EQ. Find out more about the Profile EQ on page 14.
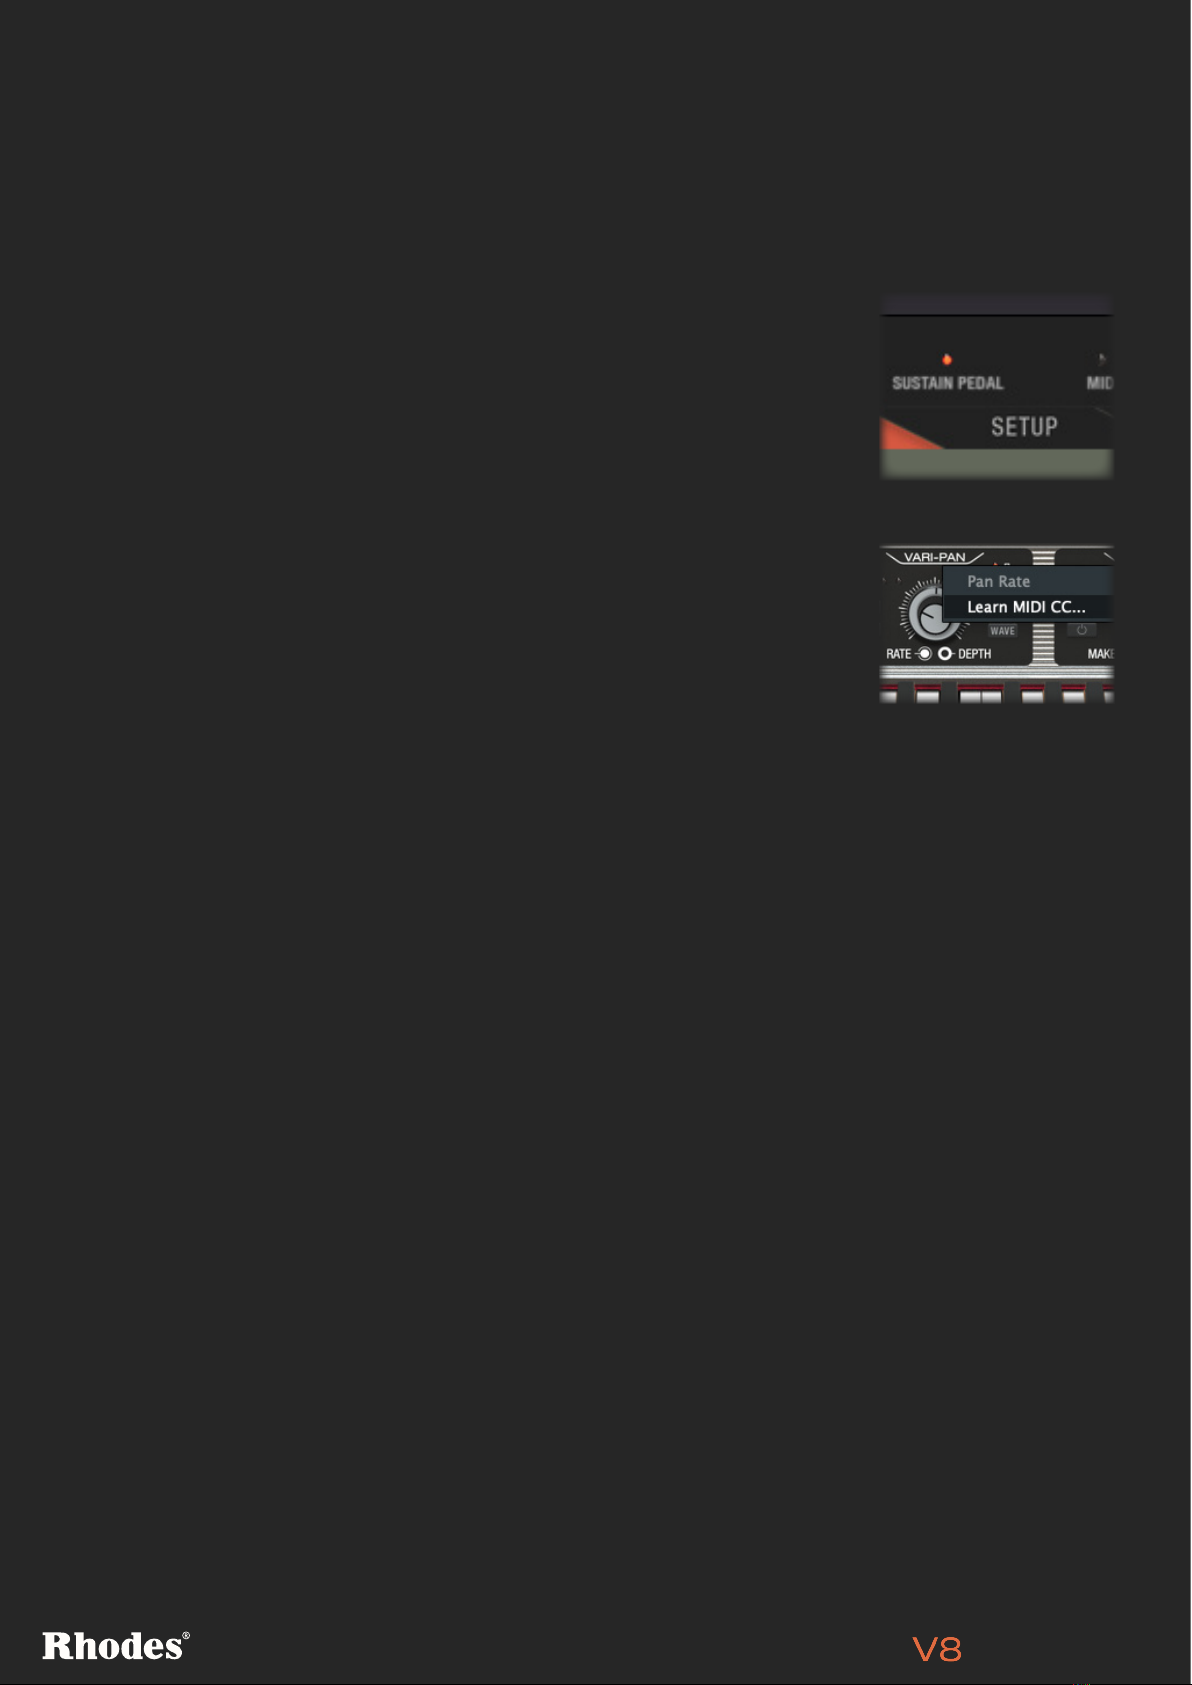
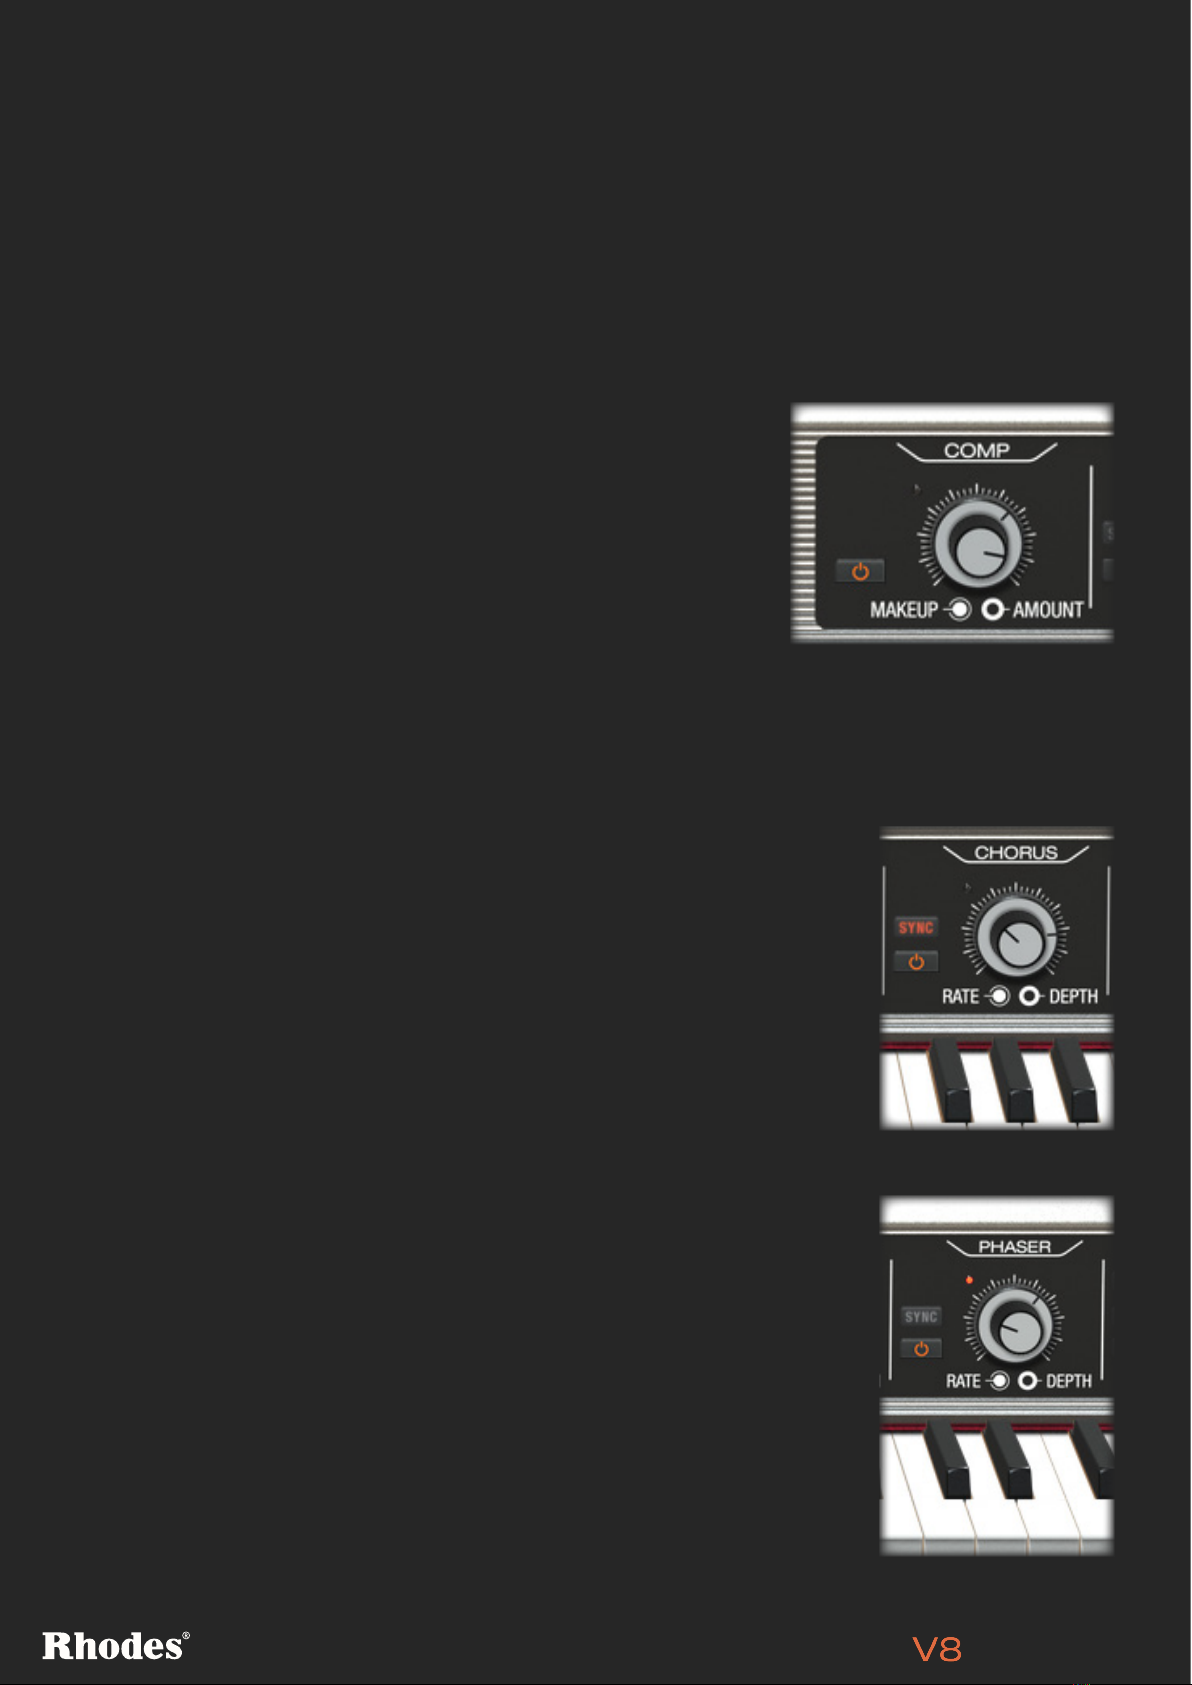
VARI-PAN DEPTH
The Vari-Pan Depth dial (an external collar around the Rate dial) increases
the amount of Vari-Pan applied to the sound. At higher values, the Vari-Pan
effect is at its fullest; reduce the Depth collar and more of the original dry
signal will be blended back in.
VARI-PAN
The original Rhodes Suitcase piano is well-known for its
classic stereo panning effect, modulating the sound from
left to right. However, on the MK8 piano, this panning
effect is taken to altogether new sonic territories with
the versatile Vari-Pan effect section, capable of not just
classic Rhodes panning but also audio-modulated effects
including ring mod and synth-like textures.
Use the power button to switch on the effect. The two
lights – left and right – represent the current position
of the output sound between the left and right output
channels.

Owner’s Manual
9
VARI-PAN: RATE
The Vari-Pan Rate dial determines the speed of the Vari-Pan effect. At its
lowest, the effect and its waveshape are very audible, with a minimum speed
of 0.10Hz. Towards 12 o’clock, the effect is faster, up to a rate of 3.8kHz.
Past 12 o’clock, the Rate starts to reach audio frequencies and amplitude
modulation occurs. As this Rate increases, you can achieve a huge range
of never-before-heard tonalities, including unique ring-modulated sounds,
synth-esque tones and much more besides.
For audio-rate modulation effects, reducing the Vari-Pan Depth can bring
back some of the original dry input sound, while keeping the character of the
amplitude modulation present. This enables sounds where the dry Rhodes
sound remains ever-present, but you can also achieve the effect of a synth-
like or modulated layer on top of the dry Rhodes tone.
VARI-PAN: WAVE [PRO VERSION ONLY]
This setting determines the shape of the Vari-Pan’s movement between left
and right channels. The Wave button acts to select which waveshape is in
use, and a light displays next to the selected waveshape.
The waveshape choices are Square (a classic sudden side-to-side
transition), Ramp (moving from one side to another and then straight back),
Triangle (moving from one side to another then moving back), and Sine
(moving between sides but lingering more at each extreme.
NOTE: The front-panel waveshape selection can be customised further using the Pan Slew and Pan
Smooth controls on the DETAIL page. Find out how it works on page 15.

Owner’s Manual
10
COMPRESSOR [PRO VERSION ONLY]
The MK8’s VCA compressor was specifically designed to fortify the
Rhodes sound with added weight and control. The effect can be
switched on and off using its power button.
The Amount collar applies compression to the signal, reducing its
dynamic range. The effect is mostly evident from the impact it has
on transients, adding more or less initial attack (the initial burst at
the start of a note). The Makeup dial applies gain to the signal after
compression, to compensate for the overall volume changes it
introduces.
NOTE: A Threshold control for the compressor is available in the DETAIL page, see page 15.
Front Panel FX Controls
The V8 Pro includes the same four classic analogue effects as in the Rhodes MK8 FX model piano. A
Compressor, Chorus, Phaser and Delay are all available, all modelled on the components and circuits
used in the MK8 hardware, which were tailor-made to seamlessly enhance the classic Rhodes sound.
PHASER [PRO VERSION ONLY]
The Phaser module on the V8 Pro is again directly modelled from the MK8
piano’s custom four-stage VCA-based design, and is a natural choice for
adding body and characterful animation to your tone. The effect can be
switched on and off using its power button.
The Depth control (outside collar) increases or decreases the amount of the
effect applied. The Rate (central dial) controls the speed of the effect and
the Sync button snaps its selectable values to divisions of the tempo set in
your DAW.
NOTE: Additional Resonance, Phase and Spread controls are available
within the DETAIL page. Find out more about how these work and their
effect on the Phaser’s sound on page 16.
CHORUS [PRO VERSION ONLY]
The MK8’s (and therefore th V8 Pro’s) bucket-brigade Chorus module was
purpose-built to add shimmering warmth and width to the classic Rhodes
sound. The effect can be switched on and off using its power button.
The Depth control (outside collar) increases or decreases the amount of the
effect applied. The Rate (central dial) controls the speed of the effect, with
the Sync button snapping the Rate dial to divisions of your DAW’s tempo.
NOTE: Additional Delay, Phase and Spread controls are available within the
DETAIL page. Find out more about how these work on page 16.

Owner’s Manual
11
DELAY [PRO VERSION ONLY]
The V8 Pro’s Delay module is modelled on the tailor-made bucket-
brigade analogue delay found in the MK8 piano, with pristine yet
characterful delay lines and lush, warm repeats. The effect can be
switched on and off using its power button.
The Time dial sets the delay time – the time it takes for a sound
to repeat after it is first heard. With the Sync button active, this
dial snaps to fractions of your current tempo, as set in your DAW,
ensuring that it remains in time with your project.
You can also set the delay time by clicking the Tap Tempo button a
few times at your intended tempo.
The Feedback collar controls how strongly the delay’s output is fed
back into its input. In effect, this creates more repeats of the sound, with
louder initial repeats.
The Mix control takes the overall delay output and balances it with the
original sound before the delay effect. At fully Wet, only the delayed
sound is heard, and your original sound is not. At fully Dry, only the input
sound (the dry Rhodes tone) is heard. You can balance Feedback and
Wet/Dry settings (one lower, one higher), to give a different character to
your delay sound.
Without Ping Pong mode active, the delay will repeat everything in its left and right channels in those
same channels, at the delay time set on the front panel. When you activate Ping Pong, what’s in the
left channel will first repeat in the right, then back in the left again (and vice versa). A single repeat still
comes after a gap set by the Time dial, but it takes double this time for a signal on the left to play once
again in the left channel.
NOTE: Additional Jitter and Spread controls are available within the DETAIL page. Find out more about
how these work and their effect on the Delay’s sound on page 16.

Owner’s Manual
12
NAVIGATING SETUP
AND CHANGING PARAMETERS
[PRO VERSION ONLY]
There are four properties you can adjust, with each
having its own coloured horizontal row: Level, Damper,
Fine Tune and Timbre. Any of these can be removed
from view by clicking the corresponding button in the
bottom-left of this page.
To set a control for a note, drag its cell up or down. You can reset any slider to its default value quickly by
Alt-clicking on it.
SETUP Page
This page gives you access to mechanical and electronic properties for every note of the V8’s range. If
you’ve ever wanted to make adjustments under the lid of a Rhodes piano, this is a place to experiment
safely and easily. Changes made here can be saved into a Profile (see page 6) and later recalled.
LEVEL, DAMPER, FINE TUNE, TIMBRE
[PRO VERSION ONLY]
Level (lilac) is simply a measure of gain in dB, and doesn’t influence the tone as pickup distance would.
Damper (blue) determines how much
force a note’s damper uses more force
against its tine. At -100% the damper
is at its strongest, stopping the note
dead when a key is released. At +100%,
the damper is far weaker, and the note
continues to ring out after the key is
released.
Fine Tune (green)
lets you fine tune
a tine by up to 25
cents sharp or flat.
Note that there
is also a master
Tuning control in the DETAIL page (see page 13).
The Timbre row simultaneously adjusts the pickup position in relation to the end
of the tine and the height of the tine in relation to the pickup. This adjusts each
note’s sound in terms of its harmonic content and loudness. At higher levels, (up
to 50 for example), more harmonics appear – for a brighter and hotter sound.

Owner’s Manual
13
TUNING
The Tuning dial is the master tuning control for the V8. Turn it to the right and
every note goes up in pitch. Turn it to the left, and everything goes down in
pitch. This controls the tuning of the entire instrument, allowing it to be set up
to 50 cents sharp or flat.
DETAIL Page
More ways to customise the V8 sound lie in the DETAIL page, with global mechanical and electronic
controls, as well as further more detailed parameters for the front-panel effects, plus amp and cab
models to enhance the sound. Changes on the DETAIL page are saved as part of a Profile and
therefore as part of a Preset.
If we zoom in closer, the following parameters on the DETAIL page are saved as parts of a Profile:
Everything on the top row of parameters (except Tuning): Mech Noise, Timbre Shift, Profile EQ,
Velocity Curve/Depth and Pedal Level/Init Velocity. Everything on the bottom row of the DETAIL page
is saved as part of a Preset, including Pan Slew/Smooth, Compressor Threshold, Chorus Delay, Phase
and Spread, Phaser Resonance, Phase and Spread, Delay Ping-Pong, Jitter and Spread and finally, the
amp and mic models.
TIMBRE SHIFT
Acting in the same way as the SETUP page’s per-note Timbre sliders (but
globally instead of per-note), the orange Timbre Shift dial controls the angle
of the tine relative to the pickup AND the distance of the tine relative to the
pickup pole, increasing or reducing its harmonic content and perceived level.
At higher levels of Timbre Shift, the tine position is lower relative to the
pickup pole’s centre, bringing out more harmonics and animating the tone
more overall. At lower levels, the tine is raised higher above the pickup pole
centre and fewer harmonics are present in the resulting, ‘rounder’ sound.
The Timbre Shift control works closely in conjunction with the per-note
Timbre sliders on the SETUP page, so be sure to experiment with different
levels with both together to get a feel for the wide range of extended sonic
opportunities available.
MECHANICAL NOISE
The Rhodes MK8 is an electro-mechanical instrument, which generates
sound with keys and hammers that strike thin metal tines. Turning up the
mechanical noise dial introduces more of the sound of these actions, for a
more organic, textured feel.
Examples of these non-tonal sounds including cabinet resonance, hammers
hitting tines, damper release noise, pedal noise, and all other sounds from
inside the cabinet.

Owner’s Manual
14
LEVEL [PRO VERSION ONLY]
The Level dial gives you another Gain control to help compensate for
your changes on the DETAIL page, but this only has control over the
tonal part of the Rhodes sound. With Level fully down, we can still
isolate the Mechanical Noise.
VELOCITY
CURVE & DEPTH
The velocity curve scales the effect of low or high MIDI
note velocity on the instrument. You can think of this as a
MIDI note velocity translator or modifier, which can turn
lower velocity notes into higher or vice versa.
With no curve set, input MIDI velocity is ‘output’ (ie,
played) in a linear fashion. For any given increase in MIDI
note velocity, there will be a proportional increase in
hammer force. This is exactly as you would expect for any
instrument. Just as in the curve shown at the top.
But with the Curve set to higher, only the very lowest
velocities actually produce low-force hammer strikes.
As the velocity gets higher, the hammer force rapidly
increases. The middle-left graph shows how hammer force
(y axis) changes as MIDI note velocity (x axis) is increased
from 0.
With Curve set to maximum and Depth set low, most of the V8’s hammers use the highest possible
force, regardless of your MIDI note velocity (middle-right in the figure).
With the Curve set to minimum, all input MIDI note velocities, except the very highest, result in the
hammers using weaker force. The highest-velocity MIDI notes, however, bring up the hammer force
considerably. With Curve set to minimum and Depth set to maximum, the V8’s hammers use the
lowest possible force, regardless of your MIDI note velocity.
NOTE: The resulting velocity curve you create using these parameters will interact with the Level and
Timbre settings you’ve chosen in the SETUP page. If you’ve created louder or brighter notes towards
one end of the piano’s register, this will remain but will still be affected by the curve settings.
NO CURVE, NO DEPTH
Hammer Force
Input MIDI velocity
HIGH CURVE, HIGH DEPTH
Hammer Force
Input MIDI velocity
HIGH CURVE, LOW DEPTH
Hammer Force
Input MIDI velocity
LOW CURVE, HIGH DEPTH
Hammer Force
Input MIDI velocity
LOW CURVE, MIN DEPTH
Hammer Force
Input MIDI velocity
PROFILE EQ
[PRO VERSION ONLY]
This additional EQ allows you to set
the piano’s overall character, leaving
you free to make changes to the
Equalizer section on the front panel
(see Front Panel Controls, page 8).
On the profile EQ, each band is sweepable, plus you get an extra mid-band EQ too, for added control.
To adjust the gain level of a particular frequency, use the inner dial of the corresponding band. To
adjust the frequency of a band, use the outer collar of the relevant band.
Profile EQ changes can be saved and recalled as part of a Profile, and as part of a larger Preset, too.

Owner’s Manual
15
PEDAL LEVEL & INIT LEVEL
When the sustain pedal is depressed, the effect of all the dampers being
moved off the tines at once can be heard. The V8 also models the sound of
the dampers returning as the sustain pedal is lifted once again.
The Pedal dials help customise the effect of moving the Sustain pedal. Level
increases the volume of the effect, and Init Velocity determines how much the
pedal needs to be pressed before the tines will ring out.
COMPRESSOR THRESHOLD [PRO VERSION ONLY]
This dial sets the point at which the front-panel compressor will activate. A compressor reacts to
the level of an audio signal by reducing it once it gets above a certain level, and leaving the signal
untouched before it hits this level.
Reducing the Threshold will cause the compressor to react to a note earlier, and make its gain
reduction heavier. The resulting sound is a more controlled signal that doesn’t get as loud as it would
usually, but stays more consistent in level throughout the course of a single note – the initial transient
‘attack’ at the very start of a note will be reduced in level.
Increasing the Threshold will reduce the compression response, usually
eliminating it at high values.
Threshold is usually used in conjunction with the Makeup parameter (front
panel) to reduce the signal’s maximum level, smoothing it out, before
increasing it back to audibility with the Makeup’s applied gain.
PAN SLEW & SMOOTH [PRO VERSION ONLY]
These controls allow you to customise the Vari-Pan’s waveshape. The Slew control slows down
the transition between voltage states, making for a ‘lazier’ waveshape. Smooth turns a square wave
towards a sine shape, reducing straighter lines towards smoother curves. Both are shown in the
diagram below.
ORIGINAL SIGNAL
WITH SLEW
WITH SMOOTH

Owner’s Manual
16
CHORUS DELAY, PHASE, SPREAD
[PRO VERSION ONLY]
Turning up the Chorus Delay parameter delays the two
channels of Chorus effect. You can create pseudo reverb and
flam’d effects here, plus other more ambient-sounding Chorus.
There are two chorus voice channels, and the Phase parameter
changes the phase of the channels (in degrees) from 0 to 360 for more hollow (mono-sounding) or lush
characters, whilst also subtly changing the stereo imaging.
The Spread collar allows you to place the Chorus channels closer or further apart within the stereo
field. A higher Spread value gives the Chorus more stereo width. Try setting Phase to 0 and moving the
Spread dial to hear its effect on the sound – you can dial in more mono-sounding chorus effects here.
DELAY JITTER & SPREAD [PRO VERSION ONLY]
Turning up the Delay’s Jitter knob introduces analogue style unpredictability
in the delay’s timing, creating interesting shifting delay lines.
The Spread collar controls the stereo spread of the delayed signal. Higher
Delay Spread values increase the time variation between the left and right
channels, resulting in a wider stereo field when increased, or a tighter,
narrower effect when reduced.
PHASER RESONANCE, PHASE, SPREAD
[PRO VERSION ONLY]
The Phaser’s Resonance dial introduces a juicier character to the sound
at higher values (much like any synth’s resonant filter). The Phase control
changes the phase (in degrees) of the two Phaser channels for different
sonic results.
The Spread collar allows you to place the Phaser’s two channels closer
or further apart within the stereo field. To hear the effect of the Spread
parameter, turn up resonance to a high level and experiment by moving the
Spread collar. Also try turning phase to 0 and move the spread dial to hear
its effect on the sound in more detail.

Owner’s Manual
17
AMP / CAB AND MIC TYPE
[PRO VERSION ONLY]
The Rhodes V8 gives you access to four classic amplifier and
cabinet models. To turn on and cycle through the Amps/Cabs,
press the up/down arrows. Note that when there is no amp or
mic pictured, the V8 Pro is running direct with no external amps
or mics in its signal path.
The included amp and cab models are as follows…
Jazz: A clear and present solid-state transistor based stereo combo amp.
L5: A solid-state transistor based combo amp with plenty of punch and presence in the high-mid
frequency range.
Twin: Based on a classic 2x12 tube guitar amp, this model warms up and enhances the mid range
of the V8 Pro but has plenty of low end too.
Rhodes Suitcase: The classic 4x12 dual-amplified Rhodes suitcase cabinet, built under all versions
of the MK1 AND MK2 ‘suitcase’ pianos. The sound is dark and warm, with a little edge of overdrive
and a ‘larger than life’ feel.
There are also two microphones to choose from when using one of the four Amp/Cab models, for
more sonic character. Again, you can cycle through these using the up/down arrows.
Dynamic Mic: The live performance option for Rhodes players, as it can handle high sound pressure
levels without distortion.
Condenser Mic: The preferred studio recording option to captures a wider range of frequencies and
detail in the sound.
Table of contents
Other Rhodes Musical Instrument manuals

Rhodes
Rhodes MK8 User manual

Rhodes
Rhodes Mark 7-73 AM Guide

Rhodes
Rhodes Suitcase Piano 73 User manual

Rhodes
Rhodes MK-80 Operating and maintenance manual

Rhodes
Rhodes Piano User manual

Rhodes
Rhodes VK-1000 User manual

Rhodes
Rhodes MK8 User manual

Rhodes
Rhodes 54 User manual

Rhodes
Rhodes VK-1000 Operating and maintenance manual

Rhodes
Rhodes Piano User manual