www.ridem.eu
7
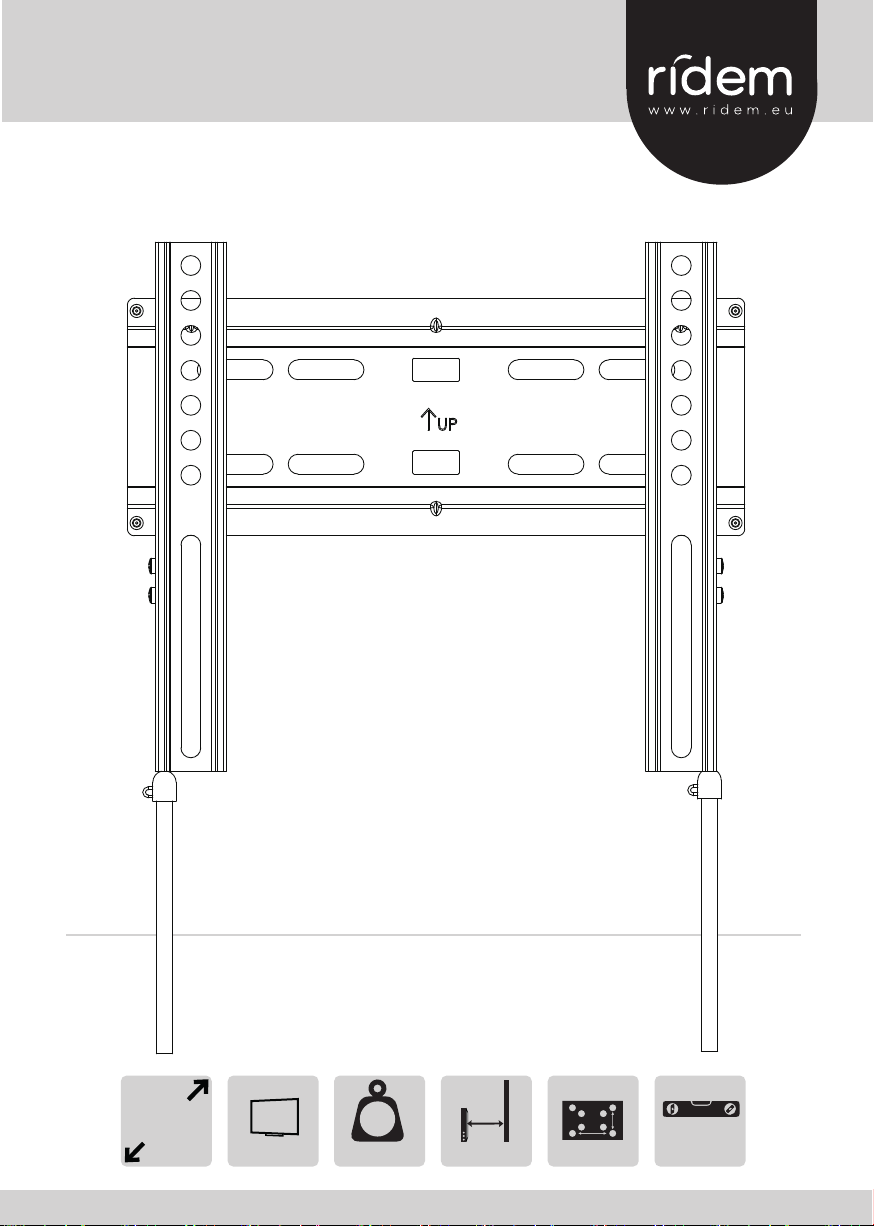
Caratteristiche tecniche / Technical specifications
Compatibilità TV/ Tv compatibility
Standard VESA
Distanza muro/Wall distance
Carico Max/ MAx load
Rotazione/ rotation
Tilt
13 - 42”
75 x 75 /100 x 100/ 200 x 200
2,8 cm
25 Kg / 55 lbs
no
no
3DJHRI
%
%%%
5
:
:::
:
:::
:
:::
(
(((
5
:
:::
:
:::
:
:::
(
(((
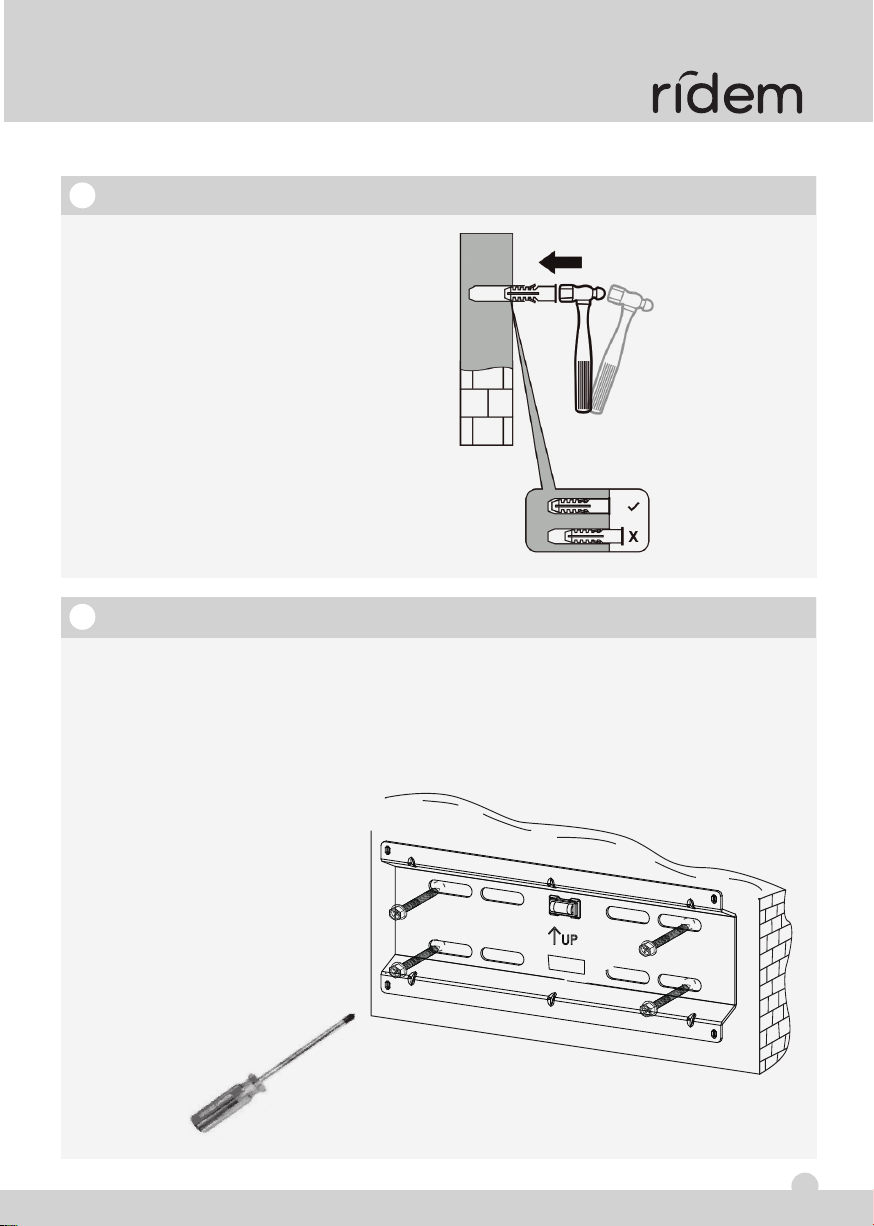
4A 4B
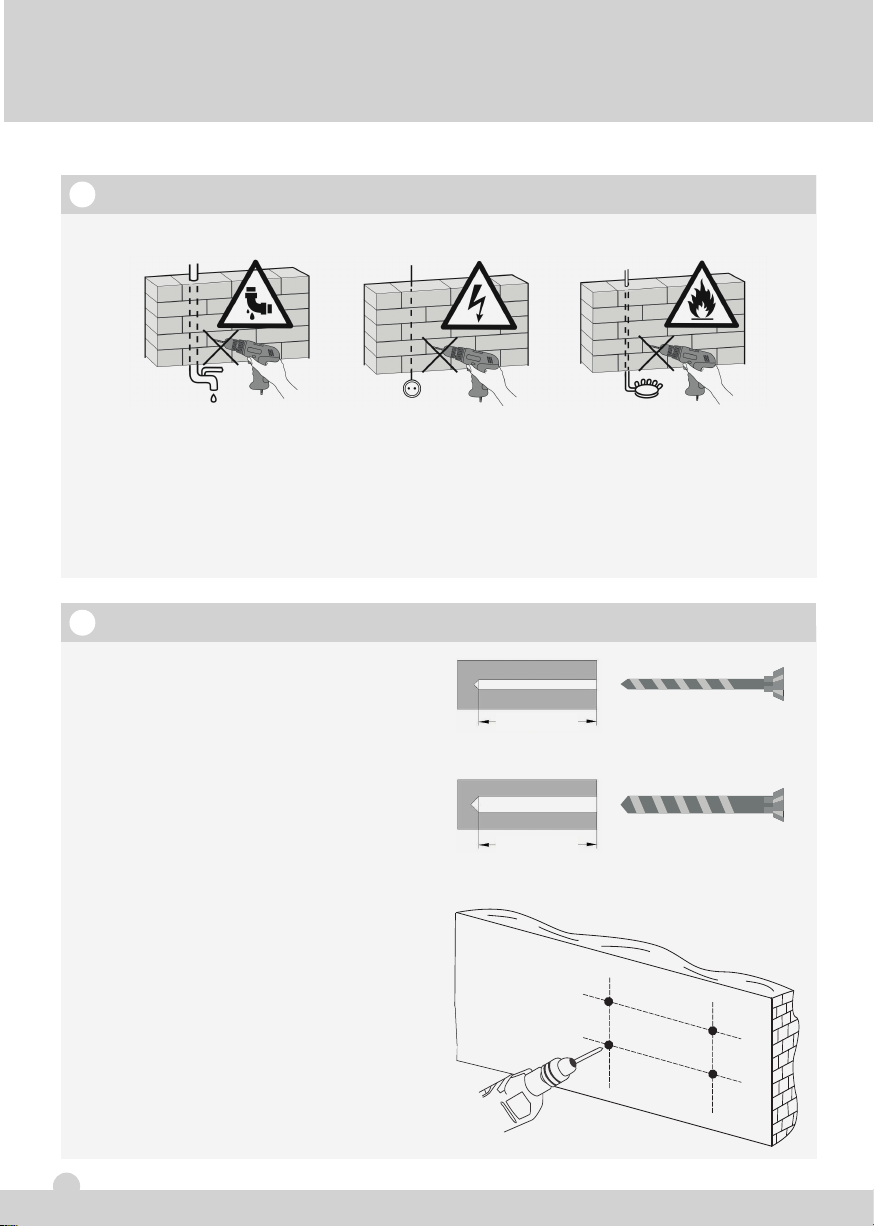
The anchor must be
sunk up to 3/8" / 10 mm
into the plaster coating
10mm
3/8"
x Min 2
Min 4
Max 9
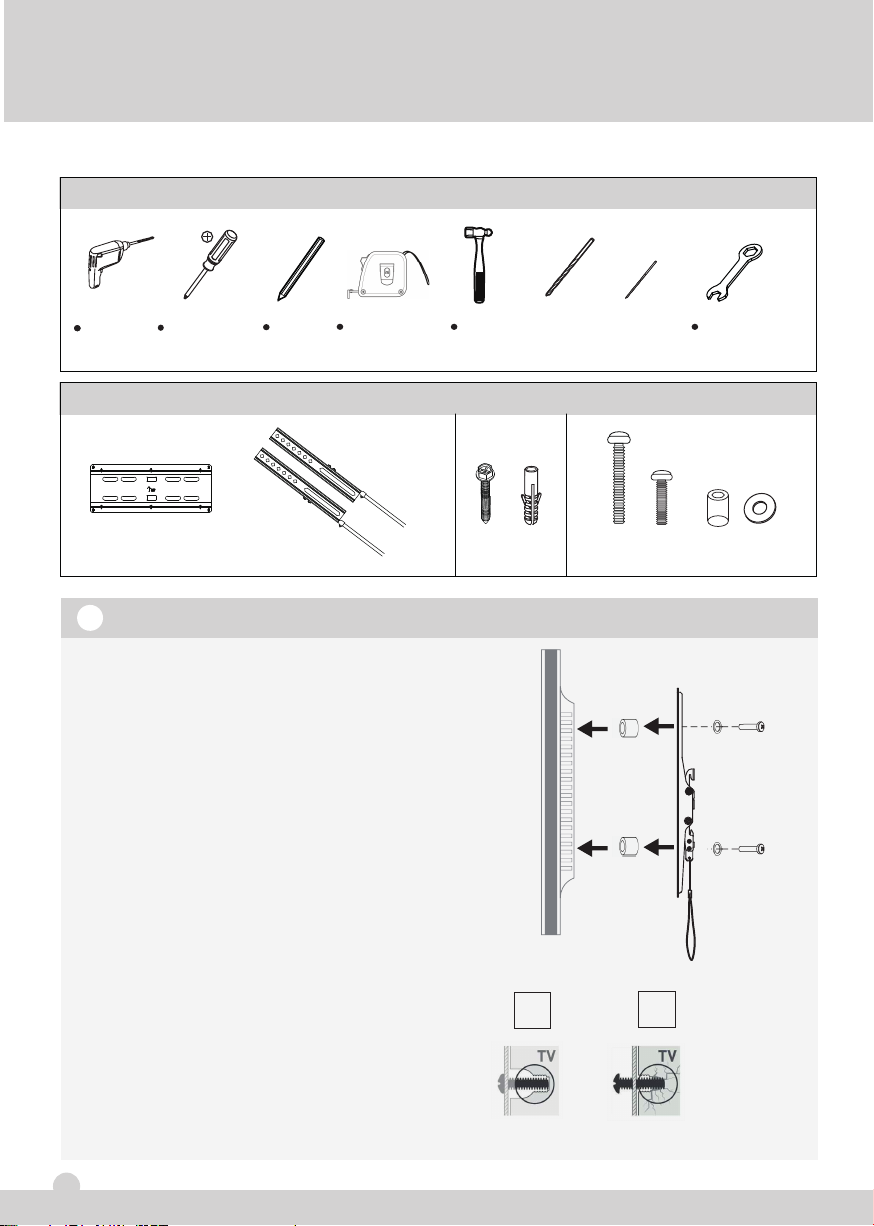
X
2
3/4
" / 70mm
1/4" / 6mm
3/8" / 10mm
$
$$$
2
3/4
" / 70mm
5/32" / 4mm
3DJHRI
%
%%%
5
:
:::
:
:::
:
:::
(
(((
5
:
:::
:
:::
:
:::
(
(((
4A 4B
The anchor must be
sunk up to 3/8" / 10 mm
into the plaster coating
10mm
3/8"
x Min 2
Min 4
Max 9
X
2
3/4
" / 70mm
2
3/4
" / 70mm
1/4" / 6mm
3/8" / 10mm
$
$$$
2
3/4
" / 70mm
5/32" / 4mm
PRECAUZIONI ED AVVERTENZE
Leggete e seguite scrupolosamente le istruzioni
riportate su questo manuale. Conservate il manuale
per future consultazioni e allegatelo se cedete
l’apparecchio ad altri.
ATTENZIONE: Questo prodotto contiene piccoli
componenti che potrebbero comportare un rischio di
soffocamento se ingeriti.Teneteli lontani dalla portata
dei bambini.
Prima di iniziare il montaggio, verificare che tutte le
parti siano presenti e integre. Se alcune parti fossero
mancanti o danneggiate contattate l'assistenza tecnica.
Non utilizzate mai evantuali parti danneggiate.
CAUTIONS AND WARNINGS
Read carefully the instructions contained in this manual and
follow them strictly. Keep this manual for future reference
and include it if you give the product to another user.
WARNING: This product contains small items that could be
a choking hazard if swallowed. Keep them away from
children's reach.
Before starting assembly, verify that all parts are included
and undamaged. If any parts are missing or damaged,
contact the customer service. Never use damaged parts!
CONDIZIONI DI GARANZIA
Il prodotto è coperto da garanzia in base alle vigenti
normative nazionali ed Europee. Per le condizioni complete
di garanzia e per effettuare richieste di assistenza visitate il
sito: www.karmaitaliana.it
La garanzia copre i difetti di fabbrica ed i guasti verificatisi
nei primi 2 anni dalla data di acquisto. Nel caso di acquisto
con fattura, la garanzia è limitata ad 1 anno. Sono esclusi i
guasti causati da imperizia o da uso non appropriato del
prodotto. La garanzia non ha più alcun effetto qualora il
prodotto risulti manomesso. La garanzia non prevede
necessariamente la sostituzione del prodotto. Le spese
di trasporto e i rischi conseguenti sono a carico del
proprietario del prodotto. A tutti gli effetti la validità della
garanzia è avallata unicamente dalla presentazione della
fattura o scontrino d’acquisto.
Vi suggeriamo anche di procedere alla registrazione del
prodotto sul nostro sito internet, www.karmaitaliana.it
loggandovi nell’area riservata. Avrete così la possibilità di
tener traccia della validità della garanzia e di ricevere
aggiornamenti sui nostri articoli.
Il fabbricante, allo scopo di migliorare i propri prodotti, si
riserva il diritto di modificarne le caratteristiche siano esse
tecniche o estetiche, in qualsiasi momento e senza alcun
preavviso.
WARRANTY CONDITIONS
The product is covered by warranty according to current
national and European regulations. For detailed warranty
conditions and RMA requests please refer to our website:
www.karmaitaliana.it
The warranty covers manifacturing defects and faults
occurred in the first 2 years from the date of purchase. In
case of purchase with invoice, the warranty is limited to 1
year. Damages caused by negligence or wrong use of the
product are not covered by warranty.
The warranty is no longer effective if the item is modified or
disassembled by not authorized people. This warranty
doesn’t necessarily envisage the product’s replacement.
Shipment for the return of faulty items is at expense and risk
of the owner. For all intents and porpuses the warranty is
effective only upon exhibition of the invoice or of the
purchase receipt. We also suggest to register
your product on our website www.karmaitaliana.it, after
signing in to access the reserved area. In this way you will
have the possibility to keep track of the warranty validity and
to receive updates on our items.
The manufacturer, in order to improve its products, reserves
the right to modify the characteristics whether technical or
aesthetic, at any time and without notice.