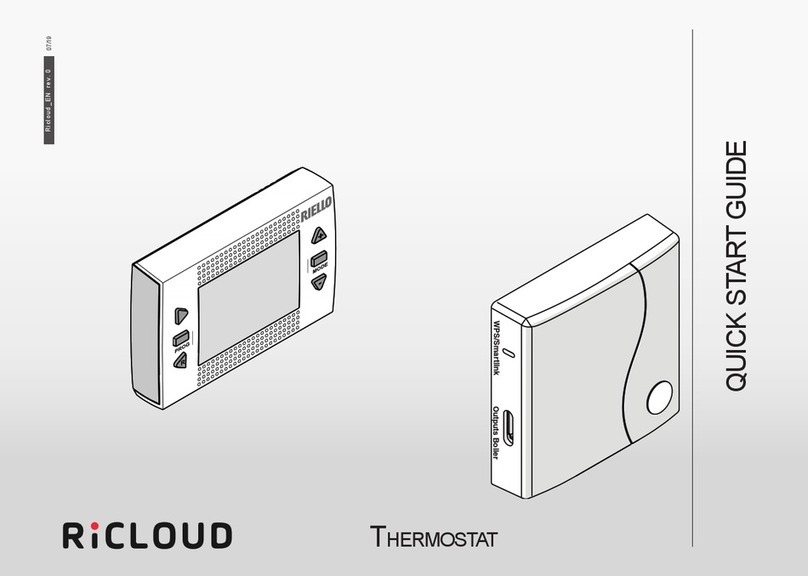
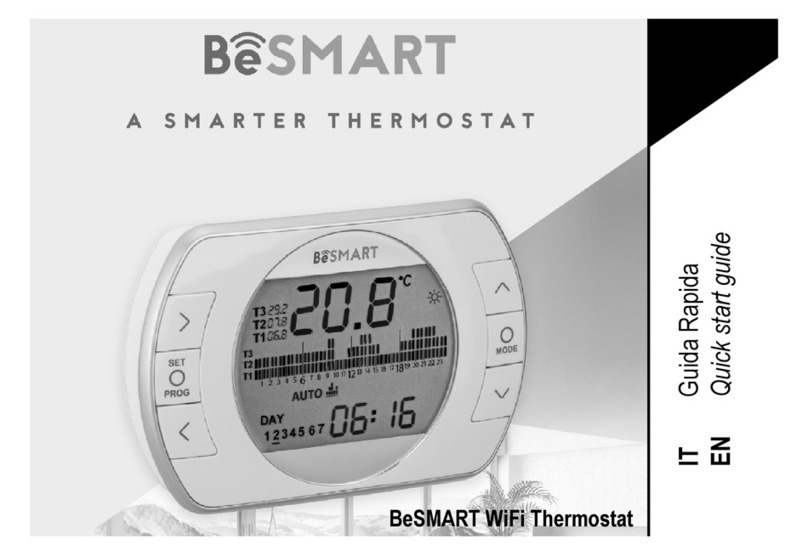
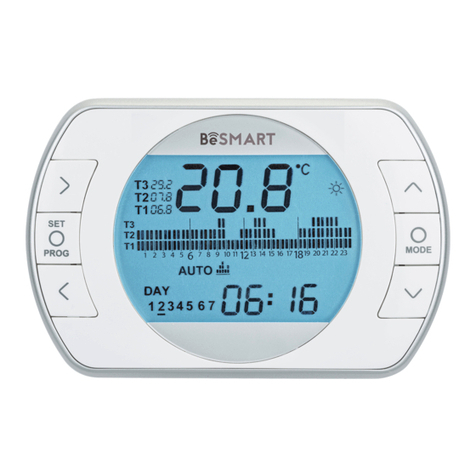
Riello ricloud User manual

IT GUIDA RAPIDA AL CRONOTERMOSTATO
EN QUICK START GUIDE TO THE THERMOSTAT
TermosTaTo / ThermosTaT
cod. RiCLOUD rev. 0 03/16

2EN
IT
INFORMAZIONI DI BASE BASIC INFORMATION
1
2
3
4
5 6
8
7
9
10
1
• Scorrimento indietro del menù
•In modalità AUTO, attivazione funzione ONE HOUR
BOOSTER
• In presenza di allarme (AXX sulla schermata prin-
cipale), premere per 1 secondo per resettare
2PROG = menù programmazione
3• Scorrimento avanti del menù
•In modalità AUTO, attiva la funzione ANTICIPO
4Temperatura ambiente desiderata (no a 3 livelli)
5Temperatura ambiente
1
•Back scrolling of the menu
• In AUTO mode, function ONE HOUR BOOSTER ac-
tivation
• In case of alarm (AXX on main display) press for 1
second and reset the alarm on the display
2PROG = programming menu
3• Forward scrolling of the menu
• in AUTO mode, advanced function activated
4Desired room temperature (up to 3 set)
5Room temperature

3EN
IT
6• Richiesta riscaldamento (se collegato in ON/OFF)
• Presenza amma (se collegato in OT-Bus)
7Modalità raffrescamento attiva
8Tasto incremento valori
9
•ESC =esci
•MODE = seleziona la modalita:
AUTO
MANUALE
VACANZA
PARTY
ESTATE (se OTBus disponibile)
OFF
• Se appare RIE sulla schermata principale, pre-
mere per 3 secondi MODE per attivare la funzione
RIEMPIMENTO SEMIAUTOMATICO
10 Tasto decremento valori
6• Heating request (if ON/OFF connected
• Flame presence (if OT-Bus connected)
7Cooling mode enable
8Values increase button
9
• ESC = exit
• MODE = select the following working mode:
AUTO
MANUAL
HOLIDAY
PARTY
SUMMER (if OT-Bus available))
OFF
• If RIE on the display, press 3 secs MODE to acti-
vate the SEMI-AUTOMATIC BOILER FILLING
10 Values decrease button

4EN
IT
FUNZIONI DEL CRONOTERMOSTATO RiCLOUD
Funzione accoppiamento in radio frequenza
Premendo per 5 secondi il tasto MODE (5) il termostato
entra in modalità accoppiamento radiofrequenza e que-
sta funzione serve per abbinare lo stesso ad un ricevitore
(WiFi Box o ricevitore RF caldaia). Anche il WiFi Box o il
Ricevitore RF caldaia devono essere portati nella stessa
modalità per concludere l’operazione (vedi pagina se-
guente). Ad operazione conclusa sul display spariscono
i trattini e viene visualizzato un codice alfanumerico che
corrisponde al codice di accoppiamento.
RICLOUD DIRECT FUNCTIONS
Function RF pairing
Press for 5 seconds the MODE button (5), the thermostat
will then enter RF coupling mode and this function is
needed to couple the thermostat with an RF receiver
(WiFi Box or boiler receiver). Also the boiler receiver or the
WiFi Box must be moved to the same mode to complete
the coupling operation (see following page). Once com-
pleted, the two line display will disappear and the al-
phanumeric code of the coupling will be shown.
1
2
38
9
10

5EN
IT
Funzione RESET
Nel caso sulla schermata principale sia presente un al-
larme di caldaia (disponibile con collegamento OT-Bus
tra WiFi Box e caldaia, se protocollo OT-Bus lo prevede), è
possibile procedere al suo reset premendo per 1 secondo
il tasto RESET (3).
Funzione riempimento impianto semiautomatico (solo
caldaie dotate della funzione in oggetto)
Se sulla schermata principale viene visualizzata la scrit-
ta rIE lampeggiante, signica che la caldaia necessita il
carico impianto. È possibile attivare il riempimento se-
miautomatico premendo il tasto MODE (5) per 5 secondi.
Ad operazione conclusa la segnalazione di bassa pres-
sione sparirà dal display.
Temperature ambiente desiderata
Il termostato ha la possibilità di selezionare ed utilizzare
3 diversi livelli di temperatura:
T3 = Comfort (o temperatura giorno) – Modalità AUTO,
PARTY e MAN
T2 = Economy (o temperatura notte) – Modalità AUTO e
VACANZA
T1 = Antigelo – Modalità AUTO e SPENTO
Le 3 temperature sono modicabili istantaneamente
mediante il tasto SU (4) e GIU (6) se il termostato si tro-
va nella modalità corrispondente alla temperatura che
si vuole modicare oppure dal MENÙ PROGRAMMAZIONE
– T1-T2-T3.
Function RESET
When an alarm code is displayed (only available if OT-
Bus connection available between WiFi Box and the
boiler and if the OT-Bus protocol is allowed to this), it
is possible make a reset of the alarm pressing once the
RESET button (3).
Function semi-automatic filling of the system (only for
boilers incorporating this function)
On the thermostat display is shown “rIE” flashing when
the system needs to be filled. It is possible to activate the
automatic filling by pressing the MODE button for 5 secs.
At the end of the automatic filling cycle, the display will
resume to a normal visualization.
Desired room temperature
The thermostat can accept the setting of 3 different tem-
perature level:
T3 = Comfort (day temperature) – in mode AUTO, PARTY
and MAN
T2 = Economy (night temperature) – in mode AUTO and
HOLIDAY
T1 = frost protection – in mode AUTO and OFF
The 3 temperatures can be changed when active; by
moving the buttons UP (4) and DOWN (6) if the thermo-
stat is set on the mode related to this temperature level
or from the PROGRAMING MENU – T1-T2-T3.

6EN
IT
Modalità di funzionamento
Premendo il tasto MODE (4) è possibile selezionare le se-
guenti modalità di funzionamento:
AUTO = funzionamento in riscaldamento/raffrescamento
alle temperature T3-T2-T1, con fasce orarie.
MANUALE = funzionamento in riscaldamento/raffresca-
mento alla temperatura T3 (comfort), senza fasce orarie.
VACANZA = funzionamento in riscaldamento/raffresca-
mento alla temperatura T2 (Economy) per il numero di
giorni impostati, senza fasce orarie.
PARTY = funzionamento in riscaldamento/raffrescamento
alla temperatura T3 (comfort), no alla mezzanotte del
giorno stesso, senza fasce orarie.
SPENTO = termostato spento (collegamento in ON/OFF) o
caldaia OFF (collegamento in OT-Bus).
SANITARIO (ESTATE) = caldaia in ESTATE (disponibile con
collegamento OT-Bus tra WiFi Box e caldaia, se protocollo
OT-Bus lo prevede).
Working modes
Pressing the MODE (4) button, it is possible to select the
following working mode:
AUTO = thermostat working in heating/cooling at tem-
peratures level T3-T2-T1 according the selected hours.
MANUAL = thermostat working in heating/cooling at
temperatures level T3 (Comfort) only, without any restri-
ction on hours.
HOLIDAY = thermostat working in heating/cooling at
temperatures level T2 (Economy) only for the number of
days set, without any restriction on hours.
PARTY = thermostat working in heating/cooling at tem-
peratures level T3 (Comfort) only, up to the midnight of
that day, without any restriction on hours.
OFF = thermostat OFF (when ON/OFF connection) or boiler
totally OFF (stand by) (when OT-Bus connection).
DOMESTIC HOT WATER (DHW – SUMMER) = boiler in summer
mode – domestic hot water only (only available when
OT-Bus connection and if the protocol allow this).

7EN
IT
Funzione ANTICIPO
Solo in modalità AUTO, premendo il tasto AVANTI (1) viene
attivata o disattivata la funzione ANTICIPO (se attiva, viene
visualizzata anche l’icona MAN).
La funzione permette di anticipare la partenza della suc-
cessiva fascia oraria riscaldamento e della relativa tem-
peratura ambiente desiderata non oltre la mezzanotte
del giorno stesso. La stessa è utile quando si rientra in
casa in anticipo o se si vuole uscire prima di casa, per
evitare di riprogrammare il termostato.
Funzione ONE HOUR BOOSTER
Solo in modalità AUTO, premendo il tasto INDIETRO (3)
viene attivata o disattivata la funzione ONE HOUR BOO-
STER (se attiva, viene visualizzata anche l’icona MAN). La
funzione attiva la fascia oraria riscaldamento e la rela-
tiva temperatura T3 (comfort) per 60 minuti. Se la fascia
oraria riscaldamento T3 (comfort) è già in corso, la stessa
viene prolungata di 60 minuti.
Function ADVANCED
Only in AUTO mode, by pressing the FORWARD button (1)
the ADVANCED function is enabled or disabled (if enabled
the MAN icon is also shown on display). The function is
used to advance to the next scheduled heating program
event (ON or OFF) with related set temperature, possible
up to midnight on that day. This temporary function is
helpful when arriving home early or leaving home befo-
re the next scheduled (OFF) event.
Function ONE HOUR BOOSTER
Only in AUTO mode, by pressing the BACK button (3) the
ONE HOUR BOOSTER function is enabled or disabled (if
enabled the MAN icon is also shown on display). This
function switches ON the heating at T3 (Comfort) for 1
hour. If current time is already in T3 (Comfort), this fun-
ction adds 1 hour to the current programmed time.

8EN
IT
FUNZIONI / ICONE / ALLARMI
Batterie
scariche
Procedere quanto prima alla
loro sostituzione. Funziona-
mento non regolare.
Presenza
amma
Presenza amma se collegato
in OT-Bus. Richiesta riscalda-
mento se collegato in ON/OFF.
Comuni-
cazione in
radiofre-
quenza
Comunicazione in radiofre-
quenza attiva con il WiFi Box o
con il ricevitore RF caldaia.
FUNCTIONS/ICONS/ALARMS
Low
batteries
Batteries must be replaced.
Functionality will be impaired
if batteries become depleted.
Flame
Signal of real flame presence
on the boiler if OT-Bus con-
nection or just heating request
if ON/OFF connection.
RF com-
munica-
tion
Radio frequency (RF) commu-
nication ON with the WiFi Box
or boiler receiver.
1
2
38
9
10

9EN
IT
Modalità
riscalda-
mento Modalità riscaldamento attiva.
Modalità
sanitario
Funzionamento sanitario
attivo (solo se disponibile
collegamento OT- Bus con la
caldaia).
Raffre-
scamento
attivo
Modalità raffrescamento attiva.
Funzionamento invertito del
relè.
Allarme Ingresso allarme remoto attivo
Funzione accoppiamento in radio frequenza su altri
componenti sistema RiCLOUD
È possibile abbinare al WiFi Box no ad un massimo di 8
oggetti (Termostato o Ricevitore RF di caldaia). Per porta-
te in modalità accoppiamento il WiFi box o il ricevitore RF
caldaia, premere per 5 secondi il tasto a LED trasparente,
no ad un lampeggio contemporaneo e veloce (0,5 sec)
dei LED verde e rosso. Terminata la funzione di accoppia-
mento il lampeggio torna normale.
Reset della funzione di auto congurazione collega-
mento OT
Il termostato è congurato per il funzionamento in ON/OFF.
Nel caso lo stesso sia collegato ad un bus di comunica-
zione OT (cablato o wireless-radiofrequenza), il termo-
stato si auto congura nella modalità di funzionamento
“Controllo remoto di caldaia”.
Heating
mode Heating mode enabled.
Domestic
hot water
(DHW)
Domestic hot water mode
enabled (only if OT-Bus
connection available with the
boiler).
Cooling
enable
Cooling mode enabled.
(inversion of the relay working
mode).
Remote alarm input active.
Function pairing in RF of others devices of RiCLOUD sy-
stem
It is possible to pair up to 8 devices (thermostats or boiler
receiver) to the WiFi Box. To enable the RF pairing fun-
ction, press and hold for 5 secs the transparent LED but-
ton on the WiFi Box or the boiler receiver, until you have
simultaneous and rapid flashing (0,5 secs) of the green
and red LEDs. Once pairing is complete, the LED’s auto-
matically return to their normal state.
Reset of the self configuration (OT) function
The thermostat is factory set to work in ON/OFF.
In case of OT-Bus connection available (wired or wireless)
the thermostat automatically detect the BUS communi-
cation. The device automatically move to OT-Bus working
mode (boiler remote control).

10 EN
IT
Per ripristinare il termostato nella modalità originale
(ON/OFF) è necessario togliere e rimettere le batterie.
Allame Allarmi principali - descrizione
rIE Funzione riempimento semiautomatico
Err Sensore temperatura danneggiato irrepa-
rabilmente
E82 Collegamento radiofrequenza assente
E83 Collegamento OT-Bus interrotto
E84 Hardware danneggiato – non riparabile
A01-A10 Mancata accensione/rilevazione del bru-
ciatore dopo n. tentativi
A02-A20 Intervento del Termostato Limite
A03-A30
Anomalia denita Termostato Fumi e/o
Termostato Sicurezza e/o Pressostato Aria
e/o Ventilatore
A04-A40 Insufciente pressione circuito primario
A06-A60 Allarme sonda NTC sanitaria
A07-A70
Allarme sonda NTC riscaldamento e/o
sonda NTC mandata e/o differenziale ec-
cessivo tra le sonde NTC mandata e ritorno
A08 Allarme sonda NTC ritorno e/o differenzia-
le eccessivo tra le sonde
A09-A91 Allarme sonda NTC fumi o scambiatore
sporco
A77 Intervento del Termostato Limite Bassa
Temperatura esterno
A99 Troppi reset da Controllo remoto
To reset to the original factory set configuration in ON/
OFF, it is necessary to remove and replace the batteries.
Alarms Main alarms and description
rIE Semi-automatic system filling function
Err Thermostat temperature sensor damaged
(non-repairable)
E82 Radio frequency communication missing
E83 OT-Bus communication missing
E84 Hardware damaged – not repairable
A01-A10 Ignition failure
A02-A20 High limit thermostat intervention
A03-A30
Alarm final flues thermostat and/or limit
thermostat and/or air pressure switch
and/or premix fan
A04-A40 Low system pressure
A06-A60 Alarm DHW NTC sensor
A07-A70
Alarm NTC heating and/or NTC flow sensor
and/or higher delta T between flow and
return
A08 Alarm NTC return sensor and/or higher
delta T between flow and return
A09-A91 Alarm flues NTC sensor or heat exchanger
need cleaning
A77 Low limit thermostat intervention
A99 Too high reset from remote location

11 EN
IT
MODE Riscaldamento Icona Descrizione
MODE Heating Icon Description
IT AUTO
Il termostato seguirà il programma impostato nel MENÙ PROGRAM-
MAZIONE – FASCE ORARIE e le temperature ambiente impostate nel
MENÙ PROGRAMMAZIONE – T1-T2-T3 (Le stesse sono anche modicabili
singolarmente con i tasti SU (4) e GIÙ (6) se il termostato si trova nella
relativa fascia oraria).
La richiesta di riscaldamento/raffrescamento viene attivata o meno
a seconda della temperatura ambiente rilevata e della temperatura
impostata in quella fascia oraria. I livelli di temperatura selezionabili
sono 3 e le fasce orarie sono programmabili.
EN AUTO
The thermostat will follow the heating program that’s been set or se-
lected via the PROGRAMMING MENU – HEATING PATTERN and the selected
temperatures on the PROGRAMMING MANU –T1-T2-T3 (the values can
also be selected individually with the UP (4) and DOWN (6) buttons
when the thermostat is following the relevant set temperature).
The heating/cooling request is enabled or disabled according to the
current room temperatures, the desired room temperature and the
programmed timing. There are 3 selectable temperature levels and the
minimum selectable programming (ON/OFF) periods, are 30-minute
segments.
MODALITÀ DI FUNZIONAMENTO WORKING MODE

12 EN
IT
MODE Riscaldamento Icona Descrizione
MODE Heating Icon Description
IT
MANUALE
-
Il termostato è in gestione manuale della temperatura ambiente senza
fasce orarie. La richiesta di riscaldamento/raffrescamento viene attivata
o meno a seconda della temperatura ambiente rilevata e della tempe-
ratura ambiente T3 (comfort).
EN MANUAL
The thermostat is in manual mode and reacts according to the room
temperature and desired room temperature, not according the
programmed heating ON/OFF times. The heating/cooling request is ac-
tivated according to the current room temperature and the set desired
room temperature T3 (Comfort).
IT VACANZA
Il termostato è in gestione manuale della temperatura ambiente senza
fasce orarie. La richiesta di riscaldamento/raffrescamento viene attivata
o meno a seconda della temperatura ambiente rilevata e della tem-
peratura ambiente T2 (Economy). Questa modalità rimane attiva per
il numero di giorni impostati nella schermata principale con il tasto
AVANTI (1), no alla mezzanotte dell’ultimo giorno, per poi ritornare
automaticamente.
EN HOLIDAY
The thermostat is working in manual mode according to the room
temperature and desired room temperature, and not according to the
programmed heating timing. The heating/cooling request is activated
according to the current room temperature and the desired room
temperature T2 (Economy). This working mode is active for a number of
days selected on the main display page with the FORWARD (1) button,
up to midnight of the last day selected. After the set days have expired,
the thermostat mode of operation automatically returns to AUTO.

13 EN
IT
MODE Riscaldamento Icona Descrizione
MODE Heating Icon Description
IT
PARTY
Il termostato è in gestione manuale della temperatura ambiente senza
fasce orarie. La richiesta di riscaldamento/raffrescamento viene attivata
o meno a seconda della temperatura ambiente rilevata e della tempe-
ratura ambiente T3 (comfort). Questa modalità rimane attiva no alla
mezzanotte del giorno stesso, per poi ritornare automaticamente.
EN PARTY
The thermostat is working in manual mode according to the room
temperature and desired room temperature, not according the pro-
grammed heating timing. The heating/cooling request is activated
according the current room temperature and the desired room tem-
perature T3 (Comfort). This working mode is active up until midnight
of the day. Thereafter the thermostat mode of operation automatically
returns to AUTO.
IT ACS Il termostato è in modalità estate (disponibile con collegamento OT-
Bus tra WiFi Box e caldaia, se protocollo OT-Bus lo prevede). L’icona
lampeggia quando la caldaia è in richiesta di calore sanitario.
EN DHW
The thermostat is working in domestic hot water mode only (available
only with OT-Bus connection between the WiFi Box and the boiler and
if the OT-Bus protocol allows this). Tap icon flashes when the boiler is
delivering domestic hot water.
IT OFF
Il termostato è in modalità OFF (nessuna richiesta RISCALDAMENTO o
RAFFRESCAMENTO). Se disponibile collegamento OT-Bus tra WiFi Box e
caldaia (se tutti i termostati sono in OFF) la caldaia andrà in OFF (nes-
suna richiesta RISCALDAMENTO, RAFFRESCAMENTO e SANITARIO). Funzione
antigelo disponibile.
EN OFF
Thermostat working mode is OFF (no heating/cooling request). If there
is OT-Bus connection between the WiFi Box and the boiler (and if all
the thermostats connected are OFF), the boiler is completely OFF mode
(no heating/cooling, no domestic hot water, only boiler frost protection
active).

14 EN
IT
Icona Descrizione Sottomenu
Icon Description Lower menu
IT
Impostazione ORA e GIORNO. Ri-premere il
tasto PROG (2) per entrare nel sottomenu e
procedere all’impostazione. Ora e giorno sono
acquisiti in automatico se il termostato è abbi-
nato ad un WiFi Box collegato a rete internet.
Da APP è possibile forzare e sincronizzare ora e
giorno del termostato con quella del cellulare.
Selezionare con il tasto AVANTI (1) o INDIETRO (3)
il campo desiderato (Ora, minuti o giorno) e con
i tasti SU (4) o GIÙ (6) modicare il suo valo-
re. Premere il tasto PROG (2) per memorizzare
e tornare al menù programmazione, premere
MODE (5) per memorizzare ed uscire dal menù
programmazione oppure attendere 5 secondi
per memorizzare automaticamente il valore.
EN
Set the HOURS and DAY. Press again the PROG
(2) to enter on lower menu and proceed to set.
Hours and day are automatically set if WiFi
Box connected to an internet network. From
APP it is possible to synchronize the hours and
the day of the thermostat with your Tablet or
Smartphone time.
Select with the buttons FORWARD (1) or BACK (3)
the desired value (hours, minutes or days) and
with the UP(4) and DOWN (6) buttons select the
values. Press the PROG (2) button to enter and
return to the programming menu, press MODE
(5) to escape from the programming menu or
wait 5 seconds to auto exit.
ACS
Impostazione temperatura ACQUA CALDA SANI-
TARIA (disponibile con collegamento OT-Bus tra
WiFi Box e caldaia, se protocollo OT-Bus lo pre-
vede). Ri-premere il tasto PROG (2) per entrare
nel sottomenu e procedere all’ impostazione.
Selezionare con tasti SU (4) e GIU (6) il valore di
temperatura desiderato. Premere il tasto PROG
(2) per memorizzare e tornare al menù pro-
grammazione, premere MODE (5) per memo-
rizzare ed uscire dal menù programmazione
oppure attendere 5 secondi per memorizzare
automaticamente il valore.
MENÙ PROGRAMMAZIONE PROGRAMMING MENU
oppure/or selezionare icona desiderata/ select the desired icon
IT

15 EN
IT
Icona Descrizione Sottomenu
Icon Description Lower menu
EN DHW
Set the temperature of DOMESTIC HOT WATER
(when OT-Bus connection available between
WiFi Box and the boiler). Press again the PROG
(2) to enter on lower menu and proceed to set.
Select with UP (4) and DOWN (6) buttons the
desired temperature value. Press the PROG (2)
button to enter and return to the program-
ming menu, press MODE (5) to enter and
esc from the programming menu or wait 5
seconds to auto exit.
IT InFO
Lettura SONDE / IMPOSTAZIONI DI CALDAIA (dispo-
nibile con collegamento OT-Bus tra WiFi Box
e caldaia, se protocollo OT-Bus lo prevede).
Ri-premere il tasto PROG (2) per entrare nel
sottomenu e procedere alla lettura.
Vengono mostrate in sequenza le seguenti
informazioni (se il valore non è disponibile,
vengono visualizzati i trattini):
tSEt = set-point di mandata riscaldamento
calcolato dal termostato.
tFLO = temperatura letta dalla sonda mandata
riscaldamento della caldaia.
trEt = temperatura letta dalla sonda ritorno
riscaldamento della caldaia.
tdH = temperatura letta dalla sonda sanitario
della caldaia.
tFLU = temperatura letta dalla sonda fumi della
caldaia.
tESt = temperatura letta dalla sonda collegata
alla caldaia o valore comunicato da APP.
MOdU = percentuale istantanea modulazione
ventilatore caldaia.
FLOr = portata rilevata dal ussimetro di
caldaia.
HOUr = numero di ore in funzionamento in
regime di elevata condensazione.
PrES = pressione impianto circuito riscalda-
mento.
tFL2 = temperatura letta dalla sonda mandata
del secondo circuito riscaldamento.

16 EN
IT
Icona Descrizione Sottomenu
Icon Description Lower menu
EN InFO
Reading SENSORS/BOILER SETTINGS (when OT-
Bus connection available between WiFi Box
and the boiler and if the OT-Bus allow it). Press
again the PROG (2) to enter on lower menu
and proceed to read the values available.
They are shown in sequence the followings
info (if value not available “- -” is shown):
tSEt = set-point flow temperature calculated
by the thermostat.
tFLO = reading of the boiler flow sensor tem-
perature.
trEt = reading of the boiler return sensor
temperature.
tdH = reading of the boiler DHW sensor tem-
perature.
tFLU = reading of the boiler flues sensor tem-
perature.
tESt = reading of the boiler outdoor sensor
temperature (fitted to the boiler or communi-
cated by the web).
MOdU = instantaneous percentage of modula-
tion of boiler fan.
FLOr = instantaneous domestic hot water flow
rate.
HOUr = hours worked in high condensation
mode.
PrES = central heating system pressure.
tFL2 = reading of the heating flow sensor on
second circuit

17 EN
IT
Icona Descrizione Sottomenu
Icon Description Lower menu
IT
Impostazione livelli di temperatura ambiente
desiderata T1-T2-T3.
Ri-premere il tasto PROG (2) per entrare nel
sottomenu e procedere all’ impostazione. Gli
stessi sono anche modicabili singolarmente
con i tasti SU (4) e GIÙ (6) se il termostato si
trova nella relativa fascia oraria.
Selezionare con il tasto AVANTI (1) o INDIETRO (3)
il campo desiderato (T1, T2 o T3) e con i tasti SU
(4) o GIÙ (6) modicare il suo valore. Premere
il tasto PROG (2) per memorizzare e tornare al
menù programmazione, premere MODE (5) per
memorizzare ed uscire dal menù programma-
zione oppure attendere 5 secondi per memo-
rizzare automaticamente il valore.
EN
Set the desired room temperatures level T1-
T2-T3. Press again the PROG (2) to enter on
lower menu and proceed to set. The 3 values
can be changed individually with UP (4) and
DOWN (6) buttons when the respective ‘T’ value
is active on the thermostat.
Select with the buttons FORWARD (1) or BACK
(3) the desired value (T1, T2 or T3) and with the
UP(4) and DOWN (6) buttons select the values.
Press the PROG (2) button to enter and return
to the programming menu, press MODE (5) to
enter and esc from the programming menu or
wait 5 seconds to auto exit.
IT
Impostazione FASCE ORARIE RISCALDAMEN-
TO-RAFFRESCAMENTO. Ri-premere il tasto PROG
(2) per procedere all’ impostazione. Seleziona-
re con il tasto AVANTI (1) o INDIETRO (3) il periodo
che di vuole modicare (lun-ven, sab-dom,
lun-dom, singolo giorno). Ri-premere il tasto
PROG (2) per entrare nel sottomenu e procede-
re all’ impostazione.
Selezionare con il tasto AVANTI (1) o INDIETRO
(3) il segmento di fascia oraria che si vuole
modicare e con il tasto MODE (4) selezionare
il livello di temperatura desiderato (T1, T2 o T3).
Premere il tasto SU (4) per copiare la preceden-
te impostazione nel segmento di fascia oraria
successivo (utilizzare il tasto GIÙ per tornare
indietro). Premere il tasto PROG (2) per memo-
rizzare e tornare al menù programmazione,
premere MODE (5) per memorizzare ed uscire
dal menù programmazione oppure attendere
30 secondi per memorizzare automaticamente
il valore.
MENÙ PROGRAMMAZIONE (CONT.) PROGRAMMING MENU (CONT.)

18 EN
IT
Icona Descrizione Sottomenu
Icon Description Lower menu
EN
Set the PROGRAMMING HEATING/COOLING PRO-
GRAMMING TIME. Press again the PROG (2) to
enter on lower menu and proceed to set. With
FORWARD (1) and BACK (3) buttons select the
period (mon-fri, sat-sun, single day). Press
again the PROG (2) to enter on lower menu
and proceed to set.
Select with the buttons FORWARD (1) or BACK (3)
the segment of hours that need to be modi-
fied and with the MODE (4) select the desired
temperature value level (T1, T2, T3). Press the
UP (4) button to copy the previous setting on
the following hours fascia (use the DOWN (6)
button to go back). Press PROG (2) to enter and
esc from the programming menu or wait 30
seconds to auto exit.
IT
Impostazione modalità di funzionamento
RISCALDAMENTO o RAFFRESCAMENTO. Ri-premere
il tasto PROG (2) per entrare nel sottomenu e
procedere all’ impostazione.
Attenzione, se disponibile collegamento
OT-Bus tra WiFi Box e caldaia, in modalità
RAFFRESCAMENTO, viene gestita la richiesta di
calore solo tramite ON/OFF.
Selezionare con il tasto SU (4) o GIÙ (6) l’impo-
stazione desiderata:
IN = inverno = modalità riscaldamento
SU = estate = modalità raffrescamento.
Premere il tasto PROG (2) per memorizzare e
tornare al menù programmazione, premere
MODE (5) per memorizzare ed uscire dal menù
programmazione oppure attendere 5 secondi
per memorizzare automaticamente il valore.
EN
Set the HEATING or COOLING mode.
Press again the PROG (2) to enter on lower
menu and proceed to set.
Attention! If the OT-Bus connection estab-
lish between the WiFi Box and the boiler, in
case of COOLING mode, the cooling request is
managed only via ON/OFF (heating is disable
vs the boiler).
Select with the UP (4) or DOWN (6) the desired
value:
IN = winter = heating mode
SU = summer = cooling mode
Press the PROG (2) button to enter and return
to the programming menu, press MODE (5) to
enter and esc from the programming menu or
wait 5 seconds to auto exit.
IT
Area tecnica riservata (solo per utenti esperti
e service). Ri-premere il tasto PROG (2) per
entrare nel sottomenu e procedere all’ impo-
stazione.
Selezionare la password (password di ingresso
area tecnica = 18) con tasti SU (4) o GIÙ (6) e
premere il tasto PROG per entrare nel menu
tecnico

19 EN
IT
Icona Descrizione Sottomenu
Icon Description Lower menu
EN
Technical menu (available only to service
personnel).
Press again the PROG (2) to enter on lower
menu and proceed to set.
Set the password (password for technical
menu = 18) using the UP (4) and DOWN (6)
buttons and press PROG (2) to enter.
IT Premere PROG per uscire dal menu programmazione.
EN Press PROG to exit from the programming menu.

20 EN
IT
MENÙ TECNICO IMPOSTAZIONI AVANZATE
Parametro
Icona Descrizione
01 t0
Impostazione minima temperatura di
sicurezza (antigelo per modalità OFF e
SANITARIO/ESTATE).
08 HH/
LL CH
Impostazione massimo e minimo set
point riscaldamento. Disponibile solo in
OT-Bus.
10 CLI Impostazione curva climatica di termo-
regolazione. Disponibile solo in OT-Bus.
11 InFL
Impostazione inuenza sensore am-
biente sulla termoregolazione. Disponi-
bile solo in OT-Bus.
13 CALI Calibrazione del sensore ambiente.
14 FACt Ripristino valori di fabbrica (RESET
generale).
16 SOFt Versione software del termostato.
17 dEGr Impostazione gradi centigradi o
Fahrenheit.
19 H On/
OFF
Impostazione isteresi di accensione e
spegnimento.
21 ALL Storico allarmi. Disponibile solo in
OT-Bus.
TECHNICAL MENU AND EXPERTISE SETTINGS
Parame-
ter Icon Description
01 t0
Set the minimum limit temperature (frost
protection for ON/OFF and DHW/SUMMER
mode).
08 HH/
LL CH
Set max and minimum set point in
heating.
Available only when OT-Bus connection.
10 CLI
Set the climatic curve for thermoregula-
tion.
Available only when OT-Bus connection.
11 InFL
Set the influence of the room sensor on
thermoregulation calculation. Available
only when OT-Bus connection.
13 CALI Calibration of the room sensor.
14 FACt Factory values RESET (general RESET).
16 SOFt Software version of the thermostat.
17 dEGr Set degree in Celsius or Fahrenheit.
19 H On/
OFF Set hysteresis On and OFF.
21 ALL Storico allarmi. Disponibile solo in OT-Bus.
22 tSP Boiler parameters setting (TSP).
Available only when OT-Bus connection.
SOLO ESPERTI
ONLY EXPERTS PL PASSWORD
IT EN
Other manuals for ricloud
2
Table of contents
Other Riello Thermostat manuals

Riello
Riello ricloud User manual

Riello
Riello Hi, Comfort T100 Operation and installation manual

Riello
Riello Hi, Comfort 100 Operation and installation manual

Riello
Riello BeSMART User manual

Riello
Riello CDI 15 User manual

Riello
Riello BeSMART Operation and installation manual

Riello
Riello RiCLOUD NA Series User manual

Riello
Riello BeSMART User manual
Popular Thermostat manuals by other brands

ritetemp
ritetemp 8050 Operation manual

Siemens
Siemens RDF660MB Series Mounting instructions

Weishaupt
Weishaupt WEM-RG1 Installation and operating instruction manual

Carrier
Carrier TCSNAC01-A installation instructions

Computime
Computime SALUS Controls HTR230 user manual

Honeywell
Honeywell RTHL2510 series operating manual