manuals.online logo
Brands
  1. Home
  2. •
  3. Brands
  4. •
  5. Rime Lite
  6. •
  7. Lighting Equipment
  8. •
  9. Rime Lite Ni-flash User manual

Rime Lite Ni-flash User manual

Other Rime Lite Lighting Equipment manuals

Rime Lite i.6 User manual

Rime Lite

Rime Lite i.6 User manual

Rime Lite i.Grandbox 16 User manual

Rime Lite

Rime Lite i.Grandbox 16 User manual

Rime Lite UNION 2 User manual

Rime Lite

Rime Lite UNION 2 User manual

Rime Lite F Series User manual

Rime Lite

Rime Lite F Series User manual

Rime Lite i.2A User manual

Rime Lite

Rime Lite i.2A User manual

Rime Lite HL1K User manual

Rime Lite

Rime Lite HL1K User manual

Rime Lite XB PRIME 3 User manual

Rime Lite

Rime Lite XB PRIME 3 User manual

Popular Lighting Equipment manuals by other brands

Life 39.9F70020C quick start guide

Life

Life 39.9F70020C quick start guide

EuroLite LED ML-20 user manual

EuroLite

EuroLite LED ML-20 user manual

LIGMAN OD-50141 installation manual

LIGMAN

LIGMAN OD-50141 installation manual

Home Accents Holiday 1002461144 instructions

Home Accents Holiday

Home Accents Holiday 1002461144 instructions

Experia IRiS Ripple Light instruction manual

Experia

Experia IRiS Ripple Light instruction manual

Erco Gecko Mounting instructions

Erco

Erco Gecko Mounting instructions

Inter-lux ZTA.100.Surface Installation and maintenance instructions

Inter-lux

Inter-lux ZTA.100.Surface Installation and maintenance instructions

Whelen Engineering Company TN Series installation guide

Whelen Engineering Company

Whelen Engineering Company TN Series installation guide

IKEA BJÖRKSPIREA manual

IKEA

IKEA BJÖRKSPIREA manual

Toolland PM 6640 instruction manual

Toolland

Toolland PM 6640 instruction manual

GTD GTD-LP200 user manual

GTD

GTD GTD-LP200 user manual

LIVARNO home 1105-W-UK manual

LIVARNO home

LIVARNO home 1105-W-UK manual

ProLights EclPar IPMFC user manual

ProLights

ProLights EclPar IPMFC user manual

Velvet EVO Series user manual

Velvet

Velvet EVO Series user manual

IDTOLIGHT GENT installation instructions

IDTOLIGHT

IDTOLIGHT GENT installation instructions

MAYTONI S35 installation manual

MAYTONI

MAYTONI S35 installation manual

MaxLite MLFP14DP4535 user manual

MaxLite

MaxLite MLFP14DP4535 user manual

SLV Elektronik 550621 instruction manual

SLV Elektronik

SLV Elektronik 550621 instruction manual

manuals.online logo
manuals.online logoBrands
  • About & Mission
  • Contact us
  • Privacy Policy
  • Terms and Conditions

Copyright 2025 Manuals.Online. All Rights Reserved.

Operating Instructions
Ni-flash
.
Thank you for choosing a Rimelite product.
Please read the operation manual before using Ni-flashes
Rimelite’s i Flash is compatible with Canon/Nikon DSLR and mirrorless which have a hot shoe.
This equipment’s HSS function can only be used through Swing III Radio Controller & Trigger. .
Nomenclature
1. Flash tube 2. Stand Bracket 3. Replaceable Battery pack 4. Battery release button 5. Strap
6. Sync sensor 7. Main Display 8. Swing III Receiver slot 9. Flash output digital encoder
10. Power On/Off button 11. Function setting buttons 12. Battery indicator-LCD display 13. Battery energy check
button
Power On/Off
Press and hold power switch to turn on/off the unit.
1. Normal Mode setting.
1) Rotate the flash digital dial left or right to set the flash output(F-stop)(6).
Rotate left to decrease output and right to increase output. Flash output can be
decreased/increased by 0.1F-Stop.
2. Duration Time setting (A2)-Freeze Mode
1) This mode is a great option to capture the moment of fast action.
The color temperature becomes slightly bluer in t.1, t.2 steps
Press the A2 button to adjust duration time settings.
“t” is displayed.
Rotate the dial left or right to adjust duration time. Rotate left to decrease duration
time and right to increase duration time.
3. Multi-flash setting
1) 5 flashes, 10 flashes, 15 flashes / 1second
Multi-flash setting is only activated on steps 1.0~1.9 (C.1) and 2.0~2.9 (C.2).
Press C/HSS button (A1) on 1.0~1.9(C.1) or 2.0~2.9(C.2) steps. C.1 and C.2 are
displayed on the FND display. Pressing the button once fires 5 flashes, pressing it 2
times fires 10 flashes, and pressing it 3 times fires 15 flashes.
Normal Mode output step, 1.0 ~ 1.9 -> C1 <- t.1 Duration time control mode
2.0 ~2.9 -> C2 <- t.2
In the duration time control mode, one can fire continuous balanced duration time
with 5 flashes, 10 flashes, 15 flashes / 1 second.
4. Modeling light setting(LED 10W, A4)
1) Press ‘LED’ button (A4) to control output of modeling light.
Press once to turn off/on modeling light, 2 times for highest output and 3 times for
moderate output power.
5. Test button (A-7)
1) Press ‘TEST’ button.
‘Ready’ is displayed if the flash is 100% full charged.
6. ‘Cell’setting (A-3)
1) Press ‘CELL’ button.
‘Cell’ is displayed.
Photocell is activated. The flash will slave Sync if another flash is fired.
CELL On
CELL Off
7. ‘Sound’ setting(A5)
‘Sound’ is displayed.
‘Sound’ function is activated. The flash beeps when it is ready to flash again.
SOUND OFF
SOUND ON
8. Battery energy check button (3, 8)
1) Press the battery status indicator button (8) to check the remaining battery energy
on the LCD display.
(battery status LCD display)
(battery status indicator button)
(check battery status)
9. HSS (High Speed Sync)
1) Use the HSS function through S-III wireless trigger.
Combine S-III Transmitter with Camera’s hot shoe and install S-III Receiver in the
slot of i-flash rear cover(2)
The S-III HSS function can support only for Canon and Nikon cameras. Please make sure beforehand that your camera
models are Full-frame or Crop camera.
2) Press and hold C/HSS button for 2 seconds. Press the button one more time and the letter ‘h’ is displayed. When using HSS
under Canon DSLR full-frame body should set Ni-Flash to Capital letter ’H’, Canon DSLR Crop body and all Nikon cameras
set Ni-Flash small letter ‘h’ when using HSS.
Capital letter ‘H’
Using HSS with Canon Cameras
Full-Frame body
Small letter ‘h’
Using HSS with Nikons’ all DSLR cameras
Canon Crop-body cameras
3) Press ‘+” button on S-III transmitter. Lit LED indicates that the HSS mode is ready for use.
*Press ‘ – ‘ button on S-III transmitter after photography shoot ends to save the battery
Energy.
(In HSS mode, LED light comes on)
*Wireless trigger is sold separately.
*Install receiver in the slot of Ni-flash rear cover.
*Take caution not to install receiver upside down.
4) Set camera shutter speed to 1/400 sec~1/8000 sec before shooting.
5) For flawless DSLR HSS, the flash On/Off function on S-3 is not available in HSS mode.
1. Charge Battery
1) Use only the charger that comes together with the packing. Plug charger into the
charging port located at the side of the battery.
2) When using AC pack
When using AC pack, connect cables to the AC pack.
2. Sync Cable
1) Connect camera SYNC cable to the flash’s SYNC
socket located on the side.
AC Pack
*AC pack is sold separately
When using AC pack, connect cables to the AC pack.
Battery pack
For battery power, slide on the battery pack.
S-3 User Manual
I. Adjusting flash output
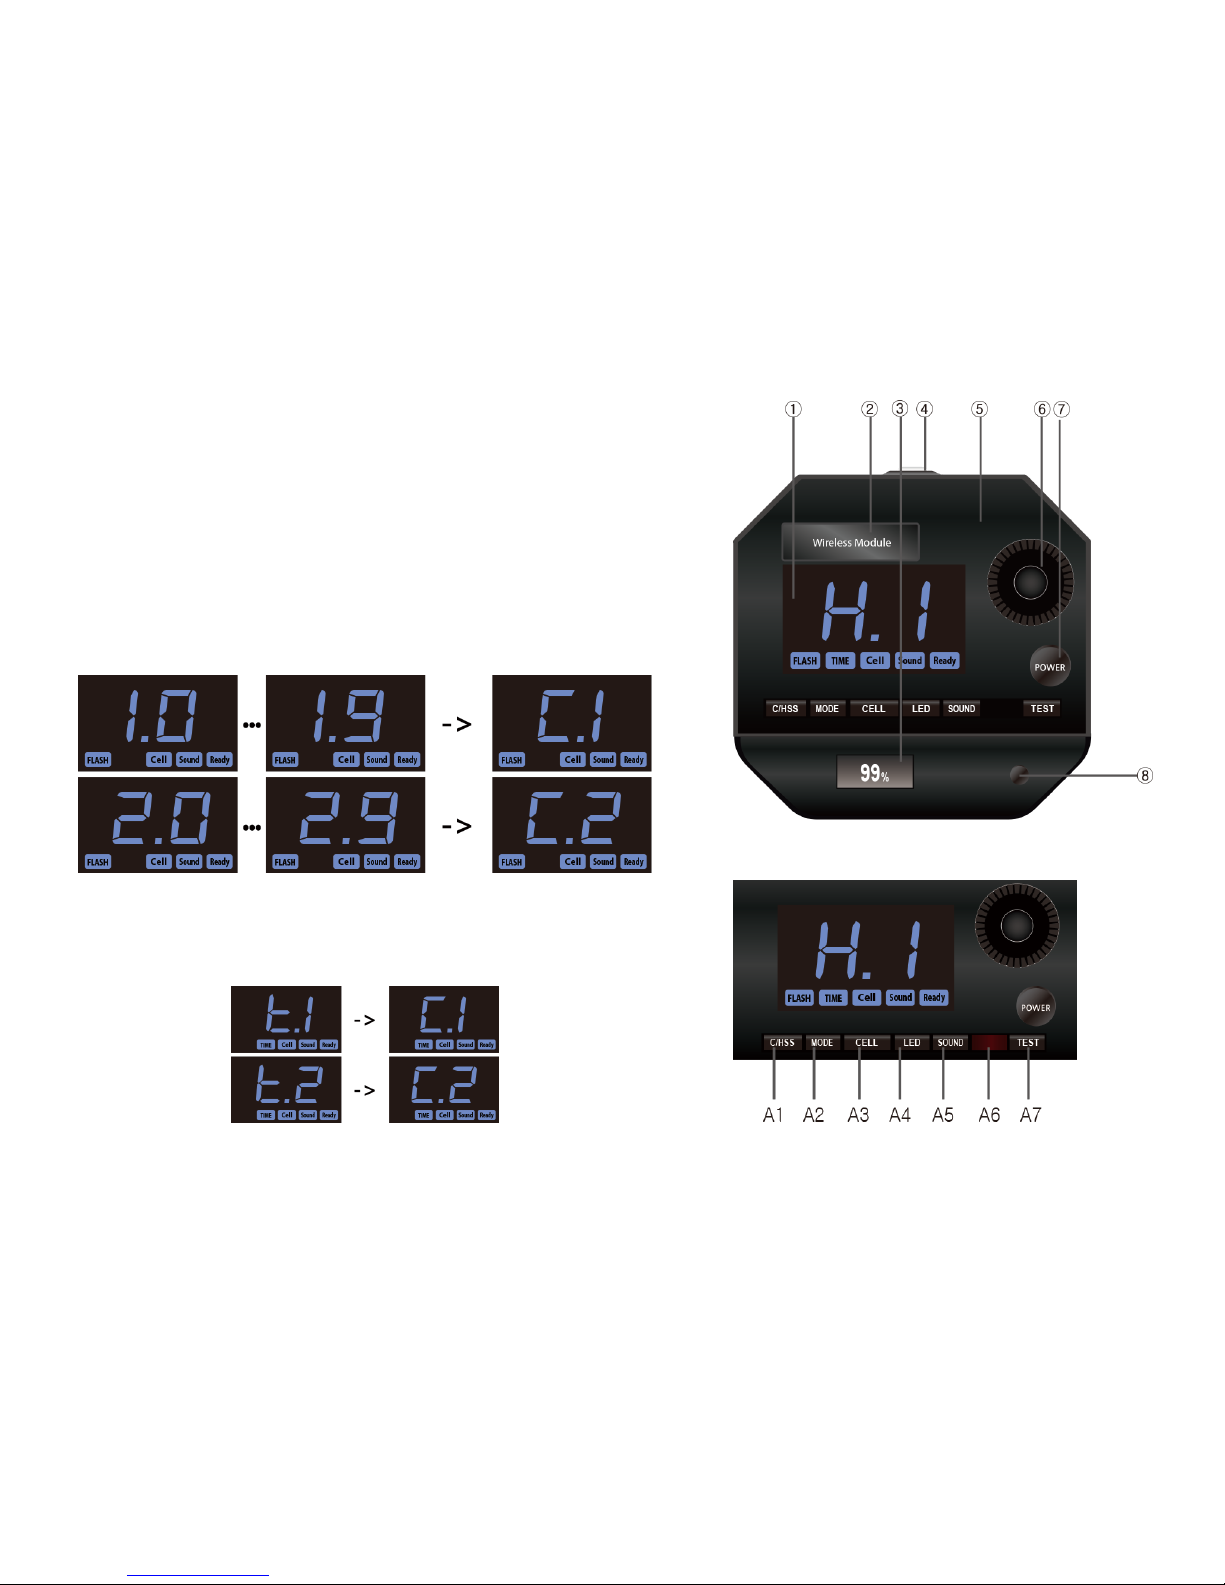
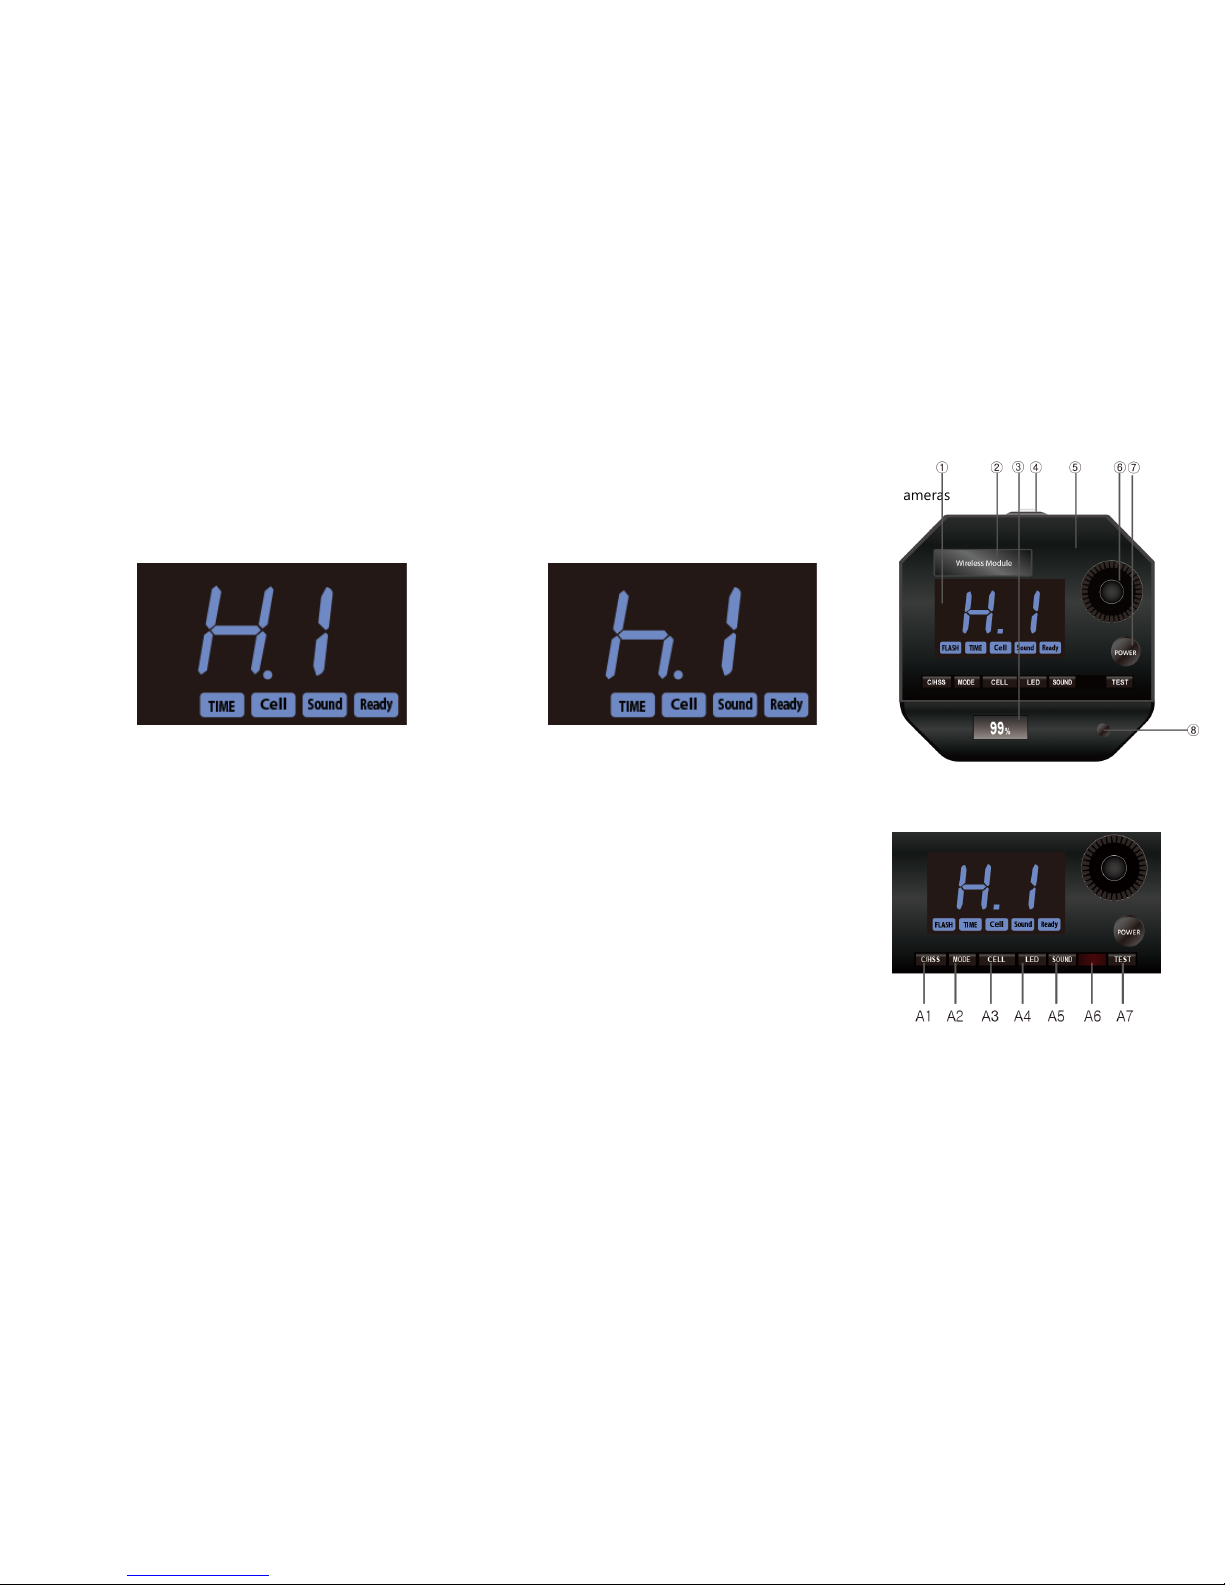
1. To adjust flash output for desired flash, press A-I (1~6)
2. LED beside selected flash button goes red and blinks for 5 seconds
3. Press transmitter’s +,- buttons (A-III) to adjust flash output.
e.g) After setting transmitter to no. 4, press 4 on transmitter to
control flash output for unit no.4 and press +,- to set desired power
output.
*Adjust flash output when red LED blinks
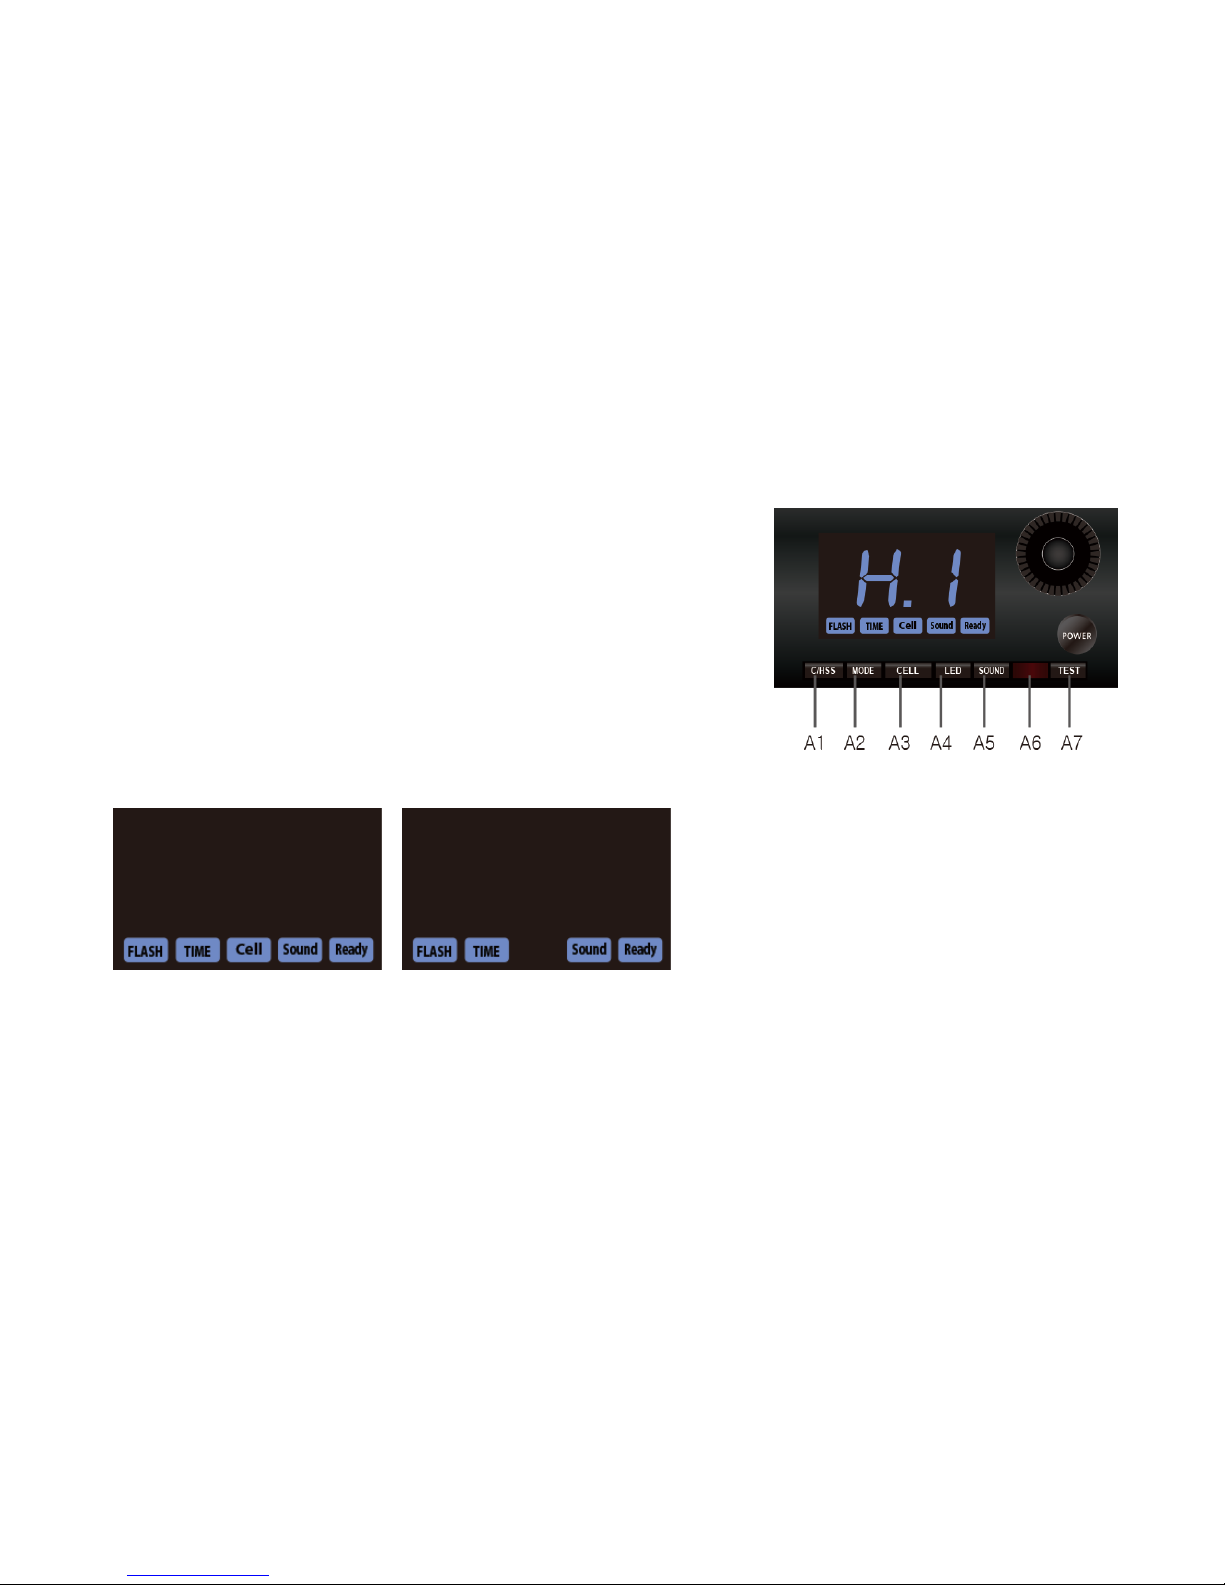
II. Turning each flash On/Off
1. Press and hold one of the desired buttons in A-I for 3 seconds.
2. Flash unit turns On/Off.
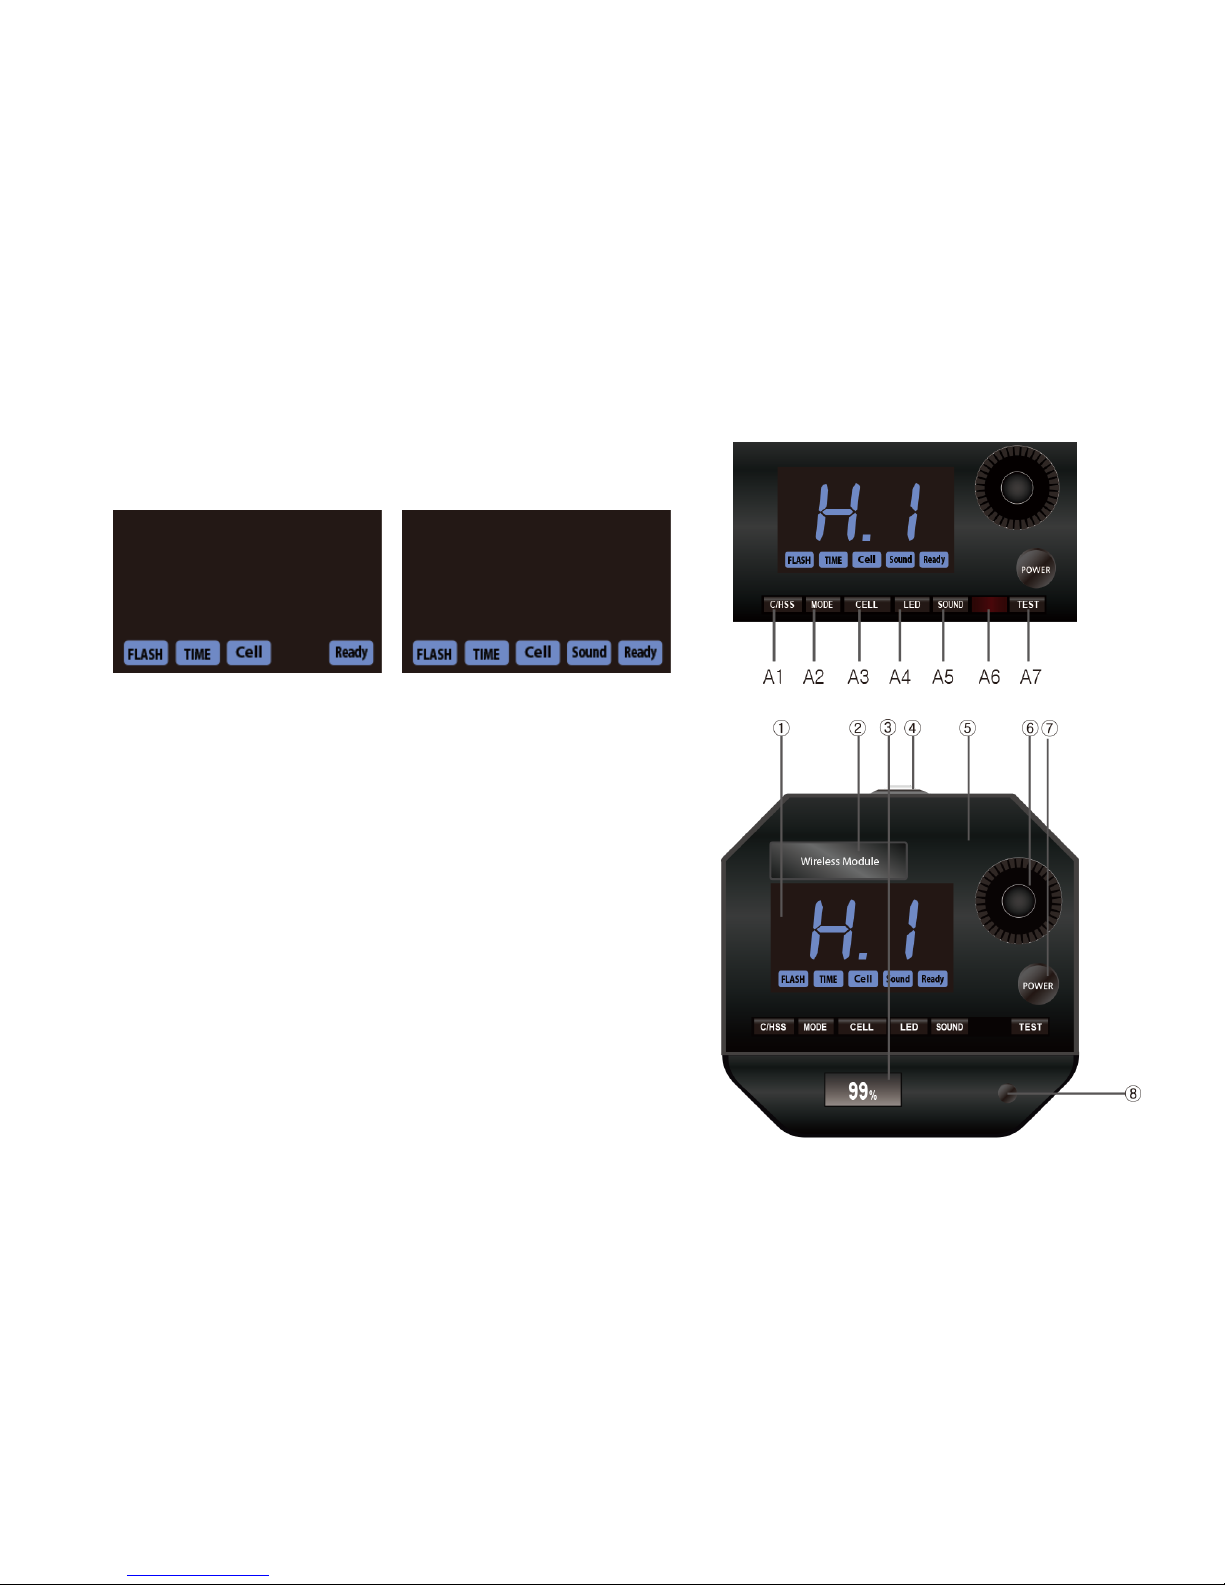
III. Channel Settings
1. To avoid frequency interruptions, 16 channels are provided.
2. Ensure that the same channel number is set on both the receiver
and transmitter.
*Due to the possibility of the same frequency usage by wireless 2.4 GHz, try
switching receiver and transmitter to a different channel when error occurs.
IV. Caution
1. Barriers to frequency settings may be experienced in a multiple wireless
device environment.
2. Shutter speed settings may differ according to camera settings. (Refer to focal
plane shutter on the manufacturer’s website.)
3. Shutter speed settings may differ according to unit model. (Refer to unit
specifications on the manufacturer’s website.)
4. This product is an acquired KCC certification product.
5. This product uses AA 1.5V batteries. Product may not operate when battery
power is low. Please replace batteries in such cases.
-On/Off separate units (hold 3
seconds)
*Selected unit turns On/Off
-Select separate unit (short click)
*Red Led comes on
-Control flash output
*compatible with 2015’s i Series, f
series and Mira.
Flash test
-battery cover
-Set unit
channels
On/Off all
units
*Install receiver at the rear
of unit
-Flash ID indication display
-Set flash ID
*Flash ID 1, 2, 3, 4, 5, 6, up to a
total of 6 IDs may be set per
channel.
*Only the ID is displayed. Switch
on receiver when power is off.
*Flash trigger is sold separately.
- Set unit channels
*channel settings must be the
same on both transmitter and
receiver to ensure operability