manuals.online logo
Brands
  1. Home
  2. •
  3. Brands
  4. •
  5. Rinnai
  6. •
  7. Oven
  8. •
  9. Rinnai RB-3Si-C User manual

Rinnai RB-3Si-C User manual

Attention: when installing the casing
• Adjust screw position as bench cut out size.
•If length of screw is not enough long (RHS/LHS screw) please change with longer
screw (M5x80) which included in packaging
•Confirm that six screws are secured firmly into the casing. (Eight screws are included.)
•Confirm that the four screws are secured firmly into the top plate pushing plate.
(Four screws are included.)
RB3SS-31-2x01
The fixing Screw M5 x 30
4 Pcs
The fixing Screw M5 x 30 / M5 x 80
Each 2 Pcs
The fixing Screw x 4 pcs.
040113
GEN
THREE-BURNERS GAS COOKER
INSTRUCTION MANUAL
RB-3Si-C
Components and Features
- 6 -
Trouble Shooting Manual for Rinnai RB-3Si Built-in Hob
Maintenance
•Wipe the tempered glass with a soft damp cloth and mild detergent
•Wash the Pan Support and Burner Covers in warm water and detergent.
- 1 -
Components and parts names
In order to obtain the best results and to maintain your Rinnai Built-In Hob in the best condition, please
read the instruction carefully.
FAULT CAUSE
1. No Ignition Spark electrode is wet, especially in
high humidity season
Dry the electrode with clean tissue
or dry cloth.
2. Flame cannot be
held
Incorrect turning of gas control
knob.
Push and turn the gas control knob
anti-clockwise until a ‘click’ sound
is heard. Hold for a few seconds until
flame is ignited.
4. Yellow flame Accumulated grease and dirt
on the burner.
Wash the burner in warm water with
detergent. Leave it to dry; then place
it back in the correct position.
3. No main flame Gas Regulator has been turned off Open gas regulator completely
REMEDY
Stainless Top Plate
Casing
Knob
RB-3Si
Pan Support H
Pan Support M Drip Pan
H Burner Cover
Top Plate Pushing Plate
Drip Pan S
S Burner Cover
RB-3Si
Installation
1. Pan Support
Fit Pan Support Legs into Top Plate.
(Fig.2)
2. Drip Pan
Fit drip pan into burner correctly, without any gap.(see Fig.3)
3. Installation of Gas Hose
- 3 - - 4 -
Operating Instruction
Ignition
•Install the built-in hob in well ventilated area and keep away from any combustible or inflammable
object i.e. paper, oil, etc.
•If the built-in hob is to be installed near any combustible surrounding i.e. wooden walls, wooden
shelves, etc, there should be a distance of more than 15cm (6 in) away from the surrounding
combustible. If the surrounding materials are fireproof, the clearance is not required.
•Place the built-in hob on a stable and level surface
• This built in hob is to be used for cooking purposes only. Do not use it to dry towel, clothes or any
other materials over it.
• Make sure that the following parts are fitted properly before use.
•Aspecific rubber hose for built-in hob must be used .
•The rubber hose must not be bent during installation and must be of an appropriate length
( less than 2m).
•During installation, make sure that the rubber hose does not come into contact with the body of the
built-in hob pass through the bottom part of the built-in hob to prevent melting of the hose.
• Place the securing ring over the rubber hose and connect the rubber hose to the coupler below the
rear side of the built-in hob till the marked red line. Then secure the rubber hose in position with the
securing ring (For LP Gas).
• The connection must be performed by a qualified person according to the relevant standards (For LP
Gas). For Town Gas / Natural Gas, the task must be executed by a qualified licensed technician.
•Do not use any other gas except for the ones indicated on the specification label of the built-in hob.
•LPG is the abbreviation for Liquefied Petroleum Gas, while TG is Town Gas supplied through
pipelines.
•For liquefied petroleum gas, please use conventional household low pressure regulators. The
standard pressure for LPG gas is 280 mm H O that for TG gas is 100 mm H O.
• Do not increase the gas pressure
• Never turn the LPG gas container upside down or subject to high temperatures or direct sunlight.
•Conversion of built-in hob from one gas type to another must be performed by a qualified technician
as major components need to be replaced.
2 2
1. Depress the control knob to about 2 mm and turn to the left (counter clock-wise) to the “ON”
position.
2. When the control knob is being turned for ignition, sparks are generated to ignite the burning device,
accompanied by clicking sound.
4. Precaution gas
(Fig.3)
X
Fig. 2
GAP
RB-3Si
Cut-Out Hole Size
Specification
1. The tempered glass and stainless top plate is beautiful and stylish.
2.The enamel pan supports are durable and will not deform, making it stable for your cooking vessels.
3. The automatic continuous ignition device will ensure a 100% ignition rate.
4. Each built-in hob is equipped with a safety valve which will cut off the gas supply automatically if
the flame is accidentally extinguished (For SV model only).
Features
Gas Type
Gas Consumption per hour
Respective gas consumption (kW)
Main
RHS / LHS Gas Connecting Tube
3.55
2.50
3.72
1.35
L.P.G (30 mbar)
Nozzle/injector size
3.60
0.90
Ø9.5 mm gas specific
rubber hose
½ In Thread (male)
Ø9.5 mm gas specific
rubber hose
T.G. (18 mbar)
Nozzle/injector size
N.G. (30 mbar)
Nozzle/injector size
Small
Center
1.40
1.50
1.40
0.83
1.45
0.60
65
725~840
435~480
550
How to Handle Safety Device and Change Battery
1. If the flame is extinguished during operation, the Flame Failure Safety Device will automatically cut
off the gas within second.
If you notice that the flame has been extinguished, please turn the knob to “OFF” position.
2. The Safety Sensor is delicate, please do not use stiff brushes or rough cleaning pads when cleaning.
•Aeration is preset at factory during assembly; please do not attempt to adjust it.
•Battery Box is located at bottom of right front (Size C, 1.5V x 1) (Fig.5).
Open the cabinet door, and change the battery.
- 5 -
1.After use, turn the control knob right to the “OFF” position, and the flame will be extinguished.
2.Make sure that the control knob is fully turned to the “OFF”position, lest there would be a danger of
gas leakage.
3. After extinguishing the flame, do not touch the conductive parts of the hobs as they remain at very
high temperatures.
4. There may be a slight hissing sound after the flames is extinguished.
5. If the built-in-hob is not in use, turn off the main gas supply to avoid gas leakage or unnecessary
accidents.
Flame Extinguishing
Fig. 5
- 2 -
Gas Inlet
Front Side
”C” Size Battery
(1.5Vx1)
3. Do not release the control knob for 2-5 seconds after the sparks have ignited the burner to activate the
safety device. Otherwise, the ignition will fail.
4.In the event of the burner flames being accidentally extinguished, turn off the burner control and do
not attempt to re-ignite the burner for at least 1 min.
The device shall not be operated for more than 15 seconds. If the burner has not lit up after 15 seconds,
stop operating the built-in hob and open the compartment door and/or wait for at least 1 minute before
attempting to ignite the burner again.
5. Flame can be adjusted between “MAX”, “MED”and “MIN” position, please adjust flame slowly.
As shown by Fig. 4:
Off Max flame Med flame Min flame
6. Do not clean the top of the sensor with a hard brush, as it may damage the sensor.
R0 ~ R110
Fig. 4
RB-3Si
Product
Net Weight
Model
Ignition
Overall Dimension
Cut out hole size
Built-in Hob
RB-3Si
13.5 kg
9 mm x 510 mm9 x 870 mm
435~480 mm x 725~840 mm
R0 mm ~ R110 mm
Continuous Ignition
“C” Size Battery (1.5V x 1)
Burners
280 mm
Max
Main
Min
120 mm
Diameters of pan which may be used on cooker
* Maximum weight for each burners 20 kg.
Other Rinnai Oven manuals

Rinnai RBO-55TIX User manual

Rinnai

Rinnai RBO-55TIX User manual

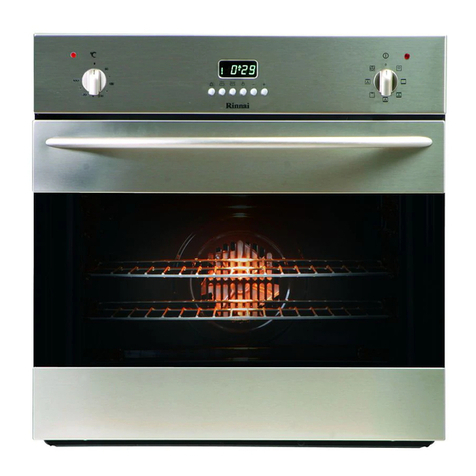
Rinnai RO-E6501-STC User manual

Rinnai

Rinnai RO-E6501-STC User manual

Rinnai RO-E6206XA-EM Specification sheet

Rinnai

Rinnai RO-E6206XA-EM Specification sheet

Rinnai RBO-10MSY Product information sheet

Rinnai

Rinnai RBO-10MSY Product information sheet

Rinnai RBO-7MSO Product information sheet

Rinnai

Rinnai RBO-7MSO Product information sheet

Rinnai RBO-7MSO Specification sheet

Rinnai

Rinnai RBO-7MSO Specification sheet

Rinnai RBO-106SIX User manual

Rinnai

Rinnai RBO-106SIX User manual

Rinnai RBO-55TIX User manual

Rinnai

Rinnai RBO-55TIX User manual

Rinnai RO-E6208TA-EM Specification sheet

Rinnai

Rinnai RO-E6208TA-EM Specification sheet

Rinnai RBO-85ETIX User manual

Rinnai

Rinnai RBO-85ETIX User manual

Popular Oven manuals by other brands

KitchenAid KEBK206 Use and care guide

KitchenAid

KitchenAid KEBK206 Use and care guide

Westinghouse WVEP916SC quick start guide

Westinghouse

Westinghouse WVEP916SC quick start guide

Wood Stone Bistro 3030 WS-BL-3030-RFG Installation and operation manual

Wood Stone

Wood Stone Bistro 3030 WS-BL-3030-RFG Installation and operation manual

Siemens HB76A1.60S instruction manual

Siemens

Siemens HB76A1.60S instruction manual

Bosch HBG976M 1 Series User manual and installation instructions

Bosch

Bosch HBG976M 1 Series User manual and installation instructions

Westinghouse PON663 owner's manual

Westinghouse

Westinghouse PON663 owner's manual

Bosch HBC86K7.0 instruction manual

Bosch

Bosch HBC86K7.0 instruction manual

Kleenmaid TO550X user manual

Kleenmaid

Kleenmaid TO550X user manual

Artusi AO676B Operation manual

Artusi

Artusi AO676B Operation manual

Cafe 27 Series owner's manual

Cafe

Cafe 27 Series owner's manual

Electrolux EOB31004 user manual

Electrolux

Electrolux EOB31004 user manual

GE ZEK957 Series Technical service guide

GE

GE ZEK957 Series Technical service guide

Euromaid ES7 Installation and operating instructions

Euromaid

Euromaid ES7 Installation and operating instructions

Electrolux EOD6330 owner's manual

Electrolux

Electrolux EOD6330 owner's manual

BOMANN EBO 7908 IX instruction manual

BOMANN

BOMANN EBO 7908 IX instruction manual

VWR International 1310 Installation and operation manual

VWR International

VWR International 1310 Installation and operation manual

NEFF U1ACE2H.0B User manual and installation instructions

NEFF

NEFF U1ACE2H.0B User manual and installation instructions

Bosch HBF011BR1M User manual and installation instructions

Bosch

Bosch HBF011BR1M User manual and installation instructions

manuals.online logo
manuals.online logoBrands
  • About & Mission
  • Contact us
  • Privacy Policy
  • Terms and Conditions

Copyright 2025 Manuals.Online. All Rights Reserved.