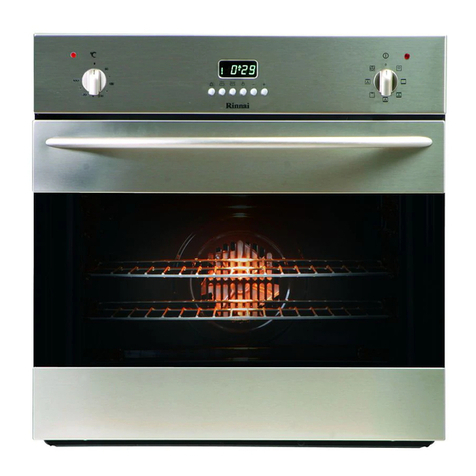
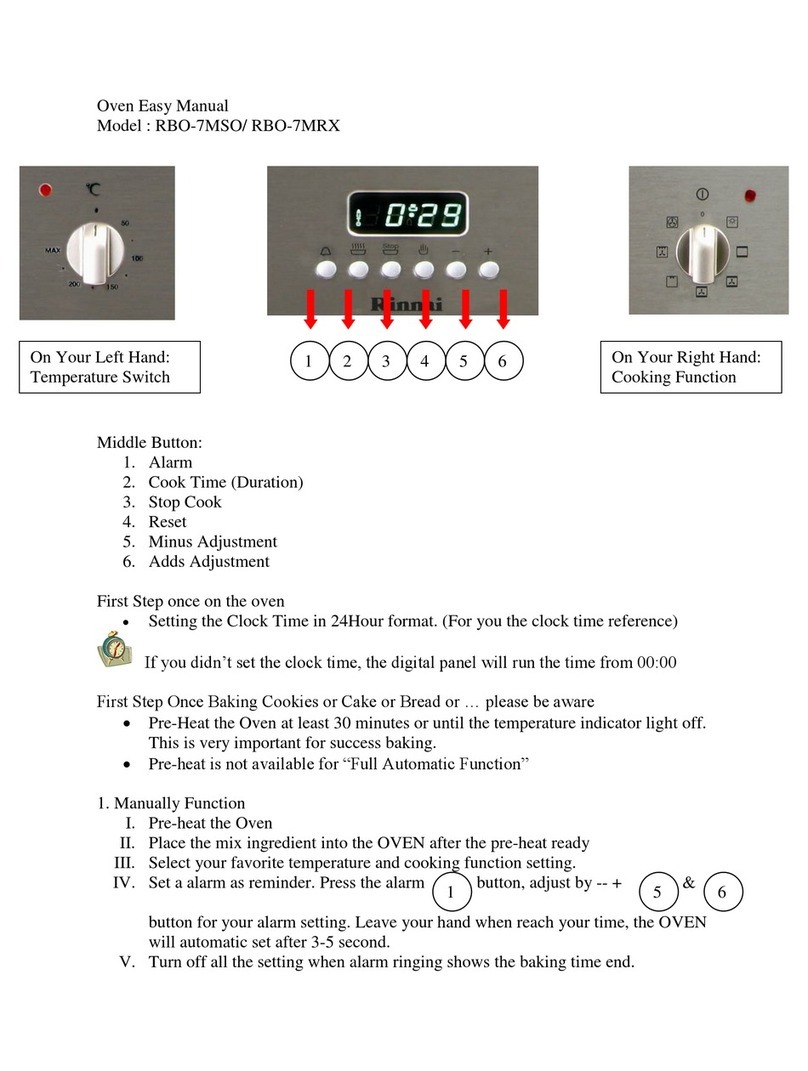
Rinnai RBO-55TIX User manual

Operation / Installation Manual
操作 / 安装说明
Petunjuk Pemakaian / Pemasangan
Hoạt động / Hướng dẫn lắp đặt
/
Electric Oven
电烤箱
Pemanggang Listrik
LÒ NƯỚNG ĐIỆN
RBO-55TIX
Rinnai Corporation

1
Safety warnings ------------------------------------------------------------------------------------------------------------------------------------------2
Appliance specifications -------------------------------------------------------------------------------------------------------------------------------3
Control panel ---------------------------------------------------------------------------------------------------------------------------------------------3
Using for the first time ---------------------------------------------------------------------------------------------------------------------------------4
Oven operation ------------------------------------------------------------------------------------------------------------------------------------------4
Oven function --------------------------------------------------------------------------------------------------------------------------------------------5
Maintenance and care ---------------------------------------------------------------------------------------------------------------------------------7
Troubleshoot --- -----------------------------------------------------------------------------------------------------------------------------------------8
Installation ------------------------------------------------------------------------------------------------------------------------------------------------9
CONTENTS
IMPORTANT
To register your product warranty, please paste the serial
numbers stickers enclosed with the packaging on your
warranty card.
Please contact your local Rinnai Customer Care Centre
should you require further assistance.
Version: 2012 04

2
Unpacking
Do not use the appliance if there are obvious signs
of transportation damage.
If the power supply cord is damaged, it must be
replaced by the manufacturer, its service agent or
qualified technician to avoid hazard.
Please ensure that young children do not play with
plastic bag packaging.
For the user
This appliance is for home food preparation only. Do
not use the appliance other than its specific
purpose.
This appliance is not intended for use by young
children or infirm persons without supervision.
Installation and repair should only be attempted by
qualified technician.
It is dangerous to modify any part of this appliance.
Tampering with electrical connections or mechanical
parts can cause operation faults and may put the
user at risk.
Always open the oven door carefully as hot steam
may escape.
To avoid danger of burning, never touch the internal
surfaces of the oven and heating elements during its
use.
Pay special attention when preparing food in the
oven. Baking pans, wire shelf and internal surfaces
may become very hot during use. Always wear heat-
resistant oven gloves when handling cookware
during food preparation.
Always use oven-safe cookware and never place
combustible items in the oven to avoid risk of fire.
Be careful with food that is prepared with drinks
with high alcohol content (e.g. cognac, rum). Alcohol
evaporates at high temperatures and in
unfavourable circumstances, the alcoholic vapours
may catch fire in the oven. Only use small quantities
of drinks with high alcohol content and open the
oven door carefully.
Never leave the appliance unattended when cooking
with oils or fats as these are a fire hazard if allowed to
overheat.
Never use a steam cleaner to clean the appliance. The
steam could attack the electrical components and
result in a short circuit.
Oven door hinges can be damaged when overloaded.
Do not place heavy items on the oven door when
cleaning the oven interior. Before cleaning, remove
the oven door if necessary.
Never trap cables of electrical appliances in the hot
oven door. The cable insulation may melt and there is
a risk of short-circuiting.
Always disconnect the power supply cord before
carrying out any cleaning or maintenance work on the
appliance.
Ensure that the power supply chord is free from heat
source or sharp objects.
Before connecting the appliance to the power mains,
make sure that the voltage and frequency
corresponds to the rating as shown on the rating
plate attached to the appliance.
The electrical safety of this appliance can only be
guaranteed if the appliance is correctly and efficiently
earthed. Use an electrical connector with earth that is
correct for your location. The electrical connection of
this appliance must be connected to earth (where
applicable): Green & Yellow=EARTH; Blue=NEUTRAL;
Brown=LIVE. The basic safety requirement should be
tested by a qualified technician.
Multiple plugs and extension cables must not be
used. Overloading is dangerous and may cause a fire
hazard.
Disposal
This appliance and its packaging are environmentally
friendly and recyclable. Please help us to care for the
environment by disposing the packaging in a proper
manner and recycling any old appliances.
Before disposing an old appliance, disconnect it from
the power supply and cut the power supply cord to
prevent hazards.
SAFETY WARNINGS
Please read this user manual thoroughly before attempting to use this appliance for the first time. This manual contains
important information on safe installation, use and care of the appliance. Keep these instructions for reference and pass
them on to any future user.
The manufacturer will not be held liable for any damages resulting from improper installation nor failure to adopt
proper safety measures during installation and operational use of the appliance.
3
Voltage and frequency of power supply
220V –240V / 50Hz
Appliance dimension
W594 X D569.5 X H589 mm
Cavity dimension
W453 X D440 X H333 mm
Oven capacity
56 litres
Net weight
32.5 kg
APPLIANCE SPECIFICATIONS
CONTROL PANEL

4
Remove packaging material
Ensure that all packaging material is removed before
using the oven for the first time.
Pre-cleaning the accessories
Remove all accessories from the oven and wash them
thoroughly with warm soapy water.
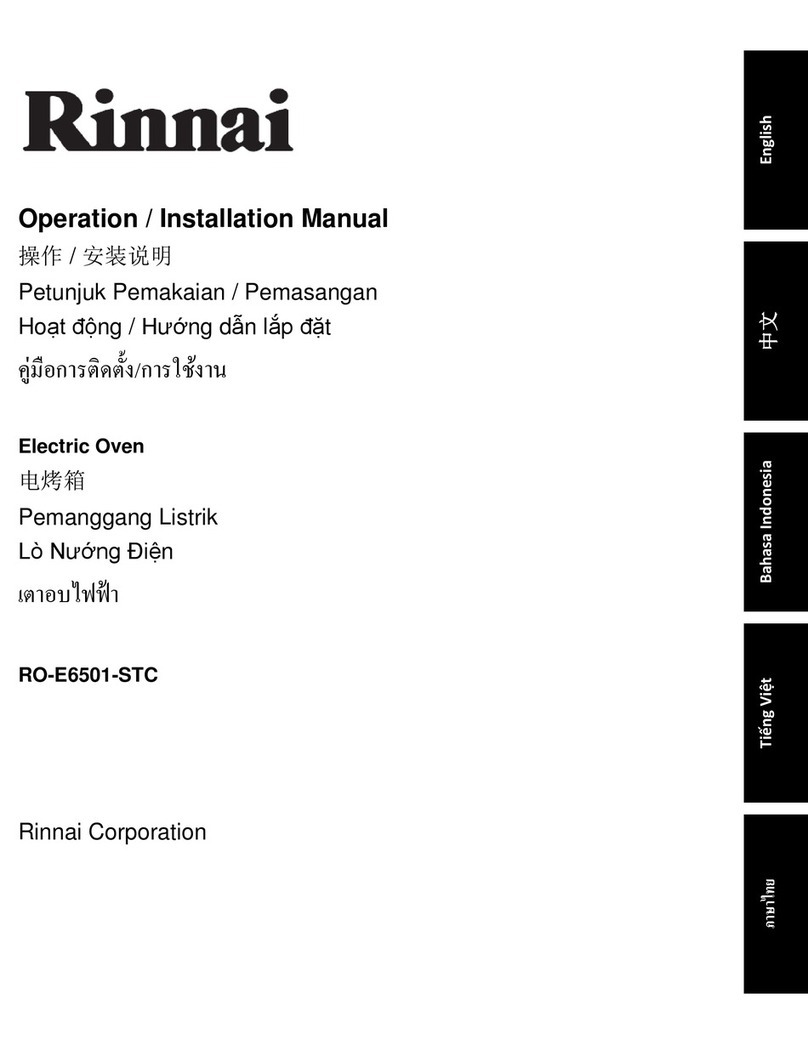
Manual mode
Turn the TIMER knob anti-clockwise to symbol to
operate in manual mode .i.e. no timer setting.
Select the cooking mode and temperature
Turn the MODE SELECTOR to the desired cooking
mode. The knob can be rotated to the right or to the
left.
Turn the THERMOSTAT knob in a clockwise direction
to the desired temperature setting. An indicator light
indicates that the oven is heating up to the
temperature set.
You may change the setting (cooking mode or
temperature) at any time.
To stop cooking at any time, position the MODE SELECTOR
knob to “O” position.
Oven light
To turn the oven light on, set the knob to symbol.
It stays on when a cooking mode is selected.
Using the timer
Turn the TIMER knob clockwise to almost one full
rotation.
Turn the TIMER knob anti-clockwise to set the
desired cooking time. Align the knob marker to the
minutes shown on the control panel.
When the selected time has elapsed, the alarm
buzzes and the oven switches off.
The timer can be used as a kitchen timer when the
oven is not in operation.
Cooling ventilation
This appliance is equipped with a cooling fan, which
turns on automatically when the oven is hot. The fan will
switch off automatically when the oven is sufficiently
cooled down.
New appliances have a slight smell on first use. The first
time you use your appliance, it is advisable to set the
thermostat to the highest setting and leave the empty
oven on for at least half an hour.
The unpleasant odour that is often detected during the
initial use is caused by the burning away of protective
substances used during the manufacturing process.
Therefore, ensure that the room is well ventilated
before switching the oven off and opening the oven
door.
USING FOR THE FIRST TIME
OVEN OPERATION
Notes
Always make sure all the knobs are in the “O”
position when the appliance is not in use. (*Turn
the THERMOSTAT knob back to original position
in an anti-clockwise direction. Do not force it
right round in a clockwise direction as this will
result in damage to the thermostat.)
Never put objects directly on the oven bottom as
this may result in damaging the enamel coating.
Always place cookware on the oven racks and
use oven-safe cookware.

5
Rinnai ovens are equipped with easy controls and
indicator light situated at the control panel.
OVEN LIGHT
GRILL mode
The top central heating element is activated. Heat is
diffused by radiation from the heating element. The
extremely high and direct temperature of the grill makes
it possible to brown the surface of meats and roasts
while retaining the juices to keep them tender.
This cooking mode is highly recommended for dishes
that require a high temperature on the surface e.g. beef
steaks, veal, hamburger, fillets etc.
Use this cooking mode with the door closed. We
recommend you to start with the oven cold. The amount
of heat radiated is adjustable on the temperature
selector.
Place the food on one of the top racks and under the
center of the grill because only the central part of the
top heating element is turned on.
Place the universal pan on the first rack from the bottom
to catch any fat or juices that may drip from the food, in
order to avoid dripping onto the oven bottom.
GRILL AND FAN mode
The top central heating element is activated. Heat is
diffused by radiation from the heating element. The
forced circulation of air caused by the fan at the back of
the oven ensures the uniform distribution of heat
throughout the oven. This cooking mode is useful when
cooking roasts or recipes using gratin.
The infrared rays ensure the perfect cooking on the food
surface, thus sealing in the tenderness and juices in the
case of meat. The uniform distribution of hot air allows
food to be grilled rapidly.
Place the food on the second rack from the oven bottom
and the universal pan on the first rack from the bottom
to catch any dripping fat or juices.
Use this cooking mode with the door closed. We
recommend you to start with the oven cold.
BAKE mode
The rear heating element and the fan operate
simultaneously. This is suitable for baking cakes and
pastries such as sponge cake, fruitcake, cup cakes,
cookies and biscuits etc.
Use the universal pan as a dish support and place it on
the second rack from the oven bottom.
We recommend you to pre-heat the oven before placing
your dishes in it.
DEFROST mode
Defrost can be operated without heating. When the
defrost system is used without heating, the air is
circulated by the fan at room temperature. This is used
for slow defrosting or thawing of frozen food.
Remove the food from its packaging and place it in
oven-safe cookware on the rack. Please observe the
instructions on the packaging. The defrosting times
depend on the type and amount of food.
OVEN FUNCTION

6
Cooking table
Mode
Dish
Weight
(kg)
Cooking rack
position from
bottom
Preheating time
(minutes)
Temperature
(0C)
Cooking time
(minutes)
Grill
Veal steak
Cutlets
Grilled vegetables
Cod fillet
Hamburgers
Kebabs
Toasted sandwiches
1
1
1
1
1
1
0.5
4
4
3-4
4
4
4
4
5
5
5
5
5
5
5
Maximum
Maximum
Maximum
Maximum
Maximum
Maximum
Maximum
15-20
15-20
10-15
10
7-10
6-8
2-3
Grill and fan
Grilled chicken
Grilled cuttlefish / squid
1.5
1.5
3
3
5
5
200
200
55-60
30-35
Baking
Cheese puffs (on 2 racks)
Small cakes
Fruitcake
Tarts
Cream puffs (on 2 racks)
Biscuits (on 2 racks)
Sponge cake
0.4
0.6
1
0.5
0.7
0.7
0.5
2-4
2-4
2-3
3
1,3,5
1,3,5
3
15
15
15
15
15
15
15
210
190
180
180
180
180
150
15-20
20-25
40-45
20-30
20-25
20-25
25-30
Defrosting
Frozen food
Please check instructions on packaging
The information given in this chart is intended only as a guide. The cooking times are approximate and may vary according
to personal taste or recipes.
FR
Always keep the oven door closed when using
GRILL mode, and GRILL AND FAN mode to achieve
the best cooking results and save energy.
Do not open the oven door more than necessary
during cooking.
After the oven is turned off it retains heat for some
time. You can use the residual heat in the oven for
keeping the food warm.
Check the door seal regularly and wipe clean to
ensure that they are free of food deposits so that
the seal stick properly to the door and do not allow
heat to disperse.
Environmental tips

7
Cleaning the oven interior
We recommend you to clean your oven after each
use. Clean with warm soapy water and a soft damp
cloth. Wipe dry with a lint-free cloth. Avoid using
corrosive or abrasive products that could damage
the enamel coating.
It is advisable to keep the oven clean and remove
any food deposits. Built-up food deposits may
overheat, release smoke and unpleasant odours.
Cleaning the oven exterior
Enamel or stainless steel surfaces can be cleaned
with warm soapy water and a soft damp cloth. Wipe
dry with a lint-free cloth. Avoid using corrosive or
abrasive products that could damage the surface.
For stainless steel surfaces, always wipe in the
direction of the grain so as not to scratch the
surface. For tougher stains, use a specific non-
abrasive product (please observe the
manufacturer’s instructions).
Door glass
Clean the glass using non-abrasive cleaning agents and
sponges. Wipe dry after cleaning.
Knobs
Clean with warm soapy water and a soft damp cloth.
Wipe dry after cleaning.
Door seal
Clean with warm soapy water and a soft damp cloth.
Wipe dry after cleaning.
Glass cover on the oven light
Clean with warm soapy water and a soft damp cloth.
Wipe dry after cleaning.
Accessories
Soak in hot soapy water to remove the grease or food
deposits. Clean with brush or sponge.
Detaching and attaching the oven door
The oven door can be removed for a more thorough
cleaning.
To detach the oven door,
Open the oven door fully
Lift up the small levers located on the two hinges
Shut the door but not completely
Hold the door firmly at both sides and lift upwards
off the hinges guide
To attach the oven door, reverse the sequence.
Replacing the oven lamp
Ensure that the power supply cord is disconnected.
Remove glass cover of the lamp
Remove lamp and replace with a similar heat-
resistant bulb of the same characteristics
Replace the glass cover
Disconnect the power supply cord before carrying
out any cleaning or maintenance activities.
Never line the bottom of the oven with aluminium foil.
The aluminium foil sheet in direct contact with the
heated enamel coating could melt and damage the
enamel coating inside the oven irreversibly.
MAINTENANCE AND CARE
Do not lift the door off
by the handle. The
handle could break
and damage the glass.
Make sure that you lift
the door off equally
on both sides.
The glass cover on the
oven lamp must be
replaced if it is damaged.
For purchase of spare
part, please check with
your local Rinnai
Customer Care Centre.

8
In case of minor faults or problems with the appliance
operation, please check the following instructions to see if
you could resolve the problem before calling for
technician service.
The oven does not work
Check that the main switch is turned on and the plug
is properly inserted in the electrical outlet.
Oven light does not work
Replace or tighten oven lamp. See ‘Replacing the
oven lamp’ section in this manual.
Oven smokes excessively during cooking
Check if you have selected the correct cooking mode
for the dish.
Check if you have used the correct accessories and
placed the dish in the oven at the recommended
height.
Check the temperature selected.
Food deposits sticking onto the enamel coating inside
the oven becomes charred and creates both smoke
and unpleasant odours. Regular cleaning is necessary
to remove grease build-up.
Grease or food spatters can also cause excessive
smoking.
Food does not bake or roast properly
Check if oven functions are properly set.
Check if correct temperature is set.
Rack position may be incorrect for the cooking mode
selected.
Check if you are using the correct cookware and
cookware size.
Condensation build-up on oven door
Excess condensation may fog the oven door. This
may happen when you are cooking large quantities
of food from a cold start. If you are using water in
cooking, this will turn to steam and may condense
outside your appliance. This is not a problem or fault
with your oven.
TROUBLESHOOT
If the problem persists despite observing the above
checks, please contact your local Rinnai Customer Care
Centre for assistance.
For service calls under warranty, please note that it is
necessary to product your proof of purchase and valid
warranty card.

9
Fit the appliance in appropriate cabinet
The panels of the adjacent cabinets must be made
of heat-resistant material.
Cabinets with a veneer exterior must be assembled
with glues which can withstand temperatures of up
to 1000C.
For installation under the counter and in a kitchen
cabinet, the housing unit must have the following
dimensions:
Ventilation
To ensure adequate ventilation to the oven once
installed, do not fit a rear panel into the housing unit.
It is advisable to install the oven resting on two strips
of wood or on a completely flat surface with an
opening of at least 45 x 560mm.
Securing the appliance
Connect the power supply cord. Do not turn on the
power mains.
Push the oven into the housing unit as far as the oven
trim and align it.
Open the oven door. Use four screws (provided) and
secure the oven to the side walls of the housing unit
through the holes in the oven trim.
Turn on the power mains. The appliance must only be
operated when it has been built in to avoid electric
shock hazard.
INSTALLATION
Installation must be performed by qualified personnel only. The manufacturer declines all responsibility for improper
installation and does not accept responsibility for appliance warranty in the event of damage caused by incorrect
installation.
The installer must ensure that the correct electrical
connection has been made and that it is compliant
with local safety regulations.


Rinnai Customer Care Centres
China
Guangzhou Rinnai Gas & Electric
Room 2805, No.31 Jianghe Building, Tianshou Road,
Guangzhou, China
Tel : (86) 20 3821 7976
Email: grrjdq@gzrinnai.com.cn
URL : www.gzrinnai.com.cn
Indonesia
Customer Care of PT. Rinnai Indonesia
Jl. Raya Pejuangan No.21, Komp. Ruko Sastra Graha No.11-13
Jakarta 11530
Tel : (62) 0800 1 889 889 (toll free) /
0815 112 99999 (SMS Center)
URL : www.rinnai.co.id
Macau
Fu Lei (Leong Si) Trading Limited
Avenida Do Almirante Lacerda No. 14-14C,
EDF. Industrial Iao Son 11-AND-A, Macau
Tel : (853) 2822 0889
Fax : (853) 2822 2733
Malaysia
Rinnai (M) Sdn Bhd
D2-3-G & D2-3-1, Block D2, Pusat Perdagangan Dana 1,
Jalan PJU 1A/46, 47301 Petaling Jaya, Selangor Darul Ehsan,
Malaysia
Tel : (60) 3 7832 0037 / 7832 0038 / 7832 0039
Fax : (60) 3 7832 0036
URL : www.rinnai.com.my
Myanmar
Myanmar Kowa International Co., Ltd
No.199, Ground Floor, 34th Street (Upper Block),
Kyauktada Township, Yangon, Myanmar
Tel : (95) 1 245925 / 246304 / 97300 7773
Fax : (95) 1 245925
Email: marketing@myanmarkowa.com
Philippines
Mitsui Industia Corporation
10 Buenaventura St., Cor MacArthur Highway,
Dalandan Valenzuela City, Philippines
Tel : (63) 2 292 9177 / 292 9179
Fax : (63) 2 292 8187
Singapore
Rinnai Holdings (Pacific) Pte Ltd
47 Tannery Lane #05-01/02, Elite Industrial Building
II,
Singapore 347794
Tel : (65) 6748 9478
Fax : (65) 6745 9240
URL : www.rinnai.sg
Thailand
Rinnai (Thailand) Co., Ltd.
61/1 Soi Kingkaew 9, Kingkaew Rd. Racha Thewa, Bangphli,
Samutprakarn 10540, Thailand
Tel : (66) 2 3124330-40
Email: lucky02@luckyflame.co.th
URL : www.luckyflame.co.th
Vietnam
Rong Viet Commerce Company Limited
120 3/2 Street, Ward 12, District 10, Ho Chi Minh
City, Vietnam
Tel : (84) 8 3862 3409
Fax : (84) 8 5404 1964
URL : www. rongviet-rinnai.com
Other manuals for RBO-55TIX
1
This manual suits for next models
1
Table of contents
Other Rinnai Oven manuals

Rinnai
Rinnai RBO-7MSO Specification sheet

Rinnai
Rinnai RBO-85ETIX User manual

Rinnai
Rinnai RO-E6206XA-EM Specification sheet

Rinnai
Rinnai RBO-106SIX User manual

Rinnai
Rinnai RBO-55TIX User manual

Rinnai
Rinnai RO-E6501-STC User manual

Rinnai
Rinnai RBO-10MSY Product information sheet

Rinnai
Rinnai RB-3Si-C User manual

Rinnai
Rinnai RO-E6208TA-EM Specification sheet

Rinnai
Rinnai RBO-7MSO Product information sheet