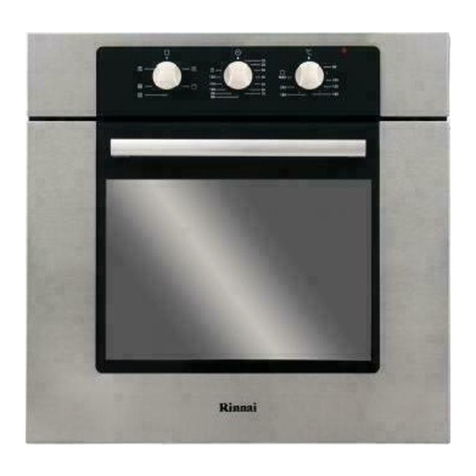
Rinnai RBO-85ETIX User manual

Operation / Installation Manual
操作 / 安装说明
Petunjuk Pemakaian / Pemasangan
Hoạt động / Hướng dẫn lắp đặt
Electric Oven
电烤箱
Pemanggang Listrik
Lò Nướng Điện
RBO-85ETIX
Rinnai Corporation
中
文
En
glis
h
Ba
has
a
English
Ind
one
sia
Việ
t
ภาษ
าไท
ย
ภาษ
าไท
ย
English
中文
Bahasa Indonesia
Tiếng Việt
ภาษาไทย

English Page 1 - 12
中文 13 - 24 页
Bahasa Indonesia Hal. 25 - 36
Tiếng ViệtTrang 37 - 48
49 - 60
Version: 2012 08
En
glis
h
TABLE OF CONTENTS

1
Safety warnings ------------------------------------------------------------------------------------------------------------------------------------------2
Appliance specifications -------------------------------------------------------------------------------------------------------------------------------3
Control panel ---------------------------------------------------------------------------------------------------------------------------------------------3
Using for the first time ---------------------------------------------------------------------------------------------------------------------------------4
Oven operation ------------------------------------------------------------------------------------------------------------------------------------------4
Oven function --------------------------------------------------------------------------------------------------------------------------------------------7
Maintenance and care ---------------------------------------------------------------------------------------------------------------------------------9
Troubleshoot --- -----------------------------------------------------------------------------------------------------------------------------------------10
Installation ------------------------------------------------------------------------------------------------------------------------------------------------11
CONTENTS
IMPORTANT
To register your product warranty, please paste the serial
numbers stickers enclosed with the packaging on your
warranty card.
Please contact your local Rinnai Customer Care Centre
should you require further assistance.
English

2
Unpacking
Do not use the appliance if there are obvious signs
of transportation damage.
If the power supply cord is damaged, it must be
replaced by the manufacturer, its service agent or
qualified technician to avoid hazard.
Please ensure that young children do not play with
plastic bag packaging.
For the user
This appliance is for home food preparation only. Do
not use the appliance other than its specific
purpose.
This appliance is not intended for use by young
children or infirm persons without supervision.
Installation and repair should only be attempted by
qualified technician.
It is dangerous to modify any part of this appliance.
Tampering with electrical connections or mechanical
parts can cause operation faults and may put the
user at risk.
Always open the oven door carefully as hot steam
may escape.
To avoid danger of burning, never touch the internal
surfaces of the oven and heating elements during its
use.
Pay special attention when preparing food in the
oven. Baking pans, wire shelf and internal surfaces
may become very hot during use. Always wear heat-
resistant oven gloves when handling cookware
during food preparation.
Always use oven-safe cookware and never place
combustible items in the oven to avoid risk of fire.
Be careful with food that is prepared with drinks
with high alcohol content (e.g. cognac, rum). Alcohol
evaporates at high temperatures and in
unfavourable circumstances, the alcoholic vapours
may catch fire in the oven. Only use small quantities
of drinks with high alcohol content and open the
oven door carefully.
Never leave the appliance unattended when cooking
with oils or fats as these are a fire hazard if allowed to
overheat.
Never use a steam cleaner to clean the appliance. The
steam could attack the electrical components and
result in a short circuit.
Oven door hinges can be damaged when overloaded.
Do not place heavy items on the oven door when
cleaning the oven interior. Before cleaning, remove
the oven door if necessary.
Never trap cables of electrical appliances in the hot
oven door. The cable insulation may melt and there is
a risk of short-circuiting.
Always disconnect the power supply cord before
carrying out any cleaning or maintenance work on the
appliance.
Ensure that the power supply chord is free from heat
source or sharp objects.
Before connecting the appliance to the power mains,
make sure that the voltage and frequency
corresponds to the rating as shown on the rating
plate attached to the appliance.
The electrical safety of this appliance can only be
guaranteed if the appliance is correctly and efficiently
earthed. See “Electrical connections” in this manual.
The basic safety requirement should be tested by a
qualified technician. Multiple plugs and extension
cables must not be used. Overloading is dangerous
and may cause a fire hazard.
Disposal
This appliance and its packaging are environmentally
friendly and recyclable. Please help us to care for the
environment by disposing the packaging in a proper
manner and recycling any old appliances.
Before disposing an old appliance, disconnect it from
the power supply and cut the power supply cord to
prevent hazards.
SAFETY WARNINGS
Please read this user manual thoroughly before attempting to use this appliance for the first time. This manual contains
important information on safe installation, use and care of the appliance. Keep these instructions for reference and pass
them on to any future user.
The manufacturer will not be held liable for any damages resulting from improper installation nor failure to adopt
proper safety measures during installation and operational use of the appliance.
English

3
Voltage and frequency of power supply
220V –240V / 50Hz
Appliance dimension
W594 X D566 X H594 mm
Cavity dimension
W453 X D440 X H333 mm
Oven capacity
56 litres
Net weight
32.5 kg
APPLIANCE SPECIFICATIONS
CONTROL PANEL
English

4
Select the cooking mode
Turn the MODE SELECTOR to the desired cooking
mode. The knob can be rotated to the right or left.
To turn the oven light on, set the knob to
symbol.
The oven light automatically comes on as soon as
cooking starts.
Select the temperature
Turn the TEMPERATURE SELECTOR in a clockwise
direction to the desired setting to set the
temperature.
An indicator light above the temperature selector will
come on.
A thermostat controls the temperature in your
appliance. When the temperature is reached, the
heating source switches itself off and the indicator
light goes out. When the oven temperature falls
below the desired setting, the heating source
switches on and the indicator light comes on again.
Once the food is ready, turn the knob back to original
position in an anti-clockwise direction. Do not force it
right round in a clockwise direction as this will result
in damage to the thermostat.
Remove packaging material
Ensure that all packaging material is removed before
using the oven for the first time.
Pre-cleaning the accessories
Remove all accessories from the oven and wash them
thoroughly with warm soapy water.
Setting and changing the time
Each time the appliance is connected to the power
mains, a flashing “0.00” and “AUTO” symbol is displayed.
Press MANUAL button and then the SELECTOR
buttons or to set the present time of day.
After a few seconds, the time of day set is adopted. The
appliance is now ready for use.
The digital clock is displayed in 24hr format
New appliances have a slight smell on first use. The first
time you use your appliance, it is advisable to set the
thermostat to the highest setting and leave the empty
oven on for at least half an hour.
The unpleasant odour that is often detected during the
initial use is caused by the burning away of protective
substances used during the manufacturing process.
Therefore, ensure that the room is well ventilated
before switching the oven off and opening the oven
door.
USING FOR THE FIRST TIME
OVEN OPERATION
Notes on cooking without the programmer:
Select the desired cooking mode using the MODE
SELECTOR.
Select the desired temperature using the
TEMPERATURE SELECTOR.
Switch off the oven when the meal is ready.
You may change the setting (cooking mode or
temperature) at any time.
English

5
Programmer
1. Use this button to set the timer.
2. Use this button to set the cooking duration.
3. Use this button to set the end of cooking time.
4. Use this button to set manual operation mode.
5. Use “-“and “+” button to increase/decrease the
values set.
Programmed cooking with immediate start
Setting the cooking duration
This mode enables setting the duration of oven
operation .i.e. cooking time. The maximum setting is 10
hours.
Set the desired cooking mode and temperature
using the MODE SELECTOR and TEMPERATURE
SELECTOR.
Press COOK TIME button and set the cooking
duration for the dish using SELECTOR buttons
or . The “AUTO” symbol flashes for a few
seconds and oven starts operating immediately. The
clock display appears with and “AUTO” symbol
light up.
To view cooking duration countdown, press COOK
TIME button . The clock display appears after a
few seconds.
When the set cooking time has elapsed, oven stops
operating automatically. The “AUTO” symbol flashes
and an audible alarm sounds. Press TIMER button
to cancel the alarm and the clock display
appears.
To clear the setting, press COOK TIME button ,
set the time to “0.00” and an audible alarm sounds.
Press TIMER button to cancel. The clock display
appears and symbol goes off.
Setting the end of cooking time
This mode enables setting the time at which the oven is to
stop operating.
The maximum setting is 23 hours & 59 minutes.
Set the desired cooking mode and temperature using
the MODE SELECTOR and TEMPERATURE SELECTOR.
Press END TIME button to set the time at which
the dish is to be ready. The oven starts operating
after a few seconds. The clock display appears with
and “AUTO” symbol light up.
To view end of cooking countdown, press COOK TIME
button . The clock display appears after a few
seconds.
The cooking stops when the selected end time is
reached. The “AUTO” symbol flashes and an audible
alarm sounds. Press TIMER button to cancel the
alarm and the clock display appears.
To clear the setting, press COOK TIME button,
set the time to “0.00” and an audible alarm sounds.
Press TIMER button to cancel. The clock display
appears and symbol goes off.
Notes on cooking with the programmer:
Select the desired cooking mode using the MODE
SELECTOR.
Select the desired temperature using the
TEMPERATURE SELECTOR.
Select the desired program mode:-
a. programmed cooking with immediate
start
b. programmed cooking with delayed start
“AUTO” and COOK TIME symbol appears
continuously in the display during cooking time.
English

6
Programmed cooking with delayed start
Setting the delayed oven start
Set the desired cooking mode and temperature
using the MODE SELECTOR and TEMPERATURE
SELECTOR.
Press COOK TIME button and set the cooking
duration for the dish e.g. 45 minutes. The “AUTO”
symbol flashes for a few seconds. The clock display
appears with and “AUTO” symbol light up.
Press END TIME button and set the time at
which the dish is to be ready e.g. 1400hrs. The
“AUTO” symbol flashes for a few seconds and clock
display appears.
The oven starts operating automatically at the time
calculated e.g. 1315hrs and switches off
automatically at 1400hrs.
When the set cooking time has elapsed, an audible
alarm sounds. Press TIMER button to cancel the
alarm. The clock display appears and symbol
goes off.
Manual operation mode
If programmer setting has been set, the “AUTO” symbol
flashes in the display.
To clear the setting, press MANUAL button .
Manual mode is then turned on.
Timer
You can use the timer as a kitchen timer. It operates
independently of the oven.
The maximum setting is 23 hours and 59 minutes.
Press TIMER button and set the desired time
using the SELECTOR buttons or .
The symbol flashes in the display.
The timer starts after a few seconds and clock
display appears with symbol light up. To view
the time set, press button again. The clock
display appears after a few seconds.
When the time set has elapsed, the symbol
flashes and an audible alarm sounds. Press TIMER
button to cancel the alarm. The clock display
appears.
To cancel timer setting, press TIMER button
and then press button until the display is at
zero. The symbol flashes for a few seconds and
the clock display appears.
Switching off the oven
Set the MODE SELECTOR and TEMPERATURE
SELECTOR knob to ‘0’ position.
Turn off the appliance power switch.
Cooling ventilation
This appliance is equipped with a cooling fan, which turns
on automatically when the oven is hot. The fan will switch
off automatically when the oven is sufficiently cooled
down.
Do not open the oven door more than necessary
during cooking.
After the oven is turned off it retains heat for some
time. You can use the residual heat in the oven for
keeping the food warm.
Check the door seal regularly and wipe clean to
ensure that they are free of food deposits so that
the seal stick properly to the door and do not allow
heat to disperse.
Environmental tips
English

7
Rinnai ovens are equipped with easy controls and the
oven may operate in the following modes.
OVEN LIGHT mode
CONVENTIONAL HEATING mode
Heat is provided by the upper and lower heating
elements of the oven. The heaters on the upper and
lower side of the oven radiate heat uniformly and evenly
into the oven interior. The heat is diffused by natural
convection.
This cooking mode is especially recommended when
cooking simmered recipes using covered casserole
dishes. Excellent results are also achieved for food which
requires the same cooking temperature both internally
and externally e.g. roasts and pastries.
When cooking in convection mode, use only one cooking
rack at a time. Otherwise the heat distribution will be
uneven. You can balance the amount of heat between
the top and bottom of oven using the different rack
heights available.
We recommend you to pre-heat the oven before placing
your dishes in it.
DELICATE COOK mode
The bottom heating element and fan are activated. This
cooking method is suitable for small pastries, cakes, or
food in baking tins or molds.
We recommend you to place the pan on the lower racks.
UPPER HEATER mode
The top heating element is activated. This mode is ideal
for soft browning. The temperature can be controlled to
achieve a perfect heat.
GRILL mode
The top central heating element is activated. Heat is
diffused by radiation from the heating element. The
extremely high and direct temperature of the grill makes
it possible to brown the surface of meats and roasts
while retaining the juices to keep them tender.
This cooking mode is highly recommended for dishes
that require a high temperature on the surface e.g. beef
steaks, veal, hamburger, fillets etc.
Leave the oven door slightly open when using the oven
grill function. We recommend you to start with the oven
cold. The amount of heat radiated is adjustable on the
temperature selector.
Place the food on one of the top racks and under the
center of the grill because only the central part of the
top heating element is turned on.
Place the universal pan on the first rack from the
bottom to catch any fat or juices that may drip from the
food, in order to avoid dripping onto the oven bottom.
GRILL AND FAN mode
The top central heating element is activated. Heat is
diffused by radiation from the heating element. The
forced circulation of air caused by the fan at the back of
the oven ensures the uniform distribution of heat
throughout the oven. This cooking mode is useful when
cooking roasts or recipes using gratin.
The infrared rays ensure the perfect cooking on the food
surface, thus sealing in the tenderness and juices in the
case of meat. The uniform distribution of hot air allows
food to be grilled rapidly.
Place the food on the second rack from the oven
bottom and the universal pan on the first rack from the
bottom to catch any dripping fat or juices.
We recommend you to start with the oven cold.
BAKE mode
The rear heating element and the fan operate
simultaneously. This is suitable for baking cakes and
pastries such as sponge cake, fruitcake, cup cakes,
cookies and biscuits etc.
Use the universal pan as a dish support and place it on
the second rack from the oven bottom.
We recommend you to pre-heat the oven before placing
your dishes in it.
DEFROST mode
Defrost can be operated without heating. When the
defrost system is used without heating, the air is
circulated by the fan at room temperature. This is used
for slow defrosting or thawing of frozen food.
Remove the food from its packaging and place it in
oven-safe cookware on the rack. Please observe the
instructions on the packaging. The defrosting times
depend on the type and amount of food.
OVEN FUNCTION
English

8
Using the rotisserie
If your oven is equipped with a rotisserie, you can use it with the GRILL mode and GRILL AND FAN mode. This accessory is
ideal for roasting meats, as the spit rotates slowly and are browned uniformly until cooking is done.
Keep the oven door shut when using the rotisserie and start with the oven cold in order to avoid scalding when positioning
the spit.
Place the universal pan on the first rack from the bottom to catch any fat or juices that may drip from the food, in order to
avoid dripping onto the oven bottom. Position the rotisserie by inserting it into the hollow shaft of the rotisserie motor
located at the interior oven rear panel.
When positioning the rotisserie assembly, check that:
the spit fits firmly into the hollow shaft connected to the motor
the roast is in the centre of the spit, and the roast is at an equal distance from both ends of the spit
When the roast is cooked, do ensure that the spit handle is well screwed on when taking out the spit (the handle should be
removed from the spit during cooking).
Cooking table
Mode
Dish
Weight
(kg)
Cooking rack position
from bottom
Preheating time
(minutes)
Temperature
(0C)
Cooking time
(minutes)
Conventional
heating
Duck
Roast veal or beef
Roast Pork
Biscuits (short pastry)
Tarts
1
1
1
-
1
3
3
3
3
3
15
15
15
15
15
200
200
200
180
180
65-75
70-75
70-80
15-20
30-35
Upper
heater
Browning food to perfect
cooking
-
3-4
15
220
-
Defrosting
Frozen food
Please check instructions on packaging
Grill
Veal steak
Cutlets
Grilled vegetables
Cod fillet
Hamburgers
Kebabs
Toasted sandwiches
1
1
1
1
1
1
0.5
4
4
3-4
4
4
4
4
5
5
5
5
5
5
5
Maximum
Maximum
Maximum
Maximum
Maximum
Maximum
Maximum
15-20
15-20
10-15
10
7-10
6-8
2-3
Grill and fan
Grilled chicken
Grilled cuttlefish / squid
1.5
1.5
3
3
5
5
200
200
55-60
30-35
Baking
Cheese puffs (on 2 racks)
Small cakes
Fruitcake
Tarts
Cream puffs (on 2 racks)
Biscuits (on 2 racks)
Sponge cake
0.4
0.6
1
0.5
0.7
0.7
0.5
2-4
2-4
2-3
3
1,3,5
1,3,5
3
15
15
15
15
15
15
15
210
190
180
180
180
180
150
15-20
20-25
40-45
20-30
20-25
20-25
25-30
The information given in this chart is intended only as a guide. The cooking times are approximate and may vary
according to personal taste or recipes.
English

9
Cleaning the oven interior
We recommend you to clean your oven after each use.
Clean with warm soapy water and a soft damp cloth.
Wipe dry with a lint-free cloth. Avoid using corrosive or
abrasive products that could damage the enamel
coating. It is advisable to keep the oven clean and
remove any food deposits. Built-up food deposits may
overheat, release smoke and unpleasant odours.
Cleaning the oven exterior
Enamel or stainless steel surfaces can be cleaned with
warm soapy water and a soft damp cloth. Wipe dry with
a lint-free cloth. Avoid using corrosive or abrasive
products that could damage the surface.
For stainless steel surfaces, always wipe in the direction
of the grain so as not to scratch the surface. For tougher
stains, use a specific non-abrasive product (please
observe the manufacturer’s instructions).
Door glass
Clean the glass using non-abrasive cleaning agents and
sponges. Wipe dry after cleaning.
Knobs and door seal
Clean with warm soapy water and a soft damp cloth.
Wipe dry after cleaning.
Glass cover on the oven light
Clean with warm soapy water and a soft damp cloth.
Wipe dry after cleaning.
Cleaning the rotisserie and other accessories
The parts comprising the rotisserie assembly can be
cleaned together with the other accessories. Soak in hot
soapy water to remove the grease or food deposits.
Clean with brush or sponge.
Catalytic layer (only with selected models)
Catalytic enamel is soft and sensitive. Do not use
abrasive cleaners and sharp objects. We recommend you
to replace the layer after a few years of regular use.
For purchase of spare part, please check with your local
Rinnai Customer Care Centre.
Detaching and attaching the oven door
The oven door can be removed for a more thorough
cleaning.
To detach the oven door,
Open the oven door fully
Lift up the small levers located on the two hinges
(see A)
Use a pin (or similar) and push into hole at point B
to release small latch
Hold the door firmly at both sides and lift upwards
off the hinges guide
To attach the oven door, reverse the sequence.
Replacing the oven lamp
Ensure that the power supply cord is disconnected.
Remove the glass cover of the lamp
Remove lamp and replace with a similar heat-
resistant bulb of the same characteristics
Replace the glass cover
Never line the bottom of the oven with aluminium foil.
The aluminium foil sheet in direct contact with the
heated enamel coating could melt and damage the
enamel coating inside the oven irreversibly.
MAINTENANCE AND CARE
Do not lift the door off
by the handle. The
handle could break
and damage the glass.
Make sure that you lift
the door off equally
on both sides.
The glass cover on the
oven lamp must be
replaced if it is
damaged.
For purchase of spare
part, please check
with your local Rinnai
Customer Care Centre.
Disconnect the power supply cord before carrying
out any cleaning or maintenance activities.
English

10
In case of minor faults or problems with the appliance
operation, please check the following instructions to see if
you could resolve the problem before calling for
technician service.
The oven does not work
Check that the main switch is turned on and the plug
is properly inserted in the electrical outlet.
Oven light does not work
Replace or tighten oven lamp. See ‘Replacing the
oven lamp’ section in this manual.
Oven smokes excessively during cooking
Check if you have selected the correct cooking mode
for the dish.
Check if you have used the correct accessories and
placed the dish in the oven at the recommended
height.
Check the temperature selected.
Food deposits sticking onto the enamel coating inside
the oven becomes charred and creates both smoke
and unpleasant odours. Regular cleaning is necessary
to remove grease build-up.
Grease or food spatters can also cause excessive
smoking.
Food does not bake or roast properly
Check if oven functions are properly set.
Check if correct temperature is set.
Rack position may be incorrect for the cooking mode
selected.
Check if you are using the correct cookware type and
size.
Condensation build-up on oven door
Excess condensation may fog the oven door. This
may happen when you are cooking large quantities
of food from a cold start. If you are using water in
cooking, this will turn to steam and may condense
outside your appliance. This is not a problem or fault
with your oven.
TROUBLESHOOT
If the problem persists despite observing the above
checks, please contact your local Rinnai Customer Care
Centre for assistance.
For service calls under warranty, please note that it is
necessary to produce your proof of purchase and valid
warranty card.
English

11
Fit the appliance in appropriate cabinet
The panels of the adjacent cabinets must be made of heat-resistant material.
Cabinets with a veneer exterior must be assembled with glues which can withstand temperatures of up to 1000C.
For installation under the counter and in a kitchen cabinet, the housing unit must have the following dimensions:
INSTALLATION
Installation must be performed by qualified personnel only. The manufacturer declines all responsibility for improper
installation and does not accept responsibility for appliance warranty in the event of damage caused by incorrect
installation.
English

12
Ventilation
To ensure adequate ventilation to the oven once
installed, do not fit a rear panel into the housing
unit. It is advisable to install the oven resting on two
strips of wood or on a completely flat surface with
an opening of at least 45 x 560mm.
Securing the appliance
Connect the power supply cord. Do not turn on the
power mains.
Push the oven into the housing unit as far as the
oven trim and align it.
Open the oven door. Use four screws (provided) and
secure the oven to the side walls of the housing unit
through the holes in the oven trim.
Turn on the power mains. The appliance must only
be operated when it has been built in to avoid
electric shock hazard.
Electrical connections
Fitting on a power supply cable (where applicable)
Open the terminal board by inserting a screwdriver
into the side tabs of the cover. Unscrew the bolt and
pull open the cover of the terminal board.
Install the power supply cable by loosening the cable
clamp screw and the three wire contact screws.
Connect the wires to the corresponding terminals:
Brown wire to the terminal marked , Yellow Green
wire to the terminal marked and Blue wire to the
terminal marked .
Fasten the power supply cable in place with the clamp
and close the cover of the terminal board.
Connecting the supply cable to the power mains
Install a standardized plug corresponding to the load
indicated on the rating label attached to the
appliance.
If the appliance is being directly connected to the
power mains supply, an omnipolar circuit breaker
must be installed with a minimum gap of 3mm
between the contacts, suitable for the load indicated
and complying with current electrical regulations (the
earthing wire must not be interrupted by the circuit
breaker). The supply cable must not come into
contact with surfaces with temperatures higher than
500C.
The installer must ensure that the correct electrical
connection has been made and that it is compliant
with local safety regulations.
Before connecting to the power supply, ensure that:
The appliance is correctly and efficiently earthed.
The socket can withstand the maximum power of the
appliance, and voltage within the value range
indicated on the rating label attached to the
appliance.
The basic safety requirement should be tested by a
qualified technician. Multiple plugs and extension
cables must not be used. Overloading is dangerous
and may cause a fire hazard.
Once the appliance has been installed, the power
supply and electrical socket must be easily accessible.
The installer must ensure that the correct electrical
connection has been made and that it is compliant with
local safety regulations.
The manufacturer declines any liability should these
safety measures not be observed.
English

13
安全警告 ----------------------------------------------------------------------------------------14
规格 ------------------------------------------------------------------------------------------15
控制面板-----------------------------------------------------------------------------------------15
初次使用-----------------------------------------------------------------------------------------16
烤箱操作-----------------------------------------------------------------------------------------16
烤箱功能-----------------------------------------------------------------------------------------19
维修与保养---------------------------------------------------------------------------------------21
常见故障的识别与处理-----------------------------------------------------------------------------22
安装---------------------------------------------------------------------------------------------23
目录
重要提示
要注册您的产品保修,需要把序列号贴纸贴到随机器
包装的保用证上。
请联系当地的林内客户售后服务中心咨询更新信息。
中文

14
开箱
如有明显的运输过程造成的损伤,请不要使用该
器具。
如果电源线破损,则必须由生产商,服务代理或
者合格的技术人员进行更换,防止伤害风险。
请确保孩童远离塑料包装。
给用户
本器具只适合国内使用。请不要把烤箱用于其他
用途。
请不要让孩童幼儿独自玩弄或操作器具。
安装与维修只能让合格的技术人员进行。
对产品任意的修改将导致危险。篡改电器连接配
件或机器配件都会导致运行错误并会使使用人员
陷入危险。
使用后请一直打开烤箱的门以便散热。
为了防止烫伤,请不要在使用时接触烤箱内部表
面与加热元件。
请特别注意在烤箱内拿放食物。在使用过程中,
焙烤盘,网架以及内部表面会变得很热。请拿放
食物时一直带着防热烤箱手套。
请使用烤箱配套的餐具,不要放置任何易燃物品
进箱内,以免发生火灾。
请注意烤煮含高度酒精材料混合的食物 (比如 白
兰地,朗姆酒). 酒精在高温时会挥发并在不利的
情况下,酒精蒸汽将会在烤箱内着火。请只使用
含少量高度酒精的饮料,并小心打开箱门。
请不要在使用器具烤煮油或者脂肪时离开,因为如
果过热将会发生火灾。
请不要使用蒸汽清洁机来清洁器具。蒸汽会跑进电
子元件并引起短路。
如果放置过重,烤箱的门铰链会损坏。在清洁箱内
时,请不要放置重物在门上。在清洁之前,如果需
要可移走烤箱门。
请不要把电器的电线绕过发热的烤箱门。电线的绝
缘层会熔化并引发短路。
在做任何清洁或保养之前,请务必切断电源拔开电
源线。
确保电源线远离热源或利刃物。
在连接器具到主电源时,请确保电压与频率与器具
铭牌上所示一致。
本器具的安全保证只会在器具正确使用与有效接地
时有效。请参照本手册的“电连接”一个接地的电
连接器必须符合当地使用规定。
基本的安全要求需要由合格的技术人员测试。不能
使用多用插头以及延长电线。满负荷运作很危险,
并会引发火灾。
处理
此器具与其包装都是环保及可循环再用的。请帮助
我们爱护环境,用合适的方法处理包装与旧器具。
在处置旧器具前,请切断电源移走电源线以防危险
发生。
安全警告
在使用本器具前,请仔细阅读本使用手册。本手册包括重要的涉及人身安全以及器具使用和保养方面
的信息。
生产商不会对由于任何安装或者通过非正当的方式安装与运行产生的损坏负责。
中文

15
电源电压与频率
220V –240V / 50Hz
器具尺寸
W594 X D566 X H594 mm
孔尺寸
W453 X D440 X H333 mm
烤箱容量
56 litres
净重
32.5 kg
规格
控制面板
温控指示灯
温度选择
显示面板与程序
模式选择键
中文

16
选择煮食模式
把模式选择旋钮( MODE SELECTOR)转到希望的
煮食模式。旋钮能向左转或向右转。
要打开烤箱灯,把按旋钮转到 图标上。
当煮食开始,烤箱灯就会自动亮起。
选择温度
顺时针旋转温度选择键(TEMPERATURE
SELECTOR),旋转到希望的设定温度处就可以
了。
在温度选择键上面的指示灯会亮起。
器具里有一个温控控制温度。当达到温度,热源便
会关闭,指示灯会熄灭。当烤箱温度低于设定温度
时,热源便会启动,指示灯又会再次亮起。
当食物煮好,请逆时针旋转按键到原位置。不要试
图顺时针强扭旋钮,这样会损坏温控。
移除包装材料
确保初次使用烤箱之前移除所有包装材料。
清洗配件
从烤箱内移走所有配件,并用肥皂水彻底清洗。
设定与更改时间
器具每一次连接主电源时,面板上有闪烁的
“0.00”,并且 “AUTO(自动)”会显示。
按下 MANUAL ( 菜 单 ) 键 然 后 按 下
SELECTOR (选择键) 或者 来设置当日
当时的时间。
几秒钟之后,时间设定完成,器具就可以使用了。
数字时钟是 24 小时制的。
初次使用时新器具有一股浅浅的味道。初次使用
时,建议把温度设定到最高,空烧至少半个小时。
初次使用产生的异味是由于要烧走在生产过程中使
用的保护物。
因此,请确保在关闭烤箱打开烤箱门之前保持房间
空气流通。
初次使用
烤箱操作
无程序下的煮食
按下模式选择(MODE SELECTOR)选择希望的煮
食模式。
按下温度选择(TEMPERATURE SELECTOR)来选
择希望的煮食温度。
当食物煮好后关闭烤箱。
您可以在随时设置 (煮食模式或煮食温度)。
中文

17
程序
1. 按此键来设定时间。
2.按此键来设定煮食时间长度。
3.按此键来设定煮食终止时间.
4. 按此键来设定手动启动模式。
5. 按“-“与“+” 键来增加/减少数值。
立即启动煮食程序
设置煮食时间长度
此模式能设置烤箱启动时间长度。即煮食需要的时
间。最长设置可达 10 小时。
按模式选择(MODE SELECTOR )或温度选择
(TEMPERATURE SELECTOR)来选择合适的煮食模
式与温度。
按下煮食时间(COOK TIME)键 并按
或设定食物的煮食时间长短。“自动
(AUTO)”图标会闪烁几秒钟,后烤箱立即启
动。时钟与此图标 显示并且 “自动
(AUTO)”图标亮起。
如想知道煮食时间的倒数时间按下 煮食 时间
(COOK TIME)键 .,时钟就会在几秒之后
显示。
当设置的煮食时间完毕,烤箱会自动关闭。
“(自动)AUTO”图标会闪烁并且发出提示音。按
下计时器键 来停止提示音,然后时钟显示。
要消除这些设置,按下煮食时间( COOK TIME)
键, 设置时间为 “0.00” ,此时有一个提
示音。按下计时器( TIMER)键 来取消。
时钟显示并且 图标熄灭。
设置煮食终止时间
此模式可设置烤箱停止运作的时间。
最大可至 23 点59 分。
按模式选择(MODE SELECTOR )或温度选择
(TEMPERATURE SELECTOR)来选择合适的煮食模式
与温度。
按下终止时间(END TIME)键 来设定食物需要
烘烤到的时间点。烤箱在几秒钟之后就会启动。时钟显
示,图标 亮起,并且 “自动(AUTO)”图标亮
起。
如想知道煮食时间的倒数时间按下 煮 食 时 间
(COOK TIME )键 。时钟就会在几秒之后
显示。
当到达选择的终止时间,煮食会停止。“自动
(AUTO)”图标闪烁并且有提示音响起。按下计时
器( TIMER)键 来取消提示音,然后时钟显
示。
要消除这些设置,按下煮食时间( COOK TIME)
键,设置时间为 “0.00” ,此时有一个提
示音。按下计时器( TIMER)键 来取消。时钟
显示并且 图标熄灭。
有程序的煮食:
把模式选择旋钮(MODE SELECTOR)转到希望的
煮食模式。
选择温度设定(TEMPERATURE SELECTOR)来设定
希望的煮食温度.
选择希望的程序模式-
c. 立即启动程序煮食
d. 延迟启动程序煮食
“自动(AUTO)” 与时间(COOK TIME)
图标会在煮食期间不断地显示。
中文

18
延迟启动程序煮食
设置延迟启动
按模式选择旋钮(MODE SELECTOR)与温度选择
旋钮(TEMPERATURE SELECTOR)来设置希望的煮
食模式与温度。
按下煮食时间(COOK TIME)键,设置煮食
需要时间长度。例如 45 分钟。“自动
(AUTO)”图标闪烁几秒钟,时钟显示, 图
标亮起, “自动 AUTO”图标也亮起。
按下终止时间(END TIME)键,设置食物
终止的时间,例如 14:00 点.。“自动
(AUTO)”图标闪烁几秒钟后时钟显示。
烤箱将计算时间自动启动。例如在 13:15hrs 时
启动,在 14:00hrs 时自动关闭。
当到达设定的煮食时间,提示音响起。按下计时
器(TIMER)键 来取消提示音。时钟显示并
且图标熄灭。
手动模式
如果程序已经有所设定,“自动(AUTO)” 图标会
在显示板闪烁。
要取消设置,按手动(MANUAL )按钮 . 手
动模式就会启动。
计时器
您可以使用计时器来作为厨房计时器。它是独自运行
的。
最大的设置是 23 点59 分.
按下计时器 TIMER 键并用 或来
设定希望的时间。
图标会闪烁。
时间会在几秒钟之后开始启动,时钟显示 图
标亮起。如果想看时间设置,再按下 键。时
钟在几秒钟之后显示。
当时间设置完毕, 图标闪烁并有提示音响
起 。 按 下 计 时器 ( TIMER)键 来取 消 提 示
音,然后会显示时钟。
取消时间设置,按下计时器键( TIMER)然
后按下 键,直到显示为零。 图标闪烁
几秒钟,然后会显示时钟。
关闭烤箱
把模式选择(MODE SELECTOR )与温度选择
(TEMPERATURE SELECTOR)转到‘0’的位置。
关闭器具的电源开关。
冷却通风
本器具有一个冷却风扇,当烤箱发热时风扇自动运
转。当烤箱冷却下来时风扇就会自动停止运转。
如非必需,使用时必须把门关上。
当烤箱停止运作,箱内还可以保温一段时间。
你可以使用烤箱内的余热来对食物进行保温。
定时检查门的封胶,并保持整洁,确保烤箱内
没有食物残渣,从而不影响门的密封度,不会
让热量散失。
环境提示
中文
Table of contents
Languages:
Other Rinnai Oven manuals

Rinnai
Rinnai RBO-55TIX User manual

Rinnai
Rinnai RO-E6501-STC User manual

Rinnai
Rinnai RBO-55TIX User manual

Rinnai
Rinnai RB-3Si-C User manual

Rinnai
Rinnai RBO-106SIX User manual

Rinnai
Rinnai RBO-7MSO Specification sheet

Rinnai
Rinnai RO-E6206XA-EM Specification sheet

Rinnai
Rinnai RBO-10MSY Product information sheet

Rinnai
Rinnai RBO-7MSO Product information sheet

Rinnai
Rinnai RO-E6208TA-EM Specification sheet