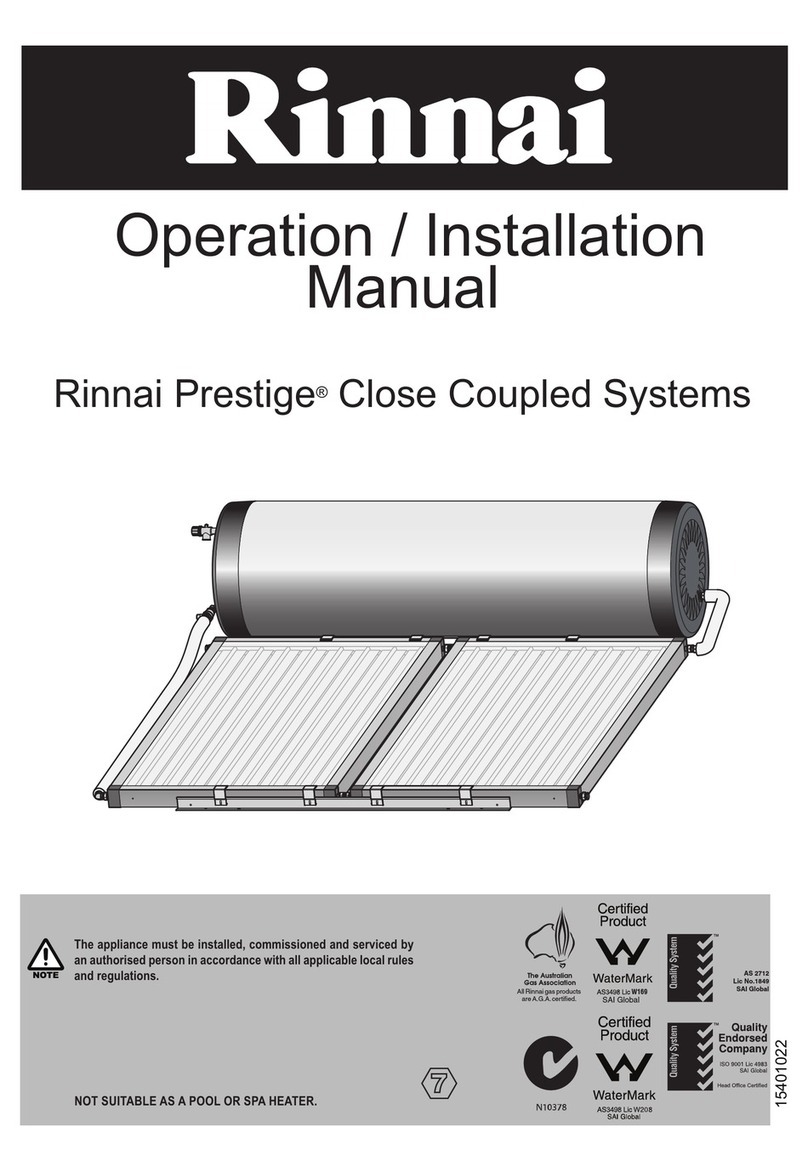
Rinnai E-Frost User manual

E-Frost Solar Collector
Installation Manual
Suitable for solar split hot water systems only
Must be installed, commissioned and serviced by an authorised
person in accordance with all applicable local rules and regulations.
Power supply must be available to the system at all times
•
•

LIMITED WARRANTY
Rinnai solar collector warranty summary table
Domestic Application Commercial Application
Parts 7 years 5 years
Labour 1 year 1 year
All terms of the warranty are effective from the date of installation of the Rinnai solar system.
Rinnai New Zealand Limited (Rinnai) reserves the right to verify this date by requesting a copy
of the Certicate of Compliance obtained by local building authority inspection of the system.
Domestic vs. commercial application
The reason for distinguishing between a domestic and commercial application is because the
expected life of a system is directly related to the hours of use.
A domestic application is dened as an installation that serves a single residential dwelling
which is not used for commercial purposes, such as a hair salon, catering kitchen, motel or
communal care facility.
All other installations are dened as a commercial application.
General warranty terms
Rinnai reserves the right to make modications and change specications and its parts without
notice.
For the purposes of the Consumer Guarantees Act 1993, Rinnai only guarantees the availability
of repair facilities and spare parts for the express warranty periods recorded in the Rinnai Solar
Collector Warranty Table.
If the Rinnai solar system is being acquired for personal, domestic or household use, this
warranty does not limit any consumer rights or guarantees that may apply under the
Consumer Guarantees Act 1993. If the product is being acquired for the purposes of a
business, the provisions of the Consumer Guarantees Act 1993 do not apply and no other
warranties (either express or implied by law) apart from those stated in this warranty apply.

LIMITED WARRANTY
Rinnai warranty terms for solar collectors
Water quality for Rinnai solar collectors
Water quality outside the maximum recommended limits (as set down below) will void this
warranty. Water quality tests must be carried out at the customer’s own cost but Rinnai will
reimburse any reasonable test costs where water quality is within the limits tabled.
TDS
(Total
Dissolved
Solids)
Total
Hardness
CaCO3
Alkalinity
(as CaCO3)
Dissolved
(free) CO2
pH Chlorides Magnesium Sodium Iron Langelier
Index
Up to 600
mg/L or
ppm
Up to 200
mg/L or
ppm
Up to 200
mg/L or
ppm
Up to 25
mg/L or
ppm
6.5-8.5 Up to 300
mg/L or
ppm
Up to 10
mg/L or ppm
Up to 150
mg/L or
ppm
Up to 1
mg/L or
ppm
Between
-1.0-0.8
Most metropolitan water supplies fall within these limits. If you are unsure about water quality,
please contact Rinnai and we will provide you with the details of an authorised agency able to
test your water for compliance to Rinnai standards. If sludge or foreign matter is present in
the water supply, a suitable lter should be incorporated in the water supply.
Some examples of water quality issues where water may need to be treated:
Hard water (areas including Wanganui)
Aggressive water (areas including Christchurch)
Both hard and aggressive water (some bore water)
E-Frost collectors are warranted against frost damage caused by temperatures down to and
including -15 °C where power is available to the system and the system is congured for low
temperature mode (factory default).
It is conditional that power is available and switched on. Failure due to lack of power supply or
changes to the temperature mode settings are not covered.
•
•
•

LIMITED WARRANTY
Warranty exclusions
The following exclusions may cause the warranty to become void and will result in a service
charge and costs of parts (if required).
Accidental damage and acts of God.
Failure due to abuse or misuse, improper maintenance or improper storage.
Failure due to incorrect or unauthorised installations.
Failure or damage caused by alterations, service or repair work carried out by persons
other than Rinnai service persons or service centres.
Where the solar collector has failed directly or indirectly as a result of poor water quality
outside the limits specied.
Where it is found that there is no fault with the solar collector and the issue is related to
the installation or failure due to lack of power supply.
Subject to any statutory provisions to the contrary, Rinnai does not accept:
liability for consequential damage or any incidental expenses resulting from any
breach of the warranty,
claims for damage to building or any other consequential loss either directly or
indirectly due to leaks from the solar collector or any other faults.
1.
2.
3.
4.
5.
6.
7.
a.
b.
G12/AS2 DURABILITY
As required by the New Zealand Building Code compliance document G12/AS2, clause 7.2.3, in
respect of the durability of the solar system components supplied by Rinnai, Rinnai makes the
following statements.
The collector mounting rails have a durability of fteen years provided they are kept clear
of debris such as leaves.
All other components of the system supplied by Rinnai may require maintenance and/or
replacement before fteen years.
A.
B.

Contents
WARNING
Improper installation, adjustment, alteration, service or maintenance
can cause property damage, personal injury or loss of life.
For assistance or additional information contact Rinnai on
0800 RINNAI (0800 746 624).
Introduction 6
Suitability for use 6
Solar collector ttings kits 7
Mounting collectors on the roof - general 8
Mounting collectors on a metal roof 9
Mounting collectors on a tile roof 12
Fitting connecting pipes and sensor lead 13
Commissioning 14
Consenting requirements for solar 15

Rinnai New Zealand Limited E-Frost Solar Collector Install Manual: 11496-A
01-10
6
Suitability for use
Water quality
Requirements must meet the standards for Rinnai solar products (refer warranty information).
Hard or aggressive water will need to be treated in order to use this product.
Water pressure
The owing water pressure in the dwelling needs to exceed the height of the solar collectors.
For example, of the highest point of the solar collector is 7 m above the incoming water, then
the water pressure needs to exceed 70 kPa to keep the collectors full.
Maximum water pressure = 1000 kPa
Roof pitch and condition
E-Frost collectors perform best at roof pitches ≥ 20°. At lesser pitches performance will be
degraded. This manual DOES NOT cover installations that may require frames for at, side, or
reverse pitch roofs.
Any damage to the roof must be repaired prior to installation of the solar collectors.
Pumped systems only
E-Frost collectors are not suitable for close coupled hot water solar systems.
Introduction
This manual is intended to be used by Rinnai accredited solar installers, who have a good
understanding of the different types of solar systems and how they operate.
The information contained is designed to reinforce information from the TradeSmart Solar
Training Course, provide an understanding of the Rinnai Solar System, its suitability for use
and high level instructions for installation.
This manual should be used in conjunction with the following codes and standards:
AS/NZS 3500.4 (Heated Water Services)
Section 5 - General Installation
Section 6 - Solar
G12/AS2 (DBH Acceptable Solution for Solar Installation)
•
•

Rinnai New Zealand Limited E-Frost Solar Collector Install Manual: 11496-A
01-10
7
Solar collector ttings kits
Hot outlet connection
The Rinnai standard mounting rails are for arrangements where the hot outlet connection is
on the top right hand corner. If you have an arrangement that requires a top left hot outlet
connection you will need a different top mounting rail. This can be purchased as an accessory
from Rinnai.
Stainless steel straps for tile roofs
G12 requires stainless steel straps for tile roofs. The Split System Solar Fittings Kits have
galvanised straps as standard. If collectors are being installed on a tile roof, stainless steel
straps can be purchased as an accessory item.
These are all the components for plumbing and mounting collectors on the roof.
Included Not included (to be supplied by the Installer)
All Plumbing Fittings
Air Release Valve
Hot Sensor Temperature Pocket
15 m of Hot Sensor Lead
Angled Mounting Rails for Panels
Straps
M5 Fasteners (guide stoppers for panels)
•
•
•
•
•
•
•
Mounting Fasteners•
Example of the solar collector ttings for a two solar collector installation

Rinnai New Zealand Limited E-Frost Solar Collector Install Manual: 11496-A
01-10
8
Mounting collectors on the roof - general
Each Rinnai solar collector is approximately 2 m tall by 1 m wide. Select
a location with sufcient space for the collectors and associated plumbing
connections.
The collectors weigh approximately 40 kg each and due care and skill
should be taken when lifting them onto the roof.
Inspect the roof before commencing installation and draw the attention of
the customer to any existing damage. Arrange repair before installation.
Mount the collectors on a suitable North facing roof surface. Select
a location where shading from adjacent buildings and trees will be
minimised.
As per G12, AS2, Figure 2, paragraph 4.1
Solar water heaters must be located away from the edge of the gable roof
structure outside the high pressure wind zone as shown.
Cold
connection
Hot
connection
Each collector must slope upwards 8-10 mm
In order to assist circulation and prevent air-locking, each collector must
slope upwards 8-10 mm from inlet to outlet as shown.
The mounting rails supplied in the collector ttings kit will enable this to
occur.
Collectors must be securely fastened to the roof, refer following pages.
Roof sizing and
collector weight
Roof inspection
required before
installation
Collector angle
and positioning

Rinnai New Zealand Limited E-Frost Solar Collector Install Manual: 11496-A
01-10
9
Mounting collectors on the roof - general
Hot collectors The surface and frames can become extremely hot. Collectors should be
kept covered while handling and suitable protective clothing including
gloves must be used to prevent burns.
Keep collectors covered until commissioning and leak testing of the
system is complete.
Pipe
connections
between
collector and
tank
Connecting pipes should pitch up continuously from the tank to the
collector to prevent air-locking
Insulation should be of a suitable material to withstand high
temperatures in solar systems and be protected with UV resistant tape
or other coating
Maximum total ow and return pipe length between cylinder and
collector is 50 m
▪
▪
▪
WARNING
Mounting collectors on a metal roof
The Rinnai standard mounting rails are for arrangements where the hot outlet connection is
on the top right hand corner. If you have an arrangement that requires a top left hot outlet
connection you will need a different top mounting rail. This can be purchased as an accessory
from Rinnai.
Unpainted galvanised roofs will require painting under the area where the collector is installed
and any subsequent run off areas (e.g. down the guttering below).
Check purlin
size
Position top
collector
Fasten top
mounting rail
1.
2.
3.
Check purlins are a minimum size of 50 x 50 mm. If there are no
sufciently sized purlins available at the correct centres they can be
added between the rafters or trusses at the correct spacing.
Establish the position at a suitable purlin, usually identied by a row
of fasteners. The assembled collectors should cross as many rafters as
possible and be evenly distributed across them.
Fasten with the bottom edge level and horizontal as shown below. Use a
minimum of 8 x 8 gauge fasteners per collector. Two are secured into the
purlin with the balance either into the purlin or metal roof cladding.
Each fastener should have a suitable EDPM or similar washer under its
head and between the rail and roong material. There should be no metal
to metal contact between the roof and rail.

Rinnai New Zealand Limited E-Frost Solar Collector Install Manual: 11496-A
01-10
10
Mounting collectors on a metal roof
Mark position
for strap
hooks and
secure
4. Measure down the roof from each end of the top rail and mark the
position for the strap hook as follows:
Fit strap hook approximately 75 mm in from each edge of the mounting
rail. Screw both straps to the roof using a minimum of 4 x 8 gauge
fasteners per strap. Trim off any excess length.
At least one fastener per strap must be attached to a purlin. Use EDPM
washers underneath to avoid direct contact between the strap and the
roof.
Fit lower
mounting rail
to the straps
5. Fasten the lower mounting rail through the straps to the roof and in
additional places as required. Check the distance between the inside faces
of the mounting rails is correct.

Rinnai New Zealand Limited E-Frost Solar Collector Install Manual: 11496-A
01-10
11
Mounting collectors on a metal roof
Fit additional
straps as
required
6. Fit additional straps so there are two straps per collector. Each fastener
should be sealed with suitable washers, both under the head of the fastener
and between the rail and roof, as shown below.
Fit
collectors
7. To assist in tting the collectors there are a series of M5 threaded holes
along the mounting rails. In the solar collector ttings kit are M5 fasteners.
These should be inserted into the holes in the rail before the collectors are
tted. These will act as ‘stoppers’.
Fit the collectors into the mounting rails. The stoppers will position the
panels at the right height for the slots to align so the mounting fasteners
can insert easily. The stoppers should be removed after the collectors are
tted.
Fit
additional
collectors
8. Fit the rst collector between the mounting brackets using fasteners
supplied, do not fully tighten at this point. Fit the collector connectors
for two or three panel systems to the rst panel. Fit second collector by
inserting the header tubes into the connectors and attach the collector to
the rail with fasteners provided. Tighten fasteners on the rst collector.
Firmly push collectors together, tighten connectors and then tighten
fasteners on second collector. Repeat from step 7 if tting a third panel.
Use lower holes

Rinnai New Zealand Limited E-Frost Solar Collector Install Manual: 11496-A
01-10
12
Mounting collectors on a tile roof
The Rinnai standard mounting rails are for arrangements where the hot outlet connection is
on the top right hand corner. If you have an arrangement that requires a top left hot outlet
connection you will need a different top mounting rail. This can be purchased as an accessory
from Rinnai.
G12 requires stainless steel straps for tile roofs. The Split System Solar Fittings Kits have
galvanised straps as standard. If collectors are being installed on a tile roof, stainless steel
straps can be purchased as an accessory item.
Determine
position for top
mounting rail
The assembled collectors should cross as many rafters as possible and be
evenly distributed across them.
The top rail should be approximately in the middle of a line of tiles. Mark
a horizontal line at the determined position.
Measure down the roof from the top line for the respective collector.
Check that the lower line does not coincide with an edge of tiles. If
necessary adjust the position of the upper line slightly to prevent this
happening.
The procedure is the same as for the metal roof with the exception that
the top mounting rail is also fastened using straps. Additionally there
should be no need to use spacers to prevent the rails touching the tile
roong.
Bottom edge of top rail
to be level
Tile removed
E-Frost collector 1980 mm

Rinnai New Zealand Limited E-Frost Solar Collector Install Manual: 11496-A
01-10
13
Fitting connecting pipes and sensor lead
Attach
plumbing
ttings
Run piping
and insulate
Insert hot
sensor lead
1.
2.
3.
Attach necessary plumbing ttings to the collector(s) as shown below.
Compression ttings are designed for 12 mm outside dimension (od)
copper tube.
Run and insulate piping between the pump outlet and bottom left corner
of the collector(s).
Run and insulate piping between hot sensor lead connector on top right
hand corner of collectors to the hot return at the storage cylinder.
The piping should pitch continuously upwards to the collectors to prevent
air-locking.
Insert hot sensor lead into the pocket on the tting on the top right
corner of the collector(s) and secure in place with suitable high
temperature silicon.
The other end of the assembly is run through a tting on the bottom side
of the solar pump and controller box and attached to the mating electrical
connector on the solar controller.
Longer leads of 30 m length are available from Rinnai as an accessory,
or the lead can be terminated and extended using two core sheathed
(double insulated) ex with conductors of 0.5 mm2(minimum cross
section area).
All penetrations through the roof for connecting pipes and hot sensor lead should be made
using suitable sealing boots such as dektites.
Rinnai Solar Collector Fittings Kit Assembly - Two Collectors
Hot sensor lead

Rinnai New Zealand Limited E-Frost Solar Collector Install Manual: 11496-A
01-10
14
Commissioning
The solar collectors need to be commissioned as part of a complete solar system. For
commissioning information for the Rinnai Solar Split System refer to instructions detailed in
the Solar Split System Installation Manual.
Keep the solar collectors covered until system lling and commissioning is complete.

Rinnai New Zealand Limited E-Frost Solar Collector Install Manual: 11496-A
01-10
15
Consenting requirements for solar
Rinnai has developed a G12 AS2 Rinnai Solar Compliance document to assist with the consent
process. This can be found on our technical website www.rinnai-tradesmart.co.nz within the
Solar section.

Consumers: 0800 RINNAI (746 624)
Installers: 0800 TO RINNAI (86 746 624)
Address: 105 Pavilion Drive, Airport Oaks, Mangere, Manukau
PO Box 53177, Auckland Airport, Manukau 2150
Phone: (09) 257 3800
Fax: (09) 257 3899
Email: [email protected]
Websites: www.rinnai.co.nz and www.rinnai-tradesmart.co.nz
All Rinnai appliances meet or exceed the safety standards required by New Zealand
gas and electrical regulations.
Rinnai is constantly improving its products and as such information and
specications are subject to change or variation without notice.
Table of contents
Other Rinnai Water System manuals

Rinnai
Rinnai REU-VR3237WG User manual

Rinnai
Rinnai INFINITY 26 User manual

Rinnai
Rinnai EHPA250VMAH User manual

Rinnai
Rinnai PRESTIGE User manual
Rinnai
Rinnai EHPS215VM User manual
Rinnai
Rinnai REU-V2632FFUG User manual

Rinnai
Rinnai HD210i User manual
Rinnai
Rinnai PRESTIGE User manual

Rinnai
Rinnai Infinity Series User manual
Rinnai
Rinnai Enduro SP200A User manual
Popular Water System manuals by other brands

American Water Heater
American Water Heater DELUXE SYSTEM instruction manual

Everpure
Everpure Coldrink 1-MC2 System EV9534-26 Specification sheet

AmeriWater
AmeriWater HEF CWST Operation manual

NU Aqua
NU Aqua Platinum Series installation manual

Craftsman
Craftsman 390.252158 owner's manual

salmson
salmson NSB Installation and starting instructions