age 3 of 4
Warning: The supplied wood screws (Part-[01]) may be used with a drill, but it must be
hand tightened using wrench to avoid damaged on the threads.
Concrete ceiling: Drill holes for the concrete anchor*, insert the anchors, then have the wood
screws screwed into the anchors.
*concrete anchor is sold separately, or available in local hardware stores.
False/Drop/Suspended ceiling: Using our
suspended ceiling adaptor, the mount could be installed
underneath drop ceiling tile. The suspended ceiling
adaptor will be supported by the true ceiling structure.
See Figure-6 for the measurement of Part-A1, before you drill holes on the ceiling.
Figure 5
The threaded rods and U-Bolt shown on below on Figure-6 are only used with
following applications. Not applicable to normal residential wood structures
Threaded Rod / Trusses / I-Beams / Unistrut: See Figure-6, use inner four holes to install
with four 1/4” or 5/16” threaded rods.
Figure 6
Insert the cables through the central hole on the Ceiling Plate (Part-A1) before
you tighten the screws (Part-[01]).
Mounting to solid ceiling
Use a solid ceiling anchor (not included, can be purchased from local hardware store) along
with the wood screws (Part-[01]). First drill a hole for the solid ceiling anchor, put it in, attach
Part-A1, and screw Part-[01](wood screw) into the solid ceiling anchor.
*solid ceiling anchor is sold separately, or available in local hardware stores.
Warning: Make sure the ceiling can support the combined weight of the mount and the TV.
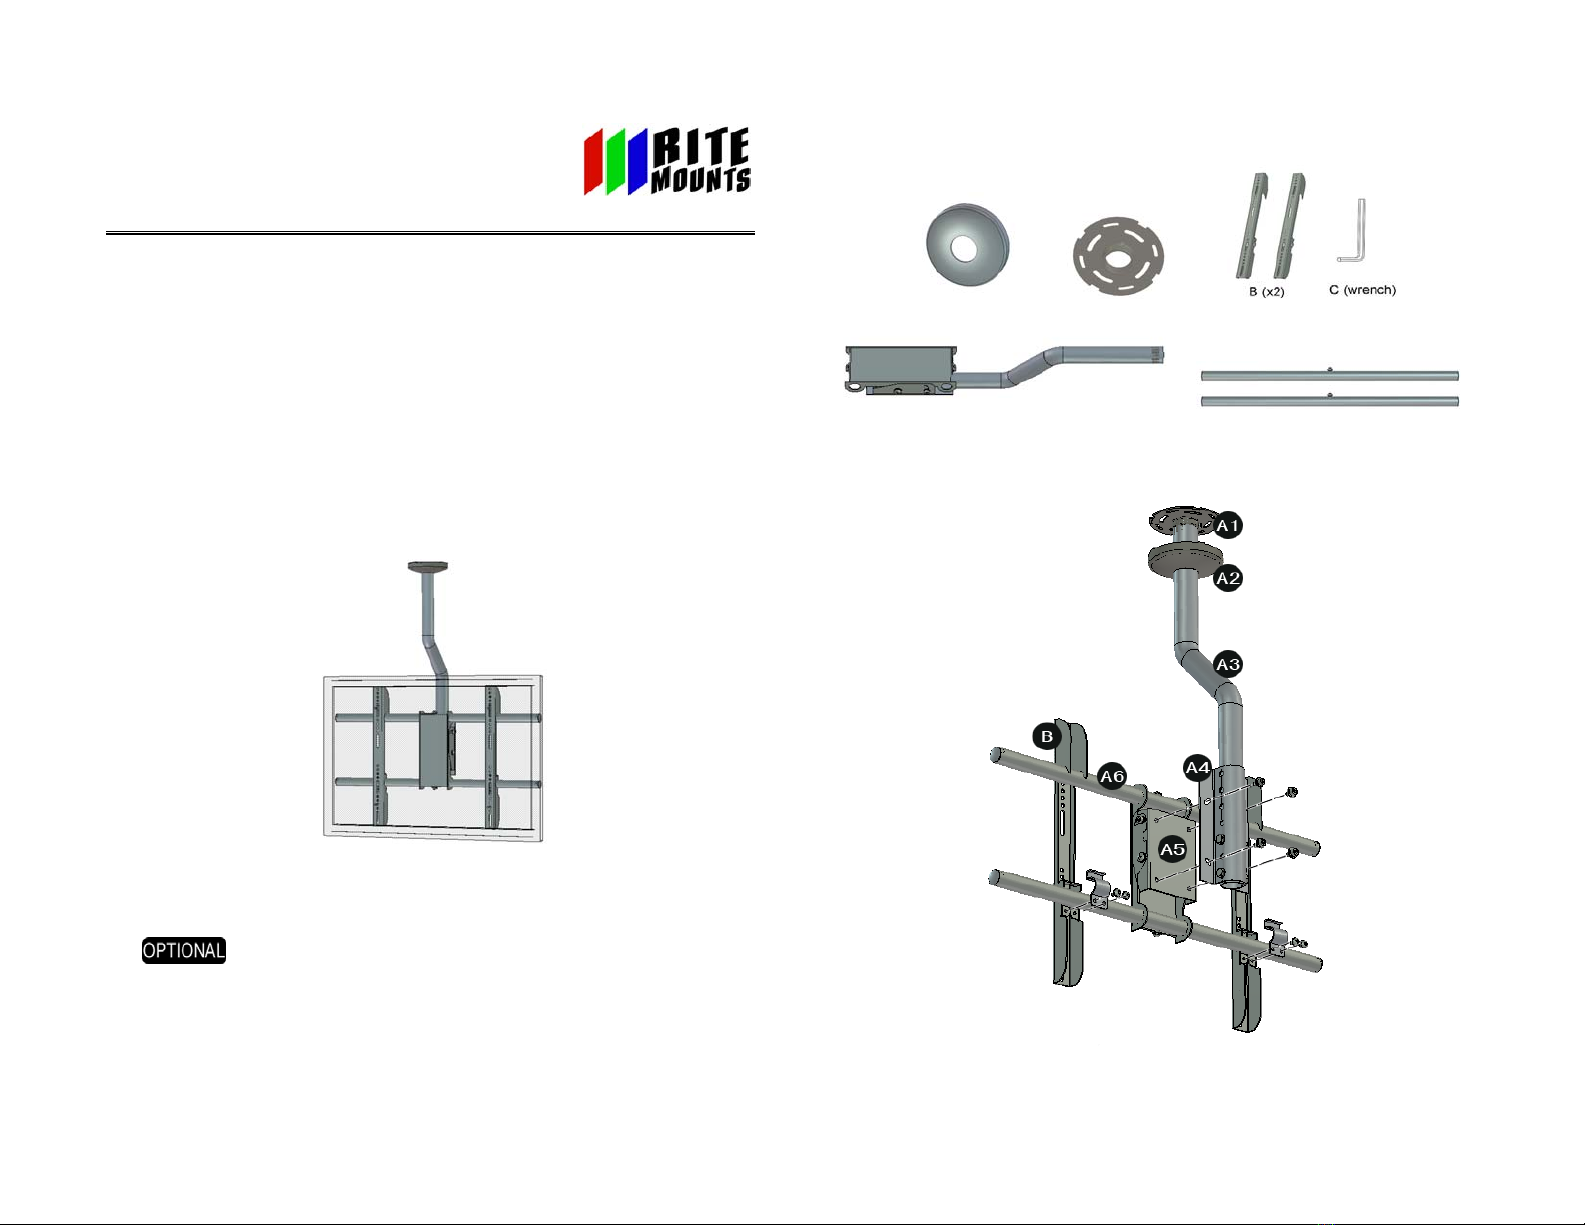
Step3: Assemble the MCM TV mount
a)Attach Part-A2 and Part-A3
Figure 7
Get Part-A3 through Part-A2 from the threaded side first.loose out the M4 screw(Part-[10])
which has been locked in Part-A1.Install Part-A3 to Part-A1 and tighten the
connection.Tighten Part-[10] to lock the position between Part-A1 and Part-A3.
Then Part-A2 could be snapped to the ceiling plate (Part-A1), and now turn Part-A2 clockwise,