RM CPD-64ET User manual

ELECTRICAL
PASTA COOKERS
DROP-IN
1015-22
CPD-64ET, CPD-84ET, CPAD-64ET, CPAD-84ET
www.rmgastro.com
INSTRUCTION FOR INSTALLATION AND USE
DIE GEBRAUCHS UND INSTALLATIONSANWEISUNG
NOTICE D‘INSTALLATION ET D‘EMPLOI
NÁVOD K OBSLUZE A INSTALACI
INSTRUCCIONES DE INSTALACION Y USO
ISTRUZIONI PER L‘INSTALLAZIONE E L‘USO

2023-09-06
CONTENT
Instruction for use
Cleaning and maintenance
Picture attachment
5
6
27
INHALT
Gebrauchsanweisung
Die Reinigung und instandshaltung
Bildlicher Anhang
9
10
27
CONTENU
Mode d‘emploi
Nettoyage et entretien
Annexe picturale
13
14
27
OBSAH
Návod k použití
Čistění a údržba
Obrazová příloha
17
18
27
CONTENIDO
Instrucciones de uso
Mantenimiento y limpieza
Anexo ilustrado
21
22
27
CONTENUTO
Istruzioni per l‘uso
Pulizia e manutenzione
Allegato illustrativo
25
26
27

INSTRUCTION FOR INSTALLATION AND USE

23
IT CH
GB IE
TECHNICAL DATA TABLE
MODELS POWER SUPPLY MAXIMUM
POWER (kW)
MAXIMUM
ABSORPTION (A)
POWER SUPPLY
CABLE (Silicon)
CPD-64ET
400V~3N 50/60 Hz 7,8 11,3 5 x 1,5 mm²
CPD-84ET
400V~3N 50/60 Hz 13,5 19,57 5 x 2,5 mm²
CPAD-64ET
400V~3N 50/60 Hz 7,8 11,3 5 x 1,5 mm²
CPAD-84ET
400V~3N 50/60 Hz 13,5 19,57 5 x 2,5 mm²
INSTRUCTIONS FOR INSTALLATION
The data plate is on the front side, (see diagram in electric connection item) and has all the data necessary for the
connection.
INSTALLATION
When fitting, the appliance must be levelled using a spirit level slight differences of level can be adjusted by screwing
or unscrewing the adjustable feet. The main switch or the socket must be near the appliance and easily accessible.
It is advisable to place the appliance under an extractor hood so that steam is extracted rapidly. If the appliance is placed
near walls, dividing panels, kitchen furniture, decorative finishing, etc. , these should be in flameproof material;
otherwise it is necessary to cover them with non-flammable material.
Above all, it is necessary to ensure that the fire prevention norms are observed.
The installation, starting up and maintenance of the appliance must be carried out by qualified personnel. All operations
done when installing must be carried out observing the norms in force.
The manufacturer declines all responsibility in the event of incorrect functioning due to wrong installation or
installation which does not comply with the norms.
Attention! In accordance with international rules, when connecting the appliance, an automatic device enabling the
disconnection of all contacts from the mains, must be installed above it; this device must have a contacts opening of at
least 3 mm.
LAWS, TECHNICAL RULES AND NORMS
Installation must be carried out observing the following norms:
- Safety prescription in force
- Installation prescription in force
ELECTRIC CONNECTION
The appliance is supplied without the connection cable. To install the power supply cable, proceed as follows:
• Disconnect the power supply.
• Remove the bottom panel
• Push the connection cable through the cable blocker, connect the conductor wires to the corresponding terminals in
the junction box and fix them into place.
• Block the cable with the cable blocker, and reassemble the bottom panel. The earth wire must be longer than the
others so that if the cable blocker should break, it will disconnect after the tension wires.
The connection cable must have an adequate section for the power of the appliance and be resistant to a temperature of
at least 150°C (see technical data table).
EQUIPOTENTIAL
The appliance must be connected to an equipotential system. The connection screw is positioned at the back of the
appliance and is identified by the symbol.
Attention! The manufacturer will neither be held responsible for, nor will give any compensation during the guarantee
period for any damage caused, and which is due to inadequate installations not compliant with the instructions.
STARTING UP
Before using the appliance, it is necessary to clean it carefully, especially the tub (see paragraph “cleaning and care”).
Check the connection of the appliance and start it up following the instructions.
4

24
IT CH
GB IE
INSTRUCTIONS FOR USE
Attention! Use the appliance only under surveillance.
- Never start up the appliance without water.
With pasta cookers it is possible to cook pasta, vegetables, rice, eggs, legumes, etc.
WATER SUPPLY CHARACTERISTICS
The system must be connected to a drinking water supply with the following characteristics. Failure to do so
automatically invalidates the guarantee
Total hardness: 0,5 to 5°F to prevent the build-up of lime-scale
Pressure: 50 to 250 kPa (0,5-2,5 bar).
Chlorine ion concentration (Cl-): not more than 10 ppm (acceptable value) to avoid damaging the internal steel
elements
pH: over 7
Electrical conductivity: 50 to 2000 S/cm (20°C)
TURNING ON
CPD: Check that the water drainage tap is turned off.
Fill the tub with water, keeping the button of the filling knob pushed down until the level indicated by the symbol --
stamped inside the tub is reached. Switch on the switch situated above the appliance.
Switch on the main switch installed above the appliance. Turn the control knob corresponding to the hotplate from
position “0” to the degree of coking desired, between 1 and 4.
The white light shows that the heating element is working
To turn off the appliance, turn the knob into position “O”.
CPAD: Check that the water drainage tap is turned off.
1) When powering the device, the red light flashes briefly for about ½ second.
2) In the absence of water in the tank the red light keeps flashing.
3a) Turn on the tap to load the tank to the desired level, which must be higher than the minimum level probe and do not
exceed the maximum level, which is marked on the tank by the symbol (--)
3b) In models with automatic load, the water starts loading and you can select the desired level by pressing the button
with symbol (level button)
4) Switch on the main switch installed above the appliance. Turn the control knob corresponding to the hotplate from
position “0” to the degree of coking desired, between 1 and 4.
The white light shows that the heating element is working
To turn off the appliance, turn the knob into position “O”.
EMPTYING THE TUB
To carry out this operation, it is necessary to open the outlet tap (lever in vertical position) which can only be reached
through the cabinet door situated below the appliance.
ANOMALIES
If the probe does not detect the presence of water in the tank for more than 15 sec. the system disables the heating
element: the alarm is indicated by a flashing red light
When the probe returns to detect the presence of water, the heating element is activated and the red light is turned off
NOTE: the filling phase is monitored by the system through the TIME-OUT.
PASTA COOKER WITH AUTOMATIC LOADING
If the probe does not detect the presence of water, the system will restore the correct level and after 15 sec. it will
disable the heating element: the alarm is indicated by a flashing red light
When the probe returns to detect the presence of water, the heating element is activated immediately and after 3 sec. the
automatic refilling is stopped
NOTE: the filling phase is monitored by the system through the TIME-OUT.
Slow refilling button
5

25
IT CH
GB IE
When the "slow refilling button" is active the system will fill the tank slowly so as to eliminate any foaming.
Level button
The "level button" defines the level of the water in the tank: high level for cooking the pasta, low level for steaming.
Important: keep clean the probe level
TIME- OUT
After discovering the level probe, the micro controller triggers an internal timer relative to the duration of this phase. If
(continuous) loading takes longer than 350 seconds, the system blocks the functions of the device and the alarm is
signalled by the steady red light.
To reset the alarm condition, after removing the fault that caused the intervention (broken or disconnected level probes,
problems with the water supply, drain valve open...), the system must be turned OFF/ON.
CLEANING AND MAINTENANCE
Attention! During cleaning, do not wash the external parts of the appliance with direct sprays of water or with
high pressure.
After every use, clean the appliance thoroughly. Daily cleaning after switching off the appliance ensures the perfect
functioning and long life of the appliance.
Before starting to clean the appliance, disconnect the power supply. The parts in steel must be washed with hot water
and neutral detergent, then rinsed thoroughly in order to eliminate all traces of detergent; after which, dried with a dry
cloth. Do not use abrasive or corrosive detergents.
PROCEDURE TO FOLLOW IF THE APPLIANCE IS NOT GOING TO BE USED FOR
SOME TIME
Clean and dry the appliance carefully according to the instructions. Disconnect the power supply.
PROCEDURE TO FOLLOW IN THE EVENT OF A BREAKDOWN
In the event of breakdown, turn off the appliance, disconnect the power supply by using the device situated above the
appliance and notify the after sales service.
MAINTENANCE (ONLY FOR QUALIFIED PERSONNEL)
Any kind of maintenance must only be done by qualified personnel. Before carrying out maintenance, remove the plug
or switch off the switch above the appliance. Empty the tub when it is full.
ACCESSIBILITY
To get to the junction box, remove the back of the appliance. The control elements are reached from the front control
panel; unscrew the cap of the Water filling Tap, unscrew the fixing screws from the control panel and remove it
6

DIE GEBRAUCHS UND INSTALLATIONSANWEISUNG

TABELLE DER TECHNISCHEN DATEN
MODELL STROMZUFUHR
HÖCHST
LEISTUNG
(kW)
MAXIMALE
STROMAUFNAHME
(A)
VERSORGUNGS
LEITUNG
aus Silikon
CPD-64ET
400V~3N 50/60 Hz 7,8 11,3 5 x 1,5 mm²
CPD-84ET
400V~3N 50/60 Hz 13,5 19,57 5 x 2,5 mm²
CPAD-64ET
400V~3N 50/60 Hz 7,8 11,3 5 x 1,5 mm²
CPAD-84ET
400V~3N 50/60 Hz 13,5 19,57 5 x 2,5 mm²
AUFSTELLUNGSANLEITUNGEN
Das technische Typenschild befindet sich auf der Vorderseite des Geräts (siehe Zeichnung unter Punkt “Elektrischer
Anschluss”) und enthält alle für den Anschluss notwendigen Daten.
AUFSTELLUNG
Während der Aufstellung ist das Gerät zu nivellieren, geringe Höhenunterschiede können mit den Stellfüßen
ausgeglichen werden (aufschrauben oder festziehen). Der Hauptschalter oder die Steckdose müssen sich in der Nähe
des Geräts befinden und leicht erreichbar sein.
Es wird empfohlen, das Gerät unter einer Abzugshaube aufzustellen, damit entstehende Dämpfe rasch abgeleitet
werden können. Falls das Gerät in der Nähe von Wänden, Trennpaneelen, Küchenmöbeln, Dekorverkleidungen etc.
aufgestellt wird, sollten diese aus nicht entflammbaren Material bestehen. Im gegenteiligen Fall sind diese Wände mit
feuerfesten Materialien zu verkleiden.
Darüber hinaus ist sicherzustellen, dass die geltenden Brandschutzbestimmungen eingehalten werden.
Die Aufstellung, Inbetriebsetzung und Wartung muss von qualifiziertem Fachpersonal durchgeführt werden. Alle
notwendigen Aufstellungsarbeiten müssen unter Einhaltung der geltenden Bestimmungen erfolgen.
Der Hersteller übernimmt keinerlei Haftung für eine mangelhafte Betriebsleistung, wenn diese auf eine fehlerhafte und
nicht gesetzmäßige Installation zurückzuführen ist.
Achtung: Gemäß den internationalen Bestimmungen muss während des Anschließens des Geräts oberhalb desselben
eine automatische Vorrichtung mit einer Kontaktöffnungsweite von mindestens 3 mm installiert werden, durch welche
das Gerät auf allpolige Weise vom Stromnetz getrennt werden kann.
GESETZLICHE BESTIMMUNGEN, TECHNISCHE VORGABEN UND VORSCHRIFTEN
Die Aufstellung muss unter Einhaltung der folgenden Vorschriften durchgeführt werden:
- Geltende unfallverhütende Bestimmungen .
- Aufstellungsanweisungen, Vorschriften der VDE
ELEKTROANSCHLUSS
Das Gerät wird ohne Anschlusskabel geliefert. Zur Installation des Anschlusskabels wie folgt vorgehen:
• Die Stromzufuhr unterbrechen.
• Das Hintenpaneel entfernen
• Das Anschlusskabel durch den Kabeldurchgang ziehen, die Leiter mit den entsprechenden Klemmen der
Klemmleiste verbinden und daran befestigen.
• Das Kabel mit der Kabelklemme blockieren und das Hintenpaneel wieder befestigen. Die Erdungsleitung muss
länger als die anderen sein, damit es sich bei einer eventuellen Beschädigung der Kabelklemme erst nach den
Spannungskabeln löst.
ZUR BEACHTUNG Das Anschlusskabel muss einen der Gerätespannung entsprechenden Querschnitt aufweisen und
Temperaturen von mindestens 150°C standhalten (siehe Tabelle Technische Daten).
ÄQUIPOTENZIAL
Das Gerät muss mit einem Äquipotenzial-System verbunden werden. Die Verbindungsschraube ist auf der Rückseite
des Geräts angebracht und mit dem Symbol gekennzeichnet.
Achtung: Der Hersteller übernimmt für Schäden, die durch eine unsachgemäße, nicht den Anleitungen
entsprechende Installation verursacht wurden, keinerlei Haftung und leistet auch innerhalb der Garantie keinen
Schadenersatz.
8

INBETRIEBNAHME
Vor der Benutzung ist es notwendig, das Gerät und insbesondere das Becken sorgfältig zu reinigen. (siehe Abschnitt
„Reinigung und Pflege“).
Den Anschluss des Geräts überprüfen und gemäß den Bedienungsanleitungen in Betrieb nehmen.
BEDIENUNGSANLEITUNGEN
Achtung: Das Gerät darf nur unter Aufsicht benutzt werden.
- Das Gerät niemals ohne Wasser in Betrieb nehmen.
Mit den Nudelkochern können Teigwaren, Gemüse, Reis, Eiern, Hülsenfrüchten etc. zubereitet werden.
EIGENSCHAFTEN DER WASSERVERSORGUNG
Der Wasseranschlu mu mit trinkwasser mit spezifischen Eigenschaften versorgt werden. Diese führt zum
vollständigen Verfall der Garantie.
Gesamthärte zwischen 0,5 und 5° franz. Härtegraden zur Reduzierung der Kalkbildung
Druck zwischen 50 und 250 kPa (0,5-2,5 bar).
Geringe Chloridionen-Konzentrazion (Cl-) (akzeptabler Vergleichswert 10 ppm), um das Angreifen der internen
Stahlstrukturen
pH-Wert gröer als 7
Elektrische Leitfähigkeit zwischen 50 und 2000 S/cm (20°C)
EINSCHALTEN
CPA: Überprüfen Sie, dass die Drain Leitungswasser, ist geschlossen.
Füllen Sie die Wanne mit Wasser, bis die Ebene mit dem Symbol in den Tank ----. gestempelt
.
Den oberhalb des Geräts befindlichen Schalter betätigen. Den der Kochplatte entsprechenden Betriebsschalter von der
position "0" auf die gewünschte Kochtemperatur zwischen 1und 4 drehen. Die grüne Kontroll-Lampe leuchtet auf,
sobald das Gerät mit Strom versorgt wird.
Zum Ausschalten des Geräts ist der Drehknopf wieder auf die Position “0” zu drehen.
CPAD: Überprüfen Sie, dass die Drain Leitungswasser, ist geschlossen.
1) Wenn das Gerät mit Spannung versorgt wird, blinkt die rote Kontrollanzeige ca. eine halbe Sekunde kurz auf.
2) Wenn Wasser im Behälter fehlt, blinkt die rote Kontrollanzeige weiter.
3a) Öffnen Sie den Wasserhahn, um den Behälter bis zum gewünschten Stand zu füllen, der über dem Mindeststand
liegen muss und den Höchststand nicht überschreiten darf, der auf der Wanne mit (-) gekennzeichnet ist
3b) Bei den Modellen mit automatischem Auffüllen beginnt der Wassereinlass und der gewünschte Stand kann durch
Betätigen der Taste mit dem Symbol (Füllstandstaste) ausgewählt werden.
4) Den oberhalb des Geräts befindlichen Schalter betätigen. Den der Kochplatte entsprechenden Betriebsschalter von
der position "0" auf die gewünschte Kochtemperatur zwischen 1und 4 drehen. Die grüne Kontroll-Lampe leuchtet auf,
sobald das Gerät mit Strom versorgt wird.
Zum Ausschalten des Geräts ist der Drehknopf wieder auf die Position “0” zu drehen.
ENTLEERUNG DES BECKENS
Um diese Arbeit durchführen zu können ist es notwendig, den Abflusshahn, der nur durch die Tür des darunter
liegenden Schrankelements erreicht werden kann, aufzudrehen (Hebel in senkrechter Stellung).
PROBLEME
Wenn die Sonde das Vorhandensein von Wasser im Behälter länger als 15 Sekunde nicht erfasst, deaktiviert das System
das Heizelement: der Alarm wird durch das Blinken der roten Anzeige angezeigt.
Wenn die Sonde das Wasser wieder erfasst, wird das Heizelement aktiviert und die rote Anzeige schaltet sich aus.
N. B.: Die Phase des Auffüllens wird vom System anhand eines TIMEOUTS überwacht.
PASTAKOCHER MIT AUTOMATISCHEM FÜLLEN
Wenn die Sonde das Wasser im Behälter nicht erfasst, stellt das System den korrekten Füllstand wieder her und
deaktiviert nach 15 Sekunden das Heizelement: der Alarm wird durch das Blinken der roten Anzeige angezeigt.
Wenn die Sonde das Wasser wieder erfasst, wird das Heizelement sofort aktiviert und nach drei Sekunden wird das
automatische Auffüllen unterbrochen
9

N. B.: Die Phase des Auffüllens wird vom System anhand eines TIMEOUTS überwacht.
Taste langsames Auffüllen
Wenn die “Taste langsames Auffüllen aktiv ist, sorgt das System für das langsame Auffüllen des Behälters, um
eventuelle Schaumbildung zu vermeiden.
Füllstandstaste
Die “Füllstandstaste” definiert den Wasserstand im Behälter: hoher Stand zum Garen von Pasta, niedriger Stand zum
Dampfgaren.
Wichtig: die Sonde Ebene sauber zu halten
TIMEOUT
Sobald die Füllstandssonde nicht mehr bedeckt ist, aktiviert das Mikrokontrollgerät einen internen Timer in Bezug auf
die Dauer dieser Phase. Wenn das (kontinuierliche) Auffüllen länger als 350 Sekunden dauert, blockiert das System den
Betrieb des Geräts und der Alarm wird durch durchgehendes Aufleuchten der roten Anzeige angezeigt.
Um die Alarmbedingung zurückzustellen, muss, nachdem der Defekt beseitigt wurde, der deren Aufleuchten ausgelöst
hat (kaputte oder nicht angeschlossene Füllstandssonden, Probleme der Wasseranlage, Ablasshahn offen, etc.) das
System aus- und wieder eingeschaltet werden.
REINIGUNG UND WARTUNG
Achtung!: Zur Reinigung darf das Gerät von außen auf keinem Fall mit einem direkten Wasserstrahl oder
einem Hochdruckreiniger abgespritzt werden.
Das Gerät muss jeden Abend nach Betriebsende sorgfältig gereinigt werden. Die tägliche Reinigung nach dem
Abschalten des Geräts garantiert den einwandfreien Betrieb und eine lange Lebensdauer der Anlage.
Vor dem Reinigungsbeginn ist die Stromzufuhr zum Gerät zu unterbrechen. Die Stahlteile sind mit heißem Wasser und
einem neutralen Reinigungsmittel zu säubern. Anschließend mit sauberem Wasser gründlich nachspülen, damit alle
Reinigungsmittelreste entfernt werden und mit einem weichen Tuch trockenreiben. Keine Scheuermittel oder ätzende
Reinigungsmittel verwenden.
VORGEHEN BEI LÄNGEREM BETRIEBSSTILLSTAND
Das Gerät laut den Anweisungen gründlich reinigen und trockenreiben. Die Stromzufuhr unterbrechen.
VORGANGSWEISE IM SCHADENSFALL
Im Falle eines Schadens ist das Gerät abzuschalten, die Stromzufuhr mittels der oberhalb des Geräts angebrachten
Vorrichtung zu unterbrechen und der Kundendienst zu verständigen.
WARTUNG (NUR DURCH FACHPERSONAL)
Sämtliche Wartungsarbeiten sind von qualifiziertem Fachpersonal durchzuführen. Vor Beginn der Wartung ist der
Stecker herauszuziehen oder die Stromzufuhr durch den oberhalb des Geräts angebrachte Schalter zu unterbrechen. Das
Wasser im Becken ausleeren.
ZUGÄNGLICHKEIT
Um zur Klemmleiste zu gelangen, ist die Rückwand des Geräts zu entfernen. Die Betriebselemente sind durch die
vordere Bedienblende zugänglich, die Abdeckkappe des
Wasserzufuhr Hahn
, die Schrauben der Bedienblende lösen und
diese entfernen.
10

NOTICE D‘INSTALLATION ET D‘EMPLOI

19
FR BE
TABLEAU DES DONNÉES TECHNIQUES
MODÈLES ALIMENTATION
PUISSANCE
MAXIMUM
(kW)
ABSORPTION
MAXIMUM (A)
CÂBLE
D'ALIMENTATION
(au silicone)
CPD-64ET
400V~3N 50/60 Hz 7,8 11,3 5 x 1,5 mm²
CPD-84ET
400V~3N 50/60 Hz 13,5 19,57 5 x 2,5 mm²
CPAD-64ET
400V~3N 50/60 Hz 7,8 11,3 5 x 1,5 mm²
CPAD-84ET
400V~3N 50/60 Hz 13,5 19,57 5 x 2,5 mm²
INSTRUCTIONS D'INSTALLATION
La plaque des caractéristiques techniques se trouve sur la paroi antérieure (voir schéma au chapitre "Branchement
électrique") et contient toutes les données nécessaires au branchement.
INSTALLATION
Durant son positionnement l'appareil doit être placé parfaitement à l'horizontale; pour cela il est possible d'intervenir sur
les pieds réglables (à visser ou à dévisser). L'interrupteur général ou la prise doit se trouver à proximité de l'appareil et
être facile d'accès.
Il est recommandé de placer l'appareil sous une hotte aspirante de façon à ce que l'évacuation des vapeurs puissent
s'effectuer plus rapidement. Dans le cas où l'appareil serait installé à proximité de murs, de parois, de meubles de
cuisine ou autres revêtements décoratifs, il est important de veiller à ce que ceux-ci soient constitués de matériaux non-
inflammables, différemment les revêtir d'un matériau non-inflammable.
Il est impératif de respecter les normes anti-incendie.
L'installation, la mise en service et l'entretien de l'appareil doivent être confiés à un personnel qualifié à cet effet. Toutes
les interventions nécessaires à l'installation doivent être effectuées dans le respect des normes en vigueur.
Le fabricant décline toute responsabilité en cas de mauvais fonctionnement dû à une mauvaise installation ou à une
installation non conforme.
Attention!: conformément aux dispositions internationales applicables, durant le branchement de l'appareil, il est
nécessaire de prévoir en amont de celui-ci un dispositif automatique assurant la coupure omnipolaire de l'alimentation
de secteur; ce dispositif doit prévoir une ouverture des contacts de 3 mm minimum.
DISPOSITIONS LÉGALES, RÈGLES TECHNIQUES ET DIRECTIVES
L'installation doit être effectuée dans le respect des normes suivantes:
- normes de sécurité en vigueur.
- règles d'installation, normes en vigueur.
BRANCHEMENT ÉLECTRIQUE
L'appareil est livré sans câble d'alimentation. Pour l'installation du câble d'alimentation procéder comme suit:
• Couper la tension.
• Retirer le panneau postérieur.
• Faire passer le câble d'alimentation à travers le passe-fil, raccorder les conducteurs aux bornes correspondantes du
bornier et les fixer.
• Bloquer le câble à l'aide du serre-fil et remettre en place le panneau postérieur. La longueur du conducteur de terre
doit être supérieure à celle des autres conducteurs de telle sorte qu'en cas de rupture du presse-fil le conducteur de
terre se décroche après les conducteurs de tension.
N.B. le câble d'alimentation doit avoir une section adaptée à la puissance de l'appareil et résister au minimum à une
température de 150°C (voir tableau des données techniques).
CIRCUIT ÉQUIPOTENTIEL
L'appareil doit être raccordé à un circuit équipotentiel. La vis de raccordement est positionnée sur la partie postérieure
de l'appareil et est marquée du symbole .
Attention!: le fabricant décline toute responsabilité en cas de dommages causés par une installation non
conforme aux instructions prévues à cet effet.
MISE EN SERVICE
Avant d'utiliser l'appareil, il est nécessaire de procéder à son nettoyage, en particulier le nettoyage du bac (voir chapitre
"nettoyage et entretien").
20
FR BE
Contrôler le branchement de l'appareil et le mettre en marche en suivant les Instructions d'utilisation.
INSTRUCTIONS D'UTILISATION
Attention!: Veiller à ce que l'appareil soit constamment contrôlé durant son utilisation.
Ne jamais mettre en marche l'appareil sans eau.
Les marmites sont prévues pour la cuisson de pâtes, légumes, riz, œufs, etc.
CARACTÉRISTIQUES DE L’EAU D’ALIMENTATION
L’arrivée doit être alimentée avec de l’eau potable possédant les caractéristiques suivantes, pein de chute immédiate de
la garantie
Dureté totale comprise entre 0,5 et 5°Françoise pour redéduire le tatre
Pression comprise 50 et 250 kPa (0,5-2,5 bar).
Concentration ions chlorures (Cl-) non elevée (valeur de référence 10 ppm), de façon ° ne pas aggresser les
structures internes en acier
pH supérieur à 7
conductivité électrique comprise entre 50 et 2000 S/cm (20°C)
ALLUMAGE
CPD: S'assurer que le robinet d'évacuation est fermé.
Remplir d'eau le bac jusqu'au niveau indiqué par le symbole présent à cet effet à l'intérieur du bac (--)
.Placer l'interrupteur présent en amont de l'appareil sur la position On. Amener la commande de la plaque à utiliser de la
position "O" à la position correspondant à la température voulue (de 1 à 4).
Pour éteindre l'appareil, ramener la commande sur la position "0".
CPAD: S'assurer que le robinet d'évacuation est fermé.
1) Lorsque l'appareil est sous tension, le voyant rouge émet un clignotement d'environ une demi-seconde.
2) En absence d'eau dans le réservoir, le voyant rouge clignote.
3a) Ouvrir le robinet d'eau pour remplir le réservoir jusqu'au niveau désiré, lequel doit être supérieur à la sonde de
niveau minimum et ne pas dépasser le niveau maximum indiqué sur le réservoir par le symbole (-).
3b) Sur les modèles à remplissage automatique, lorsque le remplissage commence, il est possible de sélectionner le
niveau souhaité en appuyant sur la touche avec le symbole (touche de niveau).
4) Placer l'interrupteur présent en amont de l'appareil sur la position On. Amener la commande de la plaque à utiliser de
la position "O" à la position correspondant à la température voulue (de 1 à 4).
Pour éteindre l'appareil, ramener la commande sur la position "0".
VIDAGE DU BAC
Pour procéder à cette opération, il est avant tout nécessaire d'ouvrir le robinet d'évacuation (position verticale),
accessible en ouvrant la porte de l'armoire présente sous l'appareil.
ANOMALIES
Si la sonde ne détecte pas la présence d'eau dans le réservoir pendant plus de 15 secondes, le système désactive le
chauffage : l'alarme est indiquée par le clignotement du voyant rouge.
Lorsque la sonde détecte à nouveau la présence d'eau, le chauffage est réactivé et le voyant rouge s'éteint.
N.B. : la phase de remplissage est surveillée par le système par le biais d'un TEMPORISATEUR.
CUISEUR DE PÂTES À REMPLISSAGE AUTOMATIQUE
Si la sonde ne détecte pas la présence d'eau dans le réservoir, le système rétablit le niveau correct, et désactive le
chauffage dans un délai de 15 secondes : l'alarme est indiquée par le clignotement du voyant rouge.
Lorsque la sonde détecte à nouveau la présence d'eau, le chauffage est immédiatement réactivé et le remplissage
automatique est interrompu dans un délai de 3 secondes.
N.B. : la phase de remplissage est surveillée par le système par le biais d'une TEMPORISATION.
12

20
FR BE
Contrôler le branchement de l'appareil et le mettre en marche en suivant les Instructions d'utilisation.
INSTRUCTIONS D'UTILISATION
Attention!: Veiller à ce que l'appareil soit constamment contrôlé durant son utilisation.
Ne jamais mettre en marche l'appareil sans eau.
Les marmites sont prévues pour la cuisson de pâtes, légumes, riz, œufs, etc.
CARACTÉRISTIQUES DE L’EAU D’ALIMENTATION
L’arrivée doit être alimentée avec de l’eau potable possédant les caractéristiques suivantes, pein de chute immédiate de
la garantie
Dureté totale comprise entre 0,5 et 5°Françoise pour redéduire le tatre
Pression comprise 50 et 250 kPa (0,5-2,5 bar).
Concentration ions chlorures (Cl-) non elevée (valeur de référence 10 ppm), de façon ° ne pas aggresser les
structures internes en acier
pH supérieur à 7
conductivité électrique comprise entre 50 et 2000 S/cm (20°C)
ALLUMAGE
CPD: S'assurer que le robinet d'évacuation est fermé.
Remplir d'eau le bac jusqu'au niveau indiqué par le symbole présent à cet effet à l'intérieur du bac (--)
.Placer l'interrupteur présent en amont de l'appareil sur la position On. Amener la commande de la plaque à utiliser de la
position "O" à la position correspondant à la température voulue (de 1 à 4).
Pour éteindre l'appareil, ramener la commande sur la position "0".
CPAD: S'assurer que le robinet d'évacuation est fermé.
1) Lorsque l'appareil est sous tension, le voyant rouge émet un clignotement d'environ une demi-seconde.
2) En absence d'eau dans le réservoir, le voyant rouge clignote.
3a) Ouvrir le robinet d'eau pour remplir le réservoir jusqu'au niveau désiré, lequel doit être supérieur à la sonde de
niveau minimum et ne pas dépasser le niveau maximum indiqué sur le réservoir par le symbole (-).
3b) Sur les modèles à remplissage automatique, lorsque le remplissage commence, il est possible de sélectionner le
niveau souhaité en appuyant sur la touche avec le symbole (touche de niveau).
4) Placer l'interrupteur présent en amont de l'appareil sur la position On. Amener la commande de la plaque à utiliser de
la position "O" à la position correspondant à la température voulue (de 1 à 4).
Pour éteindre l'appareil, ramener la commande sur la position "0".
VIDAGE DU BAC
Pour procéder à cette opération, il est avant tout nécessaire d'ouvrir le robinet d'évacuation (position verticale),
accessible en ouvrant la porte de l'armoire présente sous l'appareil.
ANOMALIES
Si la sonde ne détecte pas la présence d'eau dans le réservoir pendant plus de 15 secondes, le système désactive le
chauffage : l'alarme est indiquée par le clignotement du voyant rouge.
Lorsque la sonde détecte à nouveau la présence d'eau, le chauffage est réactivé et le voyant rouge s'éteint.
N.B. : la phase de remplissage est surveillée par le système par le biais d'un TEMPORISATEUR.
CUISEUR DE PÂTES À REMPLISSAGE AUTOMATIQUE
Si la sonde ne détecte pas la présence d'eau dans le réservoir, le système rétablit le niveau correct, et désactive le
chauffage dans un délai de 15 secondes : l'alarme est indiquée par le clignotement du voyant rouge.
Lorsque la sonde détecte à nouveau la présence d'eau, le chauffage est immédiatement réactivé et le remplissage
automatique est interrompu dans un délai de 3 secondes.
N.B. : la phase de remplissage est surveillée par le système par le biais d'une TEMPORISATION.
13

21
FR BE
Touche de remplissage lent
Lorsque la « touche de remplissage lent » est activée, le système procèdera lentement au remplissage du réservoir afin
d'éviter toute formation de mousse.
Touche de niveau
La « touche de niveau » définit le niveau d'eau dans le réservoir : haut niveau pour la cuisson des pâtes, niveau bas pour
la cuisson vapeur.
Important: maintenir nettoyer la sonde au niveau
TEMPORISATION
Lorsque la sonde de niveau est découverte, le micro rupteur déclenche une minuterie interne calculant la durée de cette
phase. Si le remplissage dure (en mode continu) plus de 350 secondes, le système bloque le fonctionnement de
l'appareil, et l'alarme est indiquée par le clignotement du voyant rouge.
Pour réinitialiser l'alarme après avoir éliminé la faute ayant provoqué son intervention (sonde de niveau cassée ou
déconnectée, problèmes d'approvisionnement en eau, robinet de vidange ouvert, ...), il sera nécessaire d'éteindre et de
rallumer l'appareil (ON/OFF).
NETTOYAGE ET ENTRETIEN
Attention!: ne pas nettoyer l'appareil à l'aide de jets d'eau directs ou à haute pression.
Une fois l'utilisation terminée veiller à nettoyer soigneusement l'appareil. Un nettoyage quotidien de l'appareil une fois
celui-ci éteint est gage de bon fonctionnement et de longue durée.
Avant de procéder au nettoyage, couper l'alimentation électrique. Les parties en acier doivent être nettoyées à l'aide
d'eau chaude et d'un détergent neutre; rincer ensuite abondamment afin d'éliminer toute trace de détergent puis essuyer à
l'aide d'un chiffon sec. Ne pas utiliser de détergents abrasifs ou corrosifs.
INSTRUCTIONS EN CAS DE NON-UTILISATION PROLONGÉE
Nettoyer et essuyer soigneusement l'appareil comme indiqué ci-dessus et l'isoler de l'alimentation électrique.
EN CAS D'ANOMALIE OU DE PANNE
Couper la tension à l'aide du dispositif situé en amont de l'appareil et prendre contact avec le service d'assistance.
ENTRETIEN (A CONFIER AU SEUL PERSONNEL QUALIFIE)
Toute intervention d'entretien doit être exclusivement confiée à un personnel qualifié. Avant de procéder à toute
opération d'entretien, débrancher la prise ou placer l'interrupteur situé en amont sur la position Off. Vider le bac lorsqu'il
est plein.
ACCÈS BORNIER/ÉLÉMENTS DE COMMANDE
Pour accéder au bornier de branchement, retirer le panneau postérieur de l'appareil. Les éléments de commande sont
accessibles depuis le panneau frontal: dévisser le capuchon de le
robinet remplissage d’eau
d'eau, dévisser les vis de
fixation du panneau frontal et retirer ce dernier
14

NÁVOD K OBSLUZE A INSTALACI

23
IT CH
GB IE
TABULKA TECHNICKÝCH ÚDAJŮ
MODEL NAPÁJENÍ MAXIMÁLNÍ
VÝKON (kW)
MAXIMÁLNÍ
ABSORPCE (A)
NAPÁJECÍ KABEL
(křemíkový)
CPD-64ET
400V~3N 50/60 Hz 7,8 11,3 5 x 1,5 mm²
CPD-84ET
400V~3N 50/60 Hz 13,5 19,57 5 x 2,5 mm²
CPAD-64ET
400V~3N 50/60 Hz 7,8 11,3 5 x 1,5 mm²
CPAD-84ET
400V~3N 50/60 Hz 13,5 19,57 5 x 2,5 mm²
NÁVOD K INSTALACI
Datový štítek je na přední straně (viz schéma v položce elektrické připojení) a obsahuje všechny údaje potřebné
pro připojení.
INSTALACE
Při montáži musí být spotřebič vyrovnán pomocí vodováhy mírné rozdíly výšky lze upravit zašroubováním nebo
vyšroubováním nastavitelných nožiček. Hlavní vypínač nebo zásuvka musí být v blízkosti spotřebiče a snadno přístupné.
Doporučuje se umístit spotřebič pod odsavač par, aby se pára rychle odváděla. Pokud je spotřebič umístěn v blízkosti
stěn, dělících panelů, kuchyňského nábytku, dekorativních povrchových úprav apod. , měly by být z nehořlavého
materiálu; v opačném případě je nutné je zakrýt nehořlavým materiálem.
Především je nutné zajistit, aby byly dodrženy normy požární ochrany.
Instalaci, uvedení do provozu a údržbu spotřebiče musí provádět kvalifikovaný personál. Veškeré úkony prováděné při
instalaci musí být prováděny s dodržením platných norem.
Výrobce odmítá veškerou odpovědnost v případě nesprávné funkce způsobené nesprávnou instalací nebo instalací,
která není v souladu s normami.
Pozor! V souladu s mezinárodními předpisy musí být při připojování spotřebiče nad ním instalováno automatické
zařízení umožňující odpojení všech kontaktů od sítě; toto zařízení musí mít otvor pro kontakty nejméně 3 mm.
ZÁKONY, TECHNICKÉ PŘEDPISY A NORMY
Instalace musí být provedena při dodržení následujících norem:
- Platný bezpečnostní předpis
- Platný předpis pro instalaci
ELEKTRICKÉ PŘIPOJENÍ
Spotřebič se dodává bez připojovacího kabelu. Pro instalaci přívodního kabelu postupujte následovně:
•Odpojte napájecí kabel.
•Odstraňte spodní panel
•Prostrčte připojovací kabel blokátorem kabelů, připojte vodiče k příslušným svorkám v propojovací skříňce
a upevněte je na místo.
•Zablokujte kabel blokátorem kabelů a znovu smontujte spodní panel. Zemnicí vodič musí být delší než ostatní,
aby se v případě porušení blokátoru kabelu odpojil až za napínacími vodiči.
Připojovací kabel musí mít odpovídající průřez pro výkon spotřebiče a musí být odolný vůči teplotě nejméně 150 °C
(viz tabulka technických údajů).
VYBAVENÍ
Spotřebič musí být připojen k ekvipotenciálnímu systému. Připojovací šroub je umístěn na zadní straně spotřebiče
a je označen symbolem.
Pozor! Výrobce nenese odpovědnost ani neposkytuje náhradu během záruční doby za případné škody, které vzniknou
a které jsou způsobeny nevhodnou instalací, jež není v souladu s návodem.
UVEDENÍ DO PROVOZU
Před použitím spotřebiče je nutné jej pečlivě vyčistit, zejména vanu (viz odstavec "čištění a péče").
Zkontrolujte připojení spotřebiče a uveďte jej do provozu podle pokynů.
16

24
IT CH
GB IE
NÁVOD K POUŽITÍ
Pozor! Spotřebič používejte pouze pod dohledem.
- Spotřebič nikdy neuvádějte do provozu bez vody!
S vařiči těstovin lze vařit těstoviny, zeleninu, rýži, vejce, luštěniny atd.
CHARAKTERISTIKA ZÁSOBOVÁNÍ VODOU
Systém musí být napojen na zdroj pitné vody s následujícími vlastnostmi. Pokud tak neučiníte, záruka
automaticky zaniká.
Celková tvrdost: 0,5 až 5°F, aby se zabránilo usazování vodního kamene
Tlak: 50 až 250 kPa (0,5-2,5 bar).
Koncentrace chlorových iontů (Cl-): nejvýše 10 ppm (přijatelná hodnota), aby nedošlo k poškození vnitřních
ocelových prvků.
pH: vyšší než 7
Elektrická vodivosty: 50 až 2000 S/cm (20 °C)
ZAPNUTÍ
CPD: Zkontrolujte, zda je kohoutek pro vypouštění vody zavřený.
Naplňte vanu vodou a držte tlačítko napouštěcího knoflíku stisknuté, dokud není dosaženo hladiny označené
symbolem -- vyraženým uvnitř vany. Zapněte vypínač umístěný nad spotřebičem.
Zapněte hlavní vypínač umístěný nad spotřebičem. Otočte ovládacím knoflíkem odpovídajícím varné desce
z polohy "0" na požadovaný stupeň vaření, mezi 1 a 4.
Bílé světlo ukazuje, že topné těleso pracuje
Chcete-li spotřebič vypnout, otočte knoflíkem do polohy "0".
CPAD: Zkontrolujte, zda je vypnutý kohoutek pro vypouštění vody.
1) Při zapínání přístroje červená kontrolka krátce bliká po dobu asi ½ sekundy.
2) Při nepřítomnosti vody v nádrži červená kontrolka stále bliká.
3a) Zapnutím vodovodního kohoutku naplňte nádrž na požadovanou úroveň hladiny, která musí být vyšší než
minimální hladinová sonda, a nepřekračujte maximální hladinu, která je na nádrži označena symbolem (--).
3b) U modelů s automatickým nabíjením se voda začne nabíjet a požadovanou hladinu můžete zvolit stisknutím tlačítka
se symbolem (tlačítko hladiny).
4) Zapněte hlavní vypínač umístěný nad spotřebičem. Otočte ovládacím knoflíkem odpovídajícím varné desce z polohy
"0" do požadovaného stupně koksování, tedy mezi 1 a 4.
Bílé světlo ukazuje, že topné těleso pracuje
Chcete-li spotřebič vypnout, otočte knoflíkem do polohy "0".
VYPRAZDŇOVÁNÍ VANY
K provedení této operace je nutné otevřít výpustný kohout (páčka ve svislé poloze), ke kterému se dostanete pouze přes
dvířka skříňky umístěné pod spotřebičem.
ANOMÁLIE
Pokud sonda nezjistí přítomnost vody v nádrži po dobu delší než 15 s, systém vypne topné těleso: alarm je signalizován
blikajícím červeným světlem.
Jakmile sonda opět detekuje přítomnost vody, aktivuje se topné těleso a červená kontrolka zhasne.
POZNÁMKA: fázi plnění monitoruje systém prostřednictvím TIME-OUT.
VAŘIČ TĚSTOVIN S AUTOMATICKÝM PLNĚNÍM
Pokud sonda nezjistí přítomnost vody, systém obnoví správnou hladinu a po 15 s vypne topné těleso: alarm je
signalizován blikajícím červeným světlem.
Pokud sonda opět detekuje přítomnost vody, okamžitě se aktivuje topné těleso a po 3 s se zastaví automatické doplňování vody.
POZNÁMKA: fázi plnění monitoruje systém prostřednictvím TIME-OUT.
Tlačítko pomalého doplňování
17

25
IT CH
GB IE
Když je aktivní tlačítko pomalého doplňování, systém plní nádrž pomalu, aby se eliminovalo pěnění.
Tlačítko hladiny
Tlačítko "level" určuje hladinu vody v nádržce: vysoká hladina pro vaření těstovin, nízká hladina pro vaření v páře.
Důležité: udržujte hladinu sondy v čistotě
ČAS VYPNUTÍ
Po zjištění hladinové sondy spustí mikrokontrolér interní časovač vzhledem k délce trvání této fáze. Pokud (nepřetržité)
plnění trvá déle než 350 sekund, systém zablokuje funkce zařízení a alarm je signalizován stálým červeným světlem.
Pro resetování stavu alarmu je třeba po odstranění závady, která způsobila zásah (poškozené nebo odpojené hladinové
sondy, problémy s přívodem vody, otevřený vypouštěcí ventil...), systém vypnout/zapnout.
ČIŠTĚNÍ A ÚDRŽBA
Pozor! Při čištění neomývejte vnější části spotřebiče přímým proudem vody nebo vysokým tlakem.
Po každém použití spotřebič důkladně vyčistěte. Každodenní čištění po vypnutí spotřebiče zajistí jeho bezvadnou funkci
a dlouhou životnost.
Před zahájením čištění spotřebiče odpojte přívod elektrické energie. Ocelové díly je třeba umýt horkou vodou s
neutrálním čisticím prostředkem, poté je důkladně opláchnout, aby se odstranily všechny stopy čisticího prostředku; poté
je osušte suchým hadříkem. Nepoužívejte abrazivní nebo žíravé čisticí prostředky.
POSTUP, KTERÝ JE TŘEBA DODRŽET, POKUD SE SPOTŘEBIČ
NEBUDE POUŽÍVAT PRO NĚJAKOU DOBU
Spotřebič pečlivě vyčistěte a vysušte podle pokynů. Odpojte přívod elektrické energie.
POSTUP V PŘÍPADĚ PORUCHY
V případě poruchy spotřebič vypněte, odpojte přívod elektrické energie pomocí zařízení umístěného nad spotřebičem
a informujte poprodejní servis.
ÚDRŽBA (POUZE PRO KVALIFIKOVANÝ PERSONÁL)
Jakoukoli údržbu smí provádět pouze kvalifikovaný personál. Před prováděním údržby vytáhněte zástrčku ze zásuvky
nebo vypněte vypínač nad spotřebičem.Když je vana plná, vyprázdněte ji.
PŘÍSTUPNOST
Chcete-li se dostat k přípojné skříňce, sejměte zadní část spotřebiče. K ovládacím prvkům se dostanete z předního
ovládacího panelu; odšroubujte víčko kohoutku pro plnění vody, odšroubujte upevňovací šrouby z ovládacího panelu
a vyjměte jej.
18

INSTRUCCIONES DE INSTALACION Y USO

27
ES
TABLA DATOS TÉCNICOS
MODELOS ALIMENTACIÓN POTENCIA
MÁXIMA (kW)
ABSORCIÓN
MÁXIMA (A)
CABLE
ALIMENTACIÓN
(A la silicona)
CPD-64ET
400V~3N 50/60 Hz 7,8 11,3 5 x 1,5 mm²
CPD-84ET
400V~3N 50/60 Hz 13,5 19,57 5 x 2,5 mm²
CPAD-64ET
400V~3N 50/60 Hz 7,8 11,3 5 x 1,5 mm²
CPAD-84ET
400V~3N 50/60 Hz 13,5 19,57 5 x 2,5 mm²
INSTRUCCIONES PARA LA INSTALACIÓN
La chapa de características técnicas se encuentra en la pared anterior de el fianco (ver diseño en el punto de conexión
eléctrica) y contiene todos los datos necesarios para la conexión.
INSTALACIÓN
Durante la colocación, es necesario nivelar el aparato, pueden ajustarse los pequeños desniveles mediante los pies de
apoyo regulables (atornillar o destornillar). El interruptor general o la toma deben estar cerca del aparato y debe poder
accederse a ellos fácilmente.
Se aconseja colocar el aparato debajo de una campana de aspiración, de manera que la evacuación de los vapores se
efectúe de manera rápida. Si el aparato se coloca cerca de paredes, paredes divisorias, muebles de cocina,
revestimientos decorativos, etc se aconseja que éstos sean de material no inflamable, sino se debe revestir estas paredes
con material no inflamable.
Debe asegurarse sobretodo que las prescripciones para la prevención de incendios se respeten.
La instalación, puesta en funcionamiento y mantenimiento del aparato deben ser efectuados por personal cualificado.
Todos los trabajos necesarios para la instalación deben efectuarse respetando las normas vigentes.
El fabricante declina cualquier responsabilidad en caso de mal funcionamiento debido a una instalación equivocada o
no conforme.
¡Atención!: como indican las disposiciones internacionales, antes del aparato se debe instalar un dispositivo
automático que permita desconectar de manera omnipolar el aparato de la red; este dispositivo debe tener una abertura
de los contactos de al menos 3 mm.
DISPOSICIONES DE LEY, REGLAS TÉCNICAS Y DIRECTIVAS
La instalación debe efectuarse respetando las siguientes normas:
- Prescripción para la prevención de accidentes vigente.
- Prescripción de instalación, normas vigente.
CONEXIÓN ELÉCTRICA
El aparato se entrega sin cable de conexión eléctrica. Para la instalación del cable de alimentación, seguir los siguientes
pasos:
• Quitar la tensión.
• Quitar el panel posterior
• Pasar el cable de conexión a través del sujeta-cables, conectar los conductores en el correspondiente borne del
tablero de bornes y fijarlos.
• Bloquear el cable con el sujeta-cables y volver a montar el panel posterior. El conductor de tierra tiene que ser más
largo que los otros, de manera que en caso de rotura de sujeta-cables, éste se separe después de los cables de la
tensión.
Nota importante: el cable de conexión debe tener un tamaño adecuado a la potencia del aparato, y debe resistir una
temperatura de al menos 150°C (ver tabla datos técnicos)
EQUIPOTENCIAL
El aparato debe conectarse a un sistema equipotencial. El tornillo de conexión está colocado en la parte posterior del
aparato y se distingue con el símbolo .
¡Atención!: el fabricante no es responsable, y la garantía no cubre, daños provocados y que se deben a
instalaciones inadecuadas y no conformes a las instrucciones.
PUESTA EN FUNCIONAMIENTO
Antes de utilizar el aparato es necesario limpiarlo con cuidado, sobretodo la cuba (ver párrafo “Limpieza y cuidado”).
Controlar la conexión del aparato y ponerlo en funcionamiento según las instrucciones.
20
This manual suits for next models
3
Table of contents
Languages:
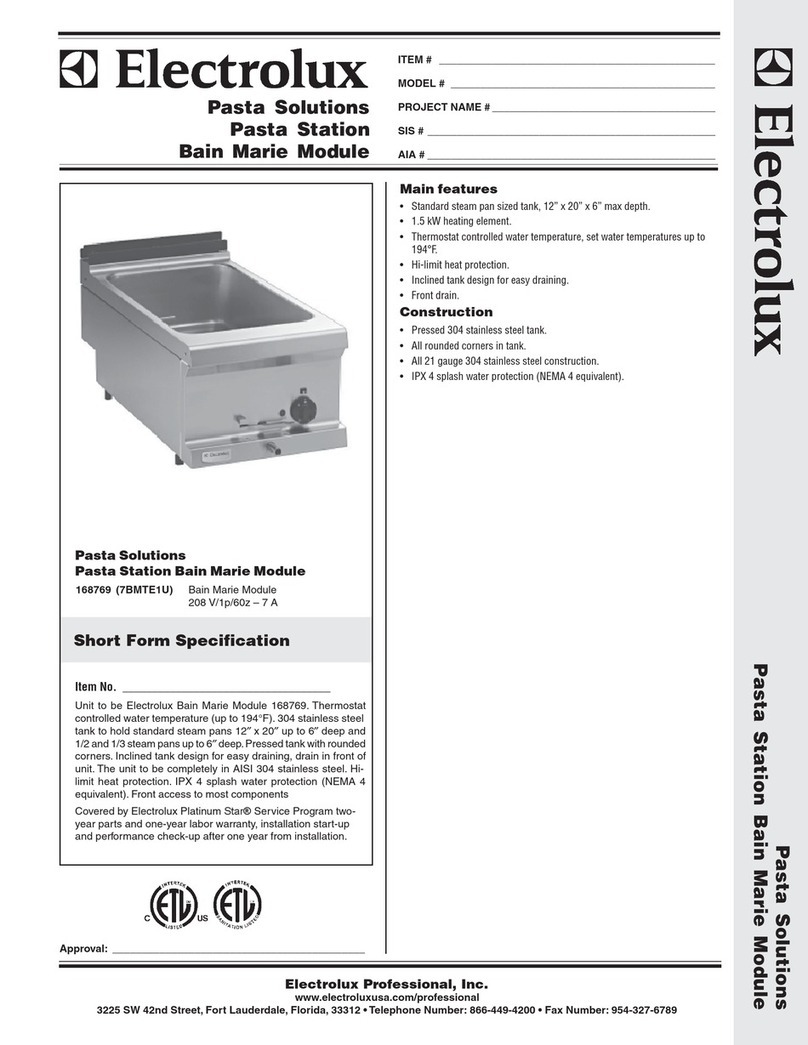
Popular Pasta Maker manuals by other brands
Electrolux
Electrolux Electric Pasta Cookers 700XP Specifications

Rieber
Rieber PASTA COOKER 4.0 Translation of the original operating instructions
SMART
SMART SPM4000-SS instruction manual

Vulcan-Hart
Vulcan-Hart GPC12 Installation & operation manual

Hendi
Hendi 224847 user manual

Omcan
Omcan PM-IT-0210-M instruction manual


